manuals.online logo
Brands
  1. Home
  2. •
  3. Brands
  4. •
  5. Honeywell
  6. •
  7. Network Hardware
  8. •
  9. Honeywell hus-nvr-1032-e User manual

Honeywell hus-nvr-1032-e User manual

Honeywell
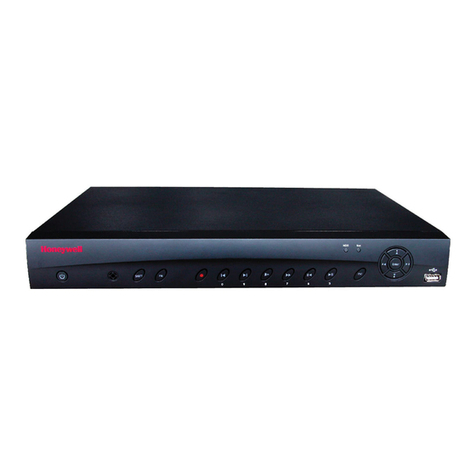
HUS-NVR-1032-E 32 Channel Network Video Recorder
Quick Guide
Front and Rear View
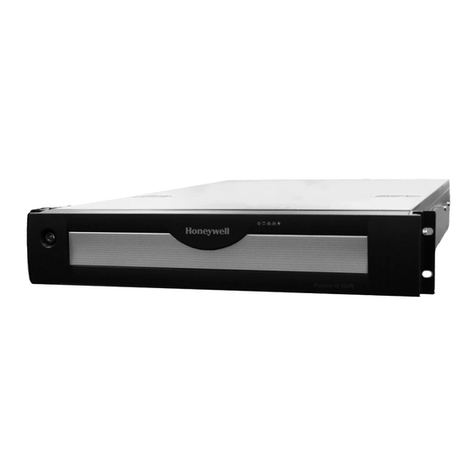
Figure 1 Front View
1: ON/OFF Switch
2: Panic Recording Key
3: System Status Indicator
4: Alarm Indicator
5: Recording Indicator
6: LAN 1 Indicator
7: LAN 2 Indicator
8: HDD Tray Button
9: HDD Active Indicator
10: HDD Connection Indicator
11: USB Port
Figure 2 Rear View
1: Power Switch
2: Power Inlet
3: BNC Output
4: Audio Output
5: Intercom Output (Reserved)
6: Intercom Input (Reserved)
7: Alarm In
8: Alarm Out
9: USB Port
10: LAN1, LAN2
11: VGA Port
12: RS232 Port
13: HDMI Port
14: e-SATA Port
15: Grounding Screw
16, 17: Labels
Installation and Connections
HDD Installation
 

Connections
1. Connect the video output: use the VGA port or HDMI port
(Figure 2) to connect the monitor. Use a certified HDMI cable for
HDMI port.
2. Connect the Ethernet cable.
3. Connect the mouse and power supply.
Starting and Login
Figure 3 Login
Turn on the Power Switch (No.1 in Figure 2) of the NVR, and the backlight of the ON/OFF Switch (No.1 in Figure
1) is on. After a while, the login window is displayed as shown in Figure 3.
1. For the first time use, select “admin” and enter the password “123456”. Click Wizard.
2. Follow the prompts to complete the basic settings: Date &Time, Network, Hard Disk, Recording Scenario and
Devices.
3. When the settings are completed, the Live screen is displayed. To play the live video, drag the target camera
icon from the “Devices” list to the target video window, as shown in Figure 4.
Basic Operation
Scheduled Recording—after successfully logged in, all the connected cameras start scheduled recording by default. To stop or set the scheduled recording, refer to the “Record
Setup” section in the User Guide.
Start Manual Recording—In Figure 4, right click the icon of the target camera in the “Devices” list and select RecordManual Recording.
Stop Manual Recording—In Figure 4, right click the icon of the target camera in the “Devices” list and select RecordStop Recording.
Playback—In Figure 4, click Playback to enter the playback screen. Drag the icon of the target camera from the “Devices” list to the video window to play the recorded video as
shown in Figure 5. The default start time of playback is 12:00 am. The playback control is shown in Figure 6.
Stop Playback—In Figure 5, right click the target video window and select “Stop Playing” in the menu, or select “Stop Playing (All)”.
Panic Recording—In Figure 4, click Panic Recording to start the panic recording and click it again to stop recording; or press and hold the Panic Recording Key (No.2 in Figure 1)
for over one second on the front panel to start the panic recording and press and hold it again for over one second to stop recording.
Live Screen and Playback Screen
Figure 4 Live Screen
Figure 5 Playback Screen
Figure 6 Playback Control
NVR Internet Explorer (IE) Client
Figure 7 Security Warning
NVR can be accessed and controlled from the IE Client via the network. Before using the IE Client, refer to the “Internet
Explorer Configuration” section in the User Guide to configure the Internet Explorer. After the configuration, enter the IP
address (e.g. http://192.168.1.90/) of the NVR in the address bar of Internet Explorer to access.
1. At first login, the window will pop up as shown in Figure 7. Click Install.
2. When the installation is completed, the login window is displayed. Select “admin” and enter the password “123456”.
Click Login.
3. After successfully logged in, the Live screen is displayed. To play the live video, drag the target camera icon from the
“Devices” list to the target video window, as shown in Figure 8.
Figure 8 Live Screen (IE Client)
For detailed information about IE Client, refer to the “System Operation and
Configuration” and “NVR Internet Explorer (IE) Client” section in the User
Guide.
Shutdown
In Figure 4, navigate to Shutdown or press and hold the ON/OFF Switch (No.1 in Figure 1 ) for over five seconds on the front panel.
Honeywell Security, Your Partner of Choice
Honeywell Security
Honeywell Security Asia Pacific
35F Tower A, City Center, 100 Zun Yi Road, Shanghai 200051, China
TEL: +86 21-22196888
FAX: +86 21-62370740
http://www.security.honeywell.com
©2014 Honeywell International Inc. All rights reserved.
Document 800-13325 Rev. B
Honeywell
HUS-NVR-1032-C 32 通道网络视频录像机
快速使用指南
前面板与背面板
图
1
前面板
1:录像机开关键
2:紧急录像键
3:状态指示灯
4:报警指示灯
5:录像指示灯
6:网络 1指示灯
7:网络 2指示灯
8:硬盘托盘按键
9:硬盘工作指示灯
10:硬盘连接指示灯
11:USB 接口
图2 背面板
1:电源开关键
2:电源插口
3:BNC 输出
4:音频输出
5:对讲输出(预留)
6:对讲输入(预留)
7:报警输入
8:报警输出
9:USB 接口
10:LAN1 和LAN2 网口
11:VGA 接口
12:RS232 串口
13:HDMI 接口
14:e-SATA 扩展接口
15:接地螺丝
16、17:标签
安装硬盘与接线
安装硬盘



接线
1. 连接视频输出:使用 VGA 接口或 HDMI 接口(
图
2)连接显
示器。若使用 HDMI 接口,请使用 HDMI 认证线缆。
2. 连接网线。
3. 连接鼠标和电源。
开机与登录
图3 登录界面
按下录像机背面板的“电源开关键”(
图
2,编号 1)后,前面板“录像机开关键”背光(
图
1,编号 1)亮起。片
刻后屏幕显示登录界面,如
图
3 所示。
1. 首次使用,选择用户名“admin”并输入密码“123456”,点击【
向导
】;
2. 根据向导提示进行基本设置:日期与时间、网络、硬盘、录像场景和添加摄像机等;
3. 完成设置后,屏幕显示实时视频界面。要播放实时视频,从界面右侧的“设备”列表中拖动目标摄像机图标到
视频窗口,如
图
4 所示。
基本操作
计划录像—登录后,所有摄像机默认开始计划录像。要停止或设置计划录像,参见用户手册“
录像设置
”章节。
开始手动录像—在
图
4 的“设备”列表中右击目标摄像机图标,在弹出菜单中选择录像手动录像。
停止手动录像—在
图
4 的“设备”列表中右击目标摄像机图标,在弹出菜单中选择录像停止录像。
回放视频—在
图
4 中点击回放视频进入回放视频界面。从“设备”列表中拖动目标摄像机图标到回放窗口进行回放,界面如
图
5 所示。起始回放时间默认为当天 12:00 点。视频回放控
制面板如
图
6 所示。
停止回放—在
图
5 中右击目标视频窗口,在弹出菜单中选择“停止回放”或“停止回放(全部)”。
紧急录像—在
图
4 中点击“紧急录像”开始紧急录像,再次点击停止紧急录像;或在录像机前面板按下“紧急录像键”(
图
1,编号 2)1秒以上开始紧急录像,再次按下该键 1秒以
上停止紧急录像。
实时视频界面和回放视频界面
图
4
实时视频界面
图
5
回放视频界面
图6 视频回放控制面板
网络客户端
图7 安全警告
录像机支持从网络客户端访问和控制。使用网络客户端时,先参考用户手册“
网络浏览器配置
”章节配置浏览器。配置完
成后,在浏览器地址栏中输入录像机的IP地址(例如:http://192.168.1.90/)进行访问。
1. 首次登录时弹出提示窗口,如
图
7 所示,点击【
安装
】开始安装。
2. 安装完毕后显示登录界面。选择用户名“admin”并输入密码“123456”,点击【
登录
】。
3. 成功登录后,屏幕显示实时视频界面。要播放实时视频,从界面右侧的“设备”列表中拖动目标摄像机图标到视频窗
口,如
图
8 所示.
图8 网络客户端实时视频界面
网络客户端具体操作和系统设置参考该产品用户手册的“
系统使用与
设置
”和“
网络客户端
”章节。
。
关机
在实时视频界面(
图
4)左上方点击 关机,在弹出界面点击【确定】或长按录像机前面板的“录像机开关键”(
图
1,编号 1)5秒以上。
霍尼韦尔安防,您值得信赖的安防合作伙伴
Honeywell Security
亚太区总部
中国上海市遵义路 100 号虹桥上海城 A座35 楼
电话:(86)21-22196888
传真:(86)21-62370740
http://www.cn.security.honeywell.com
©2014 Honeywell International Inc. All rights reserved.
Document 800-13325 Rev. B

Other manuals for hus-nvr-1032-e

1

Other Honeywell Network Hardware manuals

Honeywell MAXPRO NVR 3.1 User manual

Honeywell

Honeywell MAXPRO NVR 3.1 User manual

Honeywell Mesh Router User manual

Honeywell

Honeywell Mesh Router User manual

Honeywell HDCD8TP User manual

Honeywell

Honeywell HDCD8TP User manual

Honeywell MAXPRO PE User manual

Honeywell

Honeywell MAXPRO PE User manual

Honeywell MAXPRO NVR PE User manual

Honeywell

Honeywell MAXPRO NVR PE User manual

Honeywell 4909 CPVC User manual

Honeywell

Honeywell 4909 CPVC User manual

Honeywell MAXPRO NVR SE User manual

Honeywell

Honeywell MAXPRO NVR SE User manual

Honeywell 35 Series User manual

Honeywell

Honeywell 35 Series User manual

Honeywell LonWorks protocol User manual

Honeywell

Honeywell LonWorks protocol User manual

Honeywell MAXPRO NVR SE Series User manual

Honeywell

Honeywell MAXPRO NVR SE Series User manual

Honeywell MAXPRO NVR Hybrid SE User manual

Honeywell

Honeywell MAXPRO NVR Hybrid SE User manual

Honeywell FUSION STREAMER User manual

Honeywell

Honeywell FUSION STREAMER User manual

Honeywell HPM Assembly instructions

Honeywell

Honeywell HPM Assembly instructions

Honeywell Internet Connection Module User manual

Honeywell

Honeywell Internet Connection Module User manual

Honeywell MAXPRO NVR SE User manual

Honeywell

Honeywell MAXPRO NVR SE User manual

Honeywell MAXPRO NVR XE User manual

Honeywell

Honeywell MAXPRO NVR XE User manual

Honeywell MAXPRO 2.5 User manual

Honeywell

Honeywell MAXPRO 2.5 User manual

Honeywell HN300401 Series User manual

Honeywell

Honeywell HN300401 Series User manual

Honeywell Q7055C1053 User manual

Honeywell

Honeywell Q7055C1053 User manual

Honeywell MAXPRO NVR SE User manual

Honeywell

Honeywell MAXPRO NVR SE User manual

Honeywell 2450Cm Series User manual

Honeywell

Honeywell 2450Cm Series User manual

Honeywell Notifier NFN-GW-EM-3 User manual

Honeywell

Honeywell Notifier NFN-GW-EM-3 User manual

Honeywell Rae SensorRAE 4R+ User manual

Honeywell

Honeywell Rae SensorRAE 4R+ User manual

Honeywell 30 Series User manual

Honeywell

Honeywell 30 Series User manual

Popular Network Hardware manuals by other brands

FAST ComTec 2128N user manual

FAST ComTec

FAST ComTec 2128N user manual

Solid State Logic SB i16 user guide

Solid State Logic

Solid State Logic SB i16 user guide

Viking TR-1 Technical practice

Viking

Viking TR-1 Technical practice

Leonton CBG2-0501-SFP-12 Hardware user manual

Leonton

Leonton CBG2-0501-SFP-12 Hardware user manual

Optocore DD4MR-FX operating manual

Optocore

Optocore DD4MR-FX operating manual

evertz 9625DSK-LGA instruction manual

evertz

evertz 9625DSK-LGA instruction manual

Allied Telesis AT-9000/12PoE user guide

Allied Telesis

Allied Telesis AT-9000/12PoE user guide

evertz 7700 Series manual

evertz

evertz 7700 Series manual

Raritan MasterConsole Z user manual

Raritan

Raritan MasterConsole Z user manual

National Instruments GPIB-100A user manual

National Instruments

National Instruments GPIB-100A user manual

PCB Piezotronics 070A34 Installation and operating manual

PCB Piezotronics

PCB Piezotronics 070A34 Installation and operating manual

Forcepoint Pass-through and Mezzanine NIC installation guide

Forcepoint

Forcepoint Pass-through and Mezzanine NIC installation guide

jacarta interSeptor Pro-XP user manual

jacarta

jacarta interSeptor Pro-XP user manual

Polycom RMX 1500 Installation & quick start guide

Polycom

Polycom RMX 1500 Installation & quick start guide

Vision TECHCONNECT TC2-MATRIXBRIDGE owner's manual

Vision

Vision TECHCONNECT TC2-MATRIXBRIDGE owner's manual

Ubiquiti RD-3G26 quick start guide

Ubiquiti

Ubiquiti RD-3G26 quick start guide

evertz 7700 Series manual

evertz

evertz 7700 Series manual

Cabletron Systems MMAC-5FNB Networking guide

Cabletron Systems

Cabletron Systems MMAC-5FNB Networking guide

manuals.online logo
manuals.online logoBrands
  • About & Mission
  • Contact us
  • Privacy Policy
  • Terms and Conditions

Copyright 2025 Manuals.Online. All Rights Reserved.