manuals.online logo
Brands
  1. Home
  2. •
  3. Brands
  4. •
  5. Honeywell
  6. •
  7. Security Sensor
  8. •
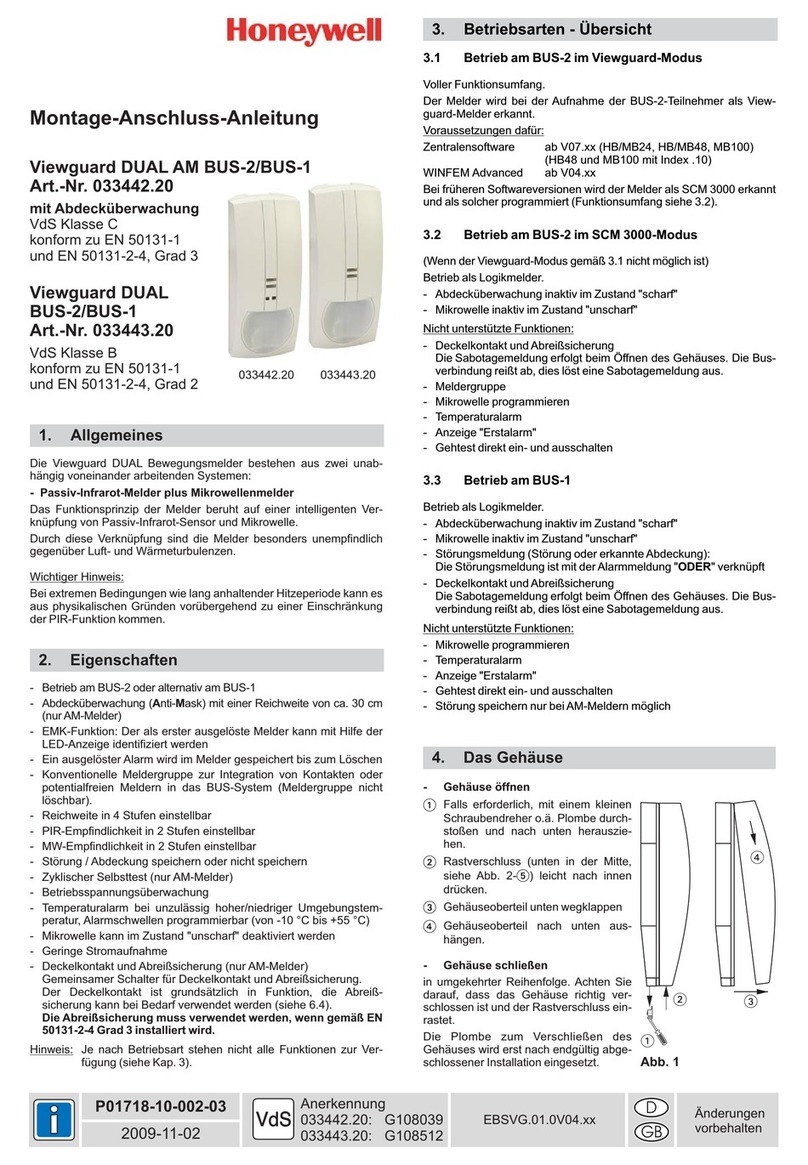
  9. Honeywell IRV800M User manual

Honeywell IRV800M User manual

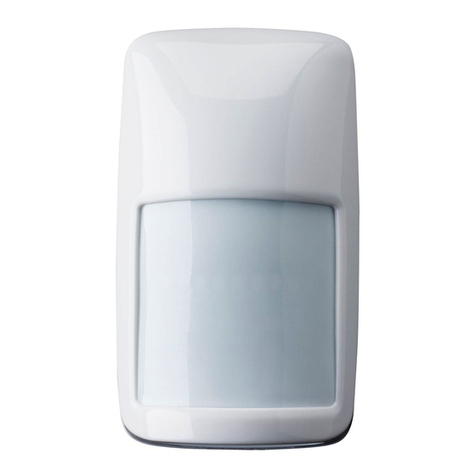
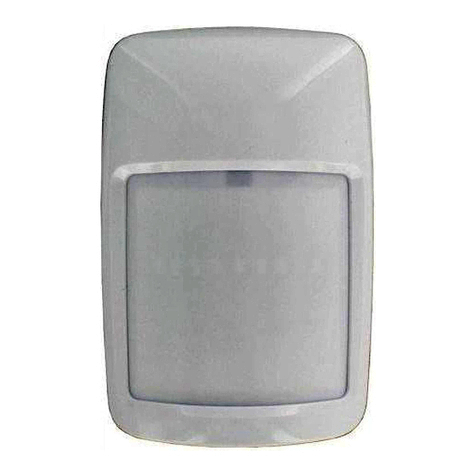
PIR detector with built-in camera
Détecteur IR à caméra intégrée
EKZ006400C juil.-05 - Page 1 – Honeywell - Sécurité Communications - Village d’entreprises - Bât D - Route des Dolines - BP41 - 06901 SOPHIA ANTIPOLIS CEDEX – France - Tél. : (33)492 942 950 - Fax : (33)492 942 960 - http://www.secom.tm.fr
Sécurité Communications se réserve le droit de modifier, à tout moment, dans l’intérêt du produit et/ou de l’utilisateur, ces caractéristiques techniques - Sécurité Communications reserve the right to change these technical specifications in the interest of product or user, without prior notice
CR123A
x 3
I
I
R
R
V
V
8
8
0
0
0
0
M
M
Media Range
I
I
-
-
P
PR
RE
ES
SE
EN
NT
TA
AT
TI
IO
ON
N
Ce détecteur volumétrique à système de prise de vue intégré, fait partie
de la gamme de périphériques radio « Média » associables à la centrale
DOMONIAL 800 de type CMI/CMT.
Lorsqu‘un intrus pénètre dans la zone surveillée par le détecteur
infrarouge, une série d’image est alors mémorisée par la caméra, puis
transmise au télésurveilleur via la centrale.
Ce système ne nécessite aucun réglage manuel.
Une LED rouge s’allume lorsqu’un mouvement est détecté et clignote
pendant la transmission des images.
I
II
I
-
-
M
MO
ON
NT
TA
AG
GE
E
Fixer l’IRV800M à 2,30m du sol, avec l’orientation du champ de détection
telle que l’intrus coupe transversalement ses faisceaux de détection
(lentilles en bas) et que le capteur d’images visualise au mieux la pièce à
surveiller. Veiller à ce qu’aucune source de déclenchement parasite ne
se trouve dans le champ du détecteur (fenêtre, source de chaleur,
miroir…).
Etapes de montage :
1– Ouvrir le détecteur avec un tournevis
2– Faire pivoter le boîtier vers le haut
3– Fixer le socle à plat ou en angle selon l’angle de détection et de prise
de vue choisi à l’aide de 2 vis (angle) ou 3 vis (montage à plat avec
gestion de l’autoprotection à l’arrachement).
4– Mettre les 3 piles en place en respectant les polarités.
5– Replacer l’IRV sur son socle fixé sur un matériau solide : bois, béton
... et refermer en le bloquant avec la vis .
Après les opérations, attendre 30 s. (temps de réveil et de
stabilisation).
I
II
II
I
–
–
P
PR
RO
OC
CE
ED
DU
UR
RE
E
D
DE
E
T
TE
ES
ST
T
A la fermeture de l’AP, l’IRV entre automatiquement(après son réveil) en
mode test pendant 10 min. L’installateur peut alors vérifier la portée de
détection par l’allumage de la LED. Si le détecteur est enregistré au
niveau de la centrale avant la fin de la période de test de 10 min, la mise
en marche de la centrale interrompt le mode test.
I
IV
V
–
–
A
AL
LI
IM
ME
EN
NT
TA
AT
TI
IO
ON
N
Le détecteur signale un défaut pile à la centrale, lorsque sa tension
d’alimentation chute entre 2,7V & 2,5V. Il dispose d’une semaine
d’autonomie après avoir signalé son défaut pile.
ATTENTION : Il y a danger d'explosion s'il y a remplacement
incorrect de la pile. Remplacer uniquement avec une pile du même
type ou d'un type équivalent recommandé par le constructeur.
Mettre au rebut les piles usagées conformément aux instructions du
fabricant.
I
I
–
–
P
PR
RE
ES
SE
EN
NT
TA
AT
TI
IO
ON
N
This volumetric detector uses an integrated shooting system. It must be
associated to the Domonial 800 control panel of type CMI/CMT.
When an intruder enters the area monitored by the PIR detector, a series
of pictures is taken and stored by the camera and then sent to the alarm
receiving centre through the control panel.
This product doesn’t require any manual settings.
A red LED turns on when a movement is detected and flashes during the
transmission of images.
I
II
I
–
–
M
MO
OU
UN
NT
TI
IN
NG
G
Mount the IRV800M in a corner, at a 2.30m height/2.30m from the ground,
turning its detection field so that an intruder will intersect the detection
beams (lens down) transversally. Make sure that there is no unwanted
source of triggering in the detector field (window, source of heat, mirror…).
Mounting steps :
1– Open the detector with a screwdriver (picture 1)
2– Pivot the case up
3– Fix the base flat or with an angle according to the selected detection
and filming angle using 2 screws (angle) or 3 screws (flat mounting with
protection against tampering by tearing ).
4– Insert 3 batteries keeping the polarities
5- Put the detector back in its base fixed on solid material :wood, concrete
… and close it by blocking it with a screw.
After the operations, wait 30 s. (wake-up and stabilization time).
I
II
II
I
-
-
T
TE
ES
ST
T
P
PR
RO
OC
CE
ED
DU
UR
RE
E
When the tamper is closed, the IRV800M automatically switches (after
waking up) to test mode for 10 min. The installer can then check the
detection range using the LED. If the detector is registered by the control
panel before the end of the 10 min. test period, turning on the control panel
will end the test mode.
I
IV
V
-
-
P
PO
OW
WE
ER
R
S
SU
UP
PP
PL
LY
Y
The detector indicates a battery fault to the alarm central unit when the
power supply voltage drops to a range of 2.7V to 2.5V. The detector offers
one week’s autonomy after indicating a battery fault.
WARNING : There is a risk of explosion in case of wrong replacement
of the battery. Replace only with a battery of the same type or an
equivalent type, which has been recommended by the manufacturer.
Throw away used batteries according to the manufacturer’s
instructions.
+
-
+
-
+
-
EKZ ` C>
EKZ ` C>
EKZ ` C>
EKZ ` C>
PIR detector with built-in camera
Détecteur IR à caméra intégrée
EKZ006400C juil.-05 - Page 2 – Honeywell - Sécurité Communications - Village d’entreprises - Bât D - Route des Dolines - BP41 - 06901 SOPHIA ANTIPOLIS CEDEX – France - Tél. : (33)492 942 950 - Fax : (33)492 942 960 - http://www.secom.tm.fr
Sécurité Communications se réserve le droit de modifier, à tout moment, dans l’intérêt du produit et/ou de l’utilisateur, ces caractéristiques techniques - Sécurité Communications reserve the right to change these technical specifications in the interest of product or user, without prior notice
CR123A
x 3
I
I
R
R
V
V
8
8
0
0
0
0
M
M
Media Range
V
V
-
-
E
EN
NR
RE
EG
GI
IS
ST
TR
RE
EM
ME
EN
NT
T
L'enregistrement est la procédure qui associe le détecteur à la centrale.
Cette opération nécessite un outil de programmation fonctionnant sur PDA.
La procédure complète est décrite dans la notice d'Installation de la
centrale.
On peut enregistrer jusqu’à 5 détecteurs de ce type par installation.
1- Connecter l’outil de programmation et entrez en programmation.
2- Choisir la rubrique « ENREGISTREMENT»
3– Déclencher l’autoprotection du périphérique. Un message de confirmation
apparaît indiquant la prise en compte du détecteur par la centrale avec le
niveau radio et le numéro de série après quelques secondes.
4– Choisir ensuite le mode de fonctionnement, le libellé…
5– Vous pouvez sortir du mode programmation.
V
VI
I
-
-
C
CA
AR
RA
AC
CT
TE
ER
RI
IS
ST
TI
IQ
QU
UE
ES
S
P
PR
RI
IN
NC
CI
IP
PA
AL
LE
ES
S
Techniques
Alimentation 3 piles lithium 3v type CR 123 A
Autonomie De 3 à 4 ans / 1500 images
Autoprotection A l’ouverture et à l’arrachement
Température de fonctionnement 0° à 40°C
Voyant de contrôle 1 LED
Température de stockage -20° à +70°C
Dimensions l : 80 mm x h : 165 mm x p : 70 mm
Poids (sans la pile) 288g
Couleur Blanc
Image
Contrôle de l’image Automatique
Type capteur Noir et Blanc / 256 niveaux
Taille image 320 x 176 pixels
Stockage interne 20 jeux de 5 images
Cadence prise de vue Jusqu’à 1 image / 100ms
Eclairage minimum 0 lux (12 LEDS infrarouge)
Radio
Type FM : 4 canaux cryptés
Fréquence 868 MHz
Portée radio 200m en champ libre
Supervision Oui
Nombre d’IRV / install. 5
Détection infrarouge
Temps de réarmement 1 min 30s (30s en mode rapide)
Lentille Fresnel 18 faisceaux sur 90°
Portée de détection 10m x 10m
V
V
–
–
R
RE
EC
CO
OR
RD
DI
IN
NG
G
The recording is the procedure associating the detector to the alarm central
unit. This operation requires a programming tool working on/compatible with
a PDA. The complete procedure is described in the alarm central unit
installation notice.
Up to 5 detectors of this type can be registered for each installation.
1– Connect the programming tool and start programming.
2– Go to the « RECORD » menu
3– Open the battery compartment to generate a radio pulse (tamper). The
radio level and serial number appears after a few seconds.
4– Choose the operating mode, the label…
5– Press the QUIT&SAVE key to get out of programming mode
V
VI
I
–
–
M
MA
AI
IN
N
C
CH
HA
AR
RA
AC
CT
TE
ER
RI
IS
ST
TI
IC
CS
S
Technical
Power supply Three 3v type CR123 A lithium batteries
Battery life 3 to 4 years / 1500 pictures
Tamper Cover and wall mounted
Operating temperature 0° to 40°C (32° to 104°F)
Signalling 1 LED
Storage temperature -20° to +70°C (-4° to +158°F)
Dimensions l :80 mm x h : 165 mm x p : 70 mm
Weight (without the battery) 288g
Colour White
Image
Image control Automatic
Sensor type Black and White / 256 levels
Picture size 320 x 176 pixels
Internal storage 20 sets of 5 pictures
Shooting rate Up to 1 picture / 100ms
Minimum lighting 0 lux (12 IR LEDS)
Radio
Type FM narrow band : 4 encrypted channels
Frequency 868.25 MHz
Radio range 200m in open space
Supervision Yes
Number of PIR / installation 5
IR Detection
Alarm duration 1 min 30s (30s in fast mode)
Lens Fresnel 18 Zones / 90°
Detection range 10m x 10m
IMPORTANT : le détecteur doit toujours être enregistré à son
emplacement définitif avec un minimum de réception de 2/10 IMPORTANT : The detector must always be programmed in its
final location with a minimum radio level of 2 units on a scale of 10
R
W
0,3m/s … 3m/s
Description du défaut / Fault description
N° de série de l’appareil / serial number Cause du retour / cause of return Défaut constaté / noticed fault
Installateur / Installer
Effraction
-
--
--
--
--
--
--
-
Intrusion
A
l’installation
-
--
--
--
--
--
-
During installation
-
--
--
-
date
Rénovation ---- Cosmetic repair Sur intervention --- On intervention ------ date
Panne -----------
Fault
Défaut aléatoire ----
Random fault
A compléter et à joindre au produit lors de son retour en SAV. Tout
produit retourné sans cette fiche entraînera son diagnostic complet
et, en conséquence, une facturation forfaitaire pour la prestation de
remise en état.
To fill in and return together with the faulty product. Any reception without
« Repair Sheet » attached to the equipment will result in a full process
diagnosis, repair and test. A fixed price repair would consequently apply.
F
FI
IC
CH
HE
E
D
DE
E
R
RE
ET
TO
OU
UR
R
S
SA
AV
V
–
–
R
R
E
E
P
P
A
A
I
IR
R
S
S
H
H
E
E
E
E
T
T
EKZ ` C>
EKZ ` C>
EKZ ` C>
EKZ ` C>

Other Honeywell Security Sensor manuals

Honeywell Notifier FSP-951AUS User manual

Honeywell

Honeywell Notifier FSP-951AUS User manual

Honeywell Ex-Or MLS2021DF Installation and operation manual

Honeywell

Honeywell Ex-Or MLS2021DF Installation and operation manual

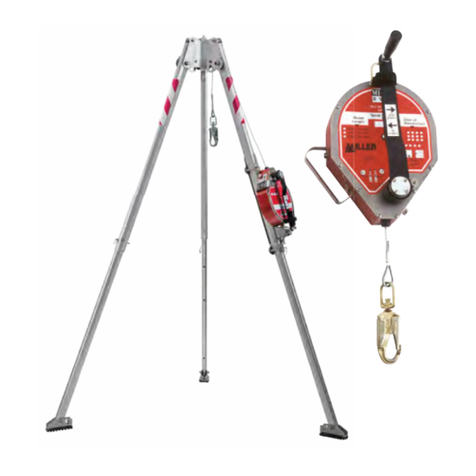
Honeywell MILLER 1032363 User manual

Honeywell

Honeywell MILLER 1032363 User manual

Honeywell FF-SPS4 Series User manual

Honeywell

Honeywell FF-SPS4 Series User manual

Honeywell BW Ultra User manual

Honeywell

Honeywell BW Ultra User manual

Honeywell C7007A User manual

Honeywell

Honeywell C7007A User manual

Honeywell 5800CO Assembly instructions

Honeywell

Honeywell 5800CO Assembly instructions

Honeywell PROINDMV Assembly instructions

Honeywell

Honeywell PROINDMV Assembly instructions

Honeywell 5800PIR-RES User manual

Honeywell

Honeywell 5800PIR-RES User manual

Honeywell HS3PIR1X User manual

Honeywell

Honeywell HS3PIR1X User manual

Honeywell GENT S4-720 Instruction manual

Honeywell

Honeywell GENT S4-720 Instruction manual

Honeywell Filtrex TC844A1007 User manual

Honeywell

Honeywell Filtrex TC844A1007 User manual

Honeywell FlexGuard FG-1625 User manual

Honeywell

Honeywell FlexGuard FG-1625 User manual

Honeywell Satronic IRD 1020 User manual

Honeywell

Honeywell Satronic IRD 1020 User manual

Honeywell SPM Flex User manual

Honeywell

Honeywell SPM Flex User manual

Honeywell ESSER 784763 User manual

Honeywell

Honeywell ESSER 784763 User manual

Honeywell SiX Series User manual

Honeywell

Honeywell SiX Series User manual

Honeywell BW Ultra User manual

Honeywell

Honeywell BW Ultra User manual

Honeywell Farenhyt Series User manual

Honeywell

Honeywell Farenhyt Series User manual

Honeywell FlexGuard FG-1625TAS User manual

Honeywell

Honeywell FlexGuard FG-1625TAS User manual

Honeywell SC100 User manual

Honeywell

Honeywell SC100 User manual

Honeywell FlexGuard 5853 Owner's manual

Honeywell

Honeywell FlexGuard 5853 Owner's manual

Honeywell Peha D MLS2001AF Installation and operation manual

Honeywell

Honeywell Peha D MLS2001AF Installation and operation manual

Honeywell Ex-Or Digital Gold Series Installation and operation manual

Honeywell

Honeywell Ex-Or Digital Gold Series Installation and operation manual

Popular Security Sensor manuals by other brands

STEINEL Multisensor True Presence IP manual

STEINEL

STEINEL Multisensor True Presence IP manual

Siemens DB721 Installation

Siemens

Siemens DB721 Installation

SKF 234-13163-9 Service manual

SKF

SKF 234-13163-9 Service manual

MSA ALTAIR 5X operating manual

MSA

MSA ALTAIR 5X operating manual

Inter-m AFD-614 Service manual

Inter-m

Inter-m AFD-614 Service manual

Alula RE636 Wireless Outdoor Siren Strobe Connect+... quick start guide

Alula

Alula RE636 Wireless Outdoor Siren Strobe Connect+... quick start guide

Optex AX-330PLUS installation instructions

Optex

Optex AX-330PLUS installation instructions

quiko QK-FTP40 Operating and installation instructions

quiko

quiko QK-FTP40 Operating and installation instructions

Retlux RDT 100 user manual

Retlux

Retlux RDT 100 user manual

Bahco BELMS12OBDL Original instructions

Bahco

Bahco BELMS12OBDL Original instructions

Safescan 155 Series manual

Safescan

Safescan 155 Series manual

nedis ZBSD10WT user manual

nedis

nedis ZBSD10WT user manual

brennenstuhl CM L 4050 operating instructions

brennenstuhl

brennenstuhl CM L 4050 operating instructions

HD Electric V-WATCH Operating instructions manual

HD Electric

HD Electric V-WATCH Operating instructions manual

RKI Instruments 35-3001-05-03 Operator's manual

RKI Instruments

RKI Instruments 35-3001-05-03 Operator's manual

Hytronik HIR23 quick start guide

Hytronik

Hytronik HIR23 quick start guide

Capital Safety DBI-Sala Ultra-Lok RSQ 3504553 Specific instructions

Capital Safety

Capital Safety DBI-Sala Ultra-Lok RSQ 3504553 Specific instructions

FootfallCam SpaceSense installation guide

FootfallCam

FootfallCam SpaceSense installation guide

manuals.online logo
manuals.online logoBrands
  • About & Mission
  • Contact us
  • Privacy Policy
  • Terms and Conditions

Copyright 2025 Manuals.Online. All Rights Reserved.