Honeywell IPT User manual

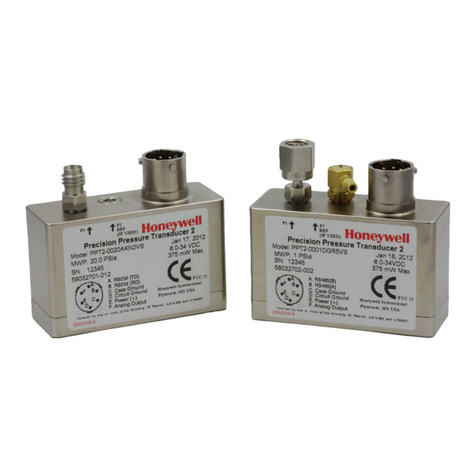
Honeywell Integrated Pressure Transducer
IPT User’s Manual

2
ADS-14152 Rev. 7/16
Customer Service Email: quotes@honeywell.com
www.pressuresensing.com
No part of this manual may be reproduced or transmitted in any form or by any means, electronic or mechanical, including
photocopying and recording, for any purpose, without the express written permission of Honeywell, Inc.
Honeywell reserves the right to make changes to improve reliability, function or design. Honeywell does not assume any
liability arising out of the application or use of any product or circuit described herein; neither does it convey any license
under its patent rights nor the rights of others.

3
IPT User’s Manual Contents
1 Introduction.....................................................................................................................................................4
1.1 Overview..................................................................................................................................................4
2 Specifications.................................................................................................................................................4
2.1 Block Diagram .........................................................................................................................................4
2.2 Specifications/Performance .....................................................................................................................5
2.3 Outline/Dimensions (inches)....................................................................................................................6
2.4 Electrical Connections .............................................................................................................................7
2.4.1 Connector.........................................................................................................................................7
3 Operation........................................................................................................................................................8
3.1 Commands and Format...........................................................................................................................8
3.1.1 Initialization.......................................................................................................................................8
3.1.2 Normal Operation (Polling)..............................................................................................................10
3.1.3 Other Modes...................................................................................................................................11
3.2 Correction Algorithms ............................................................................................................................12
3.2.1 Pressure .........................................................................................................................................12
3.2.1.1 Algorithm #1.................................................................................................................................12
3.2.1.1.1 Horner’s Method, Algorithm #1..................................................................................................12
3.2.1.2 Algorithm #2.................................................................................................................................13
3.2.1.2.1 Horner’s Method, Algorithm #2..................................................................................................13
3.2.2 Pressure Sensor Temperature........................................................................................................14
3.2.2.1 Algorithm......................................................................................................................................14
3.2.2.1.1 Horner’s Method........................................................................................................................14
3.3 EEPROM Storage..................................................................................................................................15
3.3.1 EEPROM Format............................................................................................................................15
3.3.2 Contents .........................................................................................................................................15
4 Installation Recommendations......................................................................................................................19
4.1 Installation Examples.........................................................................................................................19
4.1.1 Flexible Tubing and Double-wire Hose Clamps..........................................................................19
4.1.2 Static Radial O-ring Seals ..........................................................................................................20
4.1.3 Static Radial and Face O-ring Seals...........................................................................................20
5 Marking ........................................................................................................................................................20
6 Fletcher Checksum.......................................................................................................................................21
6.1 Calculation.............................................................................................................................................21

4
Sensor
-- Temperature --
Op-Amp
3.3V Output
LDO Regulator
256 X 8 EEPROM
SPI Serial
Connector
3.3V Analog and
Digital Supply
4-12V
-- Pressure --
Op-Amp 24-bit ADC, SPI
18+ ENOB @ 250 sps
+ P.S.
DIN
SCLK
CS_ADC_P
CS_EE
GND
16-bit ADC, SPI
~16 ENOB @ 20 sps
CS_ADC_T
DOUT/RDY
1 Introduction
1.1 Overview
The Honeywell IPT provides high accuracy pressure data in an industry standard SPI digital format. The core
of the IPT is a proven Honeywell silicon piezo-resistive pressure sensor with both pressure and temperature
sensitive elements. The IPT is both small and lightweight and can be easily integrated into a wide variety of
applications that require high performance in a small package.
Applying coefficients stored in the on-board EEPROM to normalized IPT pressure and temperature output
yields accurate pressure readings over a -40 to 85°C compensated temperature range.
2 Specifications
2.1 Block Diagram

5
2.2 Specifications/Performance
Total Error Band(1)
±0.04%FS absolute
±0.10%FS gauge, differential
±0.20%FS 1 psi gauge
Supply Voltage
4 to 12 VDC
Current Consumption
6 mA typical, 7.5 mA max
Operating Temperature Range
-40 to 85°C (-40 to 185°F)
Storage Temperature Range
-55 to 125°C (-67 to 257°F)
Sample Rate
See section 3.1.2
Long Term Stability
0.025%FS max per year typical
Pressure Ranges/Type
20, 50 psia
1, 2, 5, 10, 20 psig
1, 2, 5, 10, 20 psid
Pressure Units
PSI (2)
Media Compatibility
Non-condensing, non-corrosive,
non-combustible gases
Weight (3)
~ 8.0 grams (absolute)
~ 9.7 grams (gauge, differential)
Size
See section 2.3 (3)
Interface
3.3V SPI (mode 1,1)(4)
SCLK ≤5 MHz
Output
24-bit pressure value
16-bit temperature value
256 x 8 EEPROM configuration
Overpressure
3X FS
Burst Pressure
3X FS
Humidity Sensitivity of Pressure Ports
DO-160E, Section 6.0, category A (5)
Electromagnetic Immunity/Emissions
(6)
Mechanical Shock
DO-160E Section 7.0, Category A,
Figure 7.2, Operational Standard
Thermal Variation
Storage Temperature Cycling per
JESD22-104, Section 5.0: -55°C to
+125°C,
Vibration
DO-160E Section 8, Category H,
Aircraft Type 2, Aircraft Zones 1 & 2.
ESD
Class 3A, Table III, MIL-STD-883G,
Method 3015.7, section 3.4
RoHS Compliant (2011/65/EU)
Yes
(1) Total Error is the sum of worst case linearity, repeatability, hysteresis, thermal effects, and calibration errors over the operating
temperature range. Accuracy is only achieved after applying the correction coefficients and algorithm as shown in section 3.2. (FS =
Full Scale) For total error calculations of differential units, “Full Scale” is the pressure difference between the minimum and maximum
pressures. For example, full scale for a 1 psid PPT is 2 psi (-1 to +1 psi).
(2) After applying the correction coefficients stored in EEPROM, the resultant pressure reading is expressed in PSI (pounds per square
inch).
(3) Not including any mounting hardware. Dimensions in section 2.3 do not include Humiseal 1A33 conformal coating which is typically
applied to the PWB assembly at a thickness of 1-3 mils.
(4) Operation with a digital interface > 3.3V can damage the IPT and cause shifts in the ADC output.
(5) IPT electronics require protection from humidity.
(6) IPT requires shielding from EMI.

6
2.3 Outline/Dimensions (inches)

7
2.4 Electrical Connections
2.4.1 Connector
2mm, 2x4 Low Profile Bottom & Top-Entry Connector, Samtec P/N CLT-104-02-L-D-A-K-TR
Connector centered on circuit board and aligned with mounting holes.
Compatible Samtec mating connectors: TMM, MMT, TW, TMMH, MTMM

8
3 Operation
3.1 Commands and Format
3.1.1 Initialization
The IPT piezo-resistive pressure sensing die contains two bridge circuits; one for pressure, one for
temperature. The IPT provides two serial (SPI-compatible) Analog-to-Digital Converters (ADCs), one
for each of these data channels. The pressure channel uses a 24-bit ADC from Analog Devices, P/N
AD7799. The temperature channel uses a 16-bit ADC from Analog Devices, P/N AD7790. After
applying power to the IPT and before obtaining data, each data channel needs to be initialized.
As per the manufacturer’s data sheets, the SPI serial clock for each ADC should be ≤5 MHz. During
reads and writes to the ADC’s as detailed below, the appropriate chip-select line must be brought low
(CS_P or CS_T).
3.1.1.1 Pressure Channel
The pressure channel ADC is controlled and configured via a number of on-chip registers. ALL
communication to the pressure channel ADC starts with a write operation to the 8-bit write-only
communication register.
Initializing the pressure channel ADC requires writing data to a sequence of four registers; the
Communication register, the Mode register, the Communication register, and the Configuration
register.
3.1.1.1.1 Communication Register
Sending 0x10 to the Communication register tells the ADC the following write will be to
the 16-bit Configuration register.
3.1.1.1.2 Configuration Register
Sending 0x1020to the Configuration register sets the ADC’s gain and buffering.
3.1.1.1.3 Communication Register
Sending 0x08 to the Communication register tells the ADC the following write will be to
the 16-bit Mode register.
3.1.1.1.4 Mode Register
Sending 0x3001 to the Mode register places the ADC into a single conversion mode
and sets the update rate, fADC to 470 Hz.
From the AD7799 manufacturer’s datasheet:
“When single-conversion mode is selected, the ADC powers up and performs a single
conversion. The oscillator requires 1 ms to power up and settle. The ADC then performs
the conversion, which takes a time of 2/fADC [4.26 ms]. The conversion result is placed in
the data register, RDY goes low, and the ADC returns to power-down mode. The
conversion remains in the data register and RDY remains active (low) until the data is
read or another conversion is performed.”

9
3.1.1.1.5 Reading
Note: after initialization is complete, reading the Configuration and Mode Registers is
recommended to ensure they have been set as desired. See the AD7799 manufacturer’s
datasheet for information regarding reads of the Configuration and Mode registers.
3.1.1.2 Temperature Channel
The temperature channel ADC is controlled and configured via a number of on-chip registers.
ALL communication to the temperature channel ADC starts with a write operation to the 8-bit
write-only Communication register.
Initializing the temperature channel ADC requires writing data to a sequence of four registers;
the Communication register, the Mode register, the Communication register, and the Filter
register.
3.1.1.2.1 Communication Register
Sending 0x20 to the communication register tells the ADC the following write will be to
the 8-bit Filter register.
3.1.1.2.2 Filter Register
Sending 0x03 to the Filter register sets the ADC’s update rate (fADC) to 20 Hz.
3.1.1.2.3 Communication Register
Sending 0x10 to the Communication register tells the ADC the following write will be to
the 8-bit Mode register.
3.1.1.2.4 Mode Register
Sending 0x80 to the Mode register places the ADC into a single conversion mode.
From the AD7790 manufacturer’s datasheet:
“When single conversion mode is selected, the ADC powers up and performs a single
conversion, which occurs after a period 2/fADC [100 ms]. The conversion result in placed
in the data register, RDY goes low, and the ADC returns to power-down mode. The
conversion remains in the data register and RDY remains active (low) until the data is
read or another conversion is performed.”
3.1.1.2.5 Reading
Note: after initialization is complete, reading the Filter and Mode registers is
recommended to ensure they have been set as desired. See the AD7790 manufacturer’s
datasheet for information regarding reads of the Filter and Mode registers.

10
3.1.2 Normal Operation (Polling)
3.1.2.1 Pressure Channel
After initializing the Mode register per section 3.1.1.2, a new 24-bit pressure value will be available in ~
5.26 ms (1 ms settle time + 4.26 ms conversion).
The pressure conversion remains in the data register and DOUT/ RDY remains active (low) until the
data is read or another conversion is performed.
The process of reading the conversion and reconfiguring the ADC for single conversion mode requires
repeated cycling through the following steps:
1. Wait > 5.26 ms for the conversion to complete, and/or monitor the status of the
DOUT/ RDY line.
2. Send 0x58to the Communications register to indicate a subsequent read of the 24-bit
Data register.
3. Send 24 clock cycles to read the 24-bit Data register.
4. Send 0x08 to the Communications register to indicate a subsequent write to the 16-bit
Mode register.
5. Send 0x3001 to the Mode register to place the ADC into a single conversion mode and
set the update rate to 470 Hz.
6. Repeat
3.1.2.1 Temperature Channel
After initializing the Mode register per section 3.1.1.1, a new 16-bit temperature value will be available
in ~ 100 ms. (As temperature is generally a more slowly changing input than pressure, and has a
modest impact on the pressure output, this conversion rate should be adequate for most applications.)
The temperature conversion remains in the data register and DOUT/ RDY remains active (low) until
the data is read or another conversion is performed.
The process of reading the conversion and reconfiguring the ADC for single conversion mode requires
repeated cycling through the following steps:
1. Wait 100 ms for the conversion to complete and/or monitor the status of the
DOUT/ RDY line.
2. Send 0x38to the Communications register to indicate a subsequent read of the 16-bit
Data register.
3. Send 16 clock cycles to read the 16-bit Data register.
4. Send 0x10 to the Communications register to indicate a subsequent write to the 8-bit
Mode register.
5. Send 0x80 to the Mode register to place the ADC into a single conversion mode.
6. Repeat

11
3.1.3 Other Modes
The Honeywell IPT has been tested using the “Initialization” and “Normal Polling” as described in
sections 3.1.1 and 3.1.2. above.
Both pressure and temperature channel ADCs may also be configured to operate in Continuous
Conversion and Continuous Reads modes. Performance should be substantially the same in these
alternate modes. However, they have not been thoroughly tested.

12
3.2 Correction Algorithms
3.2.1 Pressure
One of 2 similar algorithms for converting IPT temperature and pressure channel ADC values into
corrected pressure readings is identified for each IPT. (Section 3.3.2.7 describes how the applicable
algorithm identity is documented in the IPT EEPROM contents.)
Coefficients (A, a1, a2, etc.) for the identified algorithm are stored in the IPT EEPROM. The algorithm
result (Y) is a corrected pressure reading in pounds per square inch (PSI). ADC values from the
temperature channel (normalized) are used to correct the readings for thermal effects.
3.2.1.1 Algorithm #1
Y = A + (F1 × p) + (F2 × p2) + (F3 × p3) + (F4 × p4) + (F5 × p5) + (F6 × p6)
Where:
F1 = a1 + (b1 × t) + (c1 × t2) + (d1 × t3) + (e1 × t4) + (fa1 × t5)
F2 = a2 + (b2 × t) + (c2 × t2) + (d2 × t3) + (e2 × t4) + (fa2 × t5)
F3 = a3 + (b3 × t) + (c3 × t2) + (d3 × t3) + (e3 × t4) + (fa3 × t5)
F4 = a4 + (b4 × t) + (c4 × t2) + (d4 × t3) + (e4 × t4) + (fa4 × t5)
F5 = a5 + (b5 × t) + (c5 × t2) + (d5 × t3) + (e5 × t4) + (fa5 × t5)
F6 = a6 + (b6 × t) + (c6 × t2) + (d6 × t3) + (e6 × t4) + (fa6 × t5)
Output: Y= pressure value in PSI
Inputs: p= 24-bit pressure channel ADC value, normalized 0 –1
Normalized pressure channel ADC value = pressure channel ADC value / 16,777,215
t= 16-bit temperature channel ADC value, normalized 0 - 1
Normalized temperature channel ADC value = temperature channel ADC value / 65,535
3.2.1.1.1 Horner’s Method, Algorithm #1
Horner’s method is a suggested microcontroller-friendly alternative for evaluating the above equations:
Y = A + p(F1 + p(F2 + p(F3 +p(F4 + p(F5 + p(F6)))))) (6 multiplies, 6 additions)
F1 = a1 + t(b1 + t(c1 + t(d1 + t(e1 + t(fa1))))) (5 multiplies, 5 additions)
F2 = a2 + t(b2 + t(c2 + t(d2 + t(e2 + t(fa2))))) (5 multiplies, 5 additions)
F3 = a3 + t(b3 + t(c3 + t(d3 + t(e3 + t(fa3))))) (5 multiplies, 5 additions)
F4 = a4 + t(b4 + t(c4 + t(d4 + t(e4 + t(fa4))))) (5 multiplies, 5 additions)
F5 = a5 + t(b5 + t(c5 + t(d5 + t(e5 + t(fa5))))) (5 multiplies, 5 additions)
F6 = a6 + t(b6 + t(c6 + t(d6 + t(e6 + t(fa6))))) (5 multiplies, 5 additions)
Total: 36 multiplies, 36 additions

13
3.2.1.2 Algorithm #2
Differences from Algorithm #1 are highlighted in blue
Y = A + (F1 × p) + (F2 × p2) + (F3 × p3) + (F4 × p4) + (F5 × p5) + F6
Where:
F1 = a1 + (b1 × t) + (c1 × t2) + (d1 × t3) + (e1 × t4) + (fa1 × t5)
F2 = a2 + (b2 × t) + (c2 × t2) + (d2 × t3) + (e2 × t4) + (fa2 × t5)
F3 = a3 + (b3 × t) + (c3 × t2) + (d3 × t3) + (e3 × t4) + (fa3 × t5)
F4 = a4 + (b4 × t) + (c4 × t2) + (d4 × t3) + (e4 × t4) + (fa4 × t5)
F5 = a5 + (b5 × t) + (c5 xt2) + (d5 × t3) + (e5 × t4) + (fa5 × t5)
F6 = a6 + (b6 × t) + (c6 × t2) + (d6 × t3) + (e6 × t4) + (fa6 × t5)
Output: Y= pressure value in PSI
Inputs: p= 24-bit pressure channel ADC value, normalized 0 –1
Normalized pressure channel ADC value = pressure channel ADC value / 16,777,215
t= 16-bit temperature channel ADC value, normalized 0 - 1
Normalized temperature channel ADC value = temperature channel ADC value / 65,535
3.2.1.2.1 Horner’s Method, Algorithm #2
Horner’s method is a suggested microcontroller-friendly alternative for evaluating the above equations:
Y = A + p(F1 + p(F2 + p(F3 +p(F4 + p(F5))))) + F6 (5 multiplies, 6 additions)
F1 = a1 + t(b1 + t(c1 + t(d1 + t(e1 + t(fa1))))) (5 multiplies, 5 additions)
F2 = a2 + t(b2 + t(c2 + t(d2 + t(e2 + t(fa2))))) (5 multiplies, 5 additions)
F3 = a3 + t(b3 + t(c3 + t(d3 + t(e3 + t(fa3))))) (5 multiplies, 5 additions)
F4 = a4 + t(b4 + t(c4 + t(d4 + t(e4 + t(fa4))))) (5 multiplies, 5 additions)
F5 = a5 + t(b5 + t(c5 + t(d5 + t(e5 + t(fa5))))) (5 multiplies, 5 additions)
F6 = a6 + t(b6 + t(c6 + t(d6 + t(e6 + t(fa6))))) (5 multiplies, 5 additions)
Total: 35 multiplies, 36 additions

14
3.2.2 Pressure Sensor Temperature
Starting in the May 2011 timeframe, coefficients for converting 16-bit Pressure Sensor Temperature
values to °C have been appended to the EEPROM contents of new IPT transducers. This supplemental
information allows users, if desired, to separately monitor the temperature of the pressure sensor. The
algorithm is a simple 3rd order polynomial as described below:
3.2.2.1 Algorithm
Y = g1 + (g2 × t) + (g3 × t2) + (g4 × t3)
Output: Y= pressure sensor temperature in °C
Inputs: t= 16-bit temperature channel ADC value, normalized 0 –1:
Normalized temperature channel ADC value = temperature channel ADC value / 65,535
Coefficients (g1, g2, g3 and g4) for the identified algorithm are stored in the IPT EEPROM.
3.2.2.1.1 Horner’s Method
Horner’s method is a suggested microcontroller-friendly alternative for evaluating the above equation:
Y = g1 + t(g2 + t(g3 + t(g4))) (3 multiplies, 3 additions)

15
3.3 EEPROM Storage
3.3.1 EEPROM Format
The IPT transducer uses a 2 Kbit serial EEPROM from Microchip, P/N 25LC020AT-E/MC.
The EEPROM is organized as 256 x 8. Reads/writes to the EEPROM should be per the manufacturer’s
data sheet. Note: values are stored “big-endian”; most significant bit first.
3.3.2 Contents
3.3.2.1 Pressure Correction Coefficients
The 37 correction coefficients (A through fa6) are stored in 32-bit IEEE 754 format in
locations 00 through 93.
Example: -7.2467064 = C0E7E504
3.3.2.2Full Scale Pressure Range
The IPT full scale pressure range (FS) is stored in 32-bit IEEE 754 format in locations 94
through 97.
Example: 20 = 41A00000
3.3.2.3Minimum/Maximum Operating/Storage Temperature Limits
IPT operating/storage temperature limits (Min/Max Op/Stor Temp) are stored as 8-
bit signed integers in locations 98 through 9B.
Examples: Min Operating -40 = D8
Max Operating 85 = 55
Min Storage -55 = C9
Max Storage 125 = 7D
3.3.2.4Minimum Pressure Output
The minimum pressure output value (Pmin) is the minimum value observed from the
pressure channel ADC over the IPT operating temperature/pressure range and is stored
as a 24-bit unsigned integer. Location 9C is padded with 00 and Pmin is stored in
locations 9D through 9F.
Example: 1213487 = 12842F
3.3.2.5Maximum Pressure Output
The maximum pressure output value (Pmax) is the maximum value observed from the
pressure channel ADC over the IPT operating temperature/pressure range and is stored
as a 24-bit unsigned integer. Location A0 is padded with 00 and Pmax is stored in
locations A1 through A3.
Example: 11021407 = A82C5F

16
Note: These values can be used to determine if the IPT is being used within its specified
operating range. If samples from the pressure ADC are outside this range, the accuracy
of the correction algorithm cannot be guaranteed.
3.3.2.6Minimum/Maximum Temperature Output
The minimum and maximum temperature output values (Min/Max Tout) are the
minimum and maximum values observed from the temperature channel ADC over the
IPT operating temperature/pressure range and are stored as 16-bit unsigned integers.
The minimum value is stored in locations A4 through A5 and the maximum value in A6
through A7.
Examples: Min 40175 = 9CEF
Max 60503 = EC57
Note: These values can be used to determine if the IPT is being used within its specified
operating range. If samples from the temperature ADC are outside this range, the
accuracy of the correction algorithm cannot be guaranteed.
3.3.2.7Algorithm/Type, Date
Four unsigned bytes are used to identify the correction Algorithm, IPT transducer Type
and the manufacturing Date Code (Algorithm/Type/Date Code) at locations A8
through AB.
The most significant byte is used to identify both the correction Algorithm and IPT type
with high nibble for Algorithm and low nibble for Type (shown here in binary).
Algorithm is: #1 = 0000b
#2 = 0001b
Type is defined as: Absolute = 0001b
Gauge = 0010b
Differential = 0011b
Date is stored using the three remaining bytes in the format of mmddyy.
Example: 010C1B07= Algorithm #1, Absolute, December 27, 2007
Example: 13060B0A= Algorithm #2, Differential, June 11, 2010
3.3.2.8Serial Number
The IPT’ serial number (Serial No.) is stored as an unsigned 32-bit value in locations
AC through AF.
Example: 1100009827 = 4190D163
3.3.2.9Honeywell Part Number
The Honeywell part number (Hon. P/N) stored in EEPROM is encoded to form a P/N in
the form of 22xxxxxx-0xx or 58xxxxxx-xxx with a special-order code of –Tyyy.
xxxxxxxx is 24-bit unsigned value from 000000 to 16777215 and yyy is an 8-bit
unsigned value from 00 to 255.

17
xxxxxxxx is stored in locations B0 through B2. yyy is stored in location B3.
Examples:
2FDDE901 = Honeywell Part Number 22031370-001
Special-order code –T001.
37107D07 = Honeywell Part Number 58036087-001
Special-order code –T007.
3.3.2.10 Checksum Bytes
Two checksum bytes (Checksum Bytes) are stored in locations B4 and B5. The
checksum bytes are stored such that an 8-bit Fletcher checksum calculation (Modulo
256) on the primary storage area (00 through B5) yields a zero for each of the calculated
8-bit Fletcher Checksum values.
In the case of the example Table 1 below, the checksum bytes are B4 and 64.
See section 6 for a description of the Fletcher Checksum.
3.3.2.11 Supplemental Information: Pressure Sensor Temperature to °C Coefficients
The 4 correction coefficients (g1 through g4) are stored in 32-bit IEEE 754 format in
locations B8 through C7.
Example: -1796.9403 = C4E09E17
3.3.2.12 Supplemental Information: “Seed” Values and Corresponding Corrected Pressure
To aid in development and debug of the Pressure Correction Algorithms found in section
3.2.1, a transducer-specific 24-bit Seed Pressure Count (spc), a 16-bit Seed
Temperature Count (stc) and the corresponding 32-bit IEEE 754 Corrected Seed
Pressure reading (csp) have been stored in the IPT EEPROM:
The 24-bit spc value is stored in locations C8 through CB with leading zero’s.
The 16-bit stc value is stored in locations CC through CF with leading zero’s.
The 32-bit csp value is stored in locations DO through D3 in IEEE 754 format.
3.3.2.13 Supplemental Information: Checksum Bytes
Two checksum bytes (Checksum Bytes) are stored in locations D4 and D5. The
checksum bytes are stored such that an 8-bit Fletcher checksum calculation (Modulo
256) on the supplemental storage area (B8 through D5) yields a zero for each of the
calculated 8-bit Fletcher Checksum values.
In the case of the example Table 1 below, the supplemental checksum bytes are CB and
1A. See section 6 for a description of the Fletcher Checksum.
3.3.2.14 Unused Locations
Locations B6, B7 and D6 through FF are unused and available for storage of customer
information.

18
Table 1. EEPROM Map w/ Example Values
Description
Inputs
ADDR
Stored Values
A
-10.251645
00
C1
24
06
BD
a1
-1796.9403
04
C4
E0
9E
17
a2
-4162.3979
08
C5
82
13
2F
a3
6.8445935
0C
40
DB
06
E9
a4
-2651.1321
10
C5
25
B2
1D
a5
-5778.0547
14
C5
B4
90
70
a6
10801.397
18
46
28
C5
97
b1
14889.769
1C
46
68
A7
13
b2
18248.301
20
46
8E
90
9A
b3
20223.174
24
46
9D
FE
59
b4
-4042.4363
28
C5
7C
A6
FB
b5
66986.164
2C
47
82
D5
15
b6
-93110.602
30
C7
B5
DB
4D
c1
-46230.684
34
C7
34
96
AF
c2
-28188.965
38
C6
DC
39
EE
c3
-83723.297
3C
C7
A3
85
A6
c4
20603.07
40
46
A0
F6
24
c5
-216138.38
44
C8
53
12
98
c6
295352.34
48
48
90
37
0B
d1
70067.305
4C
47
88
D9
A7
d2
20100.578
50
46
9D
09
28
d3
107100.88
54
47
D1
2E
71
d4
45148.465
58
47
30
5C
77
d5
268675.63
5C
48
83
30
74
d6
-438418.22
60
C8
D6
12
47
e1
-51952.816
64
C7
4A
F0
D1
e2
-10252.898
68
C6
20
33
98
e3
-31521.736
6C
C6
F6
43
79
e4
-148898.56
70
C8
11
68
A4
e5
-108588.63
74
C7
D4
16
50
e6
306424.84
78
48
95
9F
1B
fa1
15124.948
7C
46
6C
53
CB
fa2
4531.3633
80
45
8D
9A
E8
fa3
-13495.57
84
C6
52
DE
48
fa4
92770.586
88
47
B5
31
4B
fa5
-7349.3057
8C
C5
E5
AA
72
fa6
-80684.555
90
C7
9D
96
47
FS
50
94
42
48
00
00
Min/Max Op/Stor Temp
-40
85
-55
125
98
D8
55
C9
7D
Pmin
2336726
9C
00
23
A7
D6
Pmax
13173153
A0
00
C9
1
A1
Min/Max Tout
39393
50413
A4
99
E1
C4
ED
Algorithm/Type, Date
Code
1
7
31
10
A8
01
07
1F
0A
Serial No.
1464
AC
00
00
05
B8
Hon. P/N
3137201
0
B0
2F
DE
B1
00
Checksum Bytes
byte1
byte2
B4
B4
64
g1
-2882.41
B8
C5
34
26
8F
g2
11581.7
BC
46
34
F6
CD
g3
-16459.2
C0
C6
80
96
66
g4
8494.38
C4
46
04
B9
85
spc
10086589
C8
00
99
E8
BD
stc
41487
CC
00
00
A2
0F
csp
13.9968
DO
41
5F
F2
E5
Checksum Bytes
byte1
byte2
D4
CB
1A

19
4 Installation Recommendations
1. IPT media compatibility is non-condensing, non-corrosive, non-combustible gases. To ensure the best
transducer performance it is strongly suggested that IPT transducers and associated plumbing be
oriented to prevent accumulation of debris or condensation in the pressure ports.
2. Pressure ports P1 and P2 should be shielded from direct light due to a strong photoelectric effect on
the sense element.
3. Although conformally coated, electronics should be protected from humidity exposure.
4. Transducer should be mounted to minimize mechanical stress between circuit board and on-board
pressure sensor.
5. Although there is no official specification for the SPI interface (a defacto standard), it is intended for
short distance on-board communications between a microcontroller or microprocessor (Master) and a
peripheral (Slave). To help ensure signal integrity, minimize signal path distance between any Master
and the IPT.
4.1 Installation Examples
The three examples below are for illustrative purposes only and do not represent all possible methods
of installing the IPT.
4.1.1 Flexible Tubing and Double-wire Hose Clamps
Considerations:
1. Select tubing size/material for the application’s temperature and pressure extremes.
2. Ensure hose clamps do no contact any IPT circuitry.
3. Shield port P2 from light due to strong photoelectric effect upon the sense element.
4. Minimize mechanical stress between the circuit board and the on-board pressure sensor.

20
4.1.2 Static Radial O-ring Seals
Considerations:
1. Select o-ring size/material for the application’s temperature and pressure extremes.
2. Minimize mechanical stress between the circuit board and the on-board pressure sensor.
4.1.3 Static Radial and Face O-ring Seals
Considerations:
1. Select o-ring size/material for the application’s temperature and pressure extremes.
2. Minimize mechanical stress between the circuit board and the on-board pressure sensor.
5 Marking
An adhesive label on the O.D. of the IPT sensor contains the unit’s model code, serial number, and
date code (MMDDYY).
Example: IPT0020A33R-T003 S/N 2376 081710
Table of contents
Other Honeywell Transducer manuals
Popular Transducer manuals by other brands

APAR
APAR AR593 User instructions

Lumel
Lumel P30O user manual

Siemens
Siemens SITRANS T3K PA instruction manual

GREISINGER electronic
GREISINGER electronic GHTUMP Series operating manual

SonoSite
SonoSite TEExi user guide

Electro-Voice
Electro-Voice 3-Inch High Frequency Neodymium Transducer... Technical specifications