manuals.online logo
Brands
  1. Home
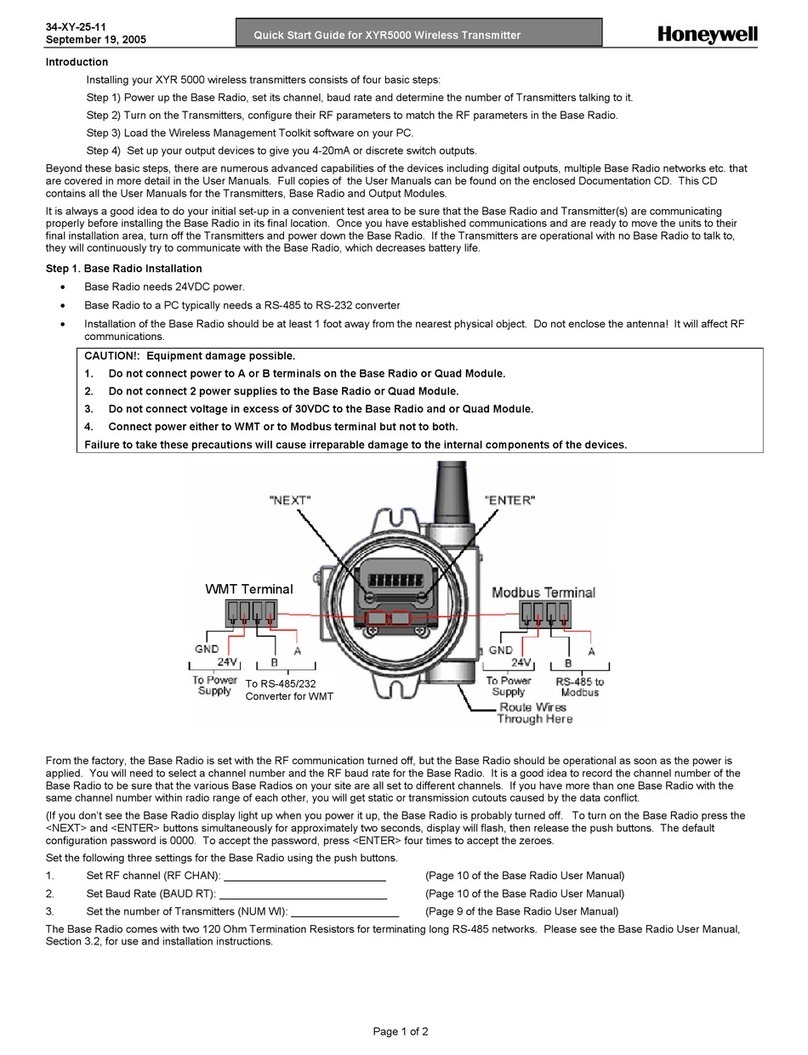
  2. •
  3. Brands
  4. •
  5. Honeywell
  6. •
  7. Transmitter
  8. •
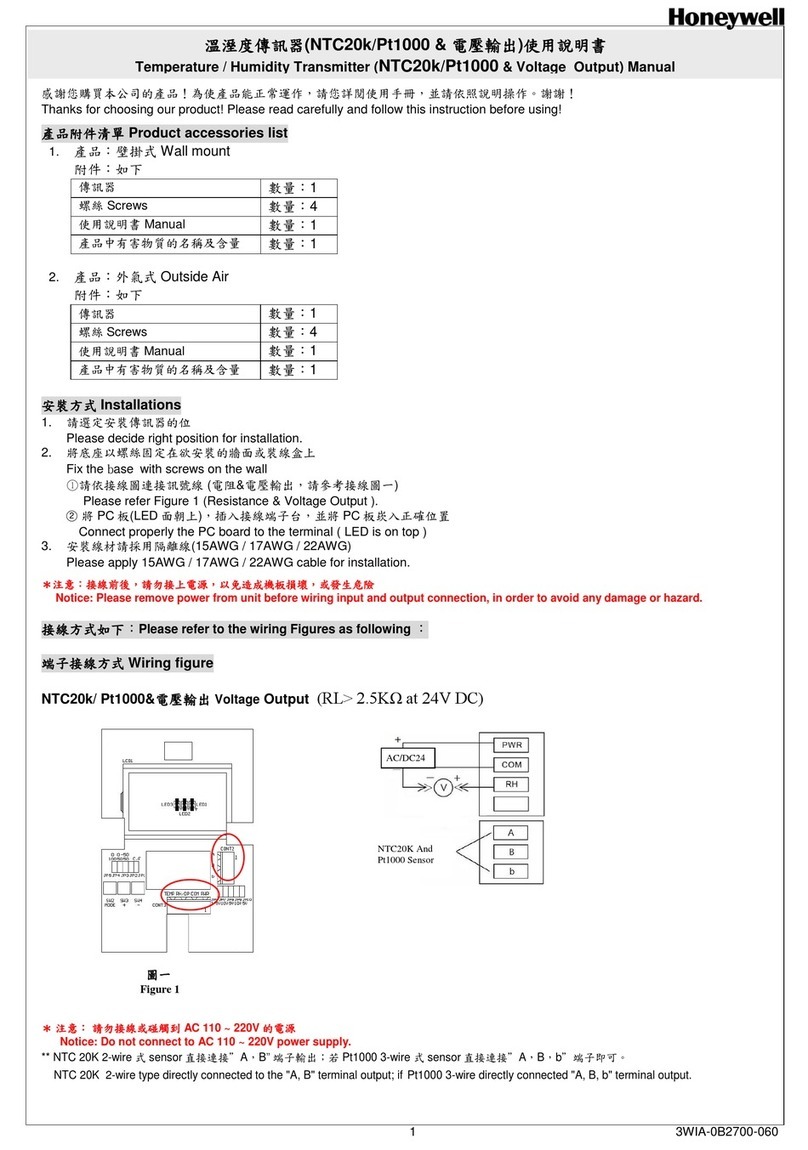
  9. Honeywell Ademco 5817CBXT Assembly instructions

Honeywell Ademco 5817CBXT Assembly instructions

ADEMCO 5817CBXT
Wireless Commercial/Household Transmitter
Installation and Setup Guide
GENERAL INFORMATION
The 5817CBXT is a universal contact-monitoring transmitter that can be
used with household and commercial fire and burglary-initiating devices
such as door/window contacts, motion and glassbreak detectors,
sprinkler water flow switches, tamper switches, post indicator valves,
manual pull stations, and remote duct detectors. The 5817CBXT has
three unique input loops (zones).
Loop 1: Supervised and typically used for high-priority alarm reporting
such as commercial fire or burglary. It requires a 470K ohm
end-of-line resistor (PN EOLR 470K) to be placed across the
sensor. Short circuit reports as loop 1; open circuit reports as
loop 4 (tamper). Response time is approx. 320mS.
Loop 2: Built-in, normally closed reed switch (used in conjunction with
a magnet).
Loop 3: Normally closed household burglary loop. Response time is
approx. 320mS.
Loop 4: Tamper loop (automatically enrolled) contains two tamper
switches. A built-in cover tamper switch is activated when the
cover is removed. A unit tamper switch is activated if the unit
is separated from its mounting plate.
ENROLLING
The 5817CBXT has a built-in serial number that must be enrolled in the
control panel prior to its usage in the alarm system. Assign loops 1-3 to
individual zones respectively. Refer to the control panel's installation
instructions for specific programming procedure.
When programming the 5817CBXT transmitter, set as Input Type "RF"
(i.e., supervised RF) (mandatory for UL installations).
NOTE: DIP switch 1 must be set to OFF during enrollment.
MOUNTING
•Signal strength may vary from location to location. Before mounting
the transmitter permanently, conduct Go/No Go tests (see control's
instructions) to verify adequate signal strength from this location.
•When a satisfactory location is found,remove the battery and
proceed with installation.
IMPORTANT: Do not mount the transmitter on or near metal
objects, as this may affect transmission range. It is also good
practice to avoid locating the transmitter near wiring such as AC,
telephone, HVAC, computer data cables, etc.
1. Remove the tamper switch hold down tab from the mounting plate
and set it aside. It will be needed if not using the mounting plate.
2. Remove the transmitter's cover using the flat blade of a small
screwdriver in the pry-off slot and twisting. To replace the cover,
engage the hooks along the top edge and snap shut.
3. Disengage the mounting plate from the case back by inserting the
blade of a small screwdriver into the mounting plate release hole
(see Figure 3) and pushing the locking tab out (see Figure 1). Slide
the mounting plate downward along the case back.
4. For Concealed Wiring: Feed the wires through the concealed wiring
entry hole at the bottom corner of the mounting plate (and/or case
back).
For Surface Wiring: Remove the knockout slot in the case back
(near loop 3 terminal block).
Do not connect the wiring to the terminal block(s) yet.
5. If Using the Mounting Plate (for easy removal later for servicing):
a. Install the mounting plate in the location determined, with its case-
holding posts pointing up. Use two flat head dry-wall screws.
NOTE: To ensure proper operation of the unit's back tamper, the
screws must be anchored to a wall stud or other solid wood
material.
b. Attach the case back to the mounting plate by sliding the
keyhole slots in the case back down onto the mounting
plate's holding posts. The locking tab clicks as the case
back locks in place.
If Not Using the Mounting Plate:
a. Make note of the location of the tamper switch hold-
down as shown
in Fig. 1 for the proper placing of the hold-down tab in Fig. 2.
b. Remove the PC board from the case back. Slide a small flat
bladed screwdriver between the case back and PC board near the
board hold-down clip and carefully pry the board out.
c. In the area that was marked, install the hold-down tab with a 5/8”
flat head dry-wall screw. The tab must be aligned with the
corresponding slot in the case back as shown in Figure 2. The tab
as well as the case back must be anchored to a wall stud or other
solid wood material.
d. Mount the case back to the wall using two flat head dry-wall
screws, anchoring it to a wall stud or other solid wood material.
e. Reinstall the PC board into the case back, position the board onto
the two retaining studs on one side of the case back and snap the
board into place. The hold-down tab must mate with the
corresponding cutout in the case back after case back is installed.
5817CB-004-V0
MOUNTING
PLATE
HOLE CASE
HOLDING
POSTS
CONCEALED
WIRING
ENTRY
HOLE
MOUNTING
PLATE HOLE
TAMPER
SWITCH
HOLD
DOWN
LOCKING
TAB
HOLD-DOWN
TAB
Figure 1. Mounting Plate
5817CB-001-V0
TAMPER SWITCH
HOLD-DOWN TAB
CASE
BACK
CONCEALED
WIRING
ENTRY HOLE
MOUNTING
HOLES (2)
INSTALL
IN LINE
WITH
CUT-OUT
IN CASE
BACK
Figure 2. Case Back
6. Set the DIP switch (after the control panel has enrolled the
transmitter loops) for the desired primary loop characteristics, as
described in the Primary Loop Options Table.
Notes:
•The DIP switch may be set by the installer only. It is not a user
function.
•Due to FCC regulation 15.231(a)(4), this switch may not be set to
ON unless loop 1 is used to indicate a type of emergency
involving fire, security, or safety of life.
PRIMARY LOOP OPTIONS
SWITCH
SET TO DIP SWITCH POSITION
ON
REPEATING TRANSMISSION (every 4 sec.)
UPON PRIMARY LOOP 1 FAULT
Use for high priority alarm, such as fire.
OFF
SINGLE TRANSMISSION
PER PRIMARY LOOP CHANGE-OF-STATE
Notes:
•In order for the control panel to enroll the transmitter, DIP
switch 1 must be set to OFF (see Figure 3).
•the Auxiliary loops are not affected by the DIP switch settings.
WIRING CONNECTIONS
Connect the loop wiring to the unit's terminals before installing the
battery (see Figure 3).
NOTES:
•Primary loop 1 is a supervised loop and must have an end-of-line
(EOL) resistor (470K ohms, supplied) placed across the last sensor.
Additionally, for Primary loop 1, a contact device may not be installed
more than 20 feet from the transmitter.
•For UL household burglary and fire installations, the loop 3 contact
device (if used) may not be more than 3 feet from the transmitter.
BATTERY
5817CB-002-V5
DIP
SWITCH
ANTENNA
COVER TAMPER
SWITCH
COVER PRY-OFF POINT
MOUNTING
PLATE RELEASE
1/2"
MAX.
N.O.
CONTACT
DEVICE
N.C.
CONTACT
DEVICE
LOOP 3 TERMINALS
(AUX)
ALIGN MAGNET WITH
MARKS ON CASE
(2 PLACES)
MAGNET
LOOP 2 REED SWITCH
(AUX)
PRIMARY LOOP 1
TERMINALS
CLASS B CIRCUIT
ON
OFF
DIP SWITCH 1 MUST
BE OFF DURING
ENROLLMENT BY THE
CONTROL
SLOT FOR CONCEALED
WIRING ACCESS
EOLR 470K ohms
PN EOLR 470K
COVER HOLDING
SLOTS (2)
LOCKING SCREW (2 PLACES)
ON
ON
Figure 3. 5817CBXT Transmitter, Top Cover Removed
NOTE: For UL commercial and household fire installations, only one
initiating device may be connected to this transmitter. For UL
commercial burglary installations, multiple initiating devices may be used
as long as the devices all serve the same function, such as door/window
contacts, motion or glassbreak detectors. All initiating devices must be
located within the same room.
No more than one wire per terminal may be connected.
Use only 14-22AWG wire.
BATTERY INSTALLATION/REPLACEMENT
1. Remove the transmitter's cover as described in Mounting Step 2.
2. Observe correct polarity and insert the battery provided into the
battery holder (see Figure 3). Take care not to bend the antenna.
Note: Replace battery only with: Duracell DL123A, HUIDERUI
CR123A, Panasonic CR123A or Resideo 466.
!
Risk of fire, explosion, and burns. Do not recha
rge, dis
-
assemble, heat above 212°F (100°C), or incinerate. Dispose
of used batteries promptly. Keep away from children.
3. To replace the cover, engage the hooks along the top edge and
snap shut. Install cover locking screws when required for regulatory
agencies.
ENROLLMENT NOTE: Wait 30 seconds after battery installation before
enrolling transmitter.
NOTE: Constant exposure to high or low temperature or high humidity
may reduce battery life.
TESTING
Regular maintenance and inspection (at least annually) by the installer
are vital to continuous satisfactory operation of any alarm system. The
installer should instruct the user to test the system frequently (at least
weekly) to insure the system's operation at all times, as well as offer a
regular maintenance program to the user. The user should also be
acquainted with proper operation and limitations of the entire alarm
system. For testing procedures, refer to the User Guide or Installation
and Setup Guide for the system control panel.
UL Requirement
1. If using a compatible commercial control panel (ex. VISTA Turbo
series) and programming the 5817CBXT as an Entry/Exit zone, you
must enroll the tamper loop (loop 4) as a separate zone,
programmed for 24-hour response (e.g., Zone type 5 Trouble-by-
day/Alarm-by-night).
2. For UL Commercial Burglary installations, this transmitter must be
used in conjunction with the 5881ENHC RF Receiver.
SPECIFICATIONS
U
LFor dry, indoor use only. Do not install in air-handling spaces
Dimensions: 1-9/16"W x 3-1/2"H x 1-3/16"D (40mm x 89mm x 30mm)
Battery: 3V Lithium (see BATTERY INSTALLATION/
REPLACEMENT).
Signal Level: To determine ambient noise level and signal strength,
refer to compatible receiver Installation and Setup
Guide.
NFPA-72 Compliant.
UL Listings:
Commercial Fire: UL864
Household Fire: UL985
Household Burglary: .UL1023
Commercial Burglary: UL365, UL609, UL634, UL1076, UL1610
TO THE INSTALLER
Regular maintenance and inspection (at least annually) by the installer and
frequent testing by the user are vital to continuous satisfactory operation of
any alarm system. The installer should assume the responsibility of
developing and offering a regular maintenance program to the user, as well
as acquainting the user with the proper operation and limitations of the
alarm system and its component parts. Recommendations must be
included for a specific program of frequent testing (at least weekly) to insure
the system’s operation at all times.
FEDERAL COMMUNICATIONS COMMISSION STATEMENTS
The user shall not make any changes or modifications to the equipment unless authorized by the Installation Instructions or User's Manual. Unauthorized
changes or modifications could void the user's authority to operate the equipment.
FCC/IC NOTICE: This device complies with Part 15 of the FCC Rules, and RSS-210 of IC. Operation is subject to the following two conditions: (1) This
device may not cause harmful interference (2) This device must accept any interference received, including interference that may cause undesired operation.
Cet appareil est conforme à la partie 15 des règles de la FCC & de RSS-210 des Industries Canada. Son fonctionnement est soumis aux conditions
suivantes: (1) Cet appareil ne doit pas causer d' interférences nuisibles. (2) Cet appareil doit accepter toute interférence reçue y compris les interférences
causant une réception indésirable.
REFER TO THE INSTALLATION INSTRUCTIONS FOR THE CONTROL WITH WHICH THIS DEVICE IS USED, FOR DETAILS REGARDING LIMITATIONS OF THE
ENTIRE ALARM SYSTEM
.
Responsible Party / Issuer of Supplier’s Declaration of Conformity: Ademco Inc., a subsidiary of Resideo Technologies, Inc., 2 Corporate Center
Drive., Melville, NY 11747, Ph: 516-577-2000
The product should not be disposed of with other household waste. Check for the nearest authorized collection centers or authorized recyclers. The
correct disposal of end-of-life equipment will help prevent potential negative consequences for the environment and human health.
Any attempt to reverse-engineer this device by decoding proprietary protocols, de-compiling firmware, or any similar actions is strictly prohibited.
SUPPORT & WARRANTY INFORMATION
For the latest documentation, support and warranty information, please go to:
www.resideo.com
This product manufactured by Resideo Technologies Inc. and its affiliates
Ê800-18448EDŠ
800-18448E 5/14 Rev. E
2 Corporate Center Drive, Suite 100
P.O. Box 9040, Melville, NY 11747
2020 Resideo Technologies, Inc.
www.resideo.com

Other Honeywell Transmitter manuals

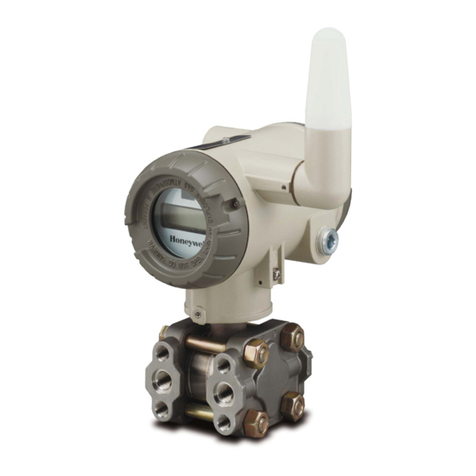
Honeywell oneWireless XYR 6000 User manual

Honeywell

Honeywell oneWireless XYR 6000 User manual

Honeywell Midas-M User manual

Honeywell

Honeywell Midas-M User manual

Honeywell 5800 Mini User manual

Honeywell

Honeywell 5800 Mini User manual

Honeywell OELD User manual

Honeywell

Honeywell OELD User manual

Honeywell SmartLine ST700 User manual

Honeywell

Honeywell SmartLine ST700 User manual

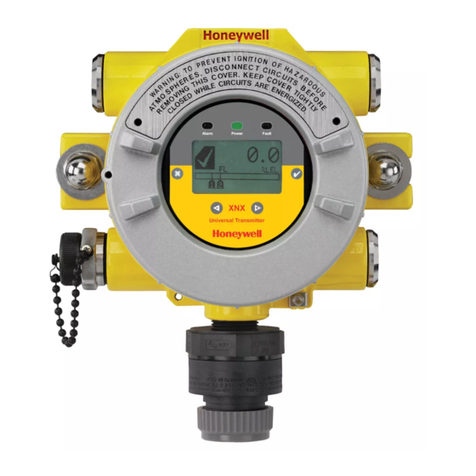
Honeywell XNX User manual

Honeywell

Honeywell XNX User manual

Honeywell SMV 3000 User manual

Honeywell

Honeywell SMV 3000 User manual

Honeywell STT750 SmartLine Instruction Manual

Honeywell

Honeywell STT750 SmartLine Instruction Manual

Honeywell SmartLine ST 800 User manual

Honeywell

Honeywell SmartLine ST 800 User manual

Honeywell 5834-4 Series Assembly instructions

Honeywell

Honeywell 5834-4 Series Assembly instructions

Honeywell ADEMCO 5805-6 Assembly instructions

Honeywell

Honeywell ADEMCO 5805-6 Assembly instructions

Honeywell K595 User manual

Honeywell

Honeywell K595 User manual

Honeywell oneWireless XYR 6000 User manual

Honeywell

Honeywell oneWireless XYR 6000 User manual

Honeywell ST 800 Series Instruction Manual

Honeywell

Honeywell ST 800 Series Instruction Manual

Honeywell 5822T User manual

Honeywell

Honeywell 5822T User manual

Honeywell SmartLine STIW400 User manual

Honeywell

Honeywell SmartLine STIW400 User manual

Honeywell STT700 SmartLine User manual

Honeywell

Honeywell STT700 SmartLine User manual

Honeywell SMV800 User manual

Honeywell

Honeywell SMV800 User manual

Honeywell PEHA 450 FU-HS128 User manual

Honeywell

Honeywell PEHA 450 FU-HS128 User manual

Honeywell SMV 3000 User manual

Honeywell

Honeywell SMV 3000 User manual

Honeywell PEHA FU-BLS User manual

Honeywell

Honeywell PEHA FU-BLS User manual

Honeywell ADEMCO 5869 Assembly instructions

Honeywell

Honeywell ADEMCO 5869 Assembly instructions

Honeywell PW Series User manual

Honeywell

Honeywell PW Series User manual

Honeywell Satellite XT 9602-0400 FTT User manual

Honeywell

Honeywell Satellite XT 9602-0400 FTT User manual

Popular Transmitter manuals by other brands

Produal Proxima WBU Commissioning and Maintenance Instructions

Produal

Produal Proxima WBU Commissioning and Maintenance Instructions

Caliber PMT 560BT quick start guide

Caliber

Caliber PMT 560BT quick start guide

Shure ADX Series manual

Shure

Shure ADX Series manual

Endress+Hauser iTEMP TMT82 operating instructions

Endress+Hauser

Endress+Hauser iTEMP TMT82 operating instructions

Johnson Controls SDP0250 quick start guide

Johnson Controls

Johnson Controls SDP0250 quick start guide

Vega VEGAPULS 62 operating instructions

Vega

Vega VEGAPULS 62 operating instructions

Pavone Systems DAT 1400 Technical manual

Pavone Systems

Pavone Systems DAT 1400 Technical manual

Quick RRCH02 Manual of installation and use

Quick

Quick RRCH02 Manual of installation and use

VESALA MicroSonde MPL6-33 user manual

VESALA

VESALA MicroSonde MPL6-33 user manual

Wilkerson Instrument DR4302 Series instructions

Wilkerson Instrument

Wilkerson Instrument DR4302 Series instructions

E+E Elektronik EE360 Operation manual

E+E Elektronik

E+E Elektronik EE360 Operation manual

Danfoss PTU 025 installation instructions

Danfoss

Danfoss PTU 025 installation instructions

Aplisens APCE-2000G user manual

Aplisens

Aplisens APCE-2000G user manual

Niko 410-00001 manual

Niko

Niko 410-00001 manual

Phonak Inspiro DynaMic user guide

Phonak

Phonak Inspiro DynaMic user guide

DRAKE 2-nt instruction manual

DRAKE

DRAKE 2-nt instruction manual

M-system M5MS instruction manual

M-system

M-system M5MS instruction manual

Ness RR2 Installation notes

Ness

Ness RR2 Installation notes

manuals.online logo
manuals.online logoBrands
  • About & Mission
  • Contact us
  • Privacy Policy
  • Terms and Conditions

Copyright 2025 Manuals.Online. All Rights Reserved.