Hoover H-PURIFIER 700 User manual

®
USER MANUAL (GB) ............................. 2
MANUEL D’UTILISATION (FR)............ 15
BEDIENUNGSANLEITUNG (DE) ......... 28
MANUALE PER L’UTENTE (IT)........... 41
GEBRUIKSAANWIJZING (NL)............. 54
MANUAL DE INSTRUÇÕES (PT) ........ 67
MANUAL DE USUARIO (ES) ............... 80
BRUGERVEJLEDNING (DK) ............... 93
BRUKERMANUAL (NO)..................... 106
INSTRUKTIONSMANUAL (SE).......... 119
KÄYTTÖOHJE (FI) ............................. 132
(RU). 145
ΟΗΓΊΕΣ ΧΡΉΣΗΣ (GR) ......................... 158
. 171
..................... 184
.. 197
KULLANMA KILAVUZU (TR)............. 210

2
GB
INSTRUCTIONS FOR SAFE USE
This appliance should only be used for private household use, as described in this user guide.
Please ensure that this guide is fully understood before operating the appliance and keep for
future reference.
Always switch off and remove the plug from the socket after use, or before cleaning the appliance
or any maintenance task.
This appliance can be used by children aged from 8 years and above and persons with reduced
physical, sensory or mental capabilities or lack of experience and knowledge if they have been
given supervision or instruction concerning use of the appliance in a safe way and understand
the hazards involved. Children shall not play with the appliance.
Cleaning and user maintenance shall not be made by children without supervision.
If the power cord is damaged stop using the appliance immediately. To avoid a safety hazard,
an authorised HOOVER service engineer must replace the power cord.
Use only attachments, consumables or spares recommended or supplied by HOOVER.
Do not remove the plug by pulling on the power cord.
Do not continue to use your appliance if it appears faulty.
Place and use the product only on a dry, stable, level horizontal surface, so that tipping over is
excluded.
Keep the product dry.
Never tilt or empty the product during operation.
Lay the supply cord so nobody will step on or trip over it.
sunlight.
The water in the water tank is not suitable for drinking. Do not drink this water and do not use it to
feed animals or to water plants. When you empty the water tank, pour the water down the drain.
Check if the voltage and ratings indicated on the label of the appliance corresponds to the local
power voltage before you connect the appliance.
Do not block the air inlet or air outlet.
This appliance is not a substitute for proper ventilation, regular vacuum cleaning, or use of an
extractor hood or fan while cooking.
Leave at least 20cm free space behind and on both sides of the appliance and leave at least
30cm free space above the appliance.
Do not place anything on top of the appliance.
Do not place the appliance directly below an air conditioner to prevent condensation from
dripping onto the appliance.
malfunctioning of the appliance.
Do not use this appliance when you have used indoor smoke-type insect repellents or in places
with oily residues, burning incense, or chemical fumes.
To prevent interference, place the appliance at least 2m away from electrical appliances that
use airborne radio waves such as TVs, radios, and radio-controlled clocks.

333
GB
Do not use the appliance in wet surroundings or in surroundings with high ambient
temperatures, such as the bathroom, toilet, or kitchen.
used a safety device in case of accidents with combustion processes and hazardous chemicals.
Do not put any substance other than water in the water tank. Do not put fragrance in the water
tank.
Clean the water tank every 3 days.
Be aware that high humidity levels may encourage growth of biological organisms in the
environment.
materials such as carpeting, curtains, drapes or tablecloths to become damp.
Never leave water in the reservoir when the appliance is not in use.
Warning: Micro-organisms that may be present in the water or in the environment where the
appliance is used or stored, can grow in the water reservoir and be blown in the air causing very
serious health risks when the water is not renewed and the tank is not cleaned properly every
3 days.
wipe all surfaces dry.
empty or remove the water tank. Carry the appliance horizontally by the handles on both sides
of the appliance.
The CO Monitor function is not to be used as, nor implied to be used as a substitute for an EN
where Local or Regional Codes or legislation mandate their use. The CO Monitor function is
a supplemental carbon monoxide monitoring device only. Use of this device is at the user’s
discretion and implies the understanding and acceptance of its limitations to adhere to codes or
legislation where applicable.
Do not place the appliance in any of the following locations:
• In a bathroom or other areas where the Alarm may be exposed to water splashes, dripping or
• Next to or directly above heaters or air conditioning vents, doors, windows, extractor fans or
anywhere that it would be affected by draughts.
• Directly above a sink or cooker.
• In an area where the temperature could drop below –20°C or rise above 50°C.
• In a damp or humid area.
• Where it would be obstructed, e.g. by curtains or furniture.
• Where dirt or dust could block the sensor.
• Near paint, thinners, solvent fumes or air fresheners.
fuel burning appliances if possible and then evacuate the property leaving the windows and
doors open. Get immediate medical help for anyone suffering the effects of carbon monoxide
poisoning. Do not re-enter the property until the alarm stops. The alarm will stop once the CO
has cleared. Do not use fuel burning appliances again until the CO source has been located and

4
To activate the CO monitor, connect the plug to a socket outlet. The CO Sensor Condition Lamp
will display green. When the CO monitor detects unsafe level of CO, the CO alarm will ring
loudly and the CO Alert button and O ring lamp will blink in red colour. The alarm will continue
to indicate until the detected CO reduces to a safe level.
Avoid using paint, thinners, solvent fumes, air fresheners, aerosol sprays or chemical cleaners
near the appliance. This may affect functioning of CO monitor.
to excessive noise when the alarm rings.
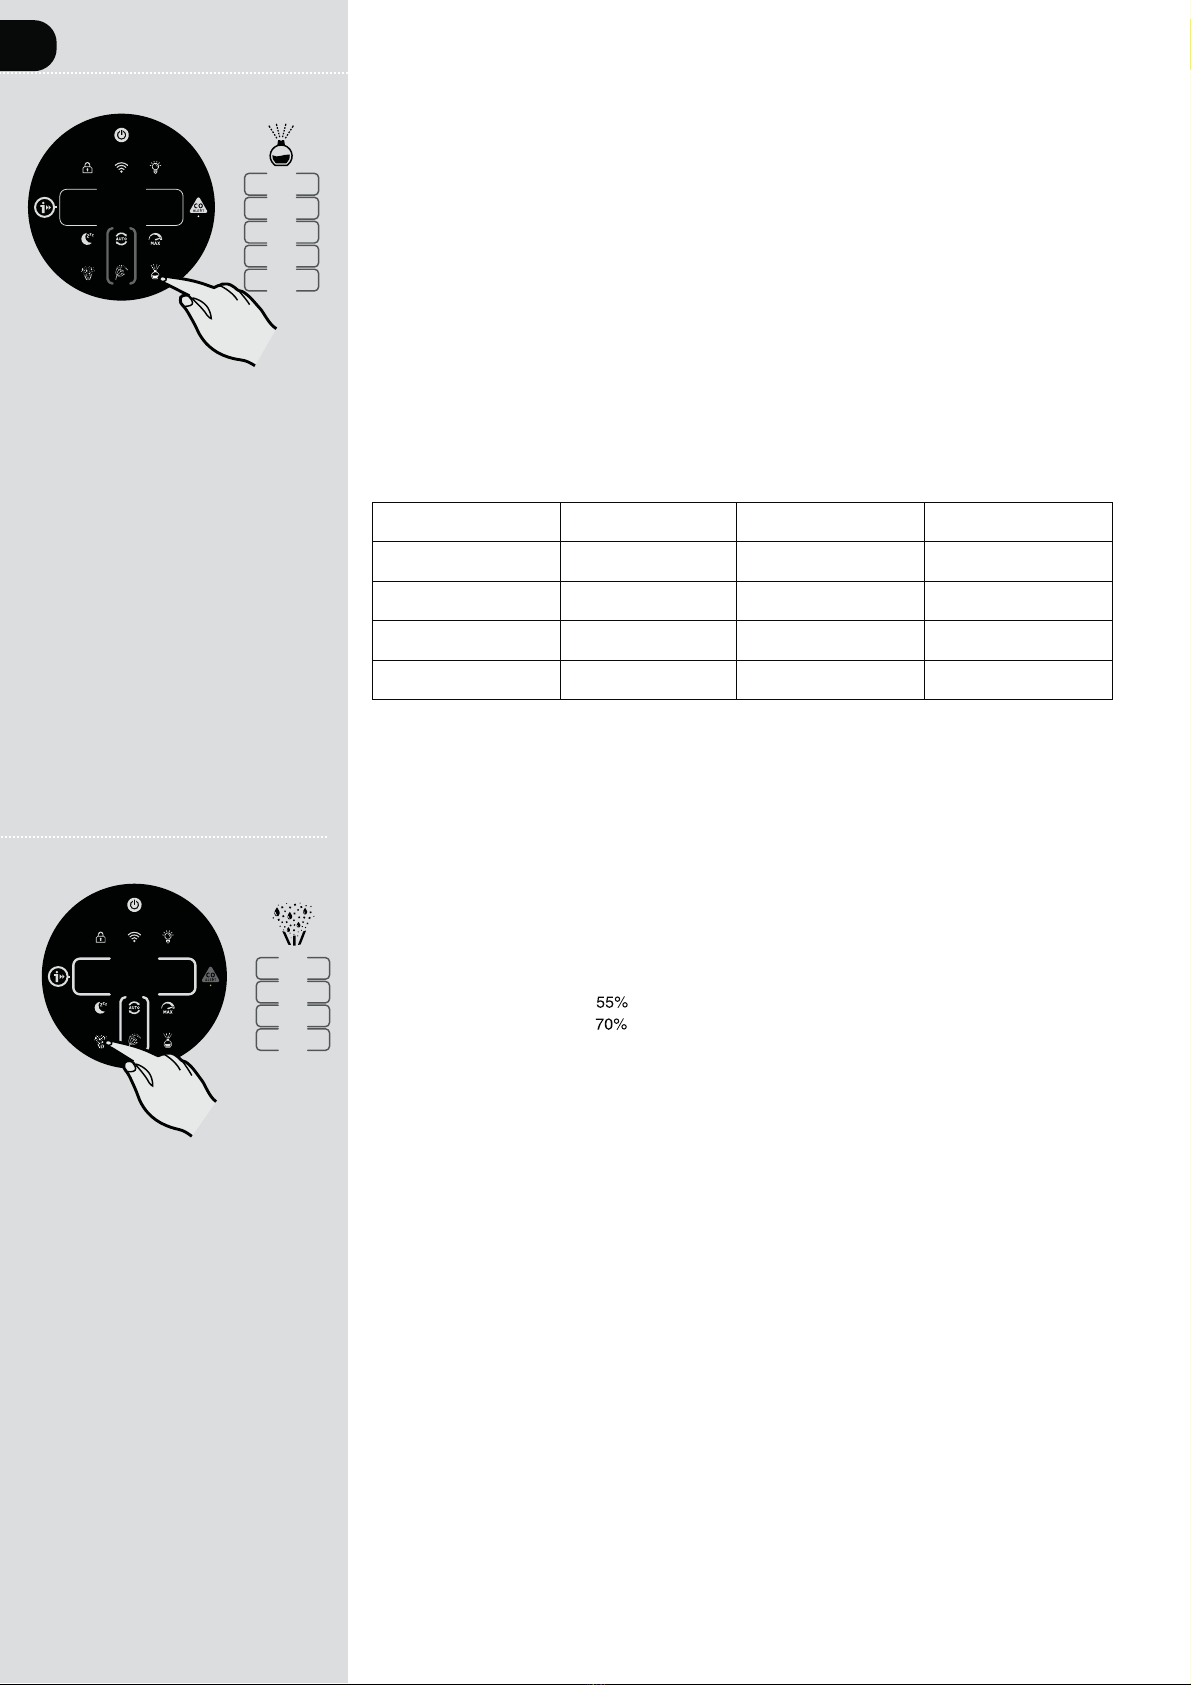
Touch [CO Alert] button for 3 seconds to test the CO Alarm function and the alarm will ring
loudly for 5 seconds. Test the alarm monthly and after prolonged absence from the building
to excessive noise when the alarm rings.
If the display indicates that the CO sensor is faulty or end of life has been reached, please
sensor. The expected lifetime of the CO sensor is 5 years and must be replaced after this time.
Operating Humidity:
Operating Temperature: 0°C to + 40°C
When the detected level of CO reaches a high level, the [CO Alert] button and the [Air Quality
continuously, the alarm will not stop until the intensity of CO falls back from the alarm level.
When CO is inhaled it attaches to the hemoglobin in the blood that normally carries oxygen
throughout the body. CO permanently displaces the ability for oxygen molecules to attach
to the hemoglobin, thus reducing oxygen to vital organs. The concentration level and time
exposed to CO can vary its effects on the body, but experts agree even low levels of carbon
monoxide exposure over prolonged periods can have serious and lasting affects to anyone’s
overall health.
WARNING: THE CO ALARM IS DESIGNED TO PROTECT INDIVIDUALS FROM THE
ACUTE EFFECTS OF CARBON MONOXIDE EXPOSURE OR PREVENT THE CHRONIC
EFFECTS OF CARBON MONOXIDE EXPOSURE. IT WILL NOT FULLY SAFEGUARD
INDIVIDUALS WITH SPECIFIC MEDICAL CONDITIONS. IF IN DOUBT CONSULT A
MEDICAL PRACTITIONER.
This appliance should not be used as a substitute for proper installation, use and maintenance
of fuel burning appliances including appropriate ventilation and exhaust systems.
operate. They are not a substitute for a third-party emergency monitoring service.
Only use aroma oil recommended or supplied by HOOVER.
Wipe any spillage of aroma oil immediately.
HOOVER service:
we recommend that any servicing or repairs are only carried out by an authorised HOOVER
service engineer.
The Environment
ensuring this product is disposed of correctly, you will help prevent potential negative consequences for the environment and human
health, which could otherwise be caused by inappropriate waste handling of this product.
The symbol on this appliance indicates that this appliance may not be treated as household waste. Instead it must be handed over to
the applicable collection point for the recycling of electrical and electronic equipment. Disposal must be carried out in accordance with
local environmental regulations for waste disposal. For more detailed information about treatment, recovery and recycling of this appliance, please
Frequency bands
Maximum RF power transmitted in the frequency band 18.9 dBm
GB

555
This appliance complies with the European Directives 2014/53/EU and 2011/65/EU. To receive a copy of the declaration of conformity,
please contact the manufacturer at: www.candy-group.com
GETTING TO KNOW YOUR H-PURIFIER
1 Control Panel / Display
2 Air Outlet
3 Product Carry Handle
4 Filter Assembly
5Air Inlet Cover Handle
6 Filter Release Switch
7 Air Inlet Cover
8
9
10
11
12
13 Diffuser Window
14 Diffuser Cover
15 Diffuser Outlet
16
17 Diffuser Unit
18
19
GB

PM 2.5 020
66
20 Air Quality LED Ring
21 Power Button
22 Child Lock Button
23 Digital Display
24 Information Button
25 Sleep Mode Button
26 Auto Mode Button
27
28
Pollen Allergy Circle lamp
29 Pollen Allergy Lamp
30 Diffuser Button
31 Max Mode Button
32 CO Alert Button & LED
33 Light Control Button
34 Wi-Fi Button
Multi Sensor Monitoring System
Thanks to the Multi Sensor Monitoring System your product will continuously monitor the indoor air condition in terms of PM10, PM2.5, Volatile
Each time you switch your product on, the Multi Sensor Monitoring system will start analyzing the indoor air and the Air Quality LED Ring will
illuminate with different colors representing real time air quality conditions.
Air Quality
LED Ring Colour
Indoor
Air Quality
GREEN EXCELLENT
YELLOW SATISFACTORY
ORANGE POOR
RED VERY POOR
Carbon Monoxide Concentration Monitoring and Alarm
silenced manually by pressing the CO Alert Button for 3 seconds.
This CO Alert LED shows the working condition of the CO sensor. It appears in green color when the CO sensor is in normal condition, in yellow
color when the sensor is malfunctioning or exceeds its working life.
GB

777
PREPARING YOUR H-PURIFIER
[Fig. 3]
• Remove the Tank Housing from the product. [Fig. 3a]
• Remove the Tank Assembly from the Tank Housing. [Fig. 3b]
• Fill the tank through the water tank inlet with distilled water until it reaches the MAX line indicated on the tank. [Fig. 3c]
• [Fig. 3d]
• [Fig. 3e]
Fig. 1
Fig. 2
Fig. 3
1. Filter Assembly [Fig. 1]
• Remove the Air Inlet Cover from your product, grip the two Air inlet cover handles and pull from the product.
[Fig. 1a]
• Remove the plug from the transport location. [Fig. 1b]
• Unlock the Filter release switch. [Fig. 1c]
• [Fig. 1d,e]
• [Fig. 1f]
• [Fig. 1g]
• [Fig. 1h]
2. Install the Diffuser Bottle [Fig. 2]
• Remove the Diffuser Cover from the product. [Fig. 2a]
• Remove the Diffuser Unit from the Diffuser Cover. [Fig. 2b]
• Remove the bottle of H-Essence or H-Biotics from the packaging and remove the cap. [Fig. 2c]
• Tightly screw the bottle on the Diffuser unit. [Fig. 2d]
• [Fig. 2e]
• [Fig. 2f]
GB

8
X1 PM10 017
X1 PM10 090
X2 PM2.5 065
X3 L3GAS
X4 16TEMP
X5 36
HUMIDITY
X6 -
FILTER LIFE
USING YOUR H-PURIFIER
Plug in the Product [Fig. 4]:
Pull out the power cord from the cord reel and plug into a power supply.
All lights on the Control Panel / Display will fully illuminate for approximately 1 second to indicate a
succesful plug in.
The POWER button will be dimly lit and the CO sensor light will be ON to indicate that the Multi Sensor
Monitoring System has started working to monitor the indoor Carbon Monoxide level.
Switching on the Product [Fig. 5]:
To switch on your product, press the POWER button on the display.
The Air Quality LED Ring will illuminate through all colours in sequence whilst the sensors are analysing
the realtime air condition. After a few seconds, the Air Quality LED ring will select the appropriate colour
for the air quality at that time.
The AUTO MODE button, INFORMATION button, LIGHTING button and PM10 information on the
Display will illuminate.
The following functions are available via the Display buttons:
Press the Wi-Fi button to turn on/off remote access.
Press the INFORMATION button to see all monitoring data.
Press the AUTO, MAX or SLEEP buttons to select a purifying mode.
Press the LIGHT CONTROL button to set the brightness of the display lights.
Press the CHILD LOCK button to inactivate all the buttons on the Control Panel / Display.
Press the DIFFUSER button to activate the function.
Press the HUMIDIFIER button to activate the function.
Pairing to Wi-Fi:
Instructions:
1. Download the hOn application from the App Store or Google Play. [Fig. 6]
2. Open the APP, create an account with your e-mail and a password.
3.
4. Ensure your mobile device is connected to Wi-Fi.
5. Log into the hOn app.
6. Press and hold the Wi-Fi button on the display for 5 seconds, there will an audible beep and the
[Fig. 7]
7. Follow the in app instructions to connect your mobile device to your product.
8. When successfully paired, the Wi-Fi button on the product will remain illuminated.
9. To reset the Wi-Fi, press & hold the Wi-Fi button for 5 Secs.
Wireless Parameters for Pairing
INFORMATION Function [Fig. 8]:
There are 6 different data sets available to monitor:
PM10, PM2.5, GAS, Temperature, Humidity, and Filter Status.
To monitor each value simply press consecutively the INFORMATION button.
By default the display will show the PM10 data, the machine will remember user’s last selection and
maintain this selection the next time the product is switched on.
Fig. 4
Fig. 5
Fig. 7
Fig. 6
Fig. 8
Technology Wi-Fi Bluetooth
Standard IEE 802.11 b/g/n Bluetooth v4.2, BR/EDR, BLE
100 10
GB

9
b
a
c
MODE Functions:
There are 3 available air purifying modes via the display: AUTO MODE, MAX MODE & SLEEP MODE
Auto mode is the default setting for your product when switched on, all modes can be selected manually
by pressing the related button on the display.
POLLEN ALLERGY mode can be activated via the hOn APP.
AUTO MODE [Fig. 9]:
automatically adapts its purifying performance to the real-time monitored indoor air quality level.
This is the recommended setting for your product.
In AUTO mode, after 30 minutes of excellent air quality, your product will enter an ECO mode by
pausing the purifying function, the Multi Sensor Monitoring System will continue to analyse the indoor air
and automatically switch on the purifying function when required.
MAX MODE [Fig. 10]:
Press the MAX mode button on the display to activate air purifying at maximum power setting. To exit
MAX mode simply select AUTO mode or SLEEP mode.
SLEEP MODE [Fig. 11]:
Press the SLEEP mode button to activate air purifying at the lowest silent power setting. The SLEEP
LIGHTING button.
POLLEN ALLERGY MODE: [Fig. 12]
The Pollen Allergy mode works only when AUTO MODE is selected. [Fig. 12c]
In Pollen Allergy mode, the appliance continuously receives real time data from the APP about
the monitored pollen concentration outdoor, and works automatically to maximize pollen capturing
performance.
Once pollens are captured, they are inactivated to help alleviate allergic symptoms.
display:
- The Pollen Allergy Lamp is WHITE [Fig. 12a]: The appliance and the App are monitoring the presence
of pollens outdoor and there is no risk.
- The Pollen Allergy Lamp turns YELLOW [Fig. 12b] and the Pollen Allergy Circle lamp is WHITE [Fig.
12a]: The appliance and the APP have detected risk.
If the product is manually put into SLEEP mode or MAX mode whilst Pollen Allergy mode is activated,
the Pollen Allergy mode will stop.
LIGHT CONTROL Function: [Fig. 13]
There are 3 settings available for the display lighting, On, Dim & Off.
through the 3 available options. ON is the default setting.
If OFF is selected, any other button will need to be pressed twice to activate, after one press, the lights
will become DIM, on second press the action will be activated.
CHILD LOCK Function: [Fig. 14]
Press and hold the CHILDLOCK button for 3 seconds to activate, an audible sound will be heard when it
has been activated and the CHILDLOCK button will remain illuminated. No other buttons will work when
activated.
To exit, simply press and hold the CHILDLOCK button for 3 seconds, an audible sound will be heard
Fig. 12
Fig. 11
Fig. 10
Fig. 9
Fig. 13
Fig. 14
GB

10
X1
X2
X3
X4
X5
SOFT
MEDIUM
CUSTOM
H-BIOTICS
OFF
X1 MIN 40
X2
X3
X4
MED 55
70
MAX
OFF
Diffuser Function: [Fig. 15]
The diffuser spreads into the air of the room H-Essence or H-Biotics. H-Essence is the Hoover collection
H-Bioticsis a natural blend based on probiotics that keeps the room bio-hygenized by inhibiting the
growth of microorganims such as bacteria or microbes.
There are 4 different settings for the DIFFUSER function, SOFT, MEDIUM, CUSTOM & H-BIOTICS. To
activate this function simply press the Diffuser button on the Display, the default setting for this function
is SOFT, to select any of the other settings simply consecutively press the button to change to the
desired selection. The button will illuminate white when switched on.
It is recommended to use SOFT & MEDIUM settings for H-Essence.
Custom setting can be created within the hOn app for your H-Essence.
When Using H-Biotics, the setting MUST be set to H-Biotics. Once user activates H-Biotics using the
APP, this will give an alert of “ACTIVATE H-BIOTICS” after 120 hours to ensure the H-biotics usage of
every 5 days.
The Diffuser function can only be used in AUTO & MAX modes and cannot be used in SLEEP
mode.
Setting Pump On Pump Off Cycle
SOFT 10 secs 300 secs Shutdown after 6 Hours
MEDIUM 90 secs 120 secs Shutdown after 6 Hours
CUSTOM Shutdown after 6 Hours
H-BIOTICS 120 secs 120 secs Shutdown after 6 Hours
To switch off the function, press the diffuser button until the button light switches off.
After each use of the Diffuser function, use a dry soft cloth to clean any residue from the product
surfaces.
To select
any of the other settings simply consecutively press the button to change to the desired selection. The
button will illuminate white when switched on.
MIN - Default Target Humidity 40%
MED - Default Target Humidity
MAX - Default Target Humidity
All 3 Target levels can be customised within the hOn app within a range of 30-80% Target Humidity.
If the real time Humidity level is equal or higher than the one selected, a message will appear on the
display showing ‘HUMIDITY REACHED’
selected target level.
REFILL ALERT:
When water level is lower than the minimum level, the digital display will show REFILL WATER advice
Important Note:
•
• If Diffuser Mode is selected without turning off
Fig. 15
Fig. 16
GB

111111
MAINTAINING YOUR H-PURIFIER
Fig. 17
Fig. 18
IMPORTANT: ALWAYS UNPLUG YOUR APPLIANCE FROM THE POWER SUPPLY WHEN PERFORMING MAINTENANCE TASKS.
FILTER CLEANING / REPLACEMENT
CLEAN FILTER OR REPLACE FILTER alert will appear on the left side of the display
Cleaning / Replacing the Filter:
[Fig. 17]
• Remove the Air Inlet Cover from your product. [Fig. 17a]
• Unlock the Filter release switch. [Fig. 17b]
• [Fig. 17c]
• [Fig. 17d]
• Re-Fit the Filter assembly into the product. [Fig. 17e]
• [Fig. 17f]
• [Fig. 17g]
• Plug in your appliance to the power supply and switch on. [Fig. 5]
• Press the INFORMATION button and follow the instructions to reset the Filter Clean function by holding the button for 3 secs, an audible alert
will be heard to indicate a successful reset. [Fig. 8]
DIFFUSER MAINTENANCE
After each use of the Diffuser function, use a dry soft cloth to clean any residue from the product surfaces.
Diffuser Bottle Replacement: [Fig. 18]
The volume of liquid remaining in the bottle can be checked through the Diffuser Window, when required the bottle should be replaced.
• Remove the Diffuser Cover from the product. [Fig. 18a]
• Remove the Diffuser Unit & Bottle from the diffuser cover. [Fig. 18b]
• Unscrew & remove the empty bottle and discard. [Fig. 18c]
• Remove the new bottle of H-Essence or H-Biotics from the packaging and remove the cap. [Fig. 18d]
• Tightly screw the new bottle on to the diffuser unit. [Fig. 18e]
• [Fig. 18f]
• [Fig. 18g]
GB

12
HUMIDIFIER MAINTENANCE
: [ [Fig. 19]
When water level is lower than the minimum level, the display will show REFILL WATER advice and blinks.
• Remove the Tank Body Housing from the product. [Fig. 19a]
• Remove the Tank Assembly from the Tank Body Housing. [Fig. 19b]
• Fill the tank through the water tank inlet with distilled water until it reaches the MAX line indicated
on the tank. [Fig. 19c]
• [Fig. 19d]
• [Fig. 19e]
: [ [Fig. 19]
CLEAN WATER TANK
action is required to clean the water tank.
• Remove the Tank Body Housing from the product. [Fig. 19f]
• Seperate the Water Tank Housing, Water Tank and Water Tank Cover and clean all 3 thoroughly and dry completely with a soft dry cloth. [Fig.
19g,h,i]
•
• [Fig. 19e]
STORAGE OF YOUR H-PURIFIER
1.
2.
3.
unit and Diffuser Cover.
4. Ensure all components are dry.
5. Remove the Air Inlet Cover [Fig. 20a] and Reel in the power cord by pulling on the cord [Fig. 20b]
[Fig. 20c,d] [Fig. 20e]
6.
Fig. 19
Fig. 20
GB

131313
REPLACE
FILTER
TROUBLESHOOTING
The following is a list of commonly encountered problems and solutions.
If any of these problems persist contact your local Hoover representative.
The Fan does not work
(Control Panel / Display
• Check the alert showing on the display or in the app.
• Check if there are any obstructions in the fan.
• Check if the H-Purifier is switched on.
• Check if the filter is incorrectly installed.
• Check if the H-Purifier is in a completely upright vertical position and not leaning.
The Fan does not work
(Control Panel / Display
• Check if the H-Purifier is plugged in and switched on.
• Check if there are any obstructions in the fan.
No Lights on Control Panel /
• Check if the lights have not been switched off by pressing the Light Control button on the control Panel
/ Display.
Buttons on the control panel
/ Display do not operate
• Check if Child lock has been activated by pressing and holding the Child Lock Button for 3 secs.
Air Flow is Weak
• Check if the protective packaging has been removed from the filter.
• Check if there are any obstructions in the Air Intake Cover or Air outlet.
• Check the Filter staus on the Control Panel / Display or in App for clean or replace warning.
• Check if the H-Purifier is in sleep mode. The fan operates on reduced power in this mode.
loudly
• Check if there are any obstructions in the Air Outlet or the fan.
• Check if the H-Purifier is running in MAX mode, the air flow is at maximum power in this mode.
ALERTS & SOLUTIONS
The following codes may appear during use. [Fig. 21]
Error Description
Error Description
Error Solution
Alert on product the
Control Panel / Display
Alert on APP
Outer Layer’s Filter
cleaning Alert
Alert of “CLEAN FILTER”
blinks on display Filter cleaning Alert
1.Follow the instructions in I/M to clean the Outer
Layer’s Filter.
2.Reset the alert.
Filter replacement
Alert
Alert of “REPLACE FILTER”
blinks on display Filter replacement Alert
2.Reset the alert.
Filter not present or
locked
Alert of “FILTER MISSING”
blinks on display
not been locked
been switched to LOCK status.
Water tank not present Alert of “NO WATER TANK”
blinks on display Water tank not present Put back the water tank.
Product doesn’t work
after it’s fallen down /Product falling
1.If product falls and there is water spilling, unplug the
power supply and wait for 48 hours before switching on
the product again.
2.If product falls without water spilling, lift the product up
and touch Power button to switch it on.
Dust sensor
malfunctioning: no
signal from sensor or
output voltage exceeds
the limit value
/Dust sensor malfunctioning: no
signal from sensor or output
voltage exceeds the limit value
Dust sensor failure or dust sensor wire has not been
Motor no speed /Motor no speed feedback Motor failure or motor wire has not been connected well,
Water in the tank need
to be replaced and
water tank need to be
cleaned
Alert of “CLEAN WATER
TANK “ blinks on display
Water in the tank need to be
replaced and water tank need
to be cleaned
1.Take the water tank, clean the internal surface and
2.Put the water tank back in position.”
Water tank without
water
Alert of “REFILL WATER”
blinks on display Water tank without water
CO sensor
malfunctioning
CO sensor status lamp is on
in yellow CO sensor malfunctioning Alert: need call service.
ATTENTION:
Fig. 21
GB

14
IMPORTANT INFORMATION
Hoover Spares and Consumables
Always replace parts with genuine Hoover spares. These are available from your local Hoover dealer or direct from Hoover. When ordering parts
always quote your model number.
Quality
Hoover’s factories have been independently assessed for quality. Our products are made using a quality system which meets the requirements of
ISO 9001.
Your Guarantee
can be obtained from the dealer from whom the appliance was purchased. The bill of sale or receipt must be produced when making any claim
under the terms of this guarantee.
GB

151515
FR
INSTRUCTIONS DE SÉCURITÉ D’UTILISATION
Cet appareil est uniquement conçu pour un usage privé, comme décrit dans ce manuel de
l’utilisateur. Prière de bien vouloir lire et comprendre entièrement ce manuel avant de mettre en
marche l’appareil. Conservez le manuel pour l’avenir.
procéder à son entretien.
Cet appareil peut être utilisé par des enfants âgés d’au moins 8 ans et par des personnes ayant
des capacités physiques, sensorielles ou mentales réduites, ou n’ayant pas d’expérience ou
de connaissances en la matière. Ces dernières doivent recevoir des instructions sur l’utilisation
de l’appareil en toute sécurité et comprendre les risques impliqués. Les enfants ne doivent pas
Le nettoyage et l’entretien ne devraient pas être effectués par des enfants sans supervision.
Silecordond’alimentation estendommagé,arrêtezimmédiatementd’utiliserl’appareil.Pouréviter
les risques d’accident, un réparateur HOOVER agréé doit remplacer le cordon d’alimentation.
N’utilisez que les accessoires, consommables ou pièces détachées recommandés ou fournis
par HOOVER.
Ne débranchez pas l’appareil en tirant le cordon d’alimentation.
Ne continuez pas à utiliser votre appareil s’il semble défectueux.
d’éviter le basculement.
Gardez l’appareil sec.
Posez le cordon d’alimentation de façon à ce que personne ne le piétine ou n’y trébuche.
Ne placez pas l’appareil sur des surfaces chaudes, près de surfaces chaudes, près de feux
ouverts ou directement exposé aux rayons du soleil.
pour éviter tout risque d’électrocution et/ou d’incendie.
éviter tout risque d’électrocution et/ou d’incendie.
de l’appareil.
L’eau dans le réservoir d’eau n’est pas potable. Ne buvez pas cette eau et ne l’utilisez pas pour
la donner à boire aux animaux ou pour arroser les plantes. Quand vous videz le réservoir d’eau,
versez l’eau dans le drainage.
tension d’alimentation locale avant de brancher l’appareil.
Ne bloquez pas l’entrée ou la sortie de l’air.
Cet appareil ne remplace pas une ventilation correcte, un nettoyage régulier avec l’aspirateur ou
l’utilisation d’une hotte aspirante ou d’un ventilateur pendant que vous cuisinez.
Laissez au moins 20 cm d’espace libre derrière et des deux côtés de l’appareil et laissez au
moins 30 cm d’espace libre au-dessus de l’appareil.
Ne placez rien sur l’appareil.
Ne placez pas l’appareil directement en dessous d’un climatiseur pour éviter que le condensat
dégouline dans l’appareil.
des blessures ou un dysfonctionnement de l’appareil.
N’utilisez pas cet appareil quand vous avez utilisez des répulsifs pour insectes à fumée intérieure
ou dans des endroits avec des résidus d’huile, de l’encens brûlant ou des fumées chimiques.
N’utilisez pas cet appareil près d’appareils à gaz, de dispositifs chauffants ou des cheminées.
N’utilisez pas l’appareil dans une chambre avec des changements de températures importants.
Pour éviter les interférences, placez l’appareil au moins à 2 m de tout appareil électrique qui
utilise les ondes radio aériennes comme les TV, les radios et les horloges radio-pilotées.

16
Quand l’appareil n’est pas utilisé pendant longtemps, des bactéries peuvent proliférer
sont très sales, remplacez-les.
N’utilisezpasl’appareildansdesenvironnementsmouillésoudansdesenvironnements
avec des températures ambiantes élevées comme des salles de bain, des toilettes
ou des cuisines.
comme dispositif de sécurité en cas d’accidents avec des processus de combustion ou des
produits chimiques dangereux.
Remplissez le réservoir d’eau uniquement avec de l’eau du robinet froide. N’utilisez pas d’eau
souterraine ou chaude.
Ne mettez pas de substance autre que de l’eau dans le réservoir d’eau. Ne mettez pas de
fragrances dans le réservoir d’eau.
Faites attention car les hauts niveaux d’humidité peuvent causer la prolifération d’organismes
biologiques dans l’environnement.
les tentures ou les nappes deviennent humides.
Pendant le remplissage et le nettoyage, débranchez l’appareil.
utilisation.
Mise en garde : Des micro-organismes peuvent être présents dans l’eau ou dans l’environnement
quand l’appareil est utilisé ou stocké, peuvent proliférer dans le réservoir d’eau et être répandus
dans l’air en causant de sérieux risques pour la santé si vous ne changez pas l’eau et vous ne
réservoir ou sur les surfaces intérieures et essuyez toutes les surfaces.
Si vous avez besoin de déplacer l’appareil, débranchez-le de l’alimentation électrique. Puis
videz ou retirez le réservoir d’eau. Transportez l’appareil à l’horizontale par les poignées des
deux côtés de l’appareil.
La fonction de CO Monitor ne doit pas être utilisée comme, ni implicitement être utilisée comme
ou toute autre norme reconnue lorsque les codes locaux ou régionaux ou la législation imposent
leur utilisation. La fonction de CO Monitor est un dispositif supplémentaire de surveillance du
monoxyde de carbone uniquement. L’utilisation de ce dispositif est à la discrétion de l’utilisateur
et implique la compréhension et l’acceptation de ses limitations pour adhérer aux codes ou aux
normes, les cas échéant.
Ne mettez pas l’appareil dans un des endroits suivants :
• dans une salle de bain ou dans d’autres zones où l’alarme pourrait être exposé à des
éclaboussures, au dégoulinement ou au condensat d’eau (par exemple au-dessus d’une
• À proximité de ou au-dessus de chauffages ou d’évents de climatisation, de portes, de fenêtres,
de ventilateurs d’extraction ou dans n’importe quel endroit où il pourrait être affecté par des
courants d’air.
• Directement au-dessus d’un évier ou d’une cuisinière.
• Dans une zone ou la température pourrait chuter en dessous de -20°C ou monter au-dessus
de 50°C.
• Dans un endroit humide ou mouillé.
• Où il pourrait être obstrué, par exemple par des rideaux ou des meubles.
• Où la saleté ou la poussière peuvent bloquer le capteur.
• Près de peinture, de diluants, de fumées de solvants ou près de désodorisants.
FRFR

171717
FR
Si la CO Alarm est activée, vous devez ouvrir toutes les fenêtres et les portes (si vous ne courez
lieux en laissant les fenêtres et les portes ouvertes. Demandez de l’aide médicale immédiatement
pour toute personne souffrant des effets d’un empoisonnement au monoxyde de carbone. Ne
rentrez pas à nouveau sur les lieux tant que l’alarme est en marche. L’alarme s’arrêtera une fois
Pour activer le CO monitor, branchez l’appareil à une prise. Le voyant d’état du capteur de CO
sera vert. Quand le CO monitor détecte un niveau non sûr de CO, la CO Alarm CO retentira
Évitez d’utiliser de la peinture, des diluants, des fumées de solvants, des désodorisants, des
vaporisateurs ou des produits de nettoyage chimiques près de l’appareil. Cela pourrait affecter
le fonctionnement du CO monitor.
Veillez à ce que les enfants ne pressent pas le bouton CO Alert pendant 3 secondes car le
bruit de l’alarme pourrait être excessif pour eux.
Touchez le bouton [CO Alert] pendant 3 secondes pour tester la fonction CO Alarm et l’alarme
retentira fortement pendant 5 secondes. Testez l’alarme tous les mois et après une longue
Veillez à ce que les enfants ne pressent pas le bouton CO Alert pendant 3 secondes car le
bruit de l’alarme pourrait être excessif pour eux.
remplacer le capteur de CO. Le capteur de CO a une durée de vie prévue de 5 ans période
après laquelle il doit être remplacé.
Humidité de fonctionnement :
Température de fonctionnement : 0°C à + 40°C
Quand le niveau de CO détecté atteint un niveau élevé, le bouton [CO Alert] et le LED ring
revienne en dessous du seuil d’alarme.
oxygène. Quand le CO est inhalé, il s’attache à l’hémoglobine dans le sang qui, normalement,
transporte l’oxygène dans tout le corps. Le CO inhibe en permanence la capacité des
molécules d’oxygène de s’attacher à l’hémoglobine en réduisant, ainsi, l’apport d’oxygène aux
ses effets sur le corps mais les experts sont tous d’accord sur le fait que même de faibles
niveaux d’exposition de monoxyde de carbone pendant des périodes prolongées peuvent
avoir des effets graves et durables sur la santé des personnes.
MISE EN GARDE : LA CO ALARM EST CONÇUE POUR PROTÉGER LES INDIVIDUS DES
EFFETS GRAVES DE L’EXPOSITION AU MONOXYDE DE CARBONE OU POUR ÉVITER
LES EFFETS CHRONIQUES DE L’EXPOSITION AU MONOXYDE DE CARBONE. ELLE
NE PRÉSERVERA PAS COMPLÈTEMENT LES INDIVIDUS AYANT DES CONDITIONS
MÉDICALES PARTICULIÈRES. EN CAS DE DOUTES, CONSULTEZ UN MÉDECIN.
Cet appareil ne doit pas être utilisé comme substitut d’un montage, d’une utilisation et d’un
entretien corrects des appareils à combustible y compris une ventilation correcte et des
systèmes d’échappement.
tiers.
Utilisez uniquement l’huile aromatique recommandée ou fournie par HOOVER.
Essuyez immédiatement tout déversement d’huile aromatique.
Service HOOVER :
agréé.
FR

18
Environnement
Cet appareil porte des marques conformes à la directive européenne 2011/65/EC relative aux déchets d’équipements électriques et
pour l’environnement et pour la santé.
déposer dans un centre de recyclage des déchets électriques et électroniques. La déposition doit être effectuée conformément à la
réglementation locale en matière de déchets. Pour obtenir des compléments d’information sur le traitement, la récupération et le recyclage de cet
appareil, veuillez contacter votre municipalité, le service local d’élimination des ordures ménagères ou le revendeur de l’appareil.
Bandes de fréquence
Puissance RF maximale transmise sur la bande de fréquence 18.9 dBm
Cet appareil est conforme aux Directives européennes 2014/53/UE, 2014/30/UE et 2011/65/UE. Pour recevoir une copie de la déclaration de
conformité, veuillez contacter le fabricant à l’adresse suivante : www.candy-group.com
APPRENEZ À CONNAITRE VOTRE H-PURIFIER
1 Panneau de commande / Ecran
2 Sortie d’air
3 Poignée de l’appareil
4
5Poignée du couvercle de l’entrée de
l’air
6
7 Couvercle de l’entrée de l’air
8
9
10
11 Couvercle du réservoir d’eau de
12 Entrée du réservoir d’eau de
13 Fenêtre du diffuseur
14 Couvercle du diffuseur
15 Prise du diffuseur
16
17 Unité du diffuseur
18
19
FRFR

191919
PM 2.5 020
20 LED Ring de qualité de l’air
21 Bouton d’alimentation
22 Bouton Child Lock (sécurité pour
23 Écran numérique
24 Bouton d’informations
25
26 Bouton mode Auto
27
28
Voyant circulaire pour l’allergie au
pollen
29 Voyant pour l’allergie au pollen
30 Bouton diffuseur
31 Bouton mode max
32 Bouton et LED CO Alert
33 Bouton Commande lumière
34
Système de surveillance à capteur multiple
Grâce au Système de surveillance à capteur multiple, votre appareil surveillera continuellement l’état de l’air à l’intérieur de la pièce en termes de
Chaque fois que vous allumez votre appareil, le Système de surveillance à capteur multiple commencera à analyser l’air à l’intérieur de la pièce et
le LED Ring de qualité de l’air s’allumera avec des couleurs différentes en indiquant, ainsi, en temps réel les conditions de la qualité de l’air.
Couleur du LED RING
de qualité de l’air
Qualité de l’air à
l’intérieur de la pièce
VERT EXCELLENT
YELLOW SATISFAISANT
ORANGE MAUVAISE
ROUGE TRÈS MAUVAISE
Surveillance et alarme de concentration de monoxyde de carbone
Quand l’alarme de monoxyde de carbone est activée, le bouton du LED Ring de la qualité de l’air, d’informations et de la CO Alert clignotera
descendra en dessous de 50 ppm à moins qu’elle ne soit arrêtée manuellEment en appuyant sur le bouton CO Alert pendant 3 secondes.
Cette LED CO Alert montre l’état de fonctionnement du capteur de CO. Elle apparait de couleur verte quand le capteur de CO est en état normal,
FRFR

20
PRÉPARATION DE VOTRE H-PURIFIER
[Fig. 3]
• Retirez le Carter du réservoir de l’appareil. [Fig. 3a]
• Retirez l’Ensemble du réservoir du Carter du réservoir. [Fig. 3b]
• Remplissez le réservoir par l’entrée du rés
[Fig. 3c]
• Remontez l’Ensemble du réservoir dans le Carter de l’ensemble du réservoir. [Fig. 3d]
• Remontez le Carter de l’ensemble du réservoir dans votre appareil. [Fig. 3e]
Fig. 1
Fig. 2
Fig. 3
• Retirez le Couvercle de l’entrée de l’air de votre appareil, saisissez les deux poignées du couvercle de l’entrée de l’air et extrayez-les de
l’appareil.
[Fig. 1a]
• [Fig. 1b]
• [Fig. 1c]
• [Fig. 1d,e]
• [Fig. 1f]
• [Fig. 1g]
• Remontez le Couvercle de l’entrée de l’air à votre appareil. [Fig. 1h]
2. Montez la bouteille du diffuseur [Fig. 2]
Pour préparer votre H-PURIFIER pour la fonction Diffuseur :
• Retirez le Couvercle du diffuseur de l’appareil. [Fig. 2a]
• Retirez le diffuseur du couvercle du diffuseur. [Fig. 2b]
• Retirez la bouteille de l’essence H ou des biotiques H de l’emballage et retirez le capuchon. [Fig. 2c]
• Vissez fermement la bouteille sur le diffuseur. [Fig. 2d]
• Remontez le diffuseur dans le couvercle du diffuseur. [Fig. 2e]
• Remontez le Couvercle du diffuseur dans l’appareil. [Fig. 2f]
FR
Table of contents
Other Hoover Air Cleaner manuals

Hoover
Hoover WH10100 User manual

Hoover
Hoover WH10600 User manual

Hoover
Hoover SILENTAIR 4000 User manual

Hoover
Hoover WH10200 User manual

Hoover
Hoover HHP75CAH011 User manual

Hoover
Hoover A101 User manual

Hoover
Hoover HHP75CAH011 User manual

Hoover
Hoover HHP55CA011 User manual

Hoover
Hoover H-PURIFIER Series User manual

Hoover
Hoover SilentAir 2000 User manual