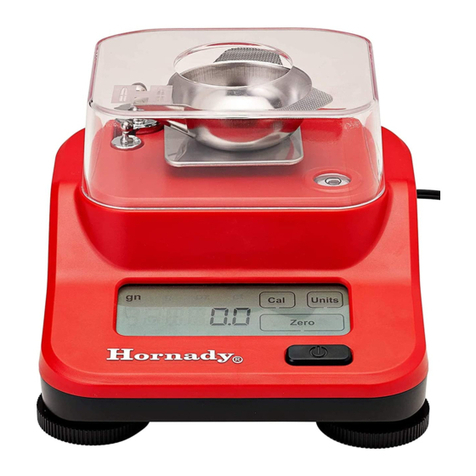
Hornady AUTO CHARGE PRO User manual

Item No. 050053
INSTRUCTIONS
AUTO CHARGE®PRO

AUTO CHARGE®PRO
The new Hornady®Auto Charge®Pro provides precise, customizable powder
dispensing in an easy-to-use, space-saving unit. Precise to within 0.1 grain, the Auto
Charge®Pro offers customizable trickle speeds for various powder types, as well as
custom time settings. Store settings for up to four custom loads or use the factory
setting. The backlit touch screen is easy to read, while a large knob on the side
simplifies powder emptying. Other features include large powder capacity, built-in
bubble level and smaller footprint than competing brands.
IMPORTANT SAFETY FUNCTIONS
WARNING - Before operating the unit, please carefully read and
understand this document.
• NEVER use with black powder – for smokeless powder only.
• Do not store powder in clear powder hopper for extended periods. Powder can
absorb moisture from the air or eventually attack the plastic. Remove powder
after every loading session.
• Internal components are very sensitive. Do not shake, drop, or overload unit.
• Handle unit with care, treating it as the sensitive instrument it is.
• If spilled powder gets inside unit, do not operate. Call Hornady Customer Service
at 1-800-338-3220.
POWER SUPPLY (Adapter):
Input: AC100-240V - 50Hz/60Hz
Output: DC 9V 1A
TIPS TO IMPROVE PERFORMANCE
• Fluctuations in temperature, even of a few degrees, can cause scale readings to
vary. While scale can be used immediately, optimal performance will occur after
unit has warmed up for 5-15 minutes.
• Always place the scale on a flat, level, and stable surface when in operation.
• Electrical interference can cause scale readings to vary. Keep other electronic
devices (power strips, florescent lights, motors, radios, phones, etc.) away from
scale when in operation.
• Do not let a fan, air conditioner, heater, or open window blow on scale.
• Using clear cover over powder pan will improve accuracy and lessen effects of
outside variables.
1

Powder
Hopper
Powder
Hopper Lid
Powder Empty Spout
50g
Calibration
Weight
10g
Calibration
Weight
220V Plug
Converter
9V Power Supply
-US Plug Adapter
-EURO Plug Adapter
Brush
Draft Cover
Bubble Level
Leveling Feet
LCD Touch Screen
PARTS LIST
2

QUICK START
• Verify unit is properly assembled with scale plate, powder pan, and clear powder
hopper in place.
• Turn unit on by removing the powder pan, plugging it in and pressing black power
button on front of unit. For best performance, allow unit to stabilize for 5-15
minutes before use.
• Calibration is recommended before each use. (See Calibration Section.)
• Ensure powder pan is on scale and that actual weight reading (right side of
display) reads “0.0.” If not, touch ZERO/CALIBRATE button.
• Verify that powder hopper empty nozzle (at rear, right side) is closed. Fill clear
powder hopper until powder is visible at bottom of clear hopper. Fill higher if
loading many rounds.
• Check to be sure that “Setting” reads “Normal.”
• Tap TARGET button in upper left corner.
• Enter Target Weight using numerical keypad. Last number entered should be
decimal amount of charge: xx.X. Press ENTER to store Target Weight.
• Tap DISPENSE to begin dispensing entered powder charge.
• Should dispensed charge be greater than 0.1 of a grain above targeted amount,
“OVER” will be displayed. Press ENTER to remove “OVER” warning. Then, either
dump charge into powder tube and re-dispense or remove a small amount of
powder, and press and hold DISPENSE to trickle to desired weight.
• Do not use “OVER” charges.
3

KEYPAD BUTTON FUNCTIONS
ON/ OFF (mechanical button): Tap to turn on. Hold for three seconds to turn off.
ZERO/CALIBRATE: Tap to zero scale. Hold for three seconds to calibrate.
DISPENSE: Tap to begin or pause dispensing target amount, hold to trickle.
AUTO/MANUAL: Tap to switch from AUTO to MANUAL mode.
AUTO – Dispensing cycle begins once empty pan is placed back on scale plate
and scale re-zeros itself.
MANUAL – Use DISPENSE button to begin each dispensing cycle after pan
is placed on scale. This allows partial charge to be placed on scale and Auto
Charge®to finish trickling remainder of charge until Target Weight is reached.
4

KEYPAD BUTTON FUNCTIONS (continued)
UNITS: Tap to select measurements in GRAINS (gn) or GRAMS (g). Hold for 6
seconds to turn button beeps off. This will not turn the beep at the end of a powder
charge off.
ENTER: Enter target amount using numeric keys, then press ENTER to store Target
Weight and to store any custom settings.
SPEED: Sets the speed at which the unit will trickle.
Larger Number - Faster Trickling, Lower Accuracy
Smaller Number - Slower Trickling, Higher Accuracy
TIME: Set how many grains away from target weight the unit will
begin to trickle.
Larger Number - Longer Trickle Time, Higher Accuracy
Smaller Number - Shorter Trickler Time, Lower Accuracy
SETTING: Tap SETTING to toggle between Normal, 1,2,3,4. The settings you are
currently using are displayed above the SETTING button. Settings 1,2,3,4 are
memory slots for any custom settings. When Target, Speed, Time, and Program
settings are modified in one of these slots, it will automatically be saved. If Normal
mode is used, no custom settings will be saved.
ENTER + 8: Touch and hold these two buttons to adjust the Program setting which
will increase or decrease the overall speed and accuracy of the unit depending
upon which of the three settings is chosen from below.
L- (Low) - Lowest Speed, Highest Accuracy
M- (Medium) - Average Speed, Average Accuracy
H- (High) - Highest Speed, Lowest Accuracy. (High speed is not recommended
for low charge weights with Long Stick Powders, i.e. 24gn of H4831)
8: Touch and hold the number 8 on the keypad to view which program setting is
currently being used. (L,M,H)
5

CALIBRATION
• For optimal performance, turn
unit on and allow 5-15 minutes to
warmup.
• Verify powder pan has been
removed, and that the red scale
plate is empty.
• Press ZERO/CALIBRATE button for
three seconds until unit displays
“CAL---“.
• When 10.00g is flashing, place
the 10g weight on the center of
the scale plate. The unit will show
“---- --” while calibrating the
10gweight.
• When 10.00g appears again,
remove theweight.
• When 50.00g is flashing, place
the 50g weight on the center of
the scale plate. The unit will show
“---- --” while calibrating the
50gweight.
• When 50.00g appears again,
remove theweight
• After calibration, the unit will
briefly display “PASS” before
returning to normaloperation.
6

CLEANING
It is very important that the powder is cleaned out of the Auto Charge Pro after each
use. The Auto Charge Pro should not be used as a powder storage device. To easily
clean out the unit perform the following steps.
• Slide Auto Charge to the edge of a table, with the Powder Empty Spout hanging
over the edge of the table.
• Hold the proper powder container below the Powder Empty Spout, and slowly
rotate the spout so that the powder will dump into the container.
• Once the powder has been emptied out of the hopper, close the powder empty
spout.
• Place the powder pan on the Auto Charge as if a charge is going to be thrown.
• Touch DISPENSE on the screen to empty out the trickle tube. If the charge weight
is smaller than the amount of powder left in the tube, this will need to be repeated
more than once.
• After all powder is out of the trickle tube, repeat steps 1 and 2 to remove the rest of
the powder.
• At this time, remove the powder hopper and use the included brush to clean out the
rest of the powder from the hopper.
• Close the powder empty spout when finished.
WARRANTY
The Hornady Auto Charge®Pro is a highly sensitive instrument, which must be
repaired and serviced by a factory qualified technician to maintain thewarranty.
Hornady Manufacturing warrants to you that for one year from the date of purchase,
your Auto Charge®Pro will be free from defects in material and workmanship.
Thiswarranty does not cover damage caused by normal wear, accidents, abuse,
or failure to provide proper care and maintenance. Please contact Hornady
Manufacturing at 1-800-338-3220 for service or warrantyinformation.
The warranty is void if the seal on bottom of unit has been tampered with.
P.O. Box 1848, Grand Island, Nebraska 68802-1848
308-382-1390 • 800-338-3220 • Fax: 308-382-5761
www.hornady.com • Hornady.com/contact_us
680091 19HMC0152 |03/2020
This manual suits for next models
1
Table of contents
Other Hornady Scale manuals

Hornady
Hornady LOCK-N-LOAD User manual

Hornady
Hornady LOCK-N-LOAD 050109 User manual

Hornady
Hornady G3-1500 User manual

Hornady
Hornady GS-1000 User manual

Hornady
Hornady M2 050111 User manual

Hornady
Hornady Model M User manual

Hornady
Hornady LOCK-N-LOAD 050109 User manual

Hornady
Hornady GS-350 User manual

Hornady
Hornady 050118 User manual

Hornady
Hornady GS-1500 User manual