manuals.online logo
Brands
  1. Home
  2. •
  3. Brands
  4. •
  5. Sealey
  6. •
  7. Batteries Charger
  8. •
  9. Sealey CHARGE6 User manual

Sealey CHARGE6 User manual

INSTRUCTIONS FOR:
BATTERY CHARGERS
IMPORTANT: PLEASE READ THESE INSTRUCTIONS CAREFULLY. NOTE THE SAFE OPERATIONAL REQUIREMENTS, WARNINGS AND CAUTIONS. USE THIS
PRODUCT CORRECTLY AND WITH CARE FOR THE PURPOSE FOR WHICH IT IS INTENDED. FAILURE TO DO SO MAY CAUSE DAMAGE AND/OR PERSONAL
INJURY AND WILL INVALIDATE THE WARRANTY. PLEASE RETAIN THESE INSTRUCTIONS FOR FUTURE USE.
Thank you for purchasing a Sealey product. Manufactured to a high standard this product will give you years of trouble free performance if these instructions are carefully followed and the
product is correctly maintained.
1. SAFETY INSTRUCTIONS
MODEL No: CHARGE6, CHARGE8, CHARGE10, CHARGE15
1.1. ELECTRICAL SAFETY
 WARNING! It is the responsibility of the owner and the operator to read, understand and comply with the following:
You must check all electrical products, before use, to ensure that they are safe. You must inspect power cables, plugs, sockets and any other
connectors for wear or damage. You must ensure that the risk of electric shock is minimised by the installation of appropriate safety devices. A
Residual Current Circuit Breaker (RCCB) should be incorporated in the main distribution board. We also recommend that a Residual Current
Device (RCD) is used. It is particularly important to use an RCD with portable products that are plugged into a supply which is not protected
by an RCCB. If in any doubt consult a qualified electrician. You may obtain a Residual Current Device by contacting your Sealey dealer.
You must also read and understand the following instructions concerning electrical safety.
1.1.1. The Electricity at Work Act 1989 requires that all portable electrical appliances, if used on business premises, are tested by a
qualified electrician, using a Portable Appliance Tester (PAT), at least once a year.
1.1.2. The Health & Safety at Work Act 1974 makes owners of electrical appliances responsible for the safe condition of those appliances
and the safety of the appliance operators. If in any doubt about electrical safety, contact a qualified electrician.
1.1.3. Ensure that the insulation on all cables and on the appliance is safe before connecting it to the power supply. See 1.1.1. and 1.1.2.
and use a Portable Appliance Tester.
1.1.4. Ensure that cables are always protected against short circuit and overload.
1.1.5. Regularly inspect power supply cables and plugs for wear or damage and check all connections to ensure that none is loose.
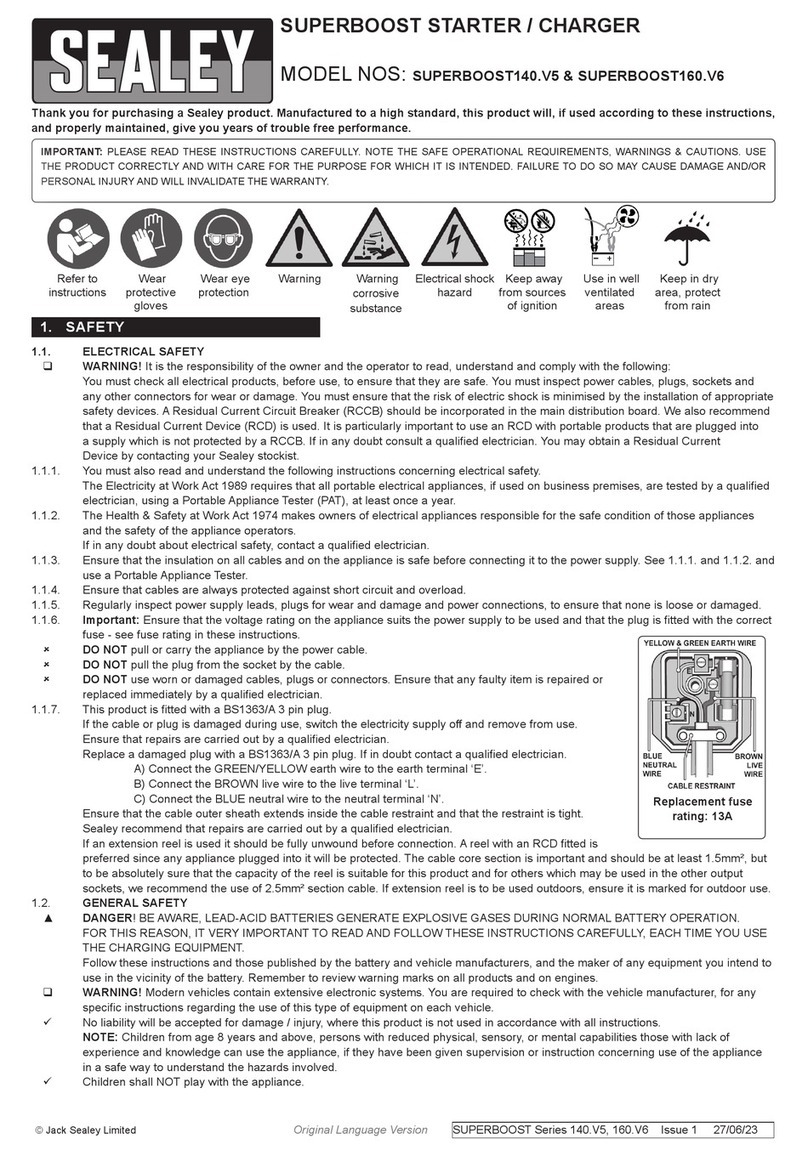
1.1.6. Important: Ensure that the voltage marked on the appliance matches the power supply
to be used and that the plug is fitted with the correct fuse - see fuse rating at right.
1.1.7. DO NOT pull or carry the appliance by the power cable.
1.1.8. DO NOT pull the plug from the socket by the cable.
1.1.9. DO NOT use worn or damaged cables, plugs or connectors. Immediately have any faulty
item repaired or replaced by a qualified electrician. When a BS 1363/A UK 3 pin plug is
damaged, cut the cable just above the plug and dispose of the plug safely.
Fit a new plug according to the following instructions (UK only).
a) Connect the BROWN live wire to the live terminal ‘L’.
b) Connect the BLUE neutral wire to the neutral terminal ‘N’.
c) After wiring, check that there are no bare wires, that all wires have been correctly
connected, that the cable outer insulation extends beyond the cable restraint and
that the restraint is tight.
Double insulated products, which are always marked with this symbol , are fitted with live
(brown) and neutral (blue) wires only. To rewire, connect the wires as indicated above - DO NOT connect either wire to the earth
terminal.
1.1.10. If an extension reel is used it should be fully unwound before connection. A reel with an RCD fitted is preferred since any appliance
plugged into it will be protected. The cable core section is important and should be at least 1.5mm², but to be absolutely sure that the
capacity of the reel is suitable for this product and for others which may be used in the other output sockets, we recommend the use
of 2.5mm² section cable.
1.2. GENERAL SAFETY
 WARNING! Disconnect the charger from the mains power before servicing or performing any maintenance.
 Disconnect the charger from the mains power before connecting to, or disconnecting from the battery.
 Maintain the charger in good condition (use an authorised service agent only).
 WARNING! The charger has components such as switches and relays which may cause sparks or arcs. When using the charger in a
garage or workshop, make sure that it is in a safe location.
 Keep the charger clean for best and safest performance.
 WARNING! Ensure that there are no sources of ignition in or near the work area i.e. naked flames, cigarettes, heaters etc. as the charging
process produces explosive gases.
 WARNING! Ensure that the work area is well ventilated as the gases produced are explosive.
 Locate the charger in a suitable work area and keep the area clean and tidy and free from unrelated materials. Ensure that there is
adequate lighting.
 Wear approved safety eye protection (standard spectacles are not adequate).
 Remove ill fitting clothing. Remove ties, watches, rings and other loose jewellery and contain long hair.
 Read vehicle manufacturer’s manual to check for any specific battery charging information.
 Disconnect the battery from the vehicle and move it to a safe, dry, level area for charging. If the battery cannot be removed from the
vehicle refer to manufacturer’s manual.
 Check that the electrolyte level in the battery is above the plates. If not, add distilled water to cover them by 5 - 10mm. DO NOT touch the
battery fluid as it is corrosive.
 Clean the charger clamps and battery terminals, before connecting the charger, to ensure good contact.
 Ensure that the correct polarity clamp is attached to the correct terminal of the battery. POSITIVE is indicated by + and red and
NEGATIVE is indicated by - and black. If there are no identifiable symbols, the NEGATIVE terminal is the one which is connected directly
to the vehicle body.
 Remove the battery electrolyte cover or caps to allow the gases produced by charging to escape.
 Keep children and unauthorised persons away from the work area.
 DO NOT attempt to charge a non-rechargeable battery.
FUSE RATING 3 AMP
Blue
Neutral
Wire
Cable
Restraint
Brown
Live
Wire
Original Language Version CHARGE6, CHARGE8, CHARGE10, CHARGE15 Issue: 2 - 05/03/10
3. CHARGING INSTRUCTIONS
2. SPECIFICATIONS
3.1. Preparation
It is important to correctly prepare for charging, ensuring that you follow Section 1 safety instructions carefully. Check that the capacity
of the battery is compatible with the charger output. Charging current (amps) should not exceed one tenth of the value of the battery
capacity (amp hours).
3.1.1. Follow the vehicle manufacturer’s instructions for charging the battery. Note special instructions for charging vehicle batteries in situ.
3.1.2. Check the battery to ensure that the POSITIVE and NEGATIVE terminals are clearly identifiable before removing the battery from the
vehicle.
3.1.3. Subject to 3.1.1. above, disconnect and remove the battery from the vehicle and place in an appropriate safe area ready for charging.
3.1.4. If possible, remove the battery electrolyte cover or caps to allow the gases produced by charging to escape.
3.1.5. Check that the electrolyte is covering the plates inside. If not add distilled water so that the plates are covered by 5-10mm.
3.1.6. The charge status of the battery may be determined by use of a hydrometer to measure the specific gravity (relative density) of the
electrolyte: 1.28 = Fully charged 1.21 = Half charged 1.14 = Fully discharged.
WARNING! Be cautious and vigilant - the electrolyte is a highly corrosive acid.
3.2. Connecting the charger to the battery. Ensure that the battery charger is unplugged from the mains power supply before connecting
the leads to the battery.
3.2.1. Charge 10 only. Select the charger voltage to match that of the battery by setting the rocker switch to either 6 or 12 volts.
Charge 15 only. Select the charger voltage to match that of the battery by setting the rocker switch to either 12 or 24 volts.
3.2.2. Check that the charger clamps and battery terminals are clean and free from oxidation.
3.2.3. Connect the chargers POSITIVE (red) lead to the POSITIVE (+) terminal on the battery, and the NEGATIVE (black)
lead to the NEGATIVE (-) terminal on the battery.
3.3. Charging the battery
3.3.1. Connect the charger to the mains power supply.
3.3.2. Check the current delivery to the battery by reading the ammeter on the front of the battery charger. During charging
the pointer on the ammeter will slowly move to the left according to the capacity and condition of the battery (see fig. 3, meter
face may vary according to model).
3.3.3. To indicate that the battery is fully charged the reading on the ammeter should be at the “0” output indicator. To correspond with
this the electrolyte in the battery will begin to gas. Stop charging at this point in order to protect the battery plates from damage.
3.3.4. Unplug the charger from the mains power supply and then disconnect the clamps from the battery terminals. Clean and store the
charger in a safe, dry area.
3.3.5. Replace the battery electrolyte cover or caps. Wipe up any splashes or spillages, remembering that the electrolyte is a corrosive acid.
Return the battery to the vehicle, secure according the manufacturer’s instructions and re-connect the power leads. Check to ensure
that all tools are removed before closing the bonnet or boot.
3.4. WARNING! LOW MAINTENANCE or SEALED “NO MAINTENANCE” BATTERY CHARGING
3.4.1. When charging a low, or no maintenance, battery take very special care. Continually monitor the voltage across the battery terminals
and when it reaches 14.4 volts stop charging.
CHARGE MODEL: 6 8 10 15
Output Peak/EN @ 6V N/A N/A 5A/2.5A N/A
Output Peak/EN @ 12V 3A/1.4A 3A/1.4A 5A/2.5A 9A/6A
Output Peak/EN @ 24V N/A N/A N/A 4.5A/3A
Supply Current 0.3A 0.4A 0.5A 0.7A
Supply Voltage 230V 230V 230V 230V
Fuse Ref No. 120/802319 10pcs (4A) 120/802319 10pcs (4A) 120/802265 10pcs (7.5A) 120/802256 10pcs (15A)
1.3. PERSONAL PRECAUTIONS
 Ensure that there is another person within hearing of your voice and close enough to come to your aid,
should a problem arise when working near a lead-acid battery.
 Wear safety eye protection and protective clothing. Avoid touching eyes while working near battery.
 Have fresh water and soap nearby in case battery acid contacts skin, clothing, or eyes.
 Wash immediately with soap and water if battery acid contacts skin or clothing. If acid enters eye, flush eye immediately with cool, clean
running water for at least 15 minutes and seek immediate medical attention.
 Remove personal metallic items such as rings, bracelets, necklaces and watches. A lead-acid battery can produce a short-circuit current
high enough to weld a ring to metal, which would cause severe burns.
 Ensure that hands, clothing (especially belts) are clear of fan blades and other moving or hot parts of the engine. Remove ties and contain
long hair.
 DO NOT smoke or allow a spark or flame in the vicinity of battery or engine.
DANGER! BE AWARE, LEAD-ACID BATTERIES GENERATE EXPLOSIVE GASES DURING NORMAL BATTERY OPERATION. FOR THIS
REASON, IT IS VERY IMPORTANT TO READ AND FOLLOW THESE INSTRUCTIONS CAREFULLY, EACH TIME YOU USE THE CHARGER.
Follow these instructions and those published by the battery and vehicle manufacturers and the manufacturer of any equipment
you intend to use in the vicinity of the battery. Remember to review warning marks on all products and on engines.
 DO NOT use the charger for any purpose other than that for which it is designed.
 DO NOT allow untrained persons to operate the charger.
 DO NOT allow the charger terminal clamps to touch each other when the power is on or the charger fuse will blow. Remember that gases
are produced which may ignite if sparks occur.
 DO NOT place the charger inside the vehicle. Remove the battery to a safe distance for charging.
 DO NOT get the charger wet or use in damp or wet locations or areas where there is condensation.
 DO NOT operate the charger if it is damaged.
 DO NOT attempt to modify or open the charger.
 When not in use, unplug from the mains power supply and store in a safe, dry, childproof area.
 WARNING! Be vigilant and cautious during battery charging as the electrolyte is highly corrosive and the emitted gases are explosive.
fig. 3
Original Language Version CHARGE6, CHARGE8, CHARGE10, CHARGE15 Issue: 2 - 05/03/10
4. MULTIPLE BATTERY CHARGING
5. SAFETY FUSE
Your charger is equipped with fuse protection which will interrupt the output
in the following circumstances:
a) Overload: too high a current to the battery.
b) Short circuit: clamps touch, or the polarity on battery is reversed.
If the fuse blows take the following action:
5.1. Disconnect the charger from the mains power supply.
5.2. Allow the unit to cool down, establish the reason for fuse blowing and correct.
5.3. Replace the fuse using only a Sealey replacement fuse.
DO NOT use fuses with copper bridges or similar as these will damage the charger. Refer to Section 2 for fuse part numbers.
4.1. A number of batteries may be charged at the same time. To do so we recommend
“parallel connection” as shown in fig. 4A
4.2. Two 12 volt batteries may be charged in series using the 24 volt output of Charge15
as shown in fig. 4B. This is only recommended if both batteries are of similar
capacity and are in a similar state of discharge.
fig.4
NOTE: It is our policy to continually improve products and as such we reserve the right to alter data, specifications and component parts without prior notice.
IMPORTANT: No liability is accepted for incorrect use of this product.
WARRANTY: Guarantee is 12 months from purchase date, proof of which will be required for any claim.
INFORMATION: For a copy of our latest catalogue and promotions call us on 01284 757525 and leave your full name and address, including postcode.
01284 757500
01284 703534
sales@sealey.co.uk
Sole UK Distributor, Sealey Group,
Kempson Way, Suffolk Business Park,
Bury St. Edmunds, Suffolk,
IP32 7AR
www.sealey.co.uk
Web
email
Original Language Version CHARGE6, CHARGE8, CHARGE10, CHARGE15 Issue: 2 - 05/03/10

CHARGE 8
ITEM PART NO. DESCRIPTION
3
120/
122190 Fuse, T500mA
5
120/
164173 Transformer
6
120/
322430 Cap Kit
8
120/
712623 Positive Clamp
9
120/
712624 Work Clamp
10
120/
802319 Kit 10 Fuses, 4A
11
120/
990462 Kit Ammeter
Issue No:- 1
Issue Date:- 18/11/02
PARTS LIST FOR:
BATTERY CHARGERS
CHARGE 10
ITEM PART NO. DESCRIPTION
1
120/
112318 Rectifier
2
120/
122400 Switch
3
120/
122190 Fuse, T500mA
5
120/
164185 Transformer
6
120/
322430 Cap Kit
8
120/
712623 Positive Clamp
9
120/
712624 Work Clamp
10
120/
802265 Kit 10 Fuses, 7,5A
11
120/
990461 Kit Ammeter
CHARGE 15
ITEM PART NO. DESCRIPTION
1 120/112318 Rectifier
2 120/122400 Switch
3 120/122437 Fuse, T2A
5 120/164170 Transformer
6 120/322430 Cap Kit
7 120/432119 Double Radiator
8 120/712623 Positive Clamp
9 120/712624 Work Clamp
10 120/802256 Kit 10 Fuses, 15A
11 120/990460 Kit Ammeter
CHARGE 8
CHARGE 10
CHARGE 15
CHARGE 6
ITEM PART NO. DESCRIPTION
2 120/122190 Fuse, T500mA
4 120/164173 Transformer
5 120/322432 Cap Kit
6 120/712623 Positive Clamp
7 120/712624 Work Clamp
8 120/802319 Kit 10 Fuses, 4A
NOTE: It is our policy to continually improve products and as such we reserve the right to alter data, specifications and component parts without prior notice.
IMPORTANT: No liability is accepted for incorrect use of this product.
WARRANTY: Guarantee is 12 months from purchase date, proof of which will be required for any claim.
INFORMATION: For a copy of our latest catalogue and promotions call us on 01284 757525 and leave your full name and address, including postcode.
01284 757500
01284 703534
sales@sealey.co.uk
Sole UK Distributor, Sealey Group,
Kempson Way, Suffolk Business Park,
Bury St. Edmunds, Suffolk,
IP32 7AR
www.sealey.co.uk
Web
email

This manual suits for next models

3

Other Sealey Batteries Charger manuals

Sealey SPI3S User manual

Sealey

Sealey SPI3S User manual

Sealey EVPC1 User manual

Sealey

Sealey EVPC1 User manual

Sealey SCI10S User manual

Sealey

Sealey SCI10S User manual

Sealey SUPERSTART550 User manual

Sealey

Sealey SUPERSTART550 User manual

Sealey START320 User manual

Sealey

Sealey START320 User manual

Sealey SPI15S User manual

Sealey

Sealey SPI15S User manual

Sealey MBC420 User manual

Sealey

Sealey MBC420 User manual

Sealey WCB4 User manual

Sealey

Sealey WCB4 User manual

Sealey SMC01 User manual

Sealey

Sealey SMC01 User manual

Sealey DSBC8 User manual

Sealey

Sealey DSBC8 User manual

Sealey Autocharge15s User manual

Sealey

Sealey Autocharge15s User manual

Sealey SUPERBOOST150D User manual

Sealey

Sealey SUPERBOOST150D User manual

Sealey SMC02.V3 User manual

Sealey

Sealey SMC02.V3 User manual

Sealey AUTOCHARGE6 User manual

Sealey

Sealey AUTOCHARGE6 User manual

Sealey CP20V Series User manual

Sealey

Sealey CP20V Series User manual

Sealey ELECTROSTART E/START1600.V2 User manual

Sealey

Sealey ELECTROSTART E/START1600.V2 User manual

Sealey SMC01.V2 User manual

Sealey

Sealey SMC01.V2 User manual

Sealey SMC03.V2 User manual

Sealey

Sealey SMC03.V2 User manual

Sealey SPI10S User manual

Sealey

Sealey SPI10S User manual

Sealey SPI3S.V2 User manual

Sealey

Sealey SPI3S.V2 User manual

Sealey SCI12S User manual

Sealey

Sealey SCI12S User manual

Sealey CHARGE 106.V3 User manual

Sealey

Sealey CHARGE 106.V3 User manual

Sealey SUPERSTART 220.V2 User manual

Sealey

Sealey SUPERSTART 220.V2 User manual

Sealey AUTOCHARGE4 User manual

Sealey

Sealey AUTOCHARGE4 User manual

Popular Batteries Charger manuals by other brands

pro user RFC4500 manual

pro user

pro user RFC4500 manual

Centech 63873 Owner's manual & safety instructions

Centech

Centech 63873 Owner's manual & safety instructions

pro user IBC4000 manual

pro user

pro user IBC4000 manual

Fairplay 25930 Safety and operating instructions

Fairplay

Fairplay 25930 Safety and operating instructions

MICRO-POWER LION 9 user manual

MICRO-POWER

MICRO-POWER LION 9 user manual

Alarm SAF PS2 Operating and installation instructions

Alarm SAF

Alarm SAF PS2 Operating and installation instructions

Tripp Lite U280-W02-68C2-G quick start guide

Tripp Lite

Tripp Lite U280-W02-68C2-G quick start guide

La Scossa Elettrica Bee Meter Duo user manual

La Scossa Elettrica

La Scossa Elettrica Bee Meter Duo user manual

Excell Solo user manual

Excell

Excell Solo user manual

Ultra Power UP-S6 user manual

Ultra Power

Ultra Power UP-S6 user manual

Case-Mate CM031201 user guide

Case-Mate

Case-Mate CM031201 user guide

e-quinux ttizi LAADAA manual

e-quinux

e-quinux ttizi LAADAA manual

FRO­NIUS Selectiva 4185 operating instructions

FRO­NIUS

FRO­NIUS Selectiva 4185 operating instructions

PC Locs Putnam 16 instructions

PC Locs

PC Locs Putnam 16 instructions

Centech 57015 user manual

Centech

Centech 57015 user manual

LRP QUADRA PRO 2 user guide

LRP

LRP QUADRA PRO 2 user guide

R/Evolution RV05 Installation & operation manual

R/Evolution

R/Evolution RV05 Installation & operation manual

Icom BC-146 instructions

Icom

Icom BC-146 instructions

manuals.online logo
manuals.online logoBrands
  • About & Mission
  • Contact us
  • Privacy Policy
  • Terms and Conditions

Copyright 2025 Manuals.Online. All Rights Reserved.