5V 2A DOUBLE WIRELESS CHARGING BASE
MODEL NO: WCB2
Thank you for purchasing a Sealey product. Manufactured to a high standard, this product will, if used according to these
instructions, and properly maintained, give you years of trouble free performance.
IMPORTANT: PLEASE READ THESE INSTRUCTIONS CAREFULLY. NOTE THE SAFE OPERATIONAL REQUIREMENTS, WARNINGS & CAUTIONS. USE
THE PRODUCT CORRECTLY AND WITH CARE FOR THE PURPOSE FOR WHICH IT IS INTENDED. FAILURE TO DO SO MAY CAUSE DAMAGE AND/OR
PERSONAL INJURY AND WILL INVALIDATE THE WARRANTY. KEEP THESE INSTRUCTIONS SAFE FOR FUTURE USE.
1. SAFETY
WARNING! To reduce the risk of electric shock, burns or re:
8DO NOT attempt to open, disassemble, modify or service the charging base.
8DO NOT crush, puncture, or dispose of in re or water.
8DO NOT expose to temperatures above 60°C (140°F).
9Recycle or dispose of used charger as stipulated by local regulation.
2. INTRODUCTION
Double wireless charging base tted with two strong magnets for attaching to a metal surface. Four holes at each corner for
permanent xture to non-metallic surface or wall. Charges both Model No’s LEDWC01 and LEDWC02 Wireless Rechargeable
Inspection Lamps. Supplied with USB charging cable and 5V 2A charging adaptor.
3. SPECIFICATION
Model No.:............................................................. WCB2.V1
Input voltage ................................................................ 5V 2A
Output (Wireless) ........................................................ 5V 1A
Output (USB) ............................................................... 5V 1A
4. OPERATION
NOTE: The wireless charging pad is not compatible with other wireless devices / smart phones etc.
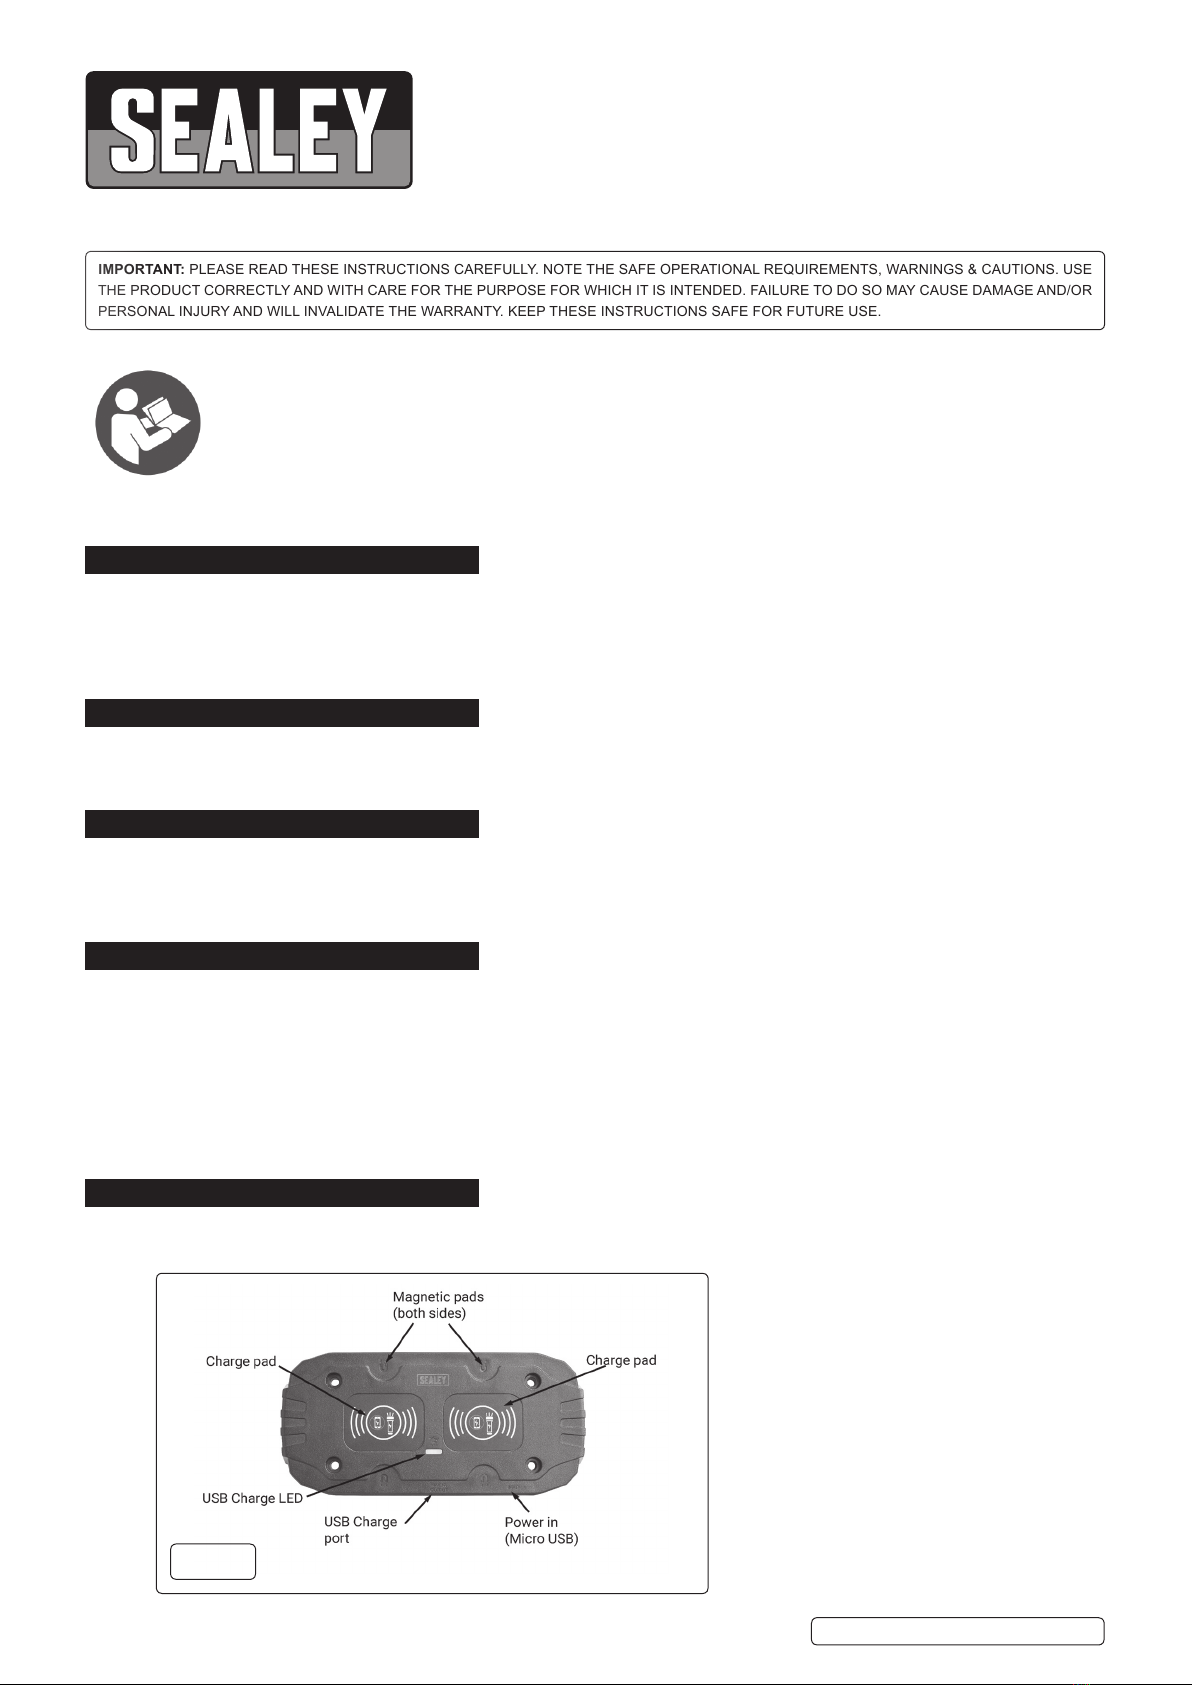
4.1. CHARGING TORCHES (g.1)
4.1.1. If required, either place the charging base on a metallic surface using the magnets (on underside) to hold it in position or
permanently x it to a non-metallic surface or wall using the four 5mm diameter counter bored holes in each corner.
4.1.2. Connect charging base to wall socket using the cable and plug supplied. Turn on the power source and the LED on the top surface
of the pad will light green indicating that the USB charging output is able to be used.
4.1.3. Place rear face of torch onto the front face of charge base ensuring alignment of charge pads and magnets.
4.1.4. The LED on the top surface of the pad will light red indicating that the USB charging output socket is not able to be used.
4.1.5. Once the torch indicates full charge, remove from base and disconnect base power supply.
5. MAINTENANCE.Keep
5.1. Keep the charging base clean by wiping with a slightly damp cloth.
5.2. Store charging base in a dry childproof area.
WCB2 Issue 1 16/07/19
Original Language Version
© Jack Sealey Limited
Refer to
instructions
g.1


