manuals.online logo
Brands
  1. Home
  2. •
  3. Brands
  4. •
  5. Hoyles
  6. •
  7. Security System
  8. •
  9. Hoyles MAYDAY User manual

Hoyles MAYDAY User manual

Specification. sounders within the working areas.
1.The MAYDAY unit is mains powered and the psu has the capacity to
deliver approx. 150mA for ancillary equipment. A 12volt/0.8Ahr Installation
rechargeable batteryis providedfor backup. 1. The MAYDAY unit will require a permanent supply of 240vac. This must be
2. The unit is housed in a plastic enclosure approx. 165 x 160 x 80 mm. connected at all times to ensure the standby rechargeable battery remains
Sealed toIP64. fully charged. The unit should be sited conveniently in the work place for the
3. Control and indication is:- OK button to be pressed periodically and for the unit to be armed and dis-
3.1. An On Off keyswitch to armthe unit. armed when required. It is not necessary to drill the box to fix it to the wall. Use
3.2. AnOK buttonto resetthe timersand thealarm. the keyhole fixing and the two holes provided in the cable entry chamber. All
3.3. A green Power On LED. cable entries should be through the bottom edge of the cable entry chamber.
3.4. A yellow System Active LED. 2. Remove both the control and cable entry covers.
3.5. A red Call Activated LED. Note:
3.6 . An integral piezo sounder. (85db at 10cm) AA' and BB'are already pre-wired to the keyswitch and the OK button.
3.7. Two adjustablerun downtimers CC' is used for closed circuit contacts of optional movement detectors. If not
4.Inputs are provided for connecting ancillary devices such as remote OK used they should be linked out.
buttons or movements detectors to supplement 3.2 above. DD' and EE' are not used.
5. Volt free contacts are provided by three independent relays. +ve and -ve provide 13.5vdc for powering ancillary devices.
5.1 Relay 1 operates when the keyswitch is thrown to arm the unit. This Leave terminal X disconnected.
relay can, if required, be connected to an indicator such as a buzzer and/or All the relay terminals are voltage free and are in the format NC. COM NO.
lamp at a remote location to indicate that the MAYDAY unit is armed and when the unit is un-powered ie all relay coils de-energised.
operating. With power applied:
5. 2 Relay 2 operates at the end of the first pre-determined run down delay R1 energises whenthe unit isarmed.
T1 (15-60 minutes). This relay can be connected to an audible warning R2 energises at the end of T1 (ie start of T2).
device to alert the Lone Worker that he/she must take some action to restart R3 is normally energisedand de-energises on CallActivated.
the timer. 3. Make all low voltage connections first (as shown in the diagrams overleaf)
5.3 Relay 3 operates at the end of the second pre-determined run down to the row of 22 terminals marked SWITCH INPUTS and CLEAN RELAY
delay T2 (2-10 minutes). This is used to connect to a remote signalling OUTPUTS. If a speech dialler is being used leave the telephone line
device such as a buzzer and/or lamp unit or possibly a speech dialler to disconnected until all programming is complete and you are ready to test.
summon off site assistance. 4. Connect the mains supply cable but leave isolated for now.
6. All terminationsare via screwterminals for cablesup to 1mm. 5. The standby battery is fitted with a polarised plug. Plug the battery onto the
7. The enclosure has rear cable entry 19mm knockouts and bottom cable pins located at the top right hand corner of the printed circuit board just above
entry 15 and 19mm knockouts. the open fuse. Do NOT reverse the polarity this will damage the unit.
8. All units are supplied with the same key. However this can be 6. If the battery is sufficiently charged you can make a preliminary test by
disconnected at the terminals and a different means of turning the unit on arming the unit with the keyswitch. Without the mains supply connected the
and off can be used if key-loss or malicious abuse is deemed to be a unit will bleep twice and then bleep once every 90 seconds. The System Active
problem. LED will illuminate. This short test verifies that the processor is working.
* Local signalling can be audible/visual devices. Remote signalling 7. Switch off at the keyswitch. The System Active LED should extinguish.
generally uses a speech auto-dialler over the telephone network. 8. Switch on the mains supply. The green Power On LED should illuminate.
9. If necessary turn the two timer potentiometers T1 and T2 fully anticlockwise
Application notes. and test the MAYDAY by following the Operation notes below.
System 1. 10. Set the potentiometers T1 and T2 to the required times and fix the front
covers.
Lone working environment on an occupied site.
11. The Speech Dialler (if fitted) should now be programmed and connected to
Use Mayday LMW1 with S1678RP as remote indicator. Remote visual
the telephone line. Separate instructions are provided for the SD1E dialler.
indication is given for System Active and audible indication for Call
12. Finally make a complete test of the system including speech dialler and
Activated, ie. an emergency.
verify receipt of the messages and that acknowledgement functions correctly.
System 2.
Lone working environment on an un-occupied site.
Operation.
Use Mayday LMW1 with SD1E speech auto-dialler to signal for assistance
1. The green mains on LED is illuminated at all times unless the mains has
via a landline. Signalling can also be given for start of work (ie System
failed.
Active), end of work (ie System switched off) and Call Activated, ie. an
2. When the keyswitch is thrown to arm the unit relay R1 changes over, the
emergency. Up to three first aider's telephone numbers can be programmed
yellow System Active LED illuminates and the run down timer T1 starts. If the
into the auto-dialler. Each is dialled in turn until acknowledged by the
keyswitch is used to switch off at any time then relay R1 is restored to its de-
recipient dialling 8. A fourth number can be programmed in the dialler for the
energised condition and no further timing or other action takes place.
lone worker. If no first aider acknowledges, then the lone worker will be
3. When armed the Lone Worker is expected to periodically press the OK
called by the system within the first few minutes of starting work to advise
button on the MAYDAY or an ancillary button within the workplace.
that he/she is working alone and without cover! A separate landline or mobile
Alternatively if a movement detector is used to sense movement within the
is needed for this return call.
workplace then no action other than movement is required by the worker.
System 3.
4. If the OK button is pressed, the panel buzzer will bleep to acknowledge this.
Wandering lone worker (with a mobile phone) on an un-occupied site
If the movement detector input CC’ resets the timer it will only be
Use Mayday LMW1 and SD1E speech auto-dialler for signalling via a
acknowledged if T1 is more than 15 minutes into it's timing. This will minimise
landline. A mobile phone is also required for the lone worker. It is
annoyance when moving around constantly.
recommended that this is dedicated for the purpose and tested periodically.
5. At the end of the T1 delay period, relay R2 will operate and the integral
As is system 2 above signalling can also be given for start of work (ie System
buzzer will sound for a time period T2. If no action is taken such as pressing the
Active), end of work (ie System switched off) and Call Activated. Up to three
OK button or movement detection within the T2 period then the Call Activated
first aider's telephone numbers can be programmed into the auto-dialler.
relay R3 operates to trigger a remote signalling device. The red Call Activated
Each is dialled in turn until acknowledged by the recipient dialling 8.If no first
LED will also illuminate, Relays R1 and R2, and the buzzer will deactivate. The
aider acknowledges, then the lone worker’s mobile will be called by the
buzzer and sounder relay R2 will then operate intermittently until the unit is
system within the first few minutes of starting work to advise that he is
reset by the OK button or switched off by the key switch.
working alone and without cover!
6. Under mains fail condition the green power on LED will extinguish and:
!If the mains have failed prior to arming then, on arming the unit, the buzzer will
The MAYDAY LMW1 will trigger the SD1E periodically call the lone worker
bleep twice and then sound intermittently, 0.5 secs. on 90 secs. off but the unit
on the dedicated mobile phone. By pressing 8 on the keypad he is effectively
will still operate as normal when armed.
pressing the OK button. If he fails to acknowledge in this way then the SD1E
!If the mains fails after arming then the MAYDAY will behave as though T1 has
will start to dial the first aiders in turn via the landline.
timed out, ie. starting T2 and sounding the buzzer.
.
The above conditions assume that the rechargeable standby battery is
In systems 1 & 2 above movement detectors such as PIRs can be used to
healthy. The alarm relay R3 is failsafe so that if all power, mains and battery, is
operate as acknowledgement devices in lieu of or in addition to the OK reset
lost an alarm output is generated.
button(s) in order to render the system largely hands free.
In noisy environments consideration should be given to installing additional
MAYDAY Lone Worker Safety System
W:\elec\corelec\instrucn\60075.cdr Iss.2 Page 1 Sep03
+
A
B
C
D
+
A
B
C
D
+
A
B
C
D
A A’ B B’ C C’ D D’ E E’ - + X
R1 R2 R3
A A’ B B’ C C’ D D’ E E’ - + X
R1 R2 R3
PIR
PIR
PIR
Pre-wired
to OK button
Pre-wired to OK button
Optional sounder for
noisy environments
on system 1 and 2
Optional movement
detector(s) in
workplace area.
Use on any system
If not used CC’
should be linked out
with the 10k resistor.
Optional movement
detector(s) in
workplace area.
Use on any system
If not used CC’
should be linked out
with the 10k resistor.
Do not use
Do not use
W:\elec\corelec\instrucn\60075.cdr Iss.2 Page 2 Sep03
Pre-wired
to On/Off Keyswitch
Pre-wired
to On/Off Keyswitch
Pre-wired
to On/Off Keyswitch
S/1678RP
Buzzer & Lamp Unit
S/1679RP
Buzzer Lamp &
Button Unit
S/1679RP
Buzzer Lamp &
Button Unit
Tamp Abort C B A
Trig
Polarity
+
-
O/P1-ve
0v
+12vdc
B1
A1
B
A
BL
WH
YL
BL
WH
YL
D
Landline
SYSTEM 1. An occupied site
SYSTEM 2 and 3. Remote signalling via SD1E speech auto-dialler
Wire to B on SD1E for STOP work signalling option on system 2 and 3
Wire R1 to A on SD1E for START work signalling option
on system 2 and 3
Wire R2 to the Abort terminal which is used as
D for signalling to a wandering lone worker’s
mobile phone System 3 only. It is recommended
that a dedicated mobile phone is used.
Sited at a remote location
to indicate:
a. system IN USE
b. Assistance Required
Optional S/1679RP unit(s) are used as
addditional OK buttons and low power
work place sounders Systems 1 and 2 only
The wiring configurations below are our recommended configurations. If being an extension OK button it will also give audible and visual indication
workplace detectors are used then most PIR detectors are suitable and within the work place to alert a lone worker to press the OK button.
you should match the coverage to the environment. Additional sounders The SD1E is a 4 message 4 number speech auto-dialler. Whilst the
can be used for noisy environments but please be aware that only 150ma MAYDAY will work with most speech diallers the programming
is available from the integral PSU. Most Normally Open non-latching instructions we give are for the SD1E dialler for the system configurations
buttons can be used in parallel with the integral OK button, we have 2 and 3 below. If you use a different dialler or a different configuration we
shown our S/1679RP, this can be used on systems 1 and 2. In addition to are not able tooffer technical help.
A= White
B= Orange
10K
10K
T. 01744 886600 F. 01744 886607 E. [email protected] W. www.hoyles.com
Hoyles Electronic Developments Ltd
and then press ENT the display should read READY.
Speech dialler setup for MAYDAY lone worker alarm
This must be used if the Mayday calls the lone worker's mobile phone to be
The notes below are our recommended set up for use with a MAYDAY lone acknowledged and reset the MAYDAY timers.
worker alarm when connected in accordance with our installation
instructions. If you wish to set the SD1E differently then you should 6.Next set up the call routing. Which numbers to call for a particular channel.
consult the installation and operation manuals supplied. 6.1.From the READY display press 7 the display should read ROUTE- Press ENT.
The SD1E is a 4 channel 4 number speech auto-dialler. (The SD1E operators The display should read A>1234. Press the numbers 1,2,3 or 4 to toggle the
manual refers to channels as trigger inputs). The channel inputs are A,B,C and display numbers on or off as required. In a typical setup telephone numbers 1, 2
D. Channel D is factory set as an abort channel and needs to be re-programmed and 3 may be toggled off for channel D, thus the display would read D>4. This is
as a message channel (see 7 below). Each channel can give a different the only number that will be called when channel D is triggered. The message sent
message. In the notes below a message is composed of two phrases, a will be the common phrase O plus phrase D
commom phrase and a channel specific phrase. The common phrase is referred 6.2.When you are satisfied that the numbers are correct for channel A the
to as phrase O and the channel phrases as A,B,C and D. Refer to the table below remaining channels B>1234, C>1234 and D>1234, can be scrolled through by
for an example of recommended phrases. Write your own phrases in a similar pressing button B. They are set up by toggling as in 6.1 above. When all are set
table before you start recording. You have a total of 40 seconds to record all 5 press ENT and the display should read READY.
phrases. It is recommended that all messages be recorded in order in one
6.3.We recommend that channels A,B and C call each of the four numbers 1,2, 3
session, to avoids trying to fit a spoken message into a predefined time slot.
and 4. Channel D should be reserved for calling the lone worker's phone when the
Throughout these instructions the keypad presses are denoted in bold capitals unit requires to be acknowledged. Thus the routing for channel D should read D> 4
eg ENT.The LCD display readings are denoted in bold italics eg READY
7. Next set up the ABORT input channel as channel D.This allows the abort input
1.If this is a first time install short circuit the Factory Restart pins JP2 whilst terminal to be used as channel D and also the dialler to be reset by the passcode if
applying 12vdc power. This erases the memory of all phrases, numbers and no one is available to acknowledge its dialled numbers.
other set up parameters. The unit should bleep and display PLEASE RECORD.
Complete all programming before connecting the BT line. 7.1.From READY,press 8, the display should read ABORT-, press ENT and press
B repeatedly until the display reads PASSCODE. Press ENT and the display
2.Next enter the PASSCODE'1234'. The display should read READY. should read READY.
3.You must now record at least one message. 8.Next set up the acknowledgement to stop the dialler from repeatedly dialling.
3.1.Press ENT. The display will alternate between: ENT 1-4 : OR O-D. Press 0 8.1.From READY press 0 and the display should read CLRBY- press ENT and
and the display will read RECORD PHRASE 0. (The 1-4 is for the telephone then the display should show how many acknowledgements are required to stop
numbers see later). Phrase 0 is the common phrase and will be announced first the dialler re-dialling. Press the B button repeatedly until you see the number that
in each message. you require, (we recommend 'ANY-1') and then press ENT.The display should go
3.2.To record the phrase press ENT and the display shows REC-40, and starts back to READY.
to count down. Speak your phrase into the integral microphone of the SD1E. If you select the NO-ONE option the SD1E will continue to call if numbers are
When you have recorded the phrase, press ESC. This will stop the timer and the engaged or not answered but will stop when one is answered even if by an
display will again alternate between ENT 1-4 : OR O-D. waiting for you to record answering machine. The NO-ONE is therefore not recommended.
the next phrase.
While it is possible to dial to a pager, it is not recommended, as the pager has
3.3.Record the phrases one at a time, To record the A phrases, press A, the no acknowledge or return call facility. The acknowledge facility, requires the
display will read RECORD PHRASE A. Press ENT and the display will show called person to press 8 to acknowledge. For this reason your message should
REC and the remaining time. Press ESC at the end of phrase A. While recording, include the words "press 8 to acknowledge".
the total time remaining will be displayed.
9.To erase the messages and start again.
3.4. Record phrase B by pressing B and repeating the procedure 3.3 above.
9.1.From READY, press ENT,the display will alternate between: ENT 1-4 : OR O-
3.5.Press ESC to get back to READY display. D. Press ENT again, the display should read ERASE-. Press B the display should
4.Next programme the telephone numbers. read SPEECH press ENT and the display should revert to ENT 1-4 : OR O-D..
4.1.From the READY display, press ENT the display will alternate between: Press ESC to return to READY. All phrases now need to be re-recorded, see 3
ENT 1-4 : OR O-D, press 1 to programme the first telephone number to be above.
dialled followed by the telephone number, including any access codes for PABX 10.To erase telephone numbers. (assuming you are in programme mode)
system, and press ENT.The display will revert to alternating between: ENT 1-4 : 10.1.From READY press ENT.The display will alternate between: ENT 1-4 : OR O-
OR O-D. Press 2 to programme the second telephone number to be dialled D. Press ENT again and the display will show ERASE- press B twice to scroll the
followed by it's number. Repeat the process for number 3. Number 4 is usually display to show PHONES. Press ENT to accept and the display should revert to
made available for the lone worker’s phone from which he/she can acknowledge READY. You will now need to re-programmed the numbers as in 4 above.
and reset the MAYDAY. If you get a digit wrong, press the, A button to correct.
Pressing ESC from display READY should display SD1+. To get back to the
4.3.Press ESC to get back to READY display. READY display, enter the passcode 1234. To return to the SD1+ wait for 60
5.Next set up the SD1+ output to acknowledge the Mayday. seconds or repeatedly press ESC. Other options such as changing the passcode
5.1.From the READY display press 6. The display should read OUTPUT. Press or setting up the BT line as pulse or tone should be done from the SD1+ operating
ENT the display should read ACTIVE. Press B until the display reads SUCCESS manual.
Phrase O XYZ Ltd. Newtown
Phrase A Lone working has started. Please press 8 to acknowledge you are on call.
Phrase B Lone working has stopped. Please press 8 to acknowledge.
Phrase C Lone worker in difficulty. Please press 8 to ackowledge you will attend.
Phrase D Only press 8 if you are not in difficulty and you are the correct recipient of this message.
Message to Name Telephone Number
st
1 Aider No. 1
st
1 Aider No. 2
st
1 Aider No. 3
Wandering Lone Worker only
Hoyles Electronic Developments Ltd.
W:\elec\corelec\instrucn\60075.cdr Iss.2 Page 3 Sep03
System 1. Configuration for an occupied site with simple
audible/visual warning at a remote location on the site.
The red Call Activated LED will also be illuminated.
There may be additional OK buttons within the workplace. Any of
1. The green Power On LED should be illuminated at all times these buttons can be pressed. The button(s) can be pressed at
unless the mains has failed. any time, you do not have to wait for the buzzer to sound.
2. At the start of a lone working period arm the MAYDAY by turning Alternatively a movement detector(s) may be fitted to sense
the keyswitch to the On position. The yellow System Active LED movement within the workplace then no action other than
will illuminate. Visual indication will be given at a remote point to movement should be required in order to prevent an audible
advise those responsible for safety that a lone working period has warning being givenat the remotepoint.
commenced. 4. At the end of the lone working period turn the keyswitch to the
3. Periodically a buzzer will sound. This is pre-set on installation Off position. This will extinguish the yellow System Active LED
at 15 - 60 mins. If there are no problems press the OK button to and call the First Aider(s) to confirm that lone working has finished.
silence the buzzer. If you are not able to press the OK button an Note: Ifthe buzzerbleeps twiceon armingthis indicates that there
audible warning will be given at the remote point after a further is a problem with the system and you should call your installing
period (2 - 10 mins) to advise those responsible for safety that a engineer. It will still be possible to use the system with the
problem has arisen. The red Call Activated LED will also be keyswitch.
illuminated. If the mains power has failed prior to arming then, on arming the
There may be additional OK buttons within the workplace. Any of MAYDAY, the buzzer will bleep twice and then sound
these buttons can be pressed. The button(s) can be pressed at intermittently, 0.5 sec. on, 90 secs. off but the unit will continue to
any time, you do not have to wait for the buzzer to sound. operate normally when armed.
Alternatively a movement detector(s) may be fitted to sense If the mains fails after arming then the MAYDAY will sound
movement within the workplace then no action other than immediately and the OK button should be pressed. The MAYDAY
movement should be required in order to prevent an audible assumes that you have caused the power failure and may be
warning being given at the remote point. injured.
4. At the end of the lone working period turn the keyswitch to the System 3. Configuration for an un-occupied site with remote
Off position. This will extinguish the yellow System Active LED signalling via a speech auto-dialler to a remote location and
and the visual indication at the remote point. using a dedicated mobile phone for a wandering lone worker
Note: If the buzzer bleeps twice on arming this indicates that there to acknowledge his well being. This assumes that the system
is a problem with the system and you should call your installing has been installed and programmed to signal start and end of
engineer. It will still be possible to use the system with the lone working and accept acknowledgment signals.
keyswitch. 1. The green Power On LED should be illuminated at all times
If the mains power has failed prior to arming then, on arming the unless the mains has failed.
MAYDAY, the buzzer will bleep twice and then sound 2. At the start of a period of lone working arm the MAYDAY by
intermittently, 0.5 sec. on, 90 secs. off but the unit will continue to turning the keyswitch to the On position. The yellow System
operate normally when armed. Active LED will illuminate. The speech auto-dialler will start to call
If the mains fails after arming then the MAYDAY will sound the nominated First Aiders via the telephone system. The First
immediately and the OK button should be pressed. The MAYDAY Aider who is on call should acknowledge this by pressing 8 on his
assumes that you have caused the power failure and may be telephone key pad. If he is not able to fulfill his ON CALL
injured. commitment then he should hang-up without acknowledging. The
System 2 Configuration for an un-occupied site with remote auto-dialler will then proceed to call the other two in turn. The first
signalling via a speech auto-dialler to a remote location. This one to acknowledge by pressing 8 stops the cycle and resets the
assumes that the system has been installed and auto-dialler.
programmed to signal start and end of lone working and If none of the First Aiders acknowledges then the auto-dialler will
accepts acknowledgment signals. dial the lone worker’s mobile telephone to warn him that he is
1. The green Power On LED should be illuminated at all times working without cover. If he acknowledges then the cycle of
unless the mains has failed. dialling is stopped. If the calls are not acknowledged then the
2. At the start of a period of lone working arm the MAYDAY by auto-dialler will make three further attempts to each number.
turning the keyswitch to the On position. The yellow System 3. Periodically the MAYDAY will call the lone worker’s mobile
Active LED will illuminate. The speech auto-dialler will start to call phone. If there are no problems he should dial 8 to acknowledge. If
the nominated First Aiders via the telephone system. The First he is not able to dial 8 the auto-dialler will call the telephone
Aider who is on call should acknowledge this by pressing 8 on his number of the first First Aider. If he is able to attend then he should
telephone key pad. If he is not able to fulfill his ON CALL acknowledge by dialling 8. This will prevent any further numbers
commitment then he shouldhang-up without acknowledging. The being called. If he cannot attend then he should not acknowledge
auto-dialler will then proceed to call the other two in turn. The first thus allowing theauto-dialler to continuecalling the othertwo First
one to acknowledge by pressing 8 stops the cycle and resets the Aiders inturn.
auto-dialler. The red Call Activated LED will also be illuminated.
If none of the First Aiders acknowledge then the auto-dialler will 4. At the end of the lone working period turn the keyswitch to the
dial the lone worker’s telephone to warn him that he is working Off position. This will extinguish the yellow System Active LED
without cover. If he acknowledges then the cycle of dialling is and the First Aider(s) to confirm that lone working has finished.
stopped. If the calls are not acknowledged then the auto-dialler Note:
will make a further threeattempts toeach number. If the mains power has failed prior to arming then, on arming the
3. Periodically a buzzer will sound. This period is pre-set on MAYDAY, the buzzer will bleep twice and then sound
installation to 15 - 60 minutes. If there are no problems press the intermittently, 0.5 sec. on, 90 secs. off but the unit will continue to
OK button to silence the buzzer. If you are not able to press the OK operate normally when armed.
button the auto-dialler will call the telephone number of the first If the mains fails after arming then the MAYDAY will sound
First Aider after a further period (2 - 10 mins). If he is able to attend immediately and the subsequent call should be acknowledge in
then he should acknowledge by dialling 8. This will prevent any the usual way. The MAYDAY assumes that you have caused the
further numbers being called. If he cannot attend then he should power failureand maybe injured.
not acknowledge thus allowing the auto-dialler to call the other
two First Aiders in turn.
MAYDAY user Operating Instructions
W:\elec\corelec\instrucn\60075.cdr Iss.2 Page 4 Sep03

Other Hoyles Security System manuals

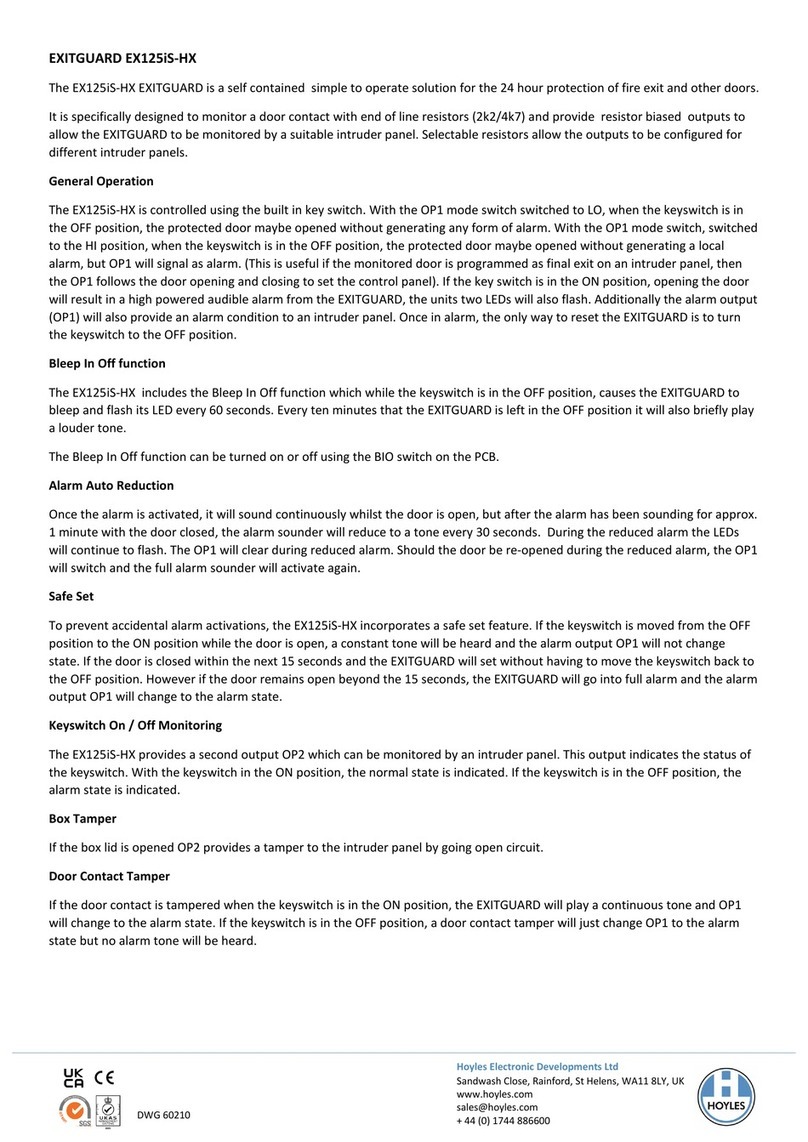
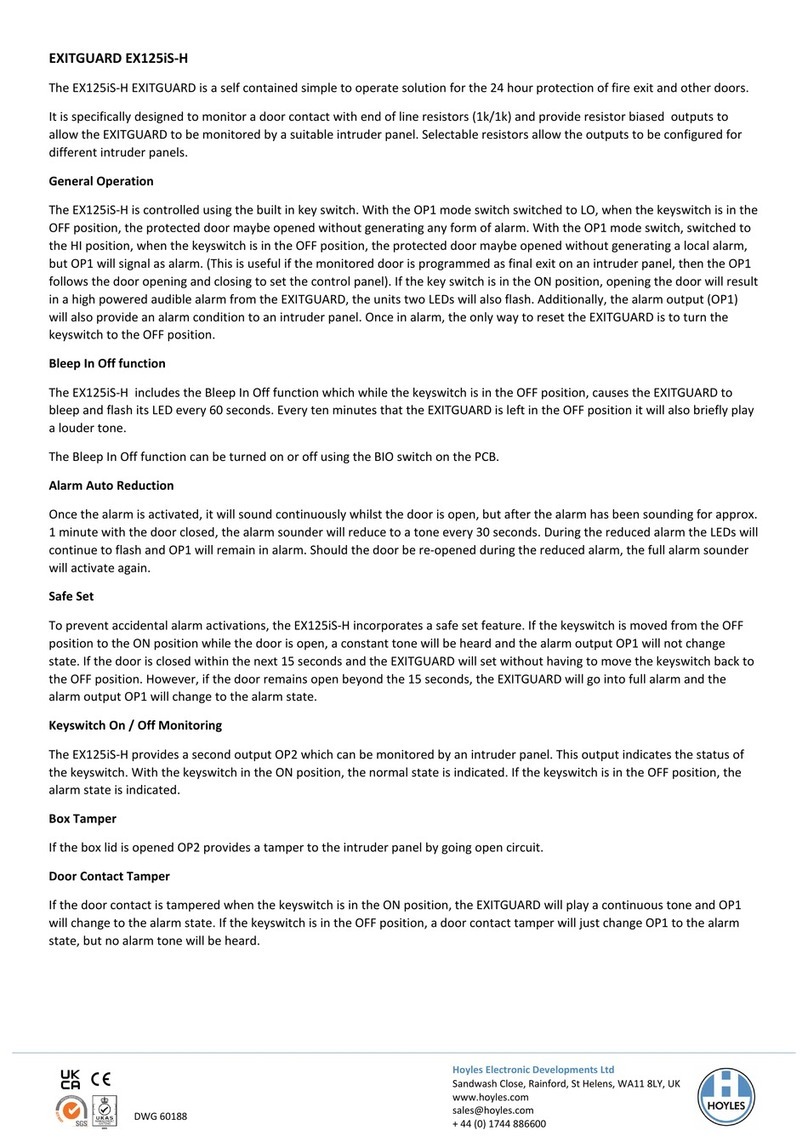
Hoyles EXITGUARD EX125iS-H User manual

Hoyles

Hoyles EXITGUARD EX125iS-H User manual

Hoyles EXITGUARD EX204 User manual

Hoyles

Hoyles EXITGUARD EX204 User manual

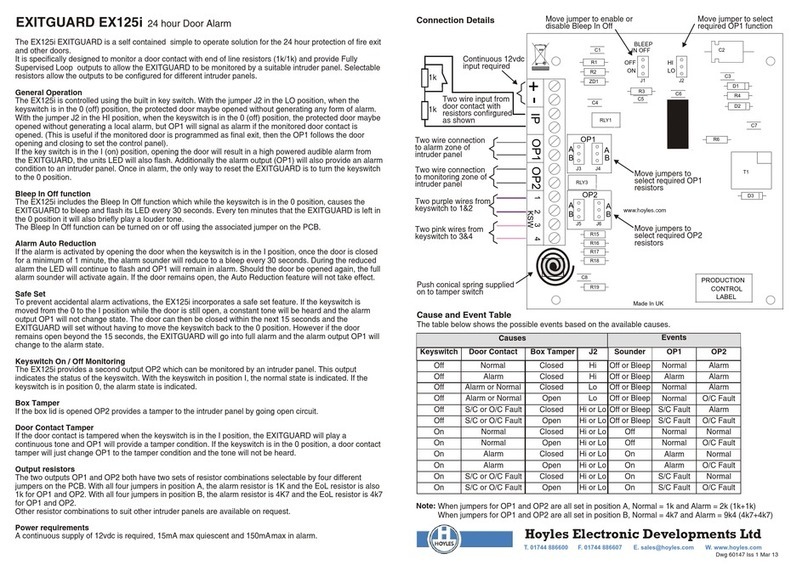
Hoyles EXITGUARD EX125i User manual

Hoyles

Hoyles EXITGUARD EX125i User manual

Hoyles EXITGUARD User manual

Hoyles

Hoyles EXITGUARD User manual

Hoyles Dado Panic Strip Installation manual

Hoyles

Hoyles Dado Panic Strip Installation manual

Hoyles A600WKITB User manual

Hoyles

Hoyles A600WKITB User manual

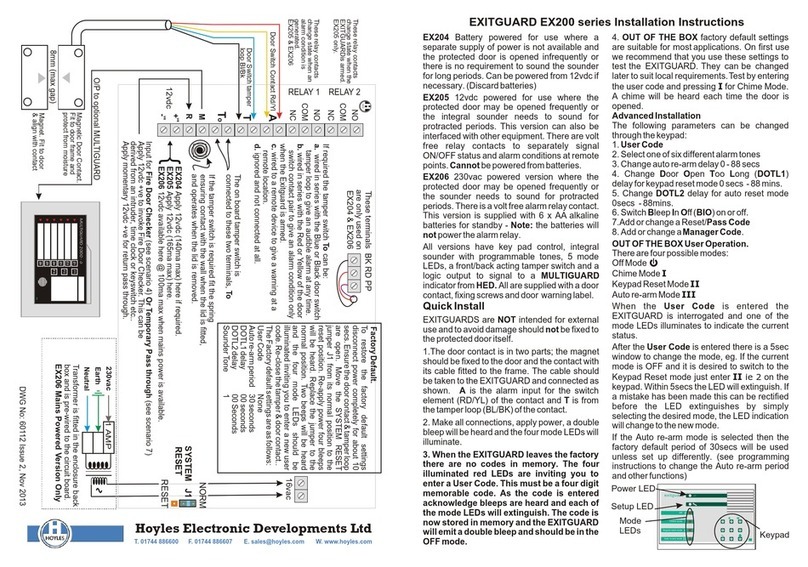
Hoyles EXITGUARD EX200 series User manual

Hoyles

Hoyles EXITGUARD EX200 series User manual

Popular Security System manuals by other brands

Bosch Solution 64 user guide

Bosch

Bosch Solution 64 user guide

Chacon 34035 user manual

Chacon

Chacon 34035 user manual

UNILED WS user manual

UNILED

UNILED WS user manual

ADT Safewatch Pro 3000 System manual

ADT

ADT Safewatch Pro 3000 System manual

Netatmo NCO01 user guide

Netatmo

Netatmo NCO01 user guide

Bosch B Series Installer quick start guide

Bosch

Bosch B Series Installer quick start guide

MuxLab VideoEase 500000 Quick installation guide

MuxLab

MuxLab VideoEase 500000 Quick installation guide

Generac Power Systems 21-light owner's manual

Generac Power Systems

Generac Power Systems 21-light owner's manual

Silent Alert MM4A-2212-EU-LEAD quick start guide

Silent Alert

Silent Alert MM4A-2212-EU-LEAD quick start guide

WamBlee W400 instruction manual

WamBlee

WamBlee W400 instruction manual

Sontay GL-CO-RFG-361 quick start guide

Sontay

Sontay GL-CO-RFG-361 quick start guide

NETGEAR Arlo quick start guide

NETGEAR

NETGEAR Arlo quick start guide

Consilium Salwico CS3004 user guide

Consilium

Consilium Salwico CS3004 user guide

Wolf-Guard YL007-M2C user manual

Wolf-Guard

Wolf-Guard YL007-M2C user manual

NITEforce SMS user manual

NITEforce

NITEforce SMS user manual

BRINKS BHS-3000A user manual

BRINKS

BRINKS BHS-3000A user manual

Linear T-90 installation instructions

Linear

Linear T-90 installation instructions

Blaupunkt Q-Pro6300 quick start guide

Blaupunkt

Blaupunkt Q-Pro6300 quick start guide

manuals.online logo
manuals.online logoBrands
  • About & Mission
  • Contact us
  • Privacy Policy
  • Terms and Conditions

Copyright 2025 Manuals.Online. All Rights Reserved.