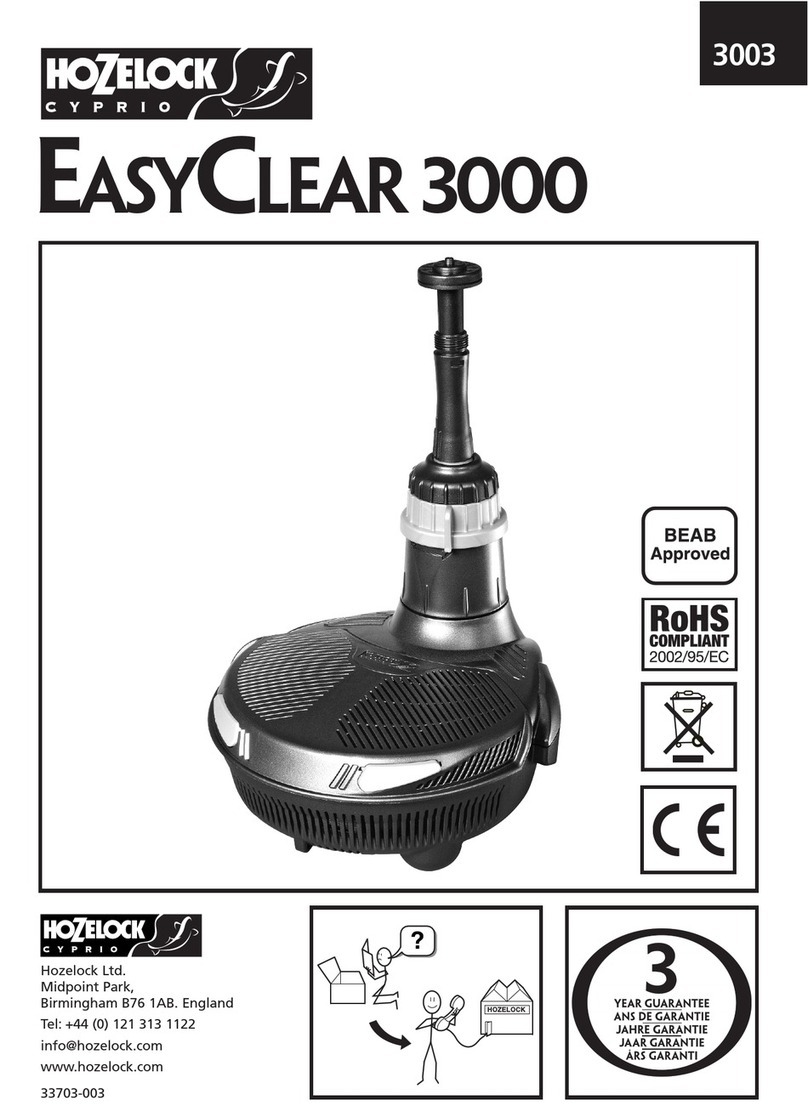
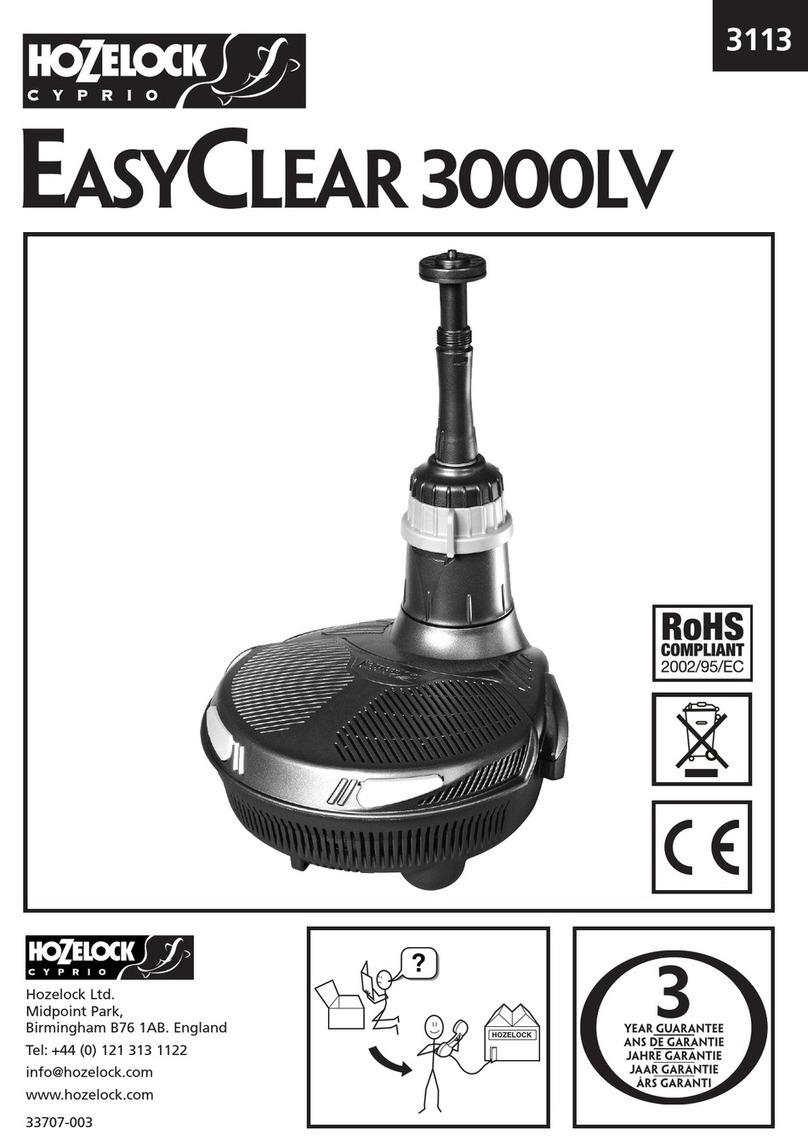
Hozelock Cyprio EasyClear 3000 1760 User manual

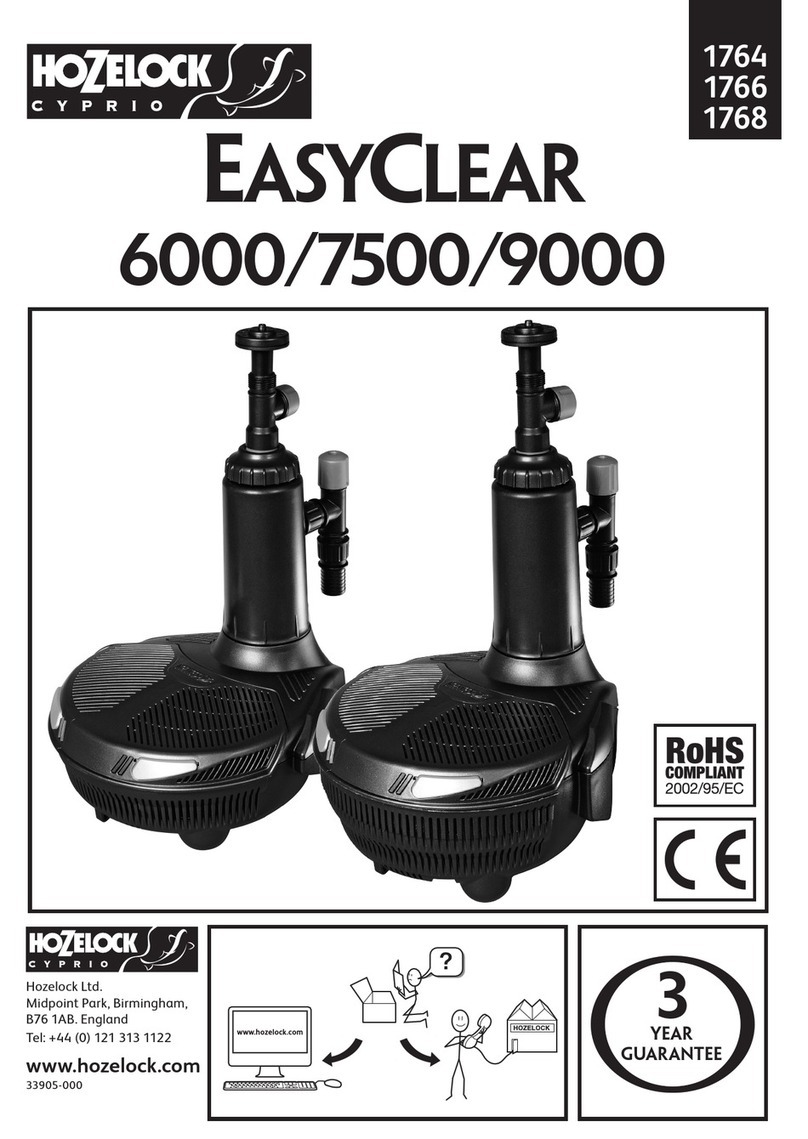
EasyClEar 3000/4500
?
www.hozelock.com
1760
1762
Hozelock Ltd.
Midpoint Park, Birmingham,
B76 1AB. England
Tel: +44 (0) 121 313 1122
www.hozelock.com
33903-000

1
4A
3
5
6 7
4B
8
2
P
P
O
N
L
Q
J
K
G
C
E
D
B
AI
F
H
RS
M

V
XY
V
V
Z
Z
W
W
10
9
10A
T
i
ii
iii
U

GB
Thank you for choosing a Hozelock quality product,
you can be assured of many years of reliable service
from this product.
INSTALLATION &
OPERATING INSTRUCTIONS
READ THESE INSTRUCTIONS CAREFULLY
BEFORE ATTEMPTING INSTALLATION.
FAILURE TO OBSERVE THE FOLLOWING
NOTICES MAY RESULT IN INJURY, PRODUCT
DAMAGE OR LOSS OF FISH.
KEEP THESE INSTRUCTIONS FOR FUTURE
REFERENCE.
The Hozelock Cyprio EasyClear™ Fountain or
Waterfall pump is designed for submersible use in
outdoor ponds. It is an integrated unit that provides
Mechanical & Biological Filtration with an Ultra Violet
Clarifier and a Fountain or Waterfall.
Attention: UV Caution
This appliance contains a UV-C emitter. Unintended
use of the appliance or damage to the housing may
result in the escape of dangerous UV-C radiation.
UV-C radiation may, even in little doses, cause harm to
the eyes and skin. The lamp is fitted with an interlock
that will turn the lamp off when the bayonet is
removed (fig 8-S).
When switched on, the lamp can be checked for
operation in dark conditions, by looking for a bluish
glow from the Fountain outlet (Fig 1-A). Do not run the
product dry.
Warning: Do not attempt to operate the UV-C
emitter when it is removed from the appliance
housing.
Warning: The appliance must be disconnected from
the supply before replacing the UV-C emitter.
Important
This appliance must only be used by or under the
supervision of a responsible adult who is capable
of using the appliance in a safe way and who
understands the hazards involved. Use and store this
appliance out of reach of children and persons with
reduced physical, sensory, or mental capabilities.”
Warning:
Safety & Electrical Connections
1.1 WARNING: ALWAYS UNPLUG OR
DISCONNECT ALL APPLIANCES IN THE
POND FROM THE ELECTRICITY SUPPLY
BEFORE PUTTING YOUR HANDS IN THE
WATER WHILST EQUIPMENT IS BEING
INSTALLED, REPAIRED, CARRYING OUT ANY
MAINTENANCE OR BEING HANDLED IN ANY
WAY.
1.2 This filter has been designed for the use with
garden ponds only. Do not use this filter for any
other use (i.e. do not use this filter in swimming
pools, etc). Using the product for any other
application may result in injury or product
damage. This pump must not be used when
people are in the water.
1.3 Appliances that are obviously damaged must
not be operated.
1.4 The clear tube inside the unit is made from
quartz glass and care should be taken during
installation and maintenance. We recommend
the use of eye protection and suitable gloves.
1.5 Do not remove and operate the pump unit from
its outer housing. Using the unit without its
outer housing may invalidate your warranty.
1.6 Important:
This product is supplied with 10m of 3-core
electric cable. The plug supplied with this
product is not waterproof and it must be
connected to the mains supply inside a dry
weatherproof enclosure according to your local
regulations.
Permanent installations to the mains supply
(hard wiring), must conform to the national and
local wiring regulations. If in any doubt about
wiring to the mains supply, consult a qualified
electrician or local electricity authority.
1.7 If an extension cable is required, this should be
connected to the end of the unit cable using
a weatherproof connector. The joint must be
positioned in a suitable weatherproof housing.
The extension cable should be of 3 core
0.75mm2Polychloroprene rubber insulated cable
(ref: HO5 RN-F) and permanently wired to the
mains supply as described above in 1.6.
1.8 WARNING: This appliance MUST be earthed
and it is essential that the connections are made
using the following code:
1.9 Exposed cable runs should be sensibly positioned
and protected by armoured conduit, especially
if there is a risk of contact with gardening
equipment such as forks and lawnmowers, or
children and domestic animals.
1.10 Do not operate this product if the mains supply
cable has become damaged in any way. The
supply cable is permanently connected and
sealed to the pump and cannot be replaced.
If the cable is damaged, the unit should be

disposed of according to local regulations.
1.11 A 30mA maximum Residual Current Device
(RCD) MUST be fitted to the mains supply.
1.12 Permanent installations to the mains supply
(hard wiring), must conform to the national and
local wiring regulations. If in any doubt about
wiring to the mains supply, consult a qualified
electrician or local electricity authority.
1.13 Do not use the supply cable to lift the unit, as
this may cause damage. We recommend fitting
a lifting cord to the hook feature on the base,
when the filter is installed in deep water. (Fig
1-H). If the product needs to be moved, the
product should be switched off and lifted out of
the water using this cord.
1.14 Do not switch the pump on out of water! The
water level should be above the UVC indicator at
the ball joint (Fig 4A-L).
1.15 Do not operate or leave the unit in freezing
conditions. (See the section, “Winter Storage”).
1.16 This product is not suitable for water
temperatures above 35ºC or below 0ºC.
1.17 Only use accessories which have been designed
for use with this product. The use of any other
accessories or spares may invalidate your
guarantee.
Overload Protection
To help ensure your EasyClear’s long life and to
prevent damage, it is fitted with automatic thermal
overload protection. This switches the pump or UV
lamp off if either overheats. If this occurs, switch off
the power at the mains supply to the unit. If it is the
pump that has activated the Overload Protection,
check for the cause (it is usually debris blocking the
inlet of the pump or obstructing the impeller). Remove
the obstruction and wait 15 minutes for the unit to
cool down. Then switch it on again.
If it is the UV lamp that is activating the overload
protection (pump is still running but UV lamp keeps
going out after running for a short time), please
contact Hozelock Consumer Services Helpline on +44
(0)121 313 1122.
Remember: The lamp is fitted with an interlock that
will turn the lamp off when the bayonet is removed
(fig 8-S), so you can only see if the lamp is working in
dark conditions, by looking for a bluish glow from the
Fountain outlet (Fig 1-A) with the bayonet tube locked
in position.
NOTE: YOU MUST SWITCH OFF THE MAINS
SUPPLY BEFORE THE UNIT WILL RESET.
CAUTION: To avoid a safety hazard due to inadvertent
resetting of the thermal overload protection, this
product must not be used with an external switching
device, such as a timer, or connected to a circuit that is
regularly switched on and off by the electricity supply.
Periods of Operation
Keep the filter working 24 hours a day. Ideally it
should run all year round, but at least throughout the
fish-feeding season, (i.e. until the water temperature
falls below 10°C and the fish stop feeding). In winter,
operating the unit will maintain a basic level of useful
bacteria in the Biological Filter, and will help prevent
the pond icing over. However, the unit must not be
allowed to freeze. If you switch the unit off for winter,
wash the unit thoroughly before resuming filtration in
the spring (see ‘Winter Storage’). Never feed your fish
when the unit is not in use.
Before First Use
Inappropriate handling of this product during transit
may result in damage to the quartz tube. Please
inspect the quartz tube and seal before installation.
See the section “Maintenance” for details on how to
access the quartz tube and lamp.
Installation
Position - Construct a solid and level platform on
which to place the EasyClear™. The platform should be
greater than 300 mm (12”) below the water level. For
depths between 300mm and 600mm use the fountain
stem extension segments (Fig 1-F), which simply screw
together, to allow the fountain to be above the water
using the EasyClear for a waterfall the entire unit
should be submersed.
Connection - Place the unit next to the pond and
route the cable back to the mains supply. Ensure that
you allow for enough cable for positioning the product
in the desired location in the pond.
Accessory Assembly
Bell Fountain (Fig 1).
Locate the Bell Support (B) to the Bell Main Body (C)
and push fully home.
Position the Bell (D) to the Body Assembly and press
into the central location.
2 and 3 tier fountain display assembly (Fig 1-I).
The plastic discs (Fig 1-E) that create the 2 and 3
tier water displays simply snap onto the fountain
stem. Push the fountain stem into the fountain stem
extension segment and screw onto the fountain outlet
(Fig 1-A).
Fountain Only Operation
(Fig 4-A for general installation guide)
Please note: The product has a water by-pass to
control water flow rates which means a quantity
of water will always come out of the product just

below the flow control. This is normal in operation.
Position the unit in the pond. The fountain angle can
be adjusted to be vertical using the ball joint (Fig 2-A).
The tightness of the ball joint can be adjusted (Fig 2-J).
If required, the 2-Tier Fountainhead can be used to
achieve an alternative and higher display pattern than
the 3-Tier.
The fountain height can be adjusted to suit your needs
by rotating the Fountain Flow Adjuster (Fig 3-K).
The Bell Fountain creates a decorative waterbell. The
size of the bell can be adjusted to suit your needs by
rotating the Fountain Flow Adjuster (Fig 3-K).
Waterfall Only Operation
(Fig 4-B for general installation guide)
Position the pump as previously described.
Attach a suitable length (3m maximum) of 25 mm (1”)
hose to the waterfall hose tail (Fig 1-G) and secure
with a suitable hose clip and position the outlet end of
the hose in the desired position.
Screw the waterfall hose tail to the fountain outlet of
the EasyClear™ (Fig 1-A) and adjust the flow using the
fountain flow adjuster, (Fig 3-K), to suit your needs.
Note: The maximum recommended waterfall height
above pond level is 0.5m (Fig 4-B).
UVC Operation
The UVC will automatically switch on once the unit
has been connected to the electricity supply if the
bayonet tube is correctly locked in place.
The UVC lamp can be checked for operation by
looking for a bluish glow from ball joint outlet (Fig
1-A). Please note that this may only become visible in
low light conditions.
See Maintenance section for Lamp replacement.
Maintenance
The Hozelock Cyprio EasyClear™ has been designed
to allow fast and easy maintenance. As with all pond
equipment, occasionally it will become necessary to
clean or replace parts.
WARNING: Disconnect this product from the
electricity supply and refer to the section “Safety
& Electrical Connections” before attempting any
maintenance.
Fountain Head (Fig 1-I)
Follow the below procedure if the fountain head is
blocked:
1 - Place a coin or similar in the slot and gently lever
off the fountain head.
2 - Rinse in clean water and reassemble.
Foam
Follow the below procedure if flow appears reduced:
1 - Release the Foam Cover by pushing the two
buttons (Fig 5-M) and lift the cover (Fig 6-N).
2 - Remove the Foam (Fig 7-O). Note:- If the unit is
out of the pond for more then 20 minutes the
biological filter action may stop working. Rinse
thoroughly in pond water (do not use tap water).
3 - The Foam Cover and Base should also be rinsed in
pond water (do not use tap water).
4 - It may also be necessary to clean out the
biomedia and stones (Fig 7-P) if these have
become clogged. If this is necessary, the biomedia
and stones should be rinsed in pond water only.
5 - Reassemble the Filter.
Quartz Tube
Follow the below procedure if your pond remains
green:
1 - Remove the bayonet locking screw (Fig 8-Q), twist
and lift the bayonet tube (Fig 8-R).
2 - Clean the Quartz Tube. Take extra care when
handling the Quartz tube. In hard water areas,
the quartz tube may become covered in limescale,
which will reduce efficiency. Clean the tube with a
soft cloth and a gentle de-scaler (such as vinegar
and water), rinse in water before refitting.
3 - Reassemble the bayonet tube and screw and
restart (Fig 8-S).
Warning! Ensure that the quartz tube is not
damaged before refitting.
Lamp Replacement
Follow the below procedure if the lamp needs
replacing or does not illuminate:
Change the lamp at the start of the new season. Even
though the lamp still glows it may not be giving out
anyuseful UV radiation. How well the EasyClear™
performs is related to the strength of the UV radiation
produced. This will slowly decline from the day your
lamp is switched on. The UVC lamp has an effective
there is a significant reduction in water clarity. Make
sure this is due to an expired lamp and not a badly
Both can greatly reduce UV transmission into the
water.
1 - Remove the bayonet locking screw (Fig 8-Q), twist
and lift the bayonet tube (Fig 8-R).
2 - Unscrew the quartz tube locking collar (Fig 9-T-i).
Gently hold the quartz tube (Fig 9-T-ii), lift up and
remove together with its o-rings (Fig 9-T-iii) and
locking collar.
3 - Remove the old lamp by gently pulling it from
its holder (Fig 9-U). Dispose of the old lamp

according to local regulations and fit the new
lamp.
4 - Slide the quartz tube down over the lamp. Ensure
that the two o-rings at the base of the quartz tube
are clean and free from debris.
5 - Slide the locking collar down over the quartz tube
the stop of the locking collar hits the stop of the
housing so that the collar cannot be screwed
down any more.
6 - Reassemble the bayonet tube and screw and
restart (Fig 8-S).
Warning! Ensure that the quartz tube is assembled
correctly so that it provides a completely watertight
seal.
Check the condition of the two o-rings on the Quartz
Tube Assembly (Fig 9-T-iii). If these are damaged in
any way or you cannot guarantee a water tight seal,
contact Hozelock Consumer Services.
Biological Filter
Normally, there is no need to remove the biomedia
as any cleaning may kill the colonies of bacteria that
make toxic waste harmless. However if the biomedia
becomes heavily clogged and does require cleaning
follow this procedure.
1 - Remove the foam.
2 - The bag of Kaldnes Biomedia (Fig 7-P) can then be
removed for cleaning.
3 - Wash in pond water.
4 - Reassemble the filter and restart.
Rotor Cleaning/Replacement
If the no water is being pumped or flow is reduced,
remove the quartz tube and lamp as described above,
then follow the below procedure.
1 - Release the Foam Cover by pushing the two
buttons (Fig 5-M) and lift the cover (Fig 6-N).
2 - Remove the foam (Fig 7-O), biomedia (Fig 7-P)
and stone bag.
3 - Turn the unit over and remove the 4 fixing screws
(Fig 10-V) and lift the base clear.
4 - Remove the 2 fixing screws (Fig 10-W) and lift the
Pump Assembly clear.
5 - Twist the Pump Chamber anticlockwise (Fig 10-X)
and lift clear. The rotor can now be pulled out
Important! Take extra care so as to not drop
any of the small components. See Fig 10A for
assembly of the rotor.
6 - Reassemble the pump and 2 off fixing screws (Fig
10-W).
7 - Reroute the cable (Fig 10-Z).
8 - Reassemble the filter, and restart.
A quick daily check should be carried out to ensure
that the pump is performing satisfactorily.
Once a week- Remove the outer casing and Fountain
Head in accordance with the general maintenance
notes.
Depending on pond water conditions, cleaning may be
required more frequently.
Once a year- Completely disassemble the unit
including the Rotor Assembly as described in the
general maintenance notes, and wash all components
in clean, freshwater.
Replace worn or broken parts.
Winter Storage
When not in use, the unit should be removed,
thoroughly washed and cleaned, dried and stored in
a dry frost protected area. Always store the unit with
the foam and foam cover off to ensure adequate
ventilation anddrying.
For product advice and spares please contact
Hozelock Cyprio Consumer Services on 0121 313 1122
or visit www.hozelock.com
Fish Stocking and Density
Under normal conditions, the EasyClear™ 3000 or
4500 will support up to 72cm of fish. Introduce fish
slowly over the first few weeks, up to 20% of the
maximum recommended level, increasing to 50% after
six months. The balance will allow for fish growth.
Hozelock Cyprio Clearwater Guarantee
WE GUARANTEE YOU CLEAR WATER OR YOUR
MONEY BACK.
NOTE: IN SOME CASES IT CAN TAKE UP TO 6-8
WEEKS FOR YOUR WATER TO BECOME CLEAR.
This guarantee runs for 12 months after purchase,
provided that
instructions.
stocking level.
enough for any problems to be put right.
A refund can only be authorised by Hozelock Cyprio
and is made only at the place of purchase to the
value of the purchase price of the EasyClear™ only.
A Proof of Purchase will be required.Please note that
the Clearwater Guarantee does not cover loss of water
clarity when blanketweed, as opposed to greenwater
algae, is the cause.

Technical Information
Part Number 1760 1762
Model 3000 4500
Volts 230V 50Hz 230V 50Hz
UVC Power (W) 5 7
Total Power (W) 25 28
Maximum Pond
size without Fish 3000 ltr (660 gal) 4500ltr (990 gal)
Maximum Pond
size with Fish 2000 ltr (440 gal) 3000 ltr (660 gal)
Max Flow,
Qmax, (lph) 1260 lph (276 gph) 1260 lph (276 gph)
Max Head,
Hmax, (m) 1m 1m
IP Rating IPX8 IPX8
Max Water
Temperature
Tmax, (°C)
35°C 35°C
* Measured under controlled conditions
Do not dispose of electrical appliances as
unsorted municipal waste, use separate
collection facilities. Contact your local
government for information regarding the
collection systems available. If electrical
appliances are disposed of in landfills or dumps,
hazardous substances can leak into the groundwater
and get into the food chain, damaging your health
and well-being. In the EU, when replacing old
appliances with new ones, the retailer is legally
obligated to take back your old appliance for disposal
at least free of charge.
If this unit, excluding the Rotor Assembly, Filter Foam
& UV Lamp becomes unserviceable within 3 years of
the date of purchase it will be repaired or replaced at
our option free of charge, unless in our opinion it has
been damaged or misused. Liability is not accepted for
damage due to accident, improper installation or use.
Liability is limited to replacement of a faulty unit. This
guarantee is not transferable. It does not affect your
statutory rights.
To obtain the benefits of the guarantee, firstly contact
Hozelock Cyprio Consumer Services who may request
that the filter is sent along with proof of purchase
directly to the address provided.
DAMAGE CAUSED BY RUNNING THE EasyClear™
OUT OF WATER OR BY FROST INVALIDATES THE
GUARANTEE.
Fault Finding
Please read the safety sections of these instructions
before carrying out any remedial action on the
EasyClearTM! It may also be necessary to refer to the
maintenance section of these instructions.
LOW FLOW FROM PUMP
a - The foams may be blocked and require cleaning
b - Ensure the outer cage is clean.
c - Clear any blockages and adjust the flow controls.
d - Check white flap inside pump chamber moves
freely.
e - Ensure rotor is clean and moves freely.
POOR FOUNTAIN DISPLAY
a - As above
b - Clean the Fountain Head.
UV LAMP NOT WORKING
a - Check power supply is on.
b - Check fuse, RCD and wiring.
c - Replace the lamp.
d - The Overload Protection may have operated – see
Overload Protection section.
PUMP NOT WORKING
a - Check power supply is on.
b - Check fuse, RCD and wiring.
c- Check the rotor is not blocked.
d - The Overload Protection may have operated – see
Overload Protection section.
e - Ensure the outer cage is clean.
f – Check for water ingress in lamp area.

F
Merci d’avoir choisi un produit de qualité Hozelock,
vous pouvez être certain que ce produit assurera de
nombreuses années de service fiable..
MODE D’EMPLOI POUR
L’INSTALLATION ET LE
FONCTIONNEMENT
LISEZ CES INSTRUCTIONS
ATTENTIVEMENT AVANT
D’ENTREPRENDRE L’INSTALLATION.
NE PAS SUIVRE CETTE NOTICE PEUT ENTRAINER
DES BLESSURES, L’ENDOMMAGEMENT DE
L’APPAREIL OU LA PERTE DE POISSONS.
CONSERVER CES INSTRUCTIONS POUR RÉFÉRENCE
ULTÉRIEURE.
La pompe de fontaine ou de cascade Hozelock Cyprio
EasyClear™ est submersible et donc conçue pour être
utilisée immergée dans des bassins extérieurs.
Attention : Avertissement concernant
les rayons UV
L’appareil contient un émetteur UVC. Une utilisation
inadaptée de l’appareil ou un endommagement du
boîtier pourrait provoquer la fuite de rayons UVC
dangereux. L’exposition aux rayons UVC peut, même
en petites doses, causer des brûlures des yeux et de
la peau. La lampe est munie d’un disjoncteur qui
l’éteindra si la vis à baïonnette est retirée (Fig 8-S).
On peut vérifier si la lampe fonctionne en repérant
un reflet bleuté à la sortie de la fontaine (Fig 1-A).
Veuillez noter que ceci ne sera visible que lorsque la
lumière ambiante est faible. Ne faites pas fonctionner
l’appareil à sec.
Avertissement : N’essayez pas de faire fonctionner
l’émetteur UVC lorsqu’il est en dehors du boîtier de
l’appareil.
Avertissement : L’appareil doit être déconnecté de
l’alimentation électrique avant d’enlever l’émetteur
UVC.
Important
Cet appareil doit être uniquement utilisé par ou sous
la surveillance d’un adulte responsable qui est capable
de l’utiliser en toute sécurité et qui comprend les
dangers possibles. Utilisez et rangez cet appareil hors
de la portée des enfants et des personnes présentant
des capacités physiques, sensorielles ou mentales
réduites.
Avertissement : Sécurité et raccorde-
ments électriques
1.1 AVERTISSEMENT : IL EST IMPÉRATIF DE
DÉBRANCHER OU DE DÉCONNECTER DE
LA SOURCE D’ÉLECTRICITÉ TOUS LES
ÉQUIPEMENTS QUI SE TROUVENT DANS
LE BASSIN AVANT DE METTRE VOS MAINS
DANS L’EAU PENDANT QUE VOUS INSTALLEZ,
RÉPAREZ, ENTRETENEZ OU MANIPULEZ CES
ÉQUIPEMENTS DE QUELQUE MANIÈRE QUE
CE SOIT.
1.2 Cet appareil a été conçu pour un usage en
bassin de jardin uniquement. N’utilisez pas ce
filtre pour tout autre usage (par exemple, ne
l’utilisez pas dans une piscine, etc.). Toute autre
utilisation de ce produit pourrait entraîner des
blessures ou endommager l’appareil. Cette
pompe ne doit pas être utilisée lorsqu’il y a des
gens dans l’eau.
1.3 Un appareil endommagé ne doit pas être mis en
marche.
1.4 Le tube transparent à l’intérieur de l’unité est
en verre de quartz et nécessite une attention
particulière lors de l’installation et de l’entretien.
Nous vous recommandons d’utiliser les lunettes
et gants de protection qui conviennent.
1.5 Ne faites pas fonctionner l’unité sans qu’elle soit
dans sa cage extérieure. L’utilisation de l’unité
sans la cage extérieure pourrait annuler votre
garantie.
1.6 Important :
Ce produit est fourni avec un câble électrique
à 3 fils d’une longueur de 10 mètres. La prise
fournie avec cet appareil n’est pas étanche et
doit être connectée à l’alimentation secteur
dans un boîtier sec et étanche conformément à
la réglementation locale.
Les installations permanentes sur l’alimentation
secteur doivent être conformes aux
réglementations locales et nationales en
matière de câblage. En cas de doute concernant
le câblage au secteur, contactez un électricien
qualifié ou le fournisseur d’électricité local.
1.7 Si une rallonge est nécessaire, elle doit être
raccordée à la fin du câble de l’unité à l’aide d’un
connecteur étanche. Le joint doit être placé dans
un boîtier étanche adapté. La rallonge doit être
un câble à 3 fils avec une section de 0,7 5mm2
et doté d’une gaine isolante en caoutchouc
polychloroprène (réf. HO5 RN-F) raccordé en
permanence à l’alimentation secteur comme
indiqué ci-dessus au point 1.6.
1.8 AVERTISSEMENT : Cet appareil DOIT être
branché à la terre et il est indispensable que les
branchements soient faits en utilisant les codes
suivants :

contacter le Service d’Assistance du Service Client
d’Hozelock au +44 (0)121 313 1122.
Rappelez-vous : La lampe est munie d’un disjoncteur
qui l’éteindra si la vis à baïonnette est retirée (Fig
8-S), donc on peut vérifier si la lampe fonctionne en
repérant un reflet bleuté à la sortie de la fontaine
(Fig 1-A) lorsque le tube à baïonnette est enclenché.
Veuillez noter que ceci ne sera visible que lorsque la
lumière ambiante est faible.
NOTE : VOUS DEVEZ FERMER L’ALIMENTATION
SECTEUR POUR PERMETTRE À L’UNITÉ DE
SE RÉINITIALISER AVANT QUE L’UNITÉ SE
RÉINITIALISE.
AVERTISSEMENT : Pour éviter tout danger pour la
sécurité dû à la réinitialisation par inadvertance de
la protection de surcharge thermique, ce produit ne
doit pas être utilisé avec un interrupteur externe,
comme un minuteur, ou raccordé à un circuit qui est
régulièrement allumé et éteint par l’alimentation
électrique.
Périodes de fonctionnement
devrait fonctionner toute l’année, et au minimum
pendant toute la saison où les poissons sont nourris
(c.-à-d. jusqu’à ce que la température descende en
dessous de 10°C et que les poissons arrêtent de
se nourrir). En hiver, le fonctionnement de l’unité
maintiendra un niveau de base de bactéries utiles
dans le filtre biologique et cela aidera à empêcher
que l’eau de surface du bassin ne gèle. Cependant,
l’unité ne doit pas geler. Si vous fermez l’unité pour
l’hiver, lavez-la soigneusement avant de recommencer
la filtration de l’eau du bassin, au printemps (Voir
« Rangement hivernal »). Ne nourrissez jamais vos
poissons lorsque l’unité n’est pas utilisée.
Avant la première utilisation
La manipulation inappropriée de ce produit pendant
le transport peut endommager le tube quartz.
Veuillez inspecter le tube quartz et vérifier qu’il est
complètement étanche avant l’installation.
Voir la section « Entretien » pour avoir des détails sur
la façon d’accéder au tube quartz et à la lampe.
Installation
Position – Construisez une plate-forme solide et à
niveau, sur laquelle sera placé l’EasyClear™. La plate-
forme doit se trouver à plus de 300 mm en dessous le
niveau de l’eau. Pour des profondeurs qui se situent
entre 300 mm et 600 mm, utilisez les segments
d’extension de la tige de la fontaine (Fig 1-F), qui se
vissent ensemble, ceci afin que la fontaine se trouve
au-dessus du niveau de l’eau. Pour l’installation
l’EasyClear pour une cascade, l’unité doit être
1.9 Les câbles exposés doivent être positionnés et
protégés dans des conduits blindés, notamment
lorsqu’ils peuvent entrer en contact avec du
matériel de jardinage (tondeuses, fourches, etc.),
des enfants ou des animaux.
1.10 Ne mettez jamais en marche l’appareil si le
câble d’alimentation est endommagé. Le câble
électrique est connecté en permanence et scellé
sur la pompe ; il ne peut pas être remplacé. Si le
câble est endommagé, la pompe doit être jetée
conformément à la réglementation locale.
1.11 Un disjoncteur de courant résiduel (RCD)
de 30 mA maximum DOIT être monté sur
l’alimentation secteur.
1.12 Les installations permanentes sur l’alimentation
secteur doivent être conformes aux
réglementations locales et nationales en
matière de câblage. En cas de doute concernant
le câblage au secteur, contactez un électricien
qualifié ou le fournisseur d’électricité local.
1.13 Ne soulevez jamais l’unité par son câble
d’alimentation, cela pourrait l’endommager.
Nous vous recommandons, quand le filtre est
installé dans une eau profonde, d’attacher une
corde au crochet sur la base. (Fig 1-H). Si le filtre
doit être déplacé, l’appareil doit d’abord être
éteint et soulevé hors de l’eau avant d’utiliser la
corde.
1.14 N’allumez pas la pompe hors de l’eau ! Le niveau
de l’eau doit être au-dessus de l’indicateur UVC
au joint à rotule (Fig 4A-L).
1.15 Ne pas faire fonctionner ou laisser l’unité dehors
lorsqu’il gèle. (Voir la section « Rangement
hivernal »).
1.16 Ce produit n’est pas adapté à une température
d’eau supérieure à 35°C ou inférieure à 0°C.
1.17 N’utilisez que des accessoires conçus pour cet
appareil. L’utilisation de tout autre accessoire ou
pièce détachée pourrait annuler votre garantie.
Protection de surcharge
Pour assurer une longue vie à votre EasyClear et pour
éviter de l’endommager, il est équipé d’une Protection
de surcharge thermique automatique. Celle-ci fermera
la pompe ou la lampe UV en cas de surchauffe. Si cela
se produit, éteignez l’alimentation secteur à l’unité. Si
c’est la pompe qui a activé la protection de surcharge,
vérifiez-en la cause (ce sont généralement des débris
qui bloquent l’entrée de la pompe ou obstruent la
roue). Retirez le blocage et attendez 15 minutes pour
que l’unité se refroidisse et ensuite rallumez-la.
Si c’est la lampe UV qui a activé la protection de
surcharge (la pompe fonctionne toujours mais
la lampe UV s’éteint continuellement après avoir
fonctionné pendant une courte durée), veuillez
complètement immergée.
Connexion – Posez l’unité à côté du bassin et
acheminez le câble jusqu’à l’alimentation secteur.
Assurez-vous d’avoir assez de câble pour positionner le
produit à l’endroit désiré dans le bassin.
L’assemblage des accessoires
La fontaine cloche (Fig 1).
Placez le support de la cloche (B) sur le corps principal
de la cloche (C) et enfoncez-le complètement.
Positionnez la cloche (D) sur l’assemblage du corps et
enfoncez sur la partie centrale.
L’assemblage du jeu de fontaine à 2 et 3 niveaux
(Fig 1-I).
Les disques en plastique (Fig 1-E) qui créent les jeux
de fontaine de 2 et 3 niveaux s’enclenchent facilement
dans la tige de la fontaine. Enfoncez la tige de la
fontaine dans le segment d’extension de la fontaine et
vissez sur la sortie de la fontaine (Fig 1-A).
Utilisation de la fontaine
(Fig 4-A comme guide général d’installation)
Veuillez noter : le produit est équipé d’un bypass
pour la commande de débit de l’eau. Une quantité
d’eau sortira donc toujours du produit juste en
dessous de la commande de débit. Ceci est normal
pendant le fonctionnement.
Positionnez l’unité dans le bassin. L’angle de la
fontaine peut être réglé de manière à être vertical en
utilisant le joint à rotule (Fig 2-A).
Le resserrement du joint à rotule peut être ajusté (Fig
2-J).
Si nécessaire, la tête de fontaine de 2 niveaux peut
être utilisée pour obtenir des jeux d’eau différents et
plus hauts que le 3 niveaux.
La hauteur de la fontaine peut être réglée pour
répondre à vos besoins en faisant tourner l’ajusteur de
débit de la fontaine (Fig 3-K).
La fontaine cloche crée un jet d’eau décoratif en forme
de cloche. La taille de la cloche peut être réglée pour
répondre à vos besoins en tournant l’ajusteur de débit
de fontaine (Fig 3-K).
Utilisation de la cascade seule
(Fig 4-B comme guide général d’installation)
Placez la pompe comme décrit ci-dessus.
Fixez une longueur appropriée (3 m maximum)
d’un tuyau de 25 mm à la queue de tuyau de la
cascade (Fig 1-G) et fixez avec une attache de tuyau
appropriée dans la position voulue.
Vissez la queue de tuyau de la cascade à la sortie de la
fontaine de l’EasyClear™ (Fig 1-A) et réglez le débit au
moyen de l’ajusteur de débit de la fontaine (Fig 3-K),
selon vos besoins.
Note : la hauteur maximum recommandée de la
cascade, au-dessus du niveau du bassin est de 0,5 m
(Fig 4-B).
Fonctionnement de l’UVC
L’UVC se met en marche automatiquement lorsque
l’unité est connectée à l’alimentation secteur si le tube
à baïonnette est correctement enclenché.
On peut vérifier si la lampe UVC fonctionne, en
repérant un reflet bleuté à la sortie du joint à rotule
(Fig 1-A). Veuillez noter que ceci ne sera visible que
lorsque la lumière ambiante est faible.
Pour remplacer la lampe, consultez la section
Entretien.
Entretien
Le Hozelock Cyprio EasyClear™ a été conçu pour
permettre un entretien rapide et facile. Comme pour
tous les équipements de bassin, il devient parfois
nécessaire d’en nettoyer ou d’en remplacer des pièces.
AVERTISSEMENT : Débranchez cet appareil et
référez-vous à la section Sécurité et raccordements
électriques avant d’entreprendre tout entretien.
Tête de fontaine (Fig 1-I)
Suivez la procédure ci-dessous en cas de blocage de la
tête de fontaine :
1 - À l’aide d’une pièce de monnaie ou d’un objet
similaire et par un mouvement de levier, dégagez
la tête de la fontaine.
2 - Rincez dans de l’eau propre et réassemblez.
Mousse
En cas de ralentissement du débit suivez la procédure
ci-dessous :
1 - Ouvrez le couvercle de la mousse en appuyant sur
les deux boutons (Fig 5-M) et soulevez le couvercle
(Fig 6-N).
2 - Retirez la mousse (Fig 7-O). Note : si l’unité est
sortie du bassin pendant plus de 20 minutes,
l’action du filtre biologique risque de s’arrêter de
fonctionner. Rincez abondamment dans l’eau du
bassin (n’utilisez pas l’eau du robinet).
3 - Le couvercle de la mousse et la base doivent aussi
être rincés dans l’eau du bassin (n’utilisez pas l’eau
du robinet).
4 - Il peut être nécessaire de nettoyer le biomédia et
les cailloux (Fig 7-P) si ceux-ci sont encrassés. Si
nécessaire, le biomédia et les cailloux doivent être
rincés dans l’eau du bassin uniquement.
5 - Réassemblez le filtre.
Tube quartz
Suivez la procédure ci-dessous si l’eau de votre bassin
reste verte :

du tube quartz (Fig 9-T-iii). S’ils sont, si peu soit-il,
endommagés, ou que vous ne pouvez pas être assuré
de leur totale étanchéité, veuillez contacter le Service
Client d’Hozelock.
Filtre biologique
En temps normal, il n’est pas nécessaire de retirer le
biomédia, le nettoyage pourrait tuer les colonies de
bactéries qui rendent les débris toxiques inoffensifs.
Toutefois, si le biomédia est très encrassé et qu’il faut
le nettoyer, suivez la procédure ci-dessous.
1 – Retirez la mousse.
2 – Le sac de Kaldnes Biomedia (Fig 7-P) peut être
retiré pour être nettoyé.
3 – Lavez dans l’eau du bassin.
4 – Réassemblez le filtre et remettez en marche.
Nettoyage/remplacement du rotor
Si aucune eau n’est pompée ou si le débit est réduit,
enlevez le tube quartz et la lampe comme indiqué ci-
dessus, puis suivez la procédure ci-dessous.
1 – Ouvrez le couvercle de la mousse en appuyant sur
les deux boutons (Fig 5-M) et soulevez le couvercle
(Fig 6-N).
2 – Retirez la mousse (Fig 7-O), le biomédia (Fig 7-P) et
le sac de cailloux.
3 – Tournez l’unité à l’envers, retirez les 4 vis de
fixation (Fig 10-V) et dégagez la base.
4 – Retirez les 2 vis de fixation (Fig 10-W) et dégagez
l’assemblage de la pompe.
5 – Tournez la chambre de la pompe dans le sens
inverse des aiguilles d’une montre (Fig 10-X) et
dégagez-la. Le rotor peut maintenant être tiré
Important ! Prenez des précautions
supplémentaires de manière à ne laisser tomber
aucun des petits éléments. Voir Fig 10A pour
l’assemblage du rotor.
6 - Réassemblez la pompe et les 2 vis de fixation (Fig
10-W).
7 – Réacheminez le câble (Fig 10-Z).
8 – Réassemblez le filtre et remettez en marche.
L’entretien de la pompe durant l’année
Une vérification rapide quotidienne doit être faite
pour s’assurer que la pompe fonctionne correctement.
Une fois par semaine, retirez le boîtier extérieur et la
tête de la fontaine en respectant les notes d’entretien
général.
Selon les conditions de l’eau du bassin, le nettoyage
peut être plus fréquent.
Une fois par an, démontez entièrement l’unité y
compris l’assemblage du rotor comme décrit dans les
notes d’entretien général.
1 – Retirez la vis de verrouillage à baïonnette (Fig
8-Q), tournez et soulevez le tube à baïonnette (Fig
8-R).
2 – Nettoyez le tube quartz. Prenez des précautions
supplémentaires lorsque vous manipulez le tube
quartz. Dans les zones d’eau calcaire, le tube
quartz peut être couvert de calcaire, ce qui réduit
son efficacité. Nettoyez le tube avec un chiffon
doux et un produit anticalcaire doux (tel que le
vinaigre et l’eau), rincez à l’eau avant de remettre
en place le tube.
3 – Réassemblez le tube à baïonnette et remettez en
marche (Fig 8-S).
Avertissement ! Assurez-vous que le tube quartz
n’est pas endommagé avant de le remonter.
Remplacement de la lampe
Suivez la procédure ci-dessous si la lampe doit être
remplacée ou si elle ne s’allume pas :
Changez la lampe en début de saison. Même si la
lampe brille encore, elle ne donnera peut-être pas
assez de rayons UV utiles. La bonne performance de
l’EasyClear™ est subordonnée à la force des rayons
UV produits. Celle-ci va diminuer lentement à partir
du jour où elle sera allumée. La lampe UVC a une
vie utile de 12 mois. Vous devez la changer lorsque
vous constatez une importante réduction de la clarté
de l’eau. Assurez-vous que cela est bien dû à la fin
de la vie utile de la lampe et non pas à un filtre mal
calcaire. Dans ces deux cas, la transmission des rayons
UV est très réduite dans l’eau.
1 – Retirez la vis de verrouillage à baïonnette (Fig 8-Q),
tournez et soulevez le tube à baïonnette (Fig 8-R).
2 – Dévissez le collier de serrage du tube quartz (Fig
9-T-i). Tenez délicatement le tube de quartz (Fig
9-T-ii), soulevez-le et enlevez-le avec ses joints
toriques (Fig 9-T-iii) et son collier de serrage.
3 – Enlevez l’ancienne lampe en la retirant doucement
de son support (Fig 9-U). Jetez la vieille lampe
conformément aux réglementations locales et
installez la nouvelle lampe.
4 – Glissez le tube quartz par-dessus la lampe. Assurez-
vous que les deux joints toriques à la base du tube
quartz sont propres et exempts de débris.
5 – Glissez le collier de serrage sur le tube quartz et
vissez-le. Vous devez visser le collier de serrage
jusqu’à ce qu’il touche le boîtier et que vous ne
puissiez plus le visser.
6 – Réassemblez le tube à baïonnette et remettez en
marche (Fig 8-S).
Avertissement ! Assurez-vous que le tube quartz est
assemblé correctement de manière à ce qu’il soit
complètement étanche.
Vérifiez l’état des deux joints toriques de l’assemblage

Lavez toutes les pièces à l’eau propre et froide.
Remplacez les pièces usées ou cassées.
Rangement hivernal
Lorsqu’elle n’est pas utilisée, l’unité doit être retirée
du bassin, entièrement lavée, nettoyée et séchée, et
rangée dans un endroit sec à l’abri du gel. Entreposez
toujours l’unité après avoir retiré la mousse et le
couvercle de mousse pour assurer une ventilation et
un séchage adéquats.
Pour des conseils et des pièces détachées, veuillez
contacter le Service Client d’Hozelock Cyprio au 0121
313 1122 ou visiter le site www.hozelock.com
Niveau de stock et densité de poissons
Dans des conditions normales l’EasyClear™ 3000 ou
4500 peut supporter un niveau de 72 cm de poissons.
Introduisez les poissons lentement au cours des
premières semaines, jusqu’à 20 % du niveau maximum
recommandé, augmentez à 50 % après six mois. La
différence permettra aux poissons de se développer.
La garantie Eau claire d’Hozelock Cyprio
NOUS VOUS GARANTISSONS UNE EAU CLAIRE OU
NOUS VOUS RENDONS VOTRE ARGENT.
NOTE : DANS CERTAINS CAS, IL FAUT PARFOIS
JUSQU’À 6 À 8 SEMAINES POUR QUE L’EAU SOIT
LIMPIDE.
Cette garantie est de 12 mois à partir de la date de
l’achat, à condition que :
de fonctionnement.
niveau de stock de poissons qui conviennent.
téléphonique (0121 313 1122) suffisamment à
temps pour pouvoir résoudre les problèmes.
Seule la société Hozelock Cyprio est habilitée à
autoriser un remboursement, et celui-ci ne pourra
être effectué que sur le lieu d’achat et à la valeur du
prix d’achat de l’EasyClear™ uniquement. Une preuve
d’achat devra être produite. Veuillez noter que la
Garantie Eau claire couvre la perte de clarté de l’eau
due aux algues causant l’eau verte, mais ne couvre pas
la perte de clarté due aux algues filamenteuses.
Garantie de produit de 3 ans
Si cette unité, à l’exclusion de l’assemblage du rotor,
de la mousse du filtre et de la lampe UV devient
inutilisable dans les trois ans à partir de la date de
l’achat, elle sera réparée ou remplacée selon notre
décision, sans frais, à moins qu’à notre avis, elle ait été
endommagée ou mal utilisée. Aucune responsabilité
n’est acceptée pour les dommages dus à un accident,
une mauvaise installation ou une mauvaise utilisation.
La responsabilité se limite au remplacement de l’unité
défectueuse. Cette garantie est non cessible. Elle
n’affecte pas vos droits légaux.
Pour obtenir les avantages de la garantie, veuillez en
premier lieu contacter le Service Client d’Hozelock
Cyprio qui pourra preuve d’achat directement à
l’adresse fournie.
LES DOMMAGES CAUSÉS PAR LE FONCTIONNEMENT
DE L’EasyClear™ HORS DE L’EAU OU PAR LE GEL
RENDENT LA GARANTIE NON VALIDE.
Dépistage des pannes
Veuillez lire les sections sur la sécurité dans ces
instructions, avant de procéder à toute réparation sur
l’EasyClearTM ! Il sera peut-être aussi nécessaire de se
référer à la section Entretien dans ces instructions.
FAIBLE DÉBIT DE LA POMPE
a – Les mousses peuvent être bloquées et il est
nécessaire de les nettoyer.
b – Assurez-vous que la cage extérieure est propre.
c – Dégagez tous les blocages et ajustez la commande
de débit de l’eau.
d – Vérifiez que le clapet blanc à l’intérieur de la
pompe remue sans gêne.
e – Assurez-vous que le rotor est propre et son
mouvement n’est pas gêné.
MAUVAIS JET D’EAU DE LA FONTAINE
a – Comme ci-dessus.
b – Nettoyez la tête de la fontaine.
LA LAMPE UV NE FONCTIONNE PAS
a – Vérifiez que l’alimentation secteur est allumée.
b – Vérifiez le fusible, le dispositif de courant résiduel
et le câblage électrique.
c – Remplacez la lampe.
d – La protection de surcharge fonctionne peut-être –
voir la section Protection de surcharge.
LA POMPE NE FONCTIONNE PAS
a – Vérifiez que l’alimentation secteur est allumée.
b – Vérifiez le fusible, le dispositif de courant résiduel
et le câblage électrique.
c – Vérifiez que le rotor n’est pas bloqué.
d – La protection de surcharge fonctionne peut-être –
voir la section Protection de surcharge.
e – Assurez-vous que la cage extérieure est propre.
f – Vérifiez que l’eau ne pénètre pas dans la partie où
se trouve la lampe.

D
Vielen Dank, dass Sie sich für ein Qualitätsprodukt von
Hozelock entschieden haben, welches Ihnen für viele
Jahre einen zuverlässigen Dienst erweisen wird.
INSTALLATIONS UND GEBRAUCHSAN
WEISUNGEN
LESEN SIE DIESE ANWEISUNGEN
SORGFÄLTIG DURCH, BEVOR SIE MIT DER
INSTALLATION BEGINNEN.
EINE NICHTBEACHTUNG DER FOLGENDEN
HINWEISE KANN ZU VERLETZUNGEN,
PRODUKTSCHÄDEN UND ZUM VERLUST VON
FISCHEN FÜHREN.
BEWAHREN SIE DIESE GEBRAUCHSANLEITUNG
ZUR SPÄTEREN BEZUGNAHME AUF.
Diese Hozelock Cyprio Easyclear™ Springbrunnen-
oder Wasserfallpumpe wurde für den Taucheinsatz
in Außenteichen konzipiert. Es handelt sich um
ein integriertes Gerät, das mechanische und
biologische Filtration mit einem UV-Reiniger für einen
Springbrunnen oder Wasserfall bietet.
Vorsicht: UV-Strahlung
Dieses Gerät enthält einen UV-C-Strahler. Durch
unbeabsichtigte Verwendung des Geräts oder eine
Beschädigung des Gehäuses kann gefährliche UV-
C-Strahlung austreten. UV-C-Strahlung kann auch in
geringer Menge die Augen und die Haut schädigen.
Die UV-Lampe ist mit einer Verriegelung ausgestattet,
welche bei Demontage des Bajonetts die Lampe
ausschaltet (Abb. 8-S).
In eingeschaltetem Zustand kann die Funktion der UV-
Lampe im Dunkeln anhand des bläulichen Lichtscheins
aus dem Springbrunnenauslass geprüft werden (Abb.
1-A). Lassen Sie das Gerät nicht trocken laufen.
Achtung: Versuchen Sie nicht, den UV-C-Strahler
anderweitig zu benutzen, wenn Sie ihn aus dem
Gerätegehäuse genommen haben.
Achtung: Das Gerät muss vor dem Austausch des
UV-C-Strahlers von der Stromversorgung getrennt
werden.
Wichtig!
Dieses Gerät darf nur durch oder unter Aufsicht
eines verantwortlichen Erwachsenen verwendet
werden, welcher in der Lage ist, das Gerät sicher zu
verwenden und der die damit verbundenen Gefahren
versteht. Verwenden und lagern Sie dieses Gerät
außerhalb der Reichweite von Kindern und Personen
mit eingeschränkten physischen, sensorischen oder
geistigen Fähigkeiten.
Informations techniques
Numéro de
pièce 1760 1762
Modèle 3000 4500
Volts 230 V 50 Hz 230V 50Hz
Puissance UVC
(W) 5 7
Puissance totale
(W) 25 28
Taille maximum
du bassin sans
poissons
3 000 l 4 500 l
Taille maximum
du bassin avec
poissons
2 000 l 3 000 l
Débit maximum,
1 260 lph 1 260 lph
Hauteur
maximum de la
tête, Hmax (m)
1 m 1 m
Classification IP IPX8 IPX8
Temperature
maximum de
l'eau, Tmax (°C)
35°C 35°C
*Mesures obtenues dans des conditions spécifiques
Ne jetez pas les appareils électriques dans les
déchets municipaux non triés, utilisez des
installations de collecte séparées. Contactez
votre collectivité locale pour davantage
d’informations sur les possibilités de collecte
disponibles. Si des appareils électriques sont jetés
dans une décharge, des substances dangereuses
peuvent se répandre dans le sol et terminer dans la
chaîne alimentaire, ce qui est dangereux pour votre
santé et votre bien-être. En Europe, lorsque vous
remplacez les anciens appareils par de nouveaux, le
distributeur est légalement obligé de reprendre votre
ancien appareil à mettre au rebut, et ce gratuitement.

Achtung: Sicherheit und elektrische
Anschlüsse
1.1 ACHTUNG: WÄHREND DER HANDHABUNG,
INSTALLATION, REPARATUR ODER
WARTUNG DER AUSRÜSTUNG MÜSSEN
IMMER ALLE GERÄTE IM TEICH VON DER
STROMVERSORGUNG GETRENNT SEIN,
BEVOR SIE IHRE HÄNDE INS WASSER
TAUCHEN.
1.2 Dieser Teichfilter ist ausschließlich für den
Gebrauch mit Gartenteichen vorgesehen.
Benutzen Sie den Filter zu keinem sonstigen
Zweck (d. h. er darf beispielsweise nicht für
Swimmingpools verwendet werden). Wenn
Sie das Produkt für andere Anwendungen
gebrauchen, können dadurch Verletzungen und
Produktschäden entstehen. Diese Pumpe darf
nicht verwendet werden, wenn sich Personen im
Wasser befinden.
1.3 Geräte, die offensichtlich beschädigt sind,
dürfen nicht verwendet werden.
1.4 Die durchsichtige Röhre innerhalb des
Geräts besteht aus Quarzglas, sodass bei der
Installation und Wartung Vorsicht geboten ist.
Wir empfehlen Ihnen, einen Augenschutz und
geeignete Handschuhe zu tragen.
1.5 Entfernen Sie nicht die Pumpeneinheit aus
ihrem Gehäuse und betreiben Sie sie nicht
ohne Gehäuse. Die Verwendung der Einheit
ohne Gehäuse kann zu einem Verlust Ihrer
Garantieansprüche führen.
1.6 Wichtig!
Dieses Produkt wird mit 10 m 3-adrigem
Elektrokabel geliefert. Da der mit diesem
Produkt mitgelieferte Stecker nicht wasserdicht
ist, muss sein Anschluss am Stromnetz gemäß
Ihren lokalen Vorschriften innerhalb eines
trockenen und wetterfesten Gehäuses erfolgen.
Permanente Installationen am Stromnetz
(Festverdrahtungen) müssen die nationalen und
regionalen Verdrahtungsvorschriften einhalten.
Wenden Sie sich an einen qualifizierten Elektriker
oder an die lokalen Stadtwerke, wenn Sie beim
Anschluss ans Stromnetz Zweifel haben.
1.7 Wenn ein Verlängerungskabel erforderlich ist,
muss dieses mit einem witterungsbeständigen
Stecker an das Gerätekabel angeschlossen
werden. Die Kupplung muss in einem geeigneten
witterungsbeständigen Gehäuse untergebracht
werden. Das Verlängerungskabel muss als
3-adriges Kabel mit je 0,75 mm2Querschnitt
und Chloropren-Kautschuk-Isolierung (Ref. HO5
RN-F) ausgeführt sein und wie in Punkt 1.6
beschrieben fest mit dem Stromnetz verdrahtet
sein.
1.8 ACHTUNG: Dieses Gerät MUSS geerdet werden,
und es ist überaus wichtig, die Anschlüsse
gemäß folgender Legende zu machen:
1.9 Freiliegende Kabelführungen sollten
insbesondere dann vernünftig platziert und
durch ein Panzerrohr geschützt werden, wenn
die Gefahr besteht, dass die Führungen mit
Gartengeräten wie Gabeln und Rasenmähern
oder Kindern und Haustieren in Kontakt kommen
können.
1.10 Das Gerät darf nicht verwendet werden,
wenn das Netzkabel auf irgendeine Weise
beschädigt wurde. Die Anschlussleitung ist fest
mit der Pumpe verbunden und abgedichtet
und kann nicht ersetzt werden. Wenn das Kabel
beschädigt ist, muss das Gerät gemäß den
örtlichen Bestimmungen entsorgt werden.
1.11 Am Stromnetz muss ein
Fehlerstromschutzschalter (RCD; für maximal 30
mA) angeschlossen sein.
1.12 Permanente Installationen am Stromnetz
(Festverdrahtungen) müssen die nationalen und
regionalen Verdrahtungsregelungen einhalten.
Wenden Sie sich an einen qualifizierten Elektriker
oder an die lokalen Stadtwerke, wenn Sie beim
Anschluss ans Stromnetz Zweifel haben.
1.13 Verwenden Sie das Netzkabel nicht, um das
Gerät anzuheben, da dies zu Schäden führen
kann. Wir empfehlen bei einer Montage des
Filters in tiefem Wasser ein Hebeseil am
Haken des Sockels anzubringen. (Abb. 1-H).
Wenn das Gerät bewegt werden muss, sollte
es ausgeschaltet und mit diesem Seil aus dem
Wasser gehoben werden.
1.14 Schalten Sie die Pumpe nicht außerhalb des
Wassers ein! Der Wasserstand sollte oberhalb
der UV-C-Anzeige am Kugelgelenk (Abb. 4A-L)
sein.
1.15 Das Gerät nicht bei Temperaturen unter 0 °C
in Betrieb nehmen oder aufbewahren. (siehe
Abschnitt „Aufbewahrung im Winter“).
1.16 Dieses Produkt eignet sich nicht für
Wassertemperaturen von über 35°C oder unter
0°C.
1.17 Benutzen Sie ausschließlich Zubehörteile, die
für den Gebrauch mit diesem Produkt ausgelegt
sind. Die Verwendung anderer Zubehör- und
Ersatzteile kann zum Verfall Ihrer Garantie
führen.
Um eine lange Lebensdauer Ihres EasyClear

Siehe Abschnitt „Wartung“ für Details zum Zugriff auf
die Quarzglasröhre und Lampe.
Installation
Position – Schaffen Sie eine festen und ebene
Plattform, auf der das Easyclear™ platziert wird.
Die Plattform sollte mehr als 300 mm (12”)
unterhalb des Wasserspiegels liegen. Verwenden
Sie für Tiefen zwischen 300 mm und 600 mm die
Verlängerungselemente des Springbrunnenschafts
(Abb. 1-F), die einfach zusammengeschraubt
werden, damit der Springbrunnenaustritt über dem
Wasserpegel ist. Für allgemeine Installationshinweise
für einen Wasserfall muss das gesamte Gerät
untergetaucht sein.
Anschluss – Stellen Sie das Gerät neben dem
Teich verlegen Sie das Kabel zur Netzversorgung.
Vergewissern Sie sich, dass das Kabel lang genug ist,
um das Gerät an der gewünschten Stelle im Teich zu
positionieren.
Zubehörmontage
Glocken-Springbrunnen (Abb. 1).
Setzen Sie den Glockenhalter (B) bis zum Anschlag in
den Glockenhauptkörper (C) ein.
Positionieren Sie den Glockeneinsatz (D) im
Hauptkörper und drücken Sie ihn in die zentrale Lage.
2- oder 3-stufige Springbrunnengruppe (Abb. 1-I).
Die Kunststoffscheiben (Abb. 1-E), die das 2- oder
3-stufige Wasserspiel schaffen, werden einfach am
Springbrunnenschaft eingerastet. Schieben Sie den
Springbrunnenschaft in das Verlängerungselement
des Springbrunnenschafts und schrauben Sie es auf
den Springbrunnenauslass (Abb. 1-A).
Ausschließlicher Springbrunnenbetrieb
(Abb. 4-A für allgemeine Installationsanleitung)
Bitte beachten Sie: Das Produkt verfügt über einen
Wasser-By-Pass zur Steuerung der Durchflussrate,
wodurch immer eine Wassermenge etwas unterhalb
der Durchflusssteuerung aus dem Produkt austritt.
Dies ist während des Betriebs normal.
Stellen Sie das Gerät in den Teich. Der
Springbrunnenwinkel kann mit der Kugelgelenk
vertikal eingestellt werden (Abb. 2-A).
Der Anzug des Kugelgelenkes kann eingestellt werden
(Abb. 2-J).
Auf Wunsch kann der 2-stufige Springbrunnenkopf
verwendet werden, um ein alternatives und höheres
Wasserspiel als mit dem 3-stufigen Kopf zu erreichen.
Die Spritzhöhe des Springbrunnens kann durch Drehen
des Springbrunnen-Durchflussreglers (Abb. 3-K) nach
Wunsch eingestellt werden.
sicherzustellen, und Schäden zu verhindern, ist es mit
ausgestattet. Diese schaltet die Pumpe oder UV-
Lampe aus, wenn eines dieser Bauteile überhitzt.
In diesem Fall müssen Sie den Strom an der
Netzversorgung des Geräts ausschalten. Wenn der
nach der Ursache suchen (normalerweise blockieren
Ablagerungen den Pumpenzulauf oder das Laufrad).
Entfernen Sie das Hindernis und warten Sie 15
Minuten, bis das Gerät abgekühlt ist. Schalten Sie sie
dann wieder ein.
aktiviert wurde (Pumpe läuft noch, aber die UV-Lampe
geht nach kurzer Laufzeit aus), kontaktieren Sie bitte
den Hozelock Kundendienst unter +44 (0) 121 313
1122.
Denken Sie an folgendes: Die UV-Lampe ist mit einer
Verriegelung ausgestattet, welche bei Demontage
des Bajonetts die Lampe ausschaltet (Abb. 8-S),
daher können nur im Dunkeln mit verriegelter
Bajonettleistung anhand des bläulichen Scheins aus
dem Springbrunnenauslass (Abb. 1-A) sehen, ob die
Lampe funktioniert.
HINWEIS: SIE MÜSSEN ZUM ZURÜCKSETZEN DES
GERÄTS DIE NETZVERSORGUNG AUSSCHALTEN.
VORSICHT: Um eine Sicherheitsgefährdung durch
ein unbeabsichtigtes Rücksetzen des thermischen
nicht mit einer externen Schaltvorrichtung verwendet
werden, wie beispielsweise einer Schaltuhr, und es
darf nicht an einem Kreis angeschlossen werden,
der regelmäßig durch die Stromversorgung ein- und
ausgeschaltet wird.
Betriebszeiträume
Lassen Sie den Filter täglich 24 Stunden laufen.
Idealerweise sollte er das ganze Jahr über oder
zumindest während der Fütterungszeit laufen (d. h. bis
die Wassertemperatur unter 10 °C fällt und die Fische
nicht mehr fressen). Im Winter ist es sinnvoll, das
Gerät laufen zu lassen, weil dadurch im Biofilter eine
Grundmenge nützlicher Bakterien verbleibt und hilft
ein Vereisen des Teichs zu verhindern. Allerdings muss
verhindert werden, dass das Gerät einfriert. Wenn Sie
das Gerät für den Winter ausschalten, müssen Sie es
gründlich waschen, bevor Sie die Filtration im Frühjahr
fortsetzen (siehe Abschnitt „Aufbewahrung im
Winter“). Füttern Sie Ihre Fische nur, wenn das Gerät
in Betrieb ist.
Vor der ersten Verwendung
Unsachgemäßer Umgang mit diesem Produkt
während des Transports kann zu Schäden an der
Quarzglasröhre führen. Kontrollieren Sie bitte die
Quarzglasröhre und Dichtung vor dem Einbau.

Die Glockendüse schafft eine dekorative
Wasserglocke. Die Größe der Glocke kann durch
Drehen des Springbrunnen-Durchflussreglers (Abb.
3-K) nach Wunsch eingestellt werden.
Ausschließlicher Wasserfallbetrieb
(Abb. 4-B für allgemeine Installationsanleitung)
Stellen Sie die Pumpe wie zuvor beschrieben auf.
Schließen Sie einen 25 mm (1”) Schlauch mit
geeigneter Länge (max. 3 m) an den Wasserfall-
Schlauchstutzen (Abb. 1-G) an, sichern Sie den
Schlauch mit einer geeigneten Schlauchklemme und
positionieren Sie das Austrittsende des Schlauches an
der gewünschten Stelle.
Schrauben Sie den Wasserfall-Schlauchstutzen auf
den Springbrunnenauslass des Easyclear™ (Abb. 1-A)
und stellen Sie den Durchfluss mit dem
Springbrunnen-Durchflussregler (Abb. 3-K) nach
Wunsch ein.
Hinweis: Die maximale empfohlene Wasserfallhöhe
über dem Teichpegel beträgt 0,5 m (Abb. 4-B).
UV-C-Betrieb
Das UV-C-Licht schaltet sich automatisch ein, wenn
das Gerät an das Stromnetz angeschlossen wurde und
das Bajonettrohr korrekt verriegelt ist.
Die Funktion der UV-C-Lampe kann anhand des
bläulichen Lichtscheins aus der Kugelgelenköffnung
geprüft werden (Abb. 1-A). Bitte beachten Sie, dass
dies nur bei schlechten Lichtverhältnissen sichtbar sein
kann.
Siehe Abschnitt Wartung für den Lampenwechsel.
Wartung
Das Hozelock Cyprio Easyclear™ wurde in Hinblick auf
eine schnelle und einfache Wartung entwickelt. Wie
bei allem Teichzubehör, muss es gelegentlich gereinigt
werden, oder es müssen Teile ausgetauscht werden.
ACHTUNG: Trennen Sie das Gerät von der
Stromversorgung und lesen Sie den Abschnitt
„Sicherheit und elektrische Anschlüsse“, bevor Sie mit
Wartungsarbeiten beginnen.
Springbrunnenkopf (Abb. 1-I)
Beachten Sie das folgende Verfahren, falls der
Springbrunnenkopf blockiert ist:
1 – Stecken Sie eine Münze oder ähnliches in den
Schlitz und hebeln Sie vorsichtig den Brunnenkopf
ab.
2 – Spülen Sie den Kopf mit sauberem Wasser und
montieren Sie ihn wieder.
Schaumstoff
Beachten Sie das folgende Verfahren, falls ein
reduzierter Durchfluss festgestellt wird:
1 – Lösen Sie die Schaumstoffabdeckung durch
Drücken der beiden Tasten (Abb. 5-M) und heben
Sie die Abdeckung (Abb. 6-N) ab.
2 – Entfernen Sie den Schaumstoff (Abb. 7-O). Hinweis:
Wenn das Gerät für mehr als 20 Minuten aus
dem Teich entnommen wird, kann die biologische
Filterwirkung unterbrochen werden. Spülen Sie
ihn gründlich mit Teichwasser (verwenden Sie kein
Leitungswasser).
3 – Die Schaumstoffabdeckung und der Sockel sollten
auch mit Teichwasser gespült werden (verwenden
Sie kein Leitungswasser).
4 – Es kann auch notwendig sein, das Biomedium
und die Steine (Abb. 7-P) zu reinigen, falls diese
verstopft sind. Falls dies erforderlich ist, dürfen
das Biomedium und die Steine nur mit Teichwasser
gespült werden.
5 – Montieren Sie wieder den Filter.
Quarzglasröhre
Beachten Sie das folgende Verfahren, falls Ihr Teich
verstärkt grüne Algen bildet:
1 – Entfernen Sie die Bajonettverriegelungsschraube
(Abb. 8-Q), drehen und heben Sie das Bajonettrohr
(Abb. 8-R) an.
2 – Reinigen der Quarzglasröhre. Behandeln Sie die
Quarzglasröhre besonders vorsichtig. In Gegenden
mit hartem Wasser kann sich Kalk auf der
Quarzglasröhre ablagern, was deren Wirkungsgrad
verringert. Reinigen Sie die Röhre mit einem
weichen Tuch und einem sanften Entkalker (wie
Essig mit Wasser). Spülen Sie die Röhre vor dem
Wiedereinbau mit Wasser ab.
3 – Montieren Sie das Bajonettrohr mit der Schraube
und nehmen Sie das Gerät wieder in Betrieb (Abb.
8-S).
Achtung! Vergewissern Sie sich vor der erneuten
Montage, dass die Quarzglasröhre nicht beschädigt
ist.
Lampenwechsel
Beachten Sie das folgende Verfahren, falls die Lampe
ersetzt werden muss, oder nicht leuchtet:
Wechseln Sie die Lampe zu Beginn der neuen Saison.
Wechseln Sie sie, selbst wenn die Lampe noch
leuchtet, da sie eventuell nicht genügend nützliche
UV-Strahlung abgibt. Die Leistung des Easyclear™
hängt von der erzeugten UV-Strahlung ab. Diese
Leistung nimmt langsam ab dem ersten Tag der
Lampenverwendung ab. Die UV-C-Lampe besitzt eine
effektive Lebensdauer von 12 Monaten. Sie müssen
die Lampe wechseln, wenn es zu einer deutlichen
Wassertrübung kommt. Vergewissern Sie sich, dass
diese Trübung auf eine verschlissene Lampe und
nicht auf einen schlecht gewarteten Filter oder eine

Drücken der beiden Tasten (Abb. 5-M) und heben
Sie die Abdeckung (Abb. 6-N) ab.
2 – Entfernen Sie den Schaumstoff (Abb. 7-O), das
Biomedium (Abb. 7-P) und den Steinbeutel.
3 – Drehen Sie das Gerät um, entfernen Sie die 4
Befestigungsschrauben (Abb. 10-V) und heben Sie
den Sockel ab.
4 – Entfernen Sie die 2 Befestigungsschrauben (Abb.
10-W) und heben Sie die Pumpeneinheit ab.
5 – Drehen Sie die Pumpenkammer gegen den
Uhrzeigersinn (Abb. 10-X) und heben Sie sie ab. Das
Laufrad kann nun zur
Reinigung oder Austausch herausgezogen werden
Wichtig! Achten Sie darauf, keine der kleinen
Bauteile fallen zu lassen. Siehe Abb. 10A für die
Montage des Laufrads.
6 – Montieren Sie die Pumpe mit 2 der
Befestigungsschrauben (Abb. 10-W).
7 – Verlegen Sie das Kabel (Abb. 10-Z).
8 – Montieren Sie wieder den Filter und nehmen Sie
das Gerät wieder in Betrieb.
Ganzjährliche Pumpenpflege
Eine schnelle tägliche Kontrolle sollte durchgeführt
werden, um sicherzustellen, dass die Pumpe
einwandfrei läuft.
Wöchentlich – Entfernen Sie das Außengehäuse und
den Springbrunnenkopf entsprechend der allgemeinen
Wartungshinweise.
Je nach Zustand des Teichwassers kann die Reinigung
häufiger erforderlich sein.
Jährlich – Zerlegen Sie das Gerät vollständig,
einschließlich der Laufradeinheit, wie in den
allgemeinen Wartungshinweisen beschrieben und
waschen Sie alle Bauteile in sauberem Leitungswasser.
Ersetzen Sie verschlissene oder beschädigte Teile.
Aufbewahrung im Winter
Wenn es nicht verwendet wird, sollte das Gerät
aus dem Teich entfernt, gründlich gewaschen und
gereinigt, getrocknet und an einem trockenen,
frostgeschützten Ort aufbewahrt werden. Lagern Sie
das Gerät immer mit ausgebautem Schaumstoff und
Schaumstoffabdeckung, um eine gute Durchlüftung
und Trocknung zu gewährleisten.
Bitte setzen Sie sich für Ersatzteile und
Produktberatung mit Hozelock Cyprios Kundendienst
in Verbindung (0121 313 1122), oder besuchen Sie uns
einfach auf www.hozelock.com.
Beide Fehler können die UV-Strahlung ins Wasser stark
verringern.
1 – Entfernen Sie die Bajonettverriegelungsschraube
(Abb. 8-Q), drehen und heben Sie das Bajonettrohr
(Abb. 8-R) an.
2 – Lösen Sie den Sicherungskragen der
Quarzglasröhre (Abb. 9-T-i). Halten Sie vorsichtig
die Quarzglasröhre (Abb. 9-T-ii), ziehen Sie sie nach
oben und entfernen Sie sie zusammen mit ihren
O-Ringen (Abb. 9-T-iii) und dem Sicherungskragen.
3 – Entfernen Sie die alte Lampe, indem Sie sie
vorsichtig aus ihrem Sockel (Abb. 9-U) ziehen.
Entsorgen Sie die alte Lampe gemäß den örtlichen
Bestimmungen und setzen Sie die neue Lampe ein.
4 – Schieben Sie die Quarzglasröhre nach unten und
über die Lampe. Achten Sie darauf, dass die zwei
O-Ringe am Fuß der Röhre sauber und frei von
Ablagerungen sind.
5 – Schieben Sie den Sicherungskragen nach unten
und über die Quarzglasröhre und schrauben Sie
ihn fest. Schrauben Sie den Sicherungskragen so
weit nach unten, bis der Anschlag des Kragens den
Anschlag des Gehäuses berührt, sodass der Kragen
nicht weiter fest geschraubt werden kann.
6 – Montieren Sie das Bajonettrohr mit der Schraube
und nehmen Sie das Gerät wieder in Betrieb (Abb.
8-S).
Achtung! Vergewissern Sie sich, dass die
Quarzglasröhre korrekt montiert ist, damit sie eine
vollständig wasserdichte Abdichtung gewährleistet.
Prüfen Sie den Zustand der beiden O-Ringe der
Quarzglasröhre (Abb. 9-T-iii). Wenden Sie sich, falls
diese beschädigt sind, oder Sie keine wasserdichte
Abdichtung herstellen können, an den Hozelock
Kundendienst.
Biologischer Filter
Normalerweise muss das Biomedium nicht entfernt
werden, da die Reinigung die Bakterienkolonien, die
giftige Abfälle unschädlich machen, abtöten können.
Gehen Sie wie folgt vor, falls das Biomedium jedoch
stark verstopft ist, und eine Reinigung erfordert.
1 – Entfernen Sie den Schaumstoff.
2 – Der Beutel Kaldnes Biomedium (Abb. 7-P) kann
dann zur Reinigung entfernt werden.
3 – In Teichwasser waschen.
4 – Montieren Sie wieder den Filter und nehmen Sie
das Gerät wieder in Betrieb.
Laufradreinigung/-austausch
Bauen Sie, wenn kein Wasser gepumpt wird oder der
Durchfluss reduziert ist, die Quarzglasröhre und Lampe
wie oben beschrieben aus und befolgen Sie den
nachstehenden Arbeitsablauf.
1 – Lösen Sie die Schaumstoffabdeckung durch

Fischbestand und Dichte
Unter normalen Bedingungen eignet sich das
Easyclear™ 3000 oder 4500 für Fische mit bis zu 72
cm. Setzen Sie Ihre Fische in den ersten paar Wochen
langsam ein, bis Sie maximal 20 % der empfohlenen
Höchstmenge erreicht haben, die Sie nach sechs
Monaten auf bis zu 50 % erhöhen können. Das
Gleichgewicht erlaubt ein Wachstum der Fische.
Hozelock Cyprio „Klarwasser-Garantie“
WIR GARANTIEREN IHNEN KLARES WASSER ODER
IHR GELD ZURÜCK.
HINWEIS: IN EINIGEN FÄLLEN KANN ES BIS ZU 6-8
WOCHEN DAUERN, BIS IHR WASSER KLAR WIRD.
Diese Garantie gilt unter folgenden Voraussetzungen
für 12 Monate nach Ihrem Kauf:
Betriebsanweisungen befolgt.
Dimensionierung und korrektem Füllstand.
Sie sich früh genug an unsere Informations- und
Beratungsstelle (0121 313 1122).
Die Bewilligung einer Rückerstattung ist ausschließlich
Hozelock Cyprio vorbehalten. Eine mögliche
Rückerstattung erhalten Sie nur am Kaufort, in
Höhe des Kaufpreises des EasyClear™. Ein Kaufbeleg
ist erforderlich. Bitte beachten Sie, dass unsere
Klarwasser-Garantie keinen Verlust der Wasserklarheit
deckt, wenn Fadenalgen und nicht Grünalgen die
Ursache darstellen.
3 Jahre Produktgarantie
Wenn dieses Gerät, ausschließlich Laufradeinheit,
Filterschaumstoff und UV-Lampe innerhalb von 3
Jahren
nach dem Kaufdatum nicht mehr gewartet werden
kann, werden wir es unter der Bedingung kostenlos
reparieren oder austauschen, dass es unserer Meinung
nach nicht beschädigt oder falsch verwendet wurde.
Hozelock Cyprio nicht haftbar gemacht werden.
Die Haftung beschränkt sich auf den Ersatz des
fehlerhaften Geräts. Diese Garantie ist nicht
übertragbar. Sie hat keine Auswirkungen auf Ihre
gesetzlichen Rechte.
Um die Vorteile der Garantie zu nutzen, müssen
Sie zunächst den Hozelock Cyprio Kundendienst
kontaktieren, der Sie auffordern kann, den Filter
zusammen mit dem Kaufbeleg direkt an die
angegebene Adresse zu schicken.
SCHÄDEN DURCH BETRIEB DES EasyClear™
AUSSERHALB DES WASSERS ODER DURCH FROST
FÜHREN ZUM GARANTIEVERLUST.
Fehlersuche
Lesen Sie die Sicherheitsabschnitte dieser Anleitung
durch, bevor Sie versuchen Störungen am
EasyclearTM zu beseitigen! Es kann auch notwendig
sein, den Wartungsabschnitt dieser Anleitung zu
lesen.
NIEDRIGER PUMPENDURCHFLUSS
a – Die Schaumstoffteile können verstopft sein und
eine Reinigung erfordern.
b – Vergewissern Sie sich, dass der äußere Käfig
sauber ist.
c – Beseitigen Sie alle Verstopfungen und stellen Sie
die Durchflussregelung ein.
Klappe in der Pumpenkammer.
e – Vergewissern Sie sich, dass das Laufrad sauber ist
und sich frei dreht.
SCHLECHTES SPRITZBILD
a – Wie vorstehend.
b – Reinigen Sie den Springbrunnenkopf.
UV-LAMPE FUNKTIONIERT NICHT
a – Vergewissern Sie sich, dass die Stromversorgung
eingeschaltet ist.
b – Prüfen Sie die Sicherung, den Schutzschalter und
die Verkabelung.
c – Ersetzen Sie die Lampe.
PUMPE LÄUFT NICHT
a – Vergewissern Sie sich, dass die Stromversorgung
eingeschaltet ist.
b – Prüfen Sie die Sicherung, den Schutzschalter und
die Verkabelung.
c – Prüfen Sie, dass das Laufrad nicht blockiert ist.
e – Vergewissern Sie sich, dass der äußere Käfig
sauber ist.
f – Prüfen Sie auf Wassereintritt im Lampenbereich.

BEWAAR DEZE HANDLEIDING VOOR TOEKOMSTIG
GEBRUIK.
De Hozelock Cyprio EasyClear™ Fontein-
of watervalpomp die ontworpen is voor
onderwatergebruik in buitenvijvers. Het is een
geïntegreerde unit dat mechanische & biologische
filtratie levert met een UVC-lamp en een fontein of
waterval.
Let op: UV-waarschuwing
Dit apparaat bevat een UV-C-uitstoter. Onbedoeld
gebruik van het apparaat of schade aan de behuizing
kan leiden tot het vrijkomen van gevaarlijke UV-
C-straling. UV-C-straling kan, zelfs in kleine doses,
leiden tot verwondingen aan ogen en huid. De lamp
is voorzien van een contactschakelaar die de lamp
uitschakelt als de bajonet wordt verwijderd (afb. 8-S).
Als de lamp brandt, kan deze voor gebruik worden
gecontroleerd door te kijken of er een blauwachtige
gloed op de fonteinuitloop valt (afb.1-A). Laat het
apparaat nooit droog lopen.
Waarschuwing: Probeer niet de UV-C-uitstoter
te bedienen als deze is verwijderd uit de
apparaatbehuizing.
Waarschuwing: Het apparaat moet van de
stroomvoorziening worden losgekoppeld voordat de
UV-C-uitstoter wordt vervangen.
Belangrijk
Dit apparaat mag uitsluitend worden gebruikt door of
onder toezicht van een volwassen persoon die in staat
is het apparaat op een veilige wijze te gebruiken en de
mogelijke gevaren begrijpt. Dit apparaat moet buiten
bereik van kinderen en personen met een verminderde
fysieke, motorieke en mentale bekwaamheden worden
gebruikt en opgeslagen.
Waarschuwing:
Veiligheid & Elektrische aansluitingen
1.1 WAARSCHUWING: KOPPEL ALLE
APPARATEN IN DE VIJVER LOS VAN HET
ELEKTRICITEITSNET WANNEER U UW
HANDEN IN HET WATER STEEKT OM
APPARATUUR TE INSTALLEREN, REPAREREN,
ONDERHOUDEN OF TE BEHANDELEN.
1.2 Dit filter is uitsluitend ontworpen voor gebruik
in tuinvijvers. Gebruik dit filter niet voor andere
toepassingen (zoals bijvoorbeeld een zwembad).
Gebruik van het apparaat voor andere
toepassingen kan leiden tot letsel of schade
aan het apparaat. Deze pomp mag niet worden
gebruikt als mensen in het water zijn.
1.3 Apparaten die duidelijk zijn beschadigd mogen
niet worden gebruikt.
1.4 De doorzichtige buis in het apparaat is gemaakt
Technische Informationen
Teilenummer 1760 1762
Modell 3000 4500
Volt 230 V, 50 Hz 230V 50Hz
Leistung der UV-C-
Lampe (W) 5 7
Gesamtleistung (W) 25 28
Maximale
Teichgröße ohne
Fische
3000 Liter (660
gal)
4500 Liter (990
gal)
Maximale
Teichgröße mit
Fischen
2000 Liter (440
gal)
3000 Liter (660
gal)
Max. Durchfluss,
Max. Förderhöhe,
Hmax, (m) 1 m 1 m
Schutzart IPX8 IPX8
Max.
Wassertemperatur
Tmax, (°C) 35 °C 35 °C
* Gemessen unter kontrollierten Bedingungen
Entsorgen Sie alte Elektrogeräte nicht als
unsortierten Hausmüll, sondern nutzen Sie
dafür gesonderte Sammelstellen. Wenden Sie
sich an Ihre örtliche Behörde für
Informationen über die verfügbaren
auf eine Müllkippe oder in eine Grube geworfen
werden, können gefährliche Substanzen austreten, die
dann ins Grundwasser und in die Nahrungskette
gelangen, was unsere Gesundheit und unser
Wohlbefinden beeinträchtigen würde. Wenn Sie in der
EU ein altes Elektrogerät gegen ein neues
austauschen, ist der Einzelhändler gesetzlich dazu
verpflichtet, Ihr Altgerät kostenlos zur Entsorgung
zurückzunehmen.
NL
Hartelijk dank voor het kiezen van een Hozelock
kwaliteitsproduct. U bent nu verzekerd van een
jarenlang betrouwbaar gebruik van dit product.
INSTALLATIE EN
GEBRUIKSERSHANDLEIDING
LEES ZORGVULDIG DEZE INSTRUCTIES
VOORDAT U BEGINT MET DE
INSTALLATIE.
HET NIET OPVOLGEN VAN DE INSTRUCTIES KAN
LEIDEN TOT LETSEL, BESCHADIGING VAN HET
APPARAAT OF STERVEN VAN VISSEN.
This manual suits for next models
1
Table of contents
Languages:
Other Hozelock Cyprio Pond Pump manuals

Hozelock Cyprio
Hozelock Cyprio Aquaforce Series User manual

Hozelock Cyprio
Hozelock Cyprio Cascade 5500 User manual

Hozelock Cyprio
Hozelock Cyprio Cascade 700 User manual

Hozelock Cyprio
Hozelock Cyprio Cascade 3000 User manual

Hozelock Cyprio
Hozelock Cyprio Cascade 1500 User manual

Hozelock Cyprio
Hozelock Cyprio EASYCLEAR 3000LV User manual

Hozelock Cyprio
Hozelock Cyprio EASYCLEAR 3000 User manual

Hozelock Cyprio
Hozelock Cyprio Aquaforce Series User manual

Hozelock Cyprio
Hozelock Cyprio Aquaforce Series User manual

Hozelock Cyprio
Hozelock Cyprio Cascade 4000 User manual