HP s979 User manual

s979
Car Camcorder
行車記錄器
行车记录器
User Manual
使用說明手冊
使用说明手册

s979
Car Camcorder
User Manual

1
Contents
About this Guide ...................................................................................... 2
Notes on Installation ............................................................................... 2
Regulatory notices ................................................................................... 2
C Regulatory Notice ............................................................................... 2
W Notice ............................................................................................. 2
Caution .................................................................................................... 3
1 Introduction .................................................................................... 4
1.1 Features ............................................................................................. 4
1.2 Package Contents .............................................................................. 4
1.3 Product Overview .............................................................................. 5
2. Getting Start ................................................................................... 7
2.1 Insert the Memory Card ..................................................................... 7
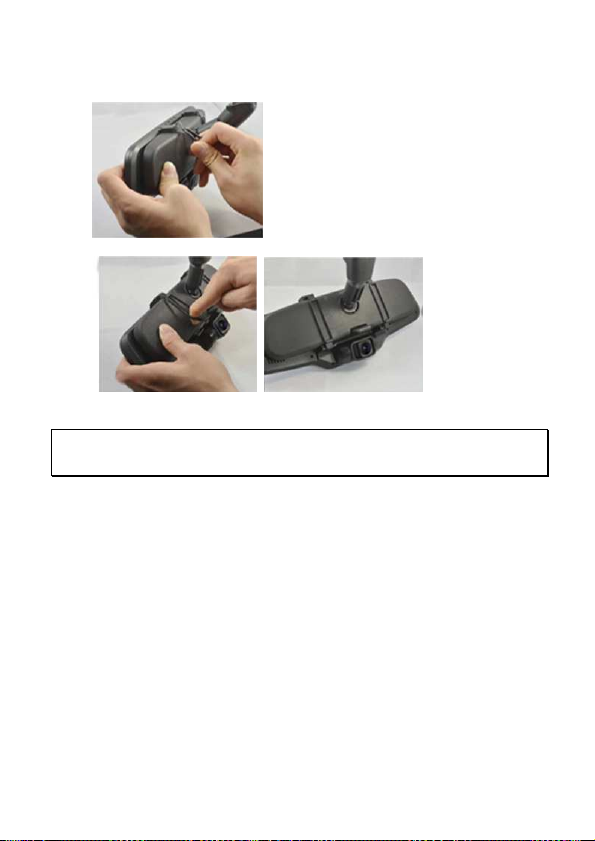
2.2 Install in Vehicles ............................................................................... 8
2.3 Connecting to Power .......................................................................... 9
2.4 Powering the Camcorder On / Off and Reset ................................... 10
2.4.1 Auto Power On/Off.................................................................. 10
2.4.2 Manual Power On/Off ............................................................. 10
2.4.3 Reset the camcorder............................................................... 10
2.5 Initial Settings ................................................................................. 11
2.5.1 Set the Date and Time
...................................................... 11
3. Using the Camcorder ...................................................................... 12
3.1 Recording Videos ............................................................................. 12
3.1.1 Auto Recording
............................................................... 12
3.1.2 Recording Screen
............................................................ 13
3.1.3 mergency Recording
...................................................... 14
3.2 GPS (Option)..................................................................................... 15
3.3 Rear Camera (Option) ...................................................................... 15
3.4 Middle Camera (Option) ................................................................... 16
3.5 File Playback .................................................................................... 16
3.6 Parking Mode ................................................................................... 17
4. Adjust the Settings ........................................................................ 18
5. Speci ications ............................................................................... 20

2
About this Guide
The content in this document is for information purpose and is subject to
change without prior notice. We made every effort to ensure that this User
Guide is accurate and complete.
However, no liability is assumed for any errors and omissions that may have
occurred.
The manufacturer reserves the right to change the technical specifications
and accessories without prior notice.
Notes on Installation
1.
Do NOT setup the camcorder while driving or while the vehicle is in
motion. Please stop at a safe place before adjusting or installing.
2.
Install the camcorder above the rear-view mirror to obtain the best
open-field view. Do NOT install the camcorder in a location that will
obstruct your required driving view.
3.
Make sure that the lens is within the wiping range of the windscreen
wiper to ensure a clear view even when it rains.
4.
Do not touch the lens with your fingers. Finger grease may be left on the
lens and will result in unclear videos or snapshots. Clean the lens on a
regular basis.
5. Use the products of the attached power charger only, please do not
use other brand power charger, in order to avoid equipment burn.
Regulatory notices
This document provides country- and region-specific non-wireless and
wireless regulatory notices and compliance information for your product.
Some of these notices may not apply to your product.
CE Regulatory Notice
The product herewith complies with the requirements of CB I C 62368-1:2014,
MC Directive 2014/30/ U and the RoHS Directive 2011/65/ U.
WEEE Notice
Disposal o Waste Electrical and Electronic Equipment and/or Battery
by users in private households in the European Union
This symbol on the product or on the packaging indicates
that this cannot be disposed of as a household waste. You
must dispose of your waste equipment and/or battery by
handling it over to the applicable take-back scheme for the
recycling of electrical and electronic equipment and/or
battery. For more information about recycling of this

3
equipment and/or battery, please contact your city office,
the shop where you purchased the equipment or your
household waste disposal service. The recycling of
materials will help to conserve natural resources and ensure
that it is recycled in a manner that protects human health
and environment.
Caution
Never disassemble or attempt repair of this product. Doing so may
damage the camcorder, cause electric shock and void your product
warranty.
Due to local laws and vehicles safety considerations, do not manually
operate the camcorder while driving.
Set up time and date accurately before you use this camcorder.
The firmware function in the camcorder is for reference only,
drivers are advised to exercise discretion based on actual road
conditions.
The values displayed in this system, such as speed, position, and the
distance warning to the speed camera set points, may be inaccurate
due to the influence of surrounding environment. They are for your
reference only.
This product is used only for non-commercial use, within the
maximum limits permitted by applicable law. We do not take any
responsibilities for the loss of use of the product.
This camcorder gets warm when in use; this is normal.
Improper use or operation of the product may result in damage of
the product or its accessories and void the warranty.
HP Inc. is NOT responsible for the loss of any data/content during
operation.
Be ore you start using the
Car Camcorder
,
it is
assumed that you agree to the above statements.

4
1Introduction
Thank you for purchasing this advanced camcorder. This camcorder is
specifically designed for real time video and audio recording when
driving.
1.1 Features
•Full HD 1920*1080
•Sony’s Starvis Sensor
•F/1.55 big aperture
•Super Capacitor
•Collision Detection
•mergency Recording File
•Parking Mode (supports timelapse)
1.2 Package Contents
The package contains the following items. If there are any missing or
damaged items, contact your dealer immediately.
Car Camcorder Rubber band Car adapter
User manual xternal GPS
(option)
Interior Camera
(option)
Rear Camera
(option)

5
1.3 Product Overview

6
No. Item
1 Rearview mirror clip
2 LCD Screen
3 CH2 port for interior camera (option)
4 GPS port for external GPS (option)
5 MicroSD memory card slot
6 USB port for car power adapter
7 CH1 port for rear camera (option)
8 Speaker
9 Lens
10
Short press: LCD on/off
Press and hold 3 seconds: manually power on/off
Press and hold 8 seconds: reset
11 Microphone

7
2. Getting Start
2.1 Insert the Memory Card
Insert the memory card with the gold contacts facing the back of the
camcorder. Push the memory card until it clicks into place. (Use class V30
or greater speed micro SD cards for this camcorder; It is recommended to
format the micro SD cards before the initial use.)
To remove the memory card
Push the edge of the memory card inward until you hear/feel it click,
then allow it to push out until you can remove it from the slot.
Note:
1. Do not remove or insert the memory card when the camcorder is powered on. This
may damage the memory card.
2. Use class V30 greater speed micro SD cards and capacity higher than 16GB for this
camcorder. Supports up to 128GB.
3. It is recommended to format the micro SD cards before the initial use.
4. Please periodically format the memory card(suggest once per month).
5. Use memory card higher than 64GB, please use the camcorder to format the
memory card before initial use.
6. Memory card has certain usage life. Long use may lower down write-in speed and
failure saving. In this case, we recommend you to purchase new memory card.

8
2.2 Install in Vehicles
1. Clip on to your original car mirror.
2. Circle the clip with the band.
3. Adjust the camcorder lens.
Note: Image shown here is for installation illustration. The outlook may differ from
what you purchased.

9
2.3 Connecting to Power
Use only the supplied car adapter to power up the camcorder.
1. Connect one end of the car adapter to the USB connector of the
camcorder. USB port input: DC 5V / 2A.
2. Plug the other end of the car adapter to the cigarette lighter socket
of your vehicle. Once the vehicle engine is started, the camcorder
automatically powers on. Car adapter input: DC 12 / 24V.
Note:
Use only the supplied car adapter. DO NOT use the other brand of car adapters;
otherwise it may cause the product mal-function or battery explosion.

10
2.4 Powering the Camcorder On / O and Reset
2.4.1 Auto Power On/O
Once the vehicle engine is started, wait a few seconds to charge the
camcorder, and then the screen will light up and camcorder
automatically powers on, and start recording.
Once the vehicle engine shuts down, the camcorder automatically saves
the recording and turns off the power.
Note:
1. Automatic power up and shut down assumes the power socket is linked to the car
ignition.
2. The camcorder uses super capacitor as power source. Please wait a few seconds to
charge the super capacitor, and then the camcorder will automatically power on and
start recording.
2.4.2 Manual Power On/O
To manually turn on/off the power, long press POWER button for
3 seconds.
2.4.3 Reset the camcorder
To reset, long press POWER button for 8 seconds.

11
2.5 Initial Settings
2.5.1 Set the Date and Time
We recommend you to set up date and time before initial use.
To set the correct date and time, do the following:
1. In the recording screen, touch the panel to wake up function bar.
2. Touch icon to enter Menu.
3. Slide the sub-menu up and down to select [date/time].
4. Touch [+][-]to change the number, and then touch [OK] to confirm
setting.
5. Touch icon to return to recording screen.

12
3. Using the Camcorder
3.1 Recording Videos
3.1.1 Auto Recording
When the vehicle engine starts up, wait a few seconds to charge the
camcorder, then it will automatically turn on and start recording.
Recording will automatically stop when the engine is switched off.
Note:
1. On some cars, the recording will continue when the engine is switched off. If this
happens, please manually turn off the cigarette lighter or remove the car adapter
from the cigarette lighter.
2. It can be configured to save a video file for every 1 minute, 2 minutes or 3 minutes
of recording.
3. The camcorder saves the recording in the memory card. If the memory card capacity
is full, the oldest file in the memory card will be overwritten.
4. The camcorder uses super capacitor as power source. Please wait a few seconds to
charge the super capacitor, and then the camcorder will automatically power on and
start recording.

13
3.1.2 Recording Screen
No
icon Item Description
1
00:10
Recording
Duration Indicates the video current duration.
2
Function
bar Menu set up and hot key.
3
Date /
Time
Indicates the current recording date
and time.
4
Menu Menu set up.
5
Playback File playback.
6
Brightness LCD brightness set up.
7
Start/Stop
Record Start/stop video recording.
8
Voice
Record Turn on/off voice recording.
9
mergency
Recording
During video recording, touch this icon
to start emergency recording and lock
the file.
10
GPS status
If install optional GPS, when GPS is
positioned, the icon will turn to blue
.

14
No
icon Item Description
11
Preview
camera
F: front camera
M: middle/interior camera(option)
R: rear camera(option)
If optional middle or rear camera is
installed, the icon will be white, touch
the icon, the preview screen will be the
camera’s view, and icon will change to
blue.
3.1.3 Emergency Recording
This Car Camcorder is equipped with a G-Force sensor. If the G-sensor
function is enabled, when collision is detected, the camcorder will
automatically trigger the mergency Recording feature. The screen will
pop up “ mergency”, and the yellow dot will blink on left top corner. The
emergency recording files will not be overwritten by the normal loop
recording files.
To manually initiate the emergency recording feature, touch icon
during the normal recording function.
The file length of emergency is as same as interval time of normal loop
recording. Once it reaches setting time, the camcorder will resume to
normal loop recording.
Note:
1. The sensitivity of G-sensor can be adjusted in the Menu. nter Menu and select
[Collision Detection] to adjust Off, Low sensitivity, Medium sensitivity, High sensitivity.
If choose Off, the camcorder will not activate auto emergency recording.
2. The emergency file is created as a new file and saved in mergency folder, which
will be protected to avoid being overwritten by normal loop recording.
3. The mergency folder will occupy 20% of available memory card capacity. When the
space is full, it will overwrite the oldest emergency files.

15
3.2 GPS (Option)
Plug the optional GPS accessory into GPS port on the camcorder, you can
preview current car speed and direction such information.
Note:
1. GPS function is limited in certain areas. Please contact dealer for details.
2. When GPS is positioned, the icon will change from white to blue .
3. If GPS function is not advertised, check that the [GPS voice alert] from Menu setting
is turned on or not.
4.
Fixed speed cam alert is in white icon, and interval speed cam alert is in yellow.
5. Speed cam audio broadcast alert is for reference only, not 100% accurate, drivers
should follow the rules of the road.
3.3 Rear Camera (Option)
Please power off the camcorder firstly, then plug the optional rear
camera into CH1 port on the camcorder. After installation, you can turn
on the main camcorder and enjoy dual channels recording.
Note:
1. Rear camera doesn’t support hot plug-n-play. Please power off the main camcorder
before plug into rear camera.
2. Touch one of three square icons on right down side of screen to switch preview
image for front or rear camera.

16
3.4 Middle Camera (Option)
Please power off the camcorder firstly, then plug the optional middle
camera into CH2 port on the camcorder. After installation, you can turn
on the main camcorder and enjoy triple channels recording.
Note:
1. Middle camera doesn’t support hot plug-n-play. Please power off the main
camcorder before plug into middle camera.
2. Touch one of three square icons on right down side of screen to switch preview
image for front or rear or middle camera.
3.5 File Playback
In the recording screen, touch the panel to wake up function bar.
Touch icon on function bar to stop recording. Touch icon to
enter Playback. Slide the screen up and down to choose desired file to
playback. Touch icon to switch front or rear or middle camera
recorded files.
In file playback screen, touch icon
/
to lock/unlock the file,
or to playback/pause the file, or to preview previous or
next file, to delete the file, to return to last level of file list.

17
Note:
1. Deleted files CANNOT be recovered. nsure the files you wish to preserve are
backup before deletion.
2. Use dual cameras or triple cameras recording, if you delete only FRONT file or R AR
file or MIDDL file, the other files will still remain existing and be able to playback, too.
3.6 Parking Mode
To monitor the vehicle when it is parked, you can activate Parking Mode.
Before activate Parking Mode, please install ACC Cable through
professional car shop.
Follow the steps below to activate Parking Mode,
1. In the recording screen, touch icon to stop recoding, and
touch icon to enter menu. Touch [Settings] sheet to enter
Settings.
2. Slide the screen to choose Parking Mode option, touch the option to
enter , and touch [On] to activate the function.
3. Touch icon to return to recording screen.
4. When car’s engine is turned off, the camcorder will enter Parking
Mode automatically and start time-lapse recording.
5. When collision is detected during parking mode, the camcorder will
automatically trigger the emergency recording. The emergency
recording will not be overwritten by the normal loop recording files.
Note:
1. ACC Cable is not included in the package. Please consult the dealer for purchase and
seek for specific professional store for installation.
2. Files recorded in Parking Mode are saved in Video folder. When the event triggered,
the files will be saved in mergency folder.

18
4. Adjust the Settings
In the recording screen, touch the panel to wake up function bar.
Touch icon on function bar to stop recording. Touch icon to
enter Menu setting.
Followings is available menu options.
Menu Description Available option
Resolution Setting of video resolution 1080P / 720P
Record Interval Set the recording duration for each
recorded video file
1 min/ 2 min/
3 min
Voice Record Setting for voice record in the video. On / Off
Parking Mode
To keep recording after engine turns off.
Once Parking Mode is activated, it will
start 1fps time-lapse recording.
*This feature needs to install ACC cable in
advance.
On/ Off
Fatigue Driving
When Fatigue
Driving is enabled, audible
alert and screen message will be
activated 1 hour after the camcorder is
powered on, with a repetition every 30
minutes.
On/ Off
Key Tone Set up sound of icon touch. On/ Off
Date/time Set up date and time
Language Set the on-screen display menu language According to ship to
area
Anti-flicker Reduce flicker on LCD 60Hz / 50Hz
LCD setting
Set LCD off time. Camcorder screen will
be off after a set time if no operation is
detected. Press any button will switch it
on. (Recording is not affected when
screen is off).
On / 1 min off / 3 min
off
Collision Detection
The camcorder will automatically trigger
emergency recording when tremor of a
collision is detected. The sensitivity level
can be adjusted.
Off / Low / Middle /
High
Table of contents
Other HP Dashcam manuals