manuals.online logo
Brands
  1. Home
  2. •
  3. Brands
  4. •
  5. HP
  6. •
  7. Network Storage Server
  8. •
  9. HP ProLiant DL585 User manual

HP ProLiant DL585 User manual

This document is for the person who installs, administers, and
troubleshoots servers and storage systems. HP assumes that you are
qualified in servicing computer equipment and trained in recognizing
hazards in products with hazardous energy levels.
© Copyright 2005 Hewlett-Packard Development Company, L.P.
Hewlett-Packard Company makes no warranty of any kind with regard to
this material, including, but not limited to, the implied warranties of merchantability
and fitness for a particular purpose. Hewlett-Packard shall not be liable for errors
contained herein or for incidental or consequential damages in connection with the
furnishing, performance, or use of this material.
This document contains proprietary information, which is protected by copyright. No
part of this document may be photocopied, reproduced, or translated into another
language without the prior written consent of Hewlett-Packard. The information
contained in this document is subject to change without notice.
Hewlett-Packard Company shall not be liable for technical or editorial errors or
omissions contained herein. The information is provided “as is” without warranty of
any kind and is subject to change without notice. The warranties for Hewlett-Packard
Company products are set forth in the express limited warranty statements accompa-
nying such products. Nothing herein should be construed as constituting an
additional warranty.
Printed in the U.S.A.
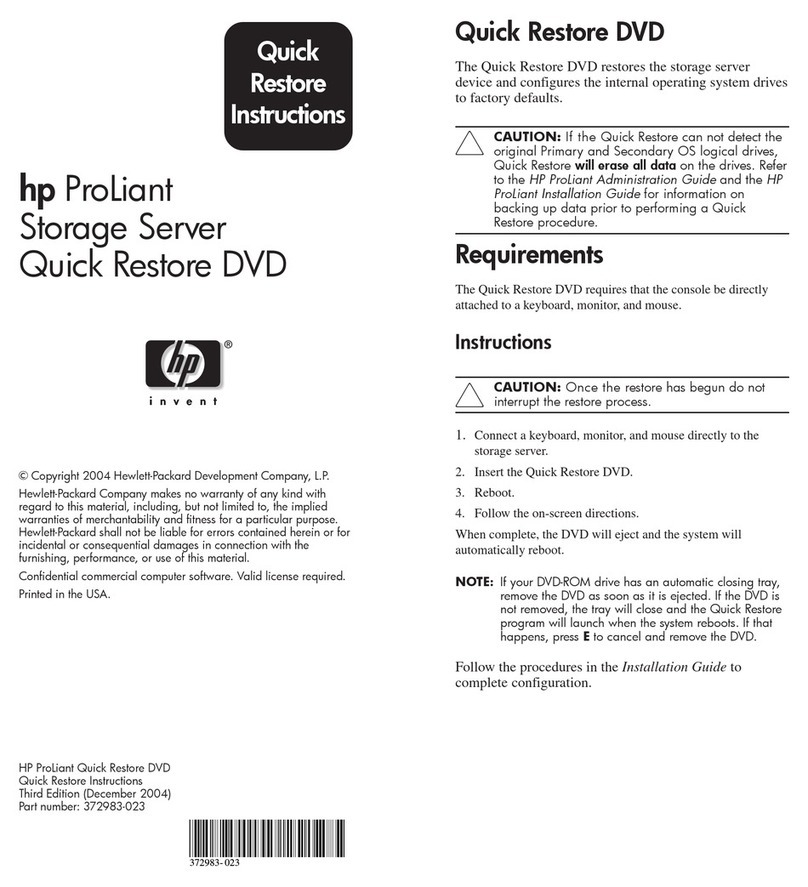
hp ProLiant
DL585 Storage Server
HP ProLiant DL585 Storage Server
Installation Instructions
First Edition (March 2005)
Part Number: 389150-001
Installation
Instructions
WARNING: This product contains energy levels that are
considered hazardous. To reduce the risk of personal injury from
electric shock and hazardous energy, individuals who are
knowledgeable of the procedures, precautions, and hazards
associated with equipment containing hazardous energy circuits
must perform the installation and servicing of this product.
WARNING: To reduce the risk of personal injury or damage to
the equipment:
• Obtain adequate assistance to lift and stabilize the chassis during
installation or removal.
• Be aware that the product becomes unstable when it is not
fastened to the rails.
• Before removing the server from the rack, remove all hot-plug
power supplies, power modules, and drives to reduce the overall
weight of the product.
• Extend leveling jacks fully to the floor and make sure that the full
weight of the rack rests on the leveling jacks.
• Install stabilizing feet on single-rack installations.
• Couple multiple-racks.
• Only extend one rack component at a time. The rack will become
unstable if more than one device is extended.
Important safety information
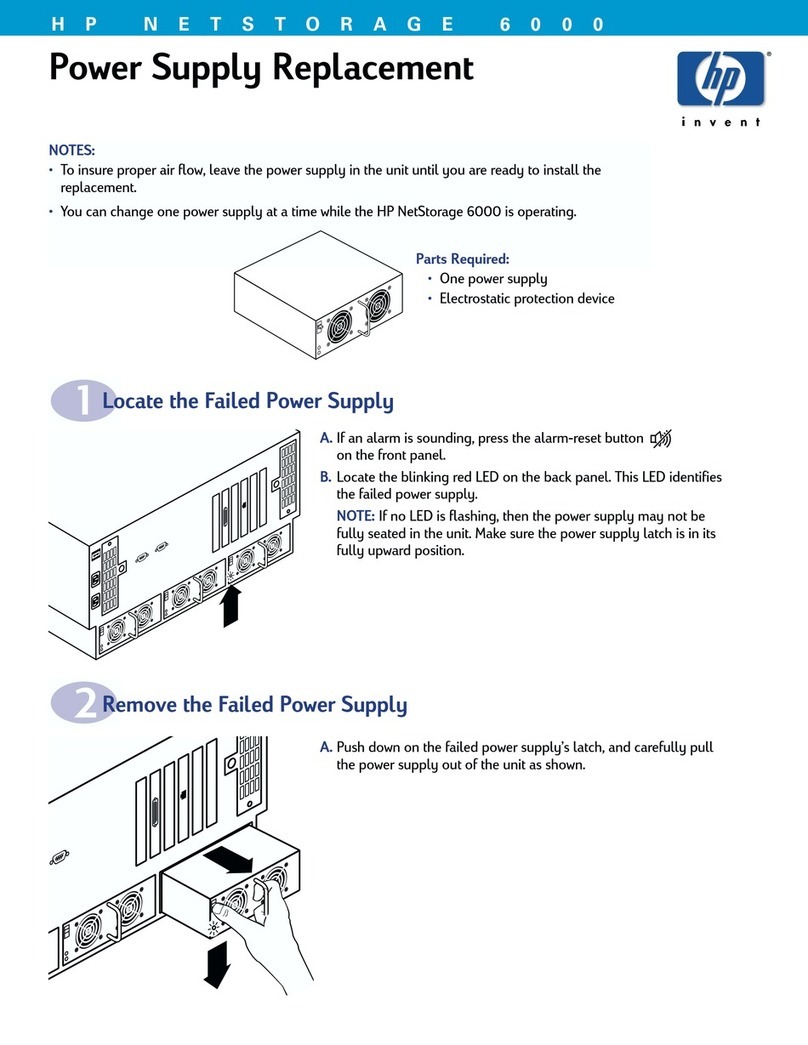
1 Prepare storage server
Remove shipping bracket from the PCI Basket, loosen the
thumbscrew (1) and remove and discard the shipping bracket (2).
NOTE: The shipping bracket is used only to secure the PCI
latches during shipment.
Install options
If you are installing additional options, such as expansion boards,
processors, hard drives, or memory, refer to the instructions
included with the option.
NOTE: For quick start memory guidelines, refer to the hood labels on the
server.
2 Storage server installation
1. Install the rails on both sides of the chassis.
2. Pull the rail compression lever toward you.
3. Install the rear of the rail into the designated holes in the rear of
the rack.
4. Install the front of the rail into the designated holes in the front
of the rack.
5. Install the rails on the chassis into the rails in the rack.
6. Slide the server onto the rack rails until the locking
pin engages.
A rack resource kit ships with all HP branded or Compaq branded 9000,
10000, and H9 series racks. For more information on the content of
each resource, refer to the rack resource kit documentation.
If you intend to deploy and configure multiple servers in a single rack,
refer to the white paper on high-density deployment at the HP website.
http://www.hp.com/products/servers/platforms
The HP ProLiant DL585 Storage Server is preloaded with the Windows®
Storage Server 2003 operating system. Prior to power up, deployment
instructions found in the “User Guide” should be followed to enable
the successful configuration of the storage server in addition to the
guidelines found below.
Required Items:
User Guide
Administration Guide
To begin the first-time startup procedure:
Be sure that the server is safely installed in an adequate
environment.
Be sure that the power cables and peripheral devices are plugged in
and AC power is supplied to the server.
Refer to the User Guide prior to powering up the server.
Storage server software
Rack planning resources
389150- 001
To register your product visit the HP Registration web site at:
http://www.register.hp.com
Register your storage server
7. Tighten the thumbscrews to secure the server to the rack.
3 Power cord and cables
The ProLiant DL585 server can operate either on a 120-V or a 240-
VAC input. Two AC inlets are on the rear of the server, one for each
power supply installed.
WARNING: To reduce the risk of electric shock or damage to
the equipment:
•Do not disable the power cord-grounding
plug. The grounding plug is an important
safety feature.
•Plug the power cord into a grounded (earthed)
electrical outlet that is easily accessible at
all times.
•Disconnect power from the server by unplugging
the power cord from either the electrical outlet
or the server.
To connect the power cord:
1. Locate the correct voltage line cord that came with the
server. Remove any labels that cover the cord connector.
IMPORTANT: To connect the power cord, plug it into the appropriate power
supply AC inlet. The power connector is connector number one for the
primary (populated) power supply and is connector number two for the
redundant hot-plug power supply.
2. Plug the other end of the power cord into a grounded electrical
outlet or UPS, depending on power cord type.
3. Connect the peripheral device cables to the server, and then
route the power cord and device cables through the cable
management arm.
Attaching cable management arm to a
square-hole rack
1. Slide the bracket onto the rack (1).
2. Insert the bracket hooks into the square holes on the rack, and
then push down to secure (2).
3. Tighten the thumbscrew to stabilize the cable management arm
on the rack (3).
Attaching the cable management arm to a
round-hole rack
1. Remove the square-hole bracket from the cable management
arm by pulling out the spring-activated fasteners (1), and then
pulling out the bracket (2).
Attaching the cable management arm to the server
1. Loosen the thumbscrews on the front of the server to enable the
server to slide forward.
3. Secure the cables to the inside of the cable management arm
using the Velcro straps.
2. Align the keyholes on the cable management arm with the posts
on the server (1), and then secure with the thumbscrew (2).
Securing the cables to the cable
management arm
1. Align the pivot points of the cable management arm by sliding
the server as needed.
2. Pivot the arm away from the server.
4. Close the cable management arm and finish securing the cables.
The hardware installation is now complete. Please refer to the
“HP ProLiant Storage Server User Guide.”
Product documentation
4 Cable management arm
2. Attach the round-hole bracket by pulling the spring-activated
fasteners on the cable management arm out (1), and then
inserting the bracket between them (2).
3. Slide the bracket onto the rack (1).
4. Attach the cable management arm to the round-hole rack, and
then secure the thumbscrews (2).
Installation Instructions
Rack template tool used during rack installation
contains:
Administration guide
User Guide
HP Warranty fulfillment
document
provides instructions to obtain a printed
warranty
HP Important Safety
Information booklet
Safety information for HP storage, power,
networking and rack products
Documentation CD
requirements and configuration optionsUser Guide
rack installation poster
Administration Guide provides administrative and procedural
instructions to manage the storage
server

Other manuals for ProLiant DL585

14

Other HP Network Storage Server manuals

HP ProLiant DL100 G2 DPSS User manual

HP

HP ProLiant DL100 G2 DPSS User manual

HP StorageWorks P4000 Series Quick reference guide

HP

HP StorageWorks P4000 Series Quick reference guide

HP 3PAR StoreServ 7000 User manual

HP

HP 3PAR StoreServ 7000 User manual

HP ProLiant DL380 G4 DPSS User manual

HP

HP ProLiant DL380 G4 DPSS User manual

HP StorageWorks E Series User manual

HP

HP StorageWorks E Series User manual

HP DL320s - ProLiant 9TB SATA Storage Server... User manual

HP

HP DL320s - ProLiant 9TB SATA Storage Server... User manual

HP J3278B - SureStore CD-ROM Server/Tower 7 NAS... User manual

HP

HP J3278B - SureStore CD-ROM Server/Tower 7 NAS... User manual

HP ProLiant DL38 User manual

HP

HP ProLiant DL38 User manual

HP ML110 - ProLiant G5 2TB Storage Server NAS User manual

HP

HP ML110 - ProLiant G5 2TB Storage Server NAS User manual

HP ProLiant ML110 G1 User manual
HP

HP ProLiant ML110 G1 User manual

HP StorageWorks NAS 500s Service manual

HP

HP StorageWorks NAS 500s Service manual

HP ProLiant DL100 G2 DPSS Instruction Manual

HP

HP ProLiant DL100 G2 DPSS Instruction Manual

HP J3278B - SureStore CD-ROM Server/Tower 7 NAS... Instruction Manual

HP

HP J3278B - SureStore CD-ROM Server/Tower 7 NAS... Instruction Manual

HP NAS 4000s User manual

HP

HP NAS 4000s User manual

HP Proliant DL580 User manual

HP

HP Proliant DL580 User manual

HP X300 Data Vault Installation guide

HP

HP X300 Data Vault Installation guide

HP StorageWorks NAS e7000 v2 User manual

HP

HP StorageWorks NAS e7000 v2 User manual

HP ProLiant Server Operator's manual

HP

HP ProLiant Server Operator's manual

HP ProLiant ML30 Gen10 User manual

HP

HP ProLiant ML30 Gen10 User manual

HP X1800sb User instructions

HP

HP X1800sb User instructions

HP 3PAR StoreServ 7000 User manual

HP

HP 3PAR StoreServ 7000 User manual

HP Ultrium 232i User manual

HP

HP Ultrium 232i User manual

HP ML350 - ProLiant - G2 User manual

HP

HP ML350 - ProLiant - G2 User manual

HP ProLiant ML110 G1 User manual

HP

HP ProLiant ML110 G1 User manual

Popular Network Storage Server manuals by other brands

LaCie 5BIG NAS PRO Quick install guide

LaCie

LaCie 5BIG NAS PRO Quick install guide

Xiva music M8 user guide

Xiva

Xiva music M8 user guide

Buffalo LS-WVL Quick setup guide

Buffalo

Buffalo LS-WVL Quick setup guide

Freecom Ultrium Generation 2 datasheet

Freecom

Freecom Ultrium Generation 2 datasheet

Dell SD630-S owner's manual

Dell

Dell SD630-S owner's manual

TRENDnet TS-U200 - NAS Server - USB Specifications

TRENDnet

TRENDnet TS-U200 - NAS Server - USB Specifications

Seagate Business Storage 1-Bay NAS Administrator's guide

Seagate

Seagate Business Storage 1-Bay NAS Administrator's guide

Dell PowerVault 3000i System installation guide

Dell

Dell PowerVault 3000i System installation guide

Silicon Graphics CHALLENGE CMN A012B owner's guide

Silicon Graphics

Silicon Graphics CHALLENGE CMN A012B owner's guide

Hewlett Packard Enterprise HPE ProLiant DL345 Gen10 Plus user guide

Hewlett Packard Enterprise

Hewlett Packard Enterprise HPE ProLiant DL345 Gen10 Plus user guide

Buffalo TeraStation WS Setup manual

Buffalo

Buffalo TeraStation WS Setup manual

ZyXEL Communications NAS540 Application notes

ZyXEL Communications

ZyXEL Communications NAS540 Application notes

LaCie 301136U - Ethernet Disk Mini NAS Server user manual

LaCie

LaCie 301136U - Ethernet Disk Mini NAS Server user manual

TYAN GT93-B7106 Service engineer's manual

TYAN

TYAN GT93-B7106 Service engineer's manual

IBM TOTAL STORAGE NAS 100 Quick start instructions

IBM

IBM TOTAL STORAGE NAS 100 Quick start instructions

Acard ARS-2212 user manual

Acard

Acard ARS-2212 user manual

IBM TotalStorageFAStT900 user guide

IBM

IBM TotalStorageFAStT900 user guide

Western Digital ShareSpace user guide

Western Digital

Western Digital ShareSpace user guide

manuals.online logo
manuals.online logoBrands
  • About & Mission
  • Contact us
  • Privacy Policy
  • Terms and Conditions

Copyright 2025 Manuals.Online. All Rights Reserved.