1-7
TURN-ON CHECKOUT PROCEDURE
The followin
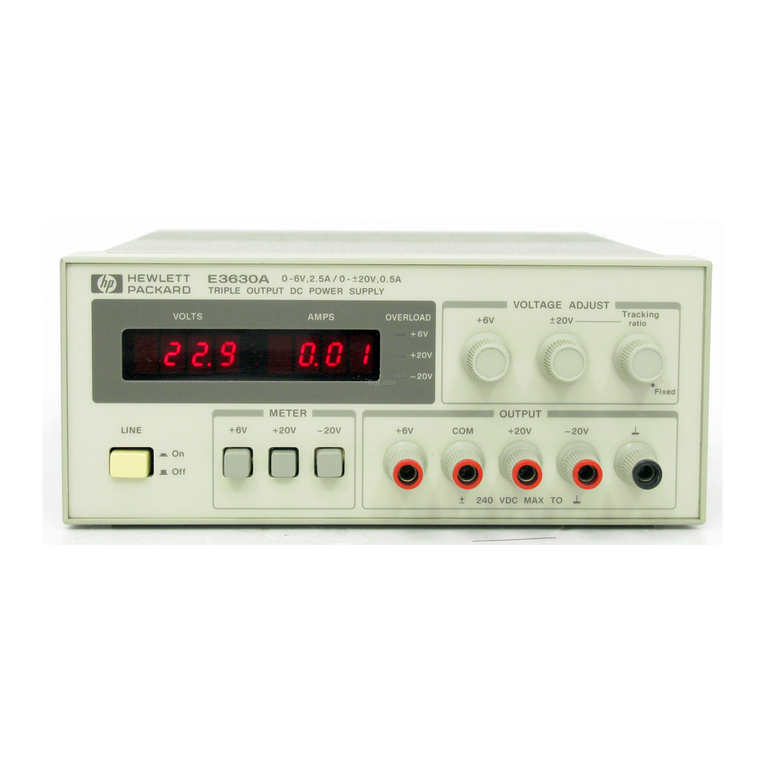
steps describe the use of the Model E3620A
front panel controls illustrated in Fi
ure 2 and serve as a brief
check that the suppl
is operational. Follow this checkout pro-
cedure or the more detailed performance test of service infor-
mation section when the instrument is received and before it
is connected to an
load equipment. Proceed to the more
detailed performance test be
innin
in service information
section if an
difficulties are encountered.
a. Connect line cord to power source and push LINE
switch ( ) in.
b. Push the V1 meter select pushbutton switch ( ) to in-
position to monitor suppl
's V1 output volta
e. With no
load connected, var
the V1 volta
e control ( ) over its
ran
e and check that the voltmeter responds to the con
trol settin
and the ammeter indicates zero.
c. Turn the V1 volta
e control ( ) full
clockwise and
short the +V1 output terminal ( ) to -V1 terminal ( )
with an insulated test lead. The ammeter should indi-
cate a short-circuit output current of minimum 1.0 A +
5% at 25 oC. Remove the short from the output termi-
nals.
d. Push the V2 meter select pushbutton switch to in-
position and repeat steps (b) and (c) for V2 output.
If this brief checkout procedure or later use of the suppl
reveals a possible malfunction, see the service information
section for detailed test, troubleshootin
, and adjustment pro-
cedures.
OPERATION
The dual outputs of the E3620A can be used individuall
, in
series, or in parallel. Each output can be floated (up to 240
volts off
round) or, the + or - terminal of either output can be
rounded to the chassis
round terminal which is located on
the suppl
's front panel.
Overload Protection Circuits
The outputs are individuall
protected a
ainst overload or
short circuit dama
e b
separate current limitin
circuits. The
circuits are factor
adjusted to limit the output current to mini-
mum 1 A + 5%. The current limits are set b
adjustin
R63 in
the V1 suppl
and R34 in the V2 suppl
(see the schematic
dia
ram). No deterioration of suppl
performance occurs if
the output current remains below the current limit settin
.
Durin
the actual operation of the V1 and V2 outputs, if a load
chan
e causes the current limit to be exceeded, the OVER-
LOAD LED is li
hted. If overload conditions occur, the V1 and
V2 supplies will protect the load b
limitin
the current to min-
imum 1 A + 5%. The V1 and V2 supplies are self restorin
;
that is, when the overload is removed or corrected, the output
volta
e is automaticall
restored to the previousl
set value.
Operation Beyond Rated Output
The suppl
ma
be able to provide volta
es and currents
reater than its rated maximum outputs if the line volta
e is at
or above its nominal value. Operation can be extended up to
5% over the rated output without dama
e to the suppl
, but
performance can not be
uaranteed to meet specifications
above the rated output of 0 to 25 V at 1 A.
Connecting Load
Connect each load to the power suppl
output terminals usin
separate pairs of connectin
wires. This will minimize mutual
couplin
effects between loads and takes full advanta
e of
the low output impedance of the suppl
. Load wires must be
of adequatel
heav
au
e to maintain satisfactor
re
ulation
at the load.
Make each pair of connectin
wires as short as possible and
twist or shield them to reduce noise pick-up. If a shield is
used, connect one end of the shield to the power suppl
round terminal and leave the other end unconnected.
If load considerations require locatin
output power distribution
terminals at a distance from the power suppl
, then the power
suppl
output terminals should be connected to the remote dis-
tribution terminals b
a pair of twisted or shielded wires and each
load should be connected to the remote distribution terminals
separatel
.
Series Operation
The two outputs (V1 and V2) can be connected in series to
obtain a volta
e (up to 50 V) hi
her than that available from a
sin
le output. Each output control (V1 and V2) must be adjusted
in order to obtain the total output volta
e. Diodes connected
internall
across each output protect the suppl
's output filter
capacitors a
ainst reverse volta
es. This could occur if the sup-
plies are connected in series and the output is shorted.
Parallel Operation
The V1 and V2 supplies can be connected in parallel to obtain a
total output current
reater than that available from one suppl
.
The total output current is the sum of the output currents of the
individual supplies. The output volta
e controls of one power
suppl
should be set to the desired output volta
e, and the other
suppl
set for a sli
htl
lar
er output volta
e. The suppl
set to
the lower output volta
e will act as a constant volta
e source,
while the suppl
set to the hi
her output will act as a current-lim-
ited source, droppin
its output volta
e until it equals that of the
other suppl
. The constant volta
e source will deliver onl
that
fraction of its rated output current necessar
to fulfill the total cur-
rent demand.
LOAD CONSIDERATIONS
This section provides information on operatin
our suppl
with various t
pes of loads connected to its output.
PULSE LOADING
The power suppl
will automaticall
cross over from constant-
volta
e to current-limit operation in response to an increase in
the output current over the preset limit. Althou
h the preset
limit ma
be set hi
her than the avera
e output current, hi
h
