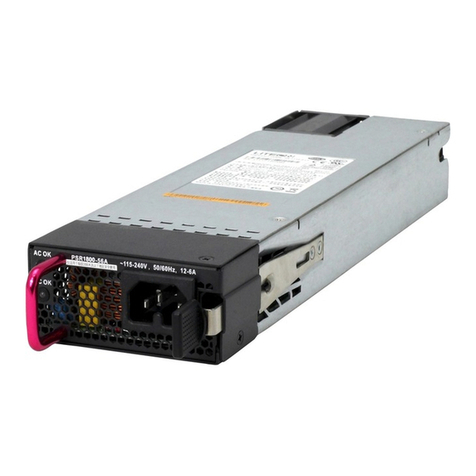
HP PSR750-A User manual

HP PSR750-A Power Supply
User Guide
Part number: 5998-1606
Document version: 5PW100-20110311

Legal and notice information
© Copyright 2011 Hewlett-Packard Development Company, L.P.
No part of this documentation may be reproduced or transmitted in any
form or by any means without prior written consent of Hewlett-Packard
Development Company, L.P.
The information contained herein is subject to change without notice.
HEWLETT-PACKARD COMPANY MAKES NO WARRANTY OF ANY
KIND WITH REGARD TO THIS MATERIAL, INCLUDING, BUT NOT
LIMITED TO, THE IMPLIED WARRANTIES OF MERCHANTABILITY AND
FITNESS FOR A PARTICULAR PURPOSE. Hewlett-Packard shall not be
liable for errors contained herein or for incidental or consequential
damages in connection with the furnishing, performance, or use of this
material.
The only warranties for HP products and services are set forth in the
express warranty statements accompanying such products and services.
Nothing herein should be construed as constituting an additional
warranty. HP shall not be liable for technical or editorial errors or
omissions contained herein.

Contacting HP
For worldwide technical support information, see the HP support
website: http://www.hp.com/support
Before contacting HP, collect the following information:
•Product model names and numbers
•Technical support registration number (if applicable)
•Product serial numbers
•Error messages
•Operating system type and revision level
•Detailed questions
Subscription service
HP recommends that you register your product at the Subscriber's
Choice for Business website: http://www.hp.com/go/e-updates
After registering, you will receive e-mail notification of product
enhancements, new driver versions, firmware updates, and other
product resources.
Warranty
The Hewlett-Packard Limited Warranty Statement for this product and
the HP Software License Terms which apply to any software
accompanying this product are available on the HP networking Web
site at www.hp.com/networking/warranty.The customer warranty
support and services information are available on the HP networking
Web site at www.hp.com/networking/support. Additionally, your

HP-authorized network reseller can provide you with assistance, both
with services that they offer and with services offered by HP.
Documentation
For the latest documentation, visit the HP website, www.hp.com, and
select the Support & Troubleshooting link.
•Choose See support and troubleshooting information radio
button
•Enter product name/number OR choose the automatic product
name/number detection OR select a product category
•From the product page, choose Manuals link to see the
documentation associated with your product.

i
Contents
Introduction to the power supply····························································1
Introduction ·························································································1
Specifications······················································································3
Panel····································································································4
Status LEDs ··························································································4
Installing and removing the power supply ············································6
Precautions··························································································6
Tools ····································································································7
Installing and removing the power supply·······································7
Installing the power supply ··························································7
Removing the power supply·························································9
Connecting the power cord···························································· 10

1
Introduction to the power supply
Introduction
The PSR750-A (JC089A) is an AC-input and DC-output power supply. It
can convert the input voltage to 12 V and –54 V as required, and its
maximum output power is 750 W.
Table 1 Features supported by the PSR750-A
Feature Description
Protection
Output over-voltage protection, output
short-circuit protection, output current-limiting
protection, and overheat protection.
Redundancy
Supports parallel connection of two power
supplies, implementing 1+1 redundant current
sharing.
Hot swapping
When the device works properly, you can
power off a power supply of the 1+1
redundant power supply system and remove it
from the device.
Auto-recovery support of the PSR 750-A in the protection status is shown
in Table 2.

2
Table 2 Protection functions of the PSR 750-A
Protection function Status Auto-recovery
support
Over-voltage
protection
No power supply
with the power
supply deadly
locked
Not supported
Short-circuit
protection No power supply Supported
Current-limiting
protection No power supply Supported
Overheat protection No power supply Supported
NOTE:
•In case of short-circuit protection, over-current protection, or
overheat protection, the power supply recovers itself after the
issue is addressed.
•When a power supply is deadly locked due to over-voltage
protection, it does not support the auto-recovery function. In this
case, power off the power supply, disconnect the power cord and
connect it again, and then power on the power supply. After all
these operations, the power supply gets restored.

3
Specifications
Table 3 PSR750-A specifications
Item Specifications
Rated voltage range 100 VAC to 240 VAC; 50 Hz or
60 Hz
Max voltage range 90 VAC to 264 VAC; 47 Hz or
63 Hz
Output voltage (dual output) 12 V and –54 V
Max output current •25 A for 12 V output voltage
•9 A for –54 V output voltage
Max output power 750 W
Dimensions (H × W × D) 40.5 × 180.6 × 235 mm (1.59 ×
7.11 × 9.25 in)
Operating temperature 0°C to 55°C (32°F to 131°F)
Storage temperature –40°C to +70°C (–40°F to
+158°F)
Operating humidity 10% to 95%
Storage humidity 5% to 95%

4
Panel
Figure 1 Panel of the PSR750-A
1 2 3 4
65
7
(1) Power switch (push “O” to switch off and push “—” to switch on)
(2) AC receptacle (3) Tab
(4) Power supply handle (5) Status LED for DC output
(6) Status LED for AC input (7) Captive screw
Status LEDs
The PSR750-A has two LEDs, which indicate the input status (AC OK)
and output status (DC OK) of the power supply. Table 4 describes the
colors and working status of the LEDs in different cases.

5
Table 4 Description of the LEDs
LED Color Status
Off No power is input or an input
failure occurs.
AC OK
On The power input is normal.
Off No power is output or an output
failure occurs.
DC OK
On The power output is normal.
In normal cases, the input LED of the PSR750-A power supply turns on
while the output LED is still off after you connect the power cord but
leave the power supply in the off state; the input and output LEDs both
turn on after you power on and switch on the power supply.
However, if the input LED is on but the output LED is off, this case may be
caused by output short-circuit, output over-current, output over-voltage,
or over-temperature. To solve such cases, take the following actions:
1. Switch off the power supply and disconnect the power cord, and
then reconnect the power cord and switch on the power supply to
check whether the power supply can work properly.
2. If the above action does not work, the case may be caused by
over-temperature. Take actions to cool down the power supply,
and then it can work properly.
6
Installing and removing the power
supply
This chapter describes how to install and remove the power supply and
the power cord. To prevent damage to the device and personal injury,
follow the power-on and power-off procedures illustrated in the
following figures respectively.
Figure 2 Power-on procedure
Figure 3 Power-off procedure
Precautions
When installing and removing a power supply, note the following
guidelines:
•Wear an ESD-preventive wrist strap and ensure a good skin
contact before installing or removing the power supply.
•Before installing the power supply, make sure that the operating
voltage provided by the power source is consistent with that
marked on the power supply, and the output voltage of the power
supply is consistent with the powered device, to prevent damage to
the power supply and powered device.

7
•Do not touch any naked wire or terminal. Doing so may result in a
personal injury.
•Never place the power supply in wet locations and prevent fluid
from leaking into the power supply.
•Do not often open the shell of the power supply to prevent damage
to the power supply. If a failure occurs on the internal wires or units,
contact the technical stuff to troubleshoot the problem.
Tools
Prepare the following tools for installation and removal:
•Flat-blade screwdriver
•Phillips screwdriver
•ESD-preventive wrist strap
Installing and removing the power supply
CAUTION:
Before installation and removal, make sure that the power supply
is
switched off and no power cord is connected to the power supply.
Installing the power supply
Follow these steps to install the power supply:
Step1 Wear an ESD-preventive wrist strap, and make sure that the
wrist strap makes good skin contact and is well grounded.
Step2 Take the power supply from the package and check that the
input mode of the power supply is as required.

8
Step3 Face the slot and plug in the power supply.
Step4 Insert the power supply with the upside up. Grasping the
handle of the power supply with one hand and supporting the
power supply bottom with the other, slide the power supply
slowly along the guide rails into the slot (see callout 1 in Figure
4).
Step5 Fasten the captive screws on the power supply clockwise with a
Philips screwdriver until the power supply seats into the chassis
(see callout 2 in Figure 4).
Figure 4 Install a power supply
1
2
2

9
NOTE:
•If the slot has a filler panel, remove it before inserting the power
supply.
•Remove the filler module before installing the power supply
on an
HP A5800-48G-PoE+ Switch with 2 Interface Slots or HP
A5800-48G-PoE+ TAA Switch with 2 Interface Slots. For more
information, see the related installation guide.
•To prevent damage to the power supply or the connector in the
powered device, insert the power supply
gently. If you encounter
a hard resistance while inserting the power supply, pull out the
power supply and then insert it again.
•If the captive screw cannot be tightly fixed, check the installation
of the power supply.
Removing the power supply
Follow these steps to remove the power supply:
Step1 Wear an ESD-preventive wrist strap, make sure that the wrist
strap makes good skin contact and is well grounded.
Step2 Switch off the power supply, disconnect the power cord from
the power supply and power source, and remove the power
cord.
Step3 Face the power supply to be removed from the powered device.
Step4 Loosen the captive screws of the power supply anti-clockwise
with a Philips screwdriver until the captive screws fall off the
powered device.

10
Step5 Grasping the handle of the power supply with one hand, pull it
part way out. Supporting the power supply bottom with the
other hand, pull the power supply slowly along the guide rails
out of the slot.
NOTE:
Put the power supply into an antistatic bag after removal.
Connecting the power cord
After you insert the power supply into the device, you can connect the
power cord. For a device using the PSR750-A power supply, use an AC
power cord to connect the power source.
Follow these steps to connect the power cord for the PSR750-A power
supply:
Step1 Switch off the AC power supply, that is, turn the power switch of
the power supply to the “O” position (see Figure 4).
Step2 Connect one end of the AC power cord shipped with the device
to the AC receptacle on the power supply (see Figure 5).
Step3 Connect the other end of the AC power cord to the power
source.

11
Figure 5 Connect an AC power cord
NOTE:
The PSR750-A is equipped with two built-in fans for heat
dissipation. The fans rotate at a low speed after the power cord is
connected (AC OK is on) but with the power supply in the off state.
When you switch on the power supply, the fans adjust their rotating
speed according to the power supply’s temperature.
Table of contents
Other HP Power Supply manuals
Popular Power Supply manuals by other brands

Motorola
Motorola Motorola PTP 250 user guide

Stahl
Stahl ISpac 9143/10-065-150 0 Series operating instructions

Siemens
Siemens 3RX9501-0BA00 operating instructions

Solar Stik
Solar Stik G-BOSS E LIGHT Operation and maintenance manual

Johansson
Johansson 5051ETH user manual

Hochiki America
Hochiki America FN-300ULX installation guide