HPC FPSPPK User manual

FPSPPK Match Lit Fire Pit Kit
Installation and Operation Instructions
WARNING: If the information in theses instructions is
not followed exactly, a fire or explosion may result
causing property damage, personal injury, or loss of life.
Do not store gasoline or other flammable vapors
and liquids in vicinity of this or any other appliance.
WHAT TO DO IF YOU SMELL GAS:
•Do not try to light appliance.
•Do not touch any electrical switch.
•Immediately call your gas supplier from a neighbor’s
phone. Follow the gas supplier’s instructions.
•If you cannot reach your gas suppler, call the fire
department.
Installation and service must be performed by a qualified
installer, service agency, or gas supplier.
INSTALLER: Leave this manual with the appliance.
CONSUMER: Retain this manual for future reference.
We highly recommend that our products be installed and serviced by professionals who are certified in
the U.S. by NFI (National Fireplace Institute).
Read and understand these instructions before starting assembly and installation of this product. Failing to
follow these instructions may void warranty. Installations must be done in accordance with local codes.
IMPORTANT SAFETY REQUIREMENTS
• Keep area surrounding fire pit clear and free from combustible materials, gasoline, and other flammable vapors.
• Solid fuels cannot be burnt within the fire pit.
• Do not use this appliance if any part has been under water. Immediately call a qualified service technician to inspect
the appliance and to replace any part of the control system and any gas control which has been under water.
• This kit must be isolated from incoming gas line via a manual shutoff valve for maintenance or pressure testing
812-1 Pg. 1
fire-parts.com

It is the responsibility of the installer to follow all local and State Codes concerning the installation and operation
of the fire pit.
SELECTING THE LOCATION
WARNING: FIRE PITS ARE DESIGNED STRICTLY FOR OUTDOOR USE ONLY.
HEARTH PRODUCTS CONTROLS CO.MUST BE NOTIFIED OF ANY OTHER USE.
WARNING: FIRE PITS CREATE VERY HIGH TEMPERATURES- IT IS VERY IMPORTANT THAT COMBUSTIBLES
BE KEPT AT SAFE DISTANCES. LP CYLINDERS NOT CONNECTED TO THIS DEVICE MUST BE STORED AWAY
FROM FIRE PIT.
•The fire pit location must accommodate a gas shut off within 4 feet of the fire pit. Gas shut off must be outside of fire
pit. The gas line should be sized minimum gas pressure at maximum flow rate (Btu/hr).
•To enjoy your fire pit, select a well drained location that allows for sufficient clearance from combustible materials.
•Choose a location that allows easy access for installation and maintenance of the fire pit. Make sure that trees and
shrubbery are well clear around and above the fire pit.
•Pick a location that allows sufficient horizontal room to enjoy the fire pit while allowing a safe distance from the heat
and flame.
•Select a location where the fire pit can be attended during operation. Never leave an operating fire pit unattended or by
someone not familiar with its operation or emergency shut off locations.
Fire Pit Clearances
Sides Surrounding Fire Pit 14”
Above Fire Pit 96”
INSTALLATION OF THE COMPLETE FIRE PIT
1) Remove fire pit from packaging material.
2) Mount valve box in preferred location.
3) Place fire pit in enclosure.
4) Connect gas supply line as outlined in Gas Supply Connection section below.
5) Carefully fill pan with lava rock- leave air box window open to allow fresh air in- as
shown to the right.
GAS SUPPLY CONNECTION:
Use only gas type indicated. If the gas type indicated is not your type of gas supply, DO NOT INSTALL. Contact your
dealer for the proper model. All piping must comply with local codes and ordinances or with the National Fuel Gas
Code, whichever applies.
The gas supply line must be of adequate size to handle the Btu/HR requirements and length of run for this fire pit.
The normal gas connection at this log set is ½” NPT made at the right of the unit.
1) Attach and tighten flex line to the gas supply line. Confirm gas type.
2) If using an LP bottle, position at safe distance away from flame.
IMPORTANT: TESTING FOR LEAKS: USE SOAPY WATER AT EVERY CONNECTING POINT IN GAS
LINE. IF BUBBLES APPEAR, TURN OFF GAS, REPAIR LEAKS AND TEST AGAIN. DO NOT LEAVE FIRE
PIT BURNING UNTIL ALL LEAKS ARE ELIMINATED. NEVER USE A FLAME TO CHECK FOR LEAKS.
812-1 Pg. 2
fire-parts.com

IMPORTANT: Gas Plumbing Connections: Use only joint compound or Teflon tape that is resistant to all gases. Apply
to all male pipe fittings only- DO NOT use on FLARED fittings. Be sure to tighten every joint securely.
FOR YOUR SAFETY READ BEFORE LIGHTING
WARNING: If you do not follow these instructions exactly, a fire or explosion may result causing property damage,
personal injury, or loss of life.
A. This appliance has a pilot which must be lighted by hand. When lighting pilot, follow these instructions exactly.
B. BEFORE OPERATION smell around the appliance area for gas. See front page- “What to do if smell gas” section.
C. Use only your hand to push in or turn the gas control knob. Never use tools. If the knob will not push in or turn by hand,
don’t try to repair it. Call a qualified technician. Force or attempted repair may cause a fire or explosion.
LIGHTING INSTRUCTIONS
1. STOP! Read the safety information above on this label.
2. Depress black knob (Fig. 1) slightly and turn clockwise to the OFF position.
3. Wait (5) minutes to clear out any gas. Then smell for gas.
If you smell gas, STOP! See front page- “What to do if smell gas” section.
If you do not smell gas, proceed to next step.
4. Depress lightly and turn black knob counterclockwise to the PILOT position.
5. Locate the pilot- it is inside the blow out box mounted on left side of fire ring when facing
front of fire pit (Fig. 2).
6. Push the knob all the way in- every 10 seconds, apply flame to the blow out box in Fig. 2
(Pilot burner will not light until all air is bled from lines).
7. After pilot lights, hold knob in for 20 seconds or until it will stay lit when you release knob.
IMPORTATNT: If the pilot will not stay lit after several tries, turn the black knob to the
OFF position and call your service technician or gas supplier.
8. Turn the control knob counterclockwise from PILOT to the ON position.
9. Never leave fire pit unattended by an adult.
Fig. 1 Fig. 2
Valve Control Knob Blow Out Box- Pilot Assembly Inside.
812-1 Pg. 3
fire-parts.com

TO TURN OFF GAS APPLIANCE
1. Turn Knob B clockwise to the OFF position.
2. Depress Knob A slightly and turn clockwise to the OFF position.
3. After cooling, cover fire pit with vinyl cover.
Maintenance of Fire Pit
Under normal use, this unit will require only limited cleaning.
To clean, first turn the control knob to “Off” and allow system to cool.
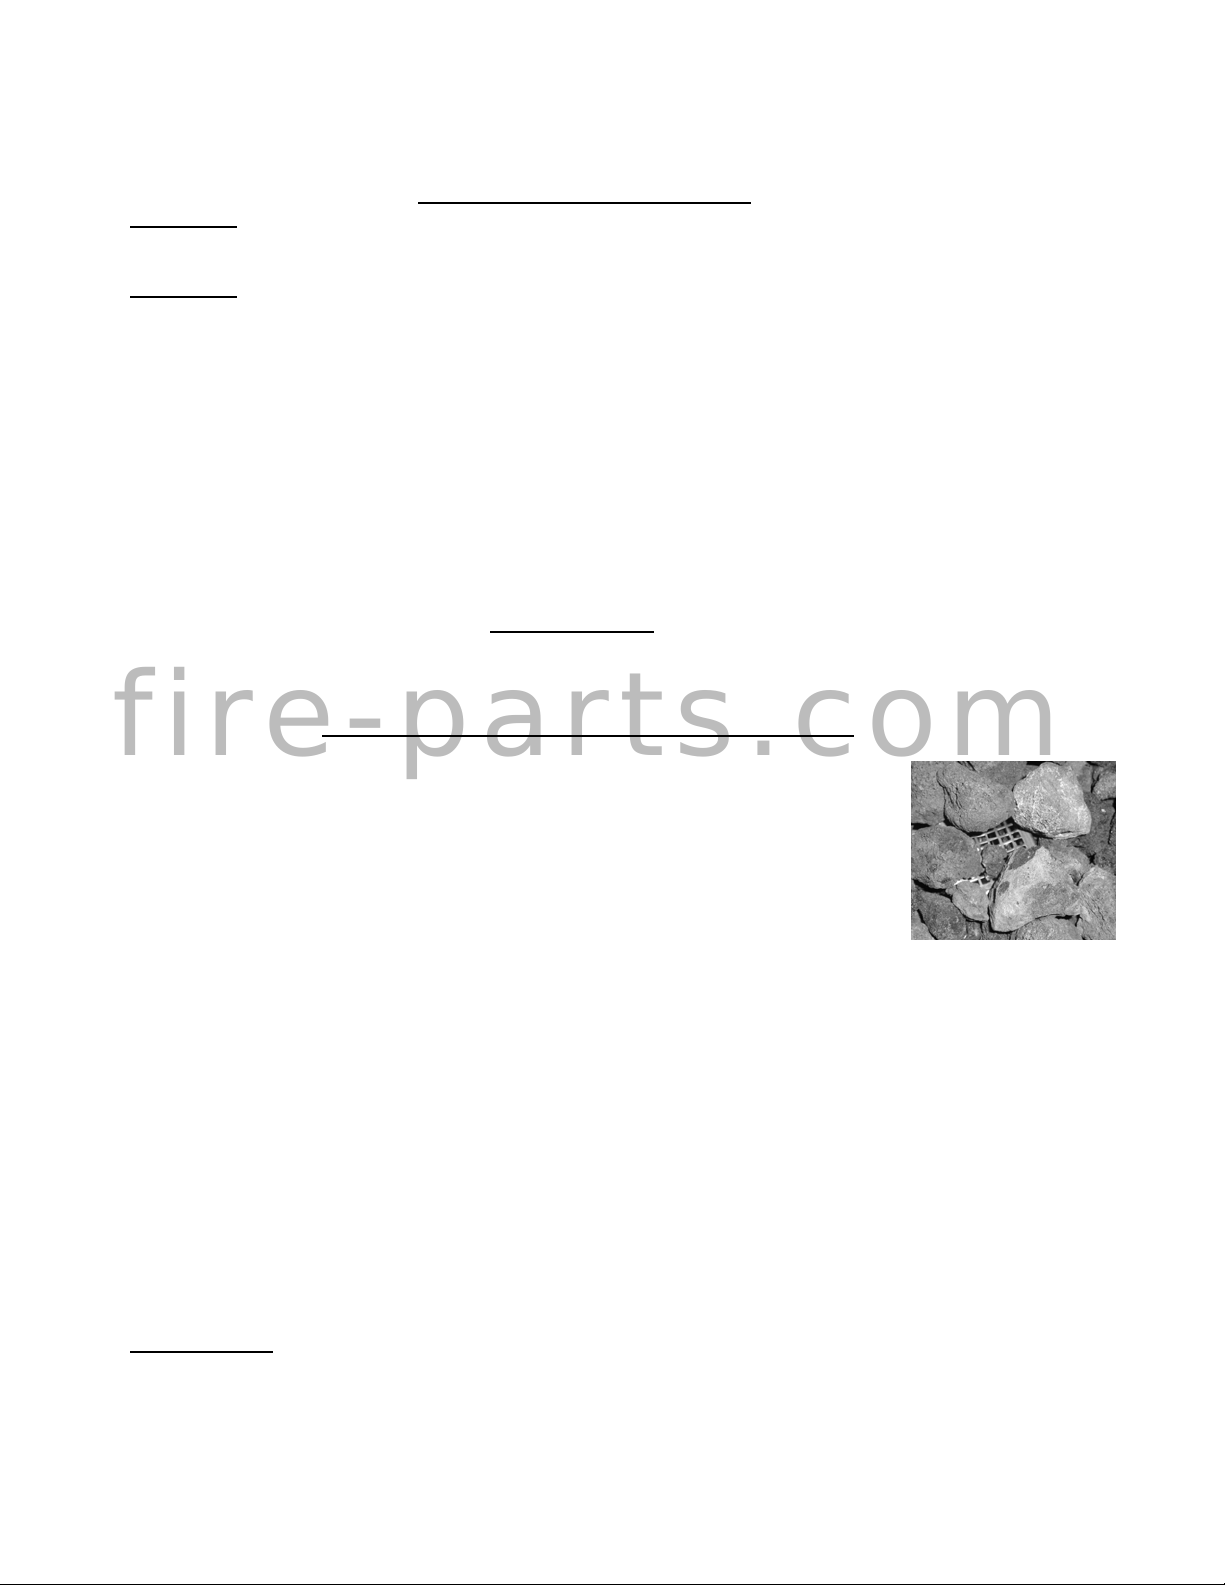
1) Keep fire pit covered at all times when not in use.
2) Ring Cleaning: If flames exhibit any abnormal shapes or behavior, or if burner fails to ignite properly, then the
burner holes may require cleaning. If this occurs, it is preferable to contact your nearest dealer to get the appliance
serviced. Alternatively, the appliance can be cleaned by carefully removing the logs and media to allow access to
burner. Use a brush to carefully remove dust, spider webs, and loose particles from base, logs, and fire ring itself.
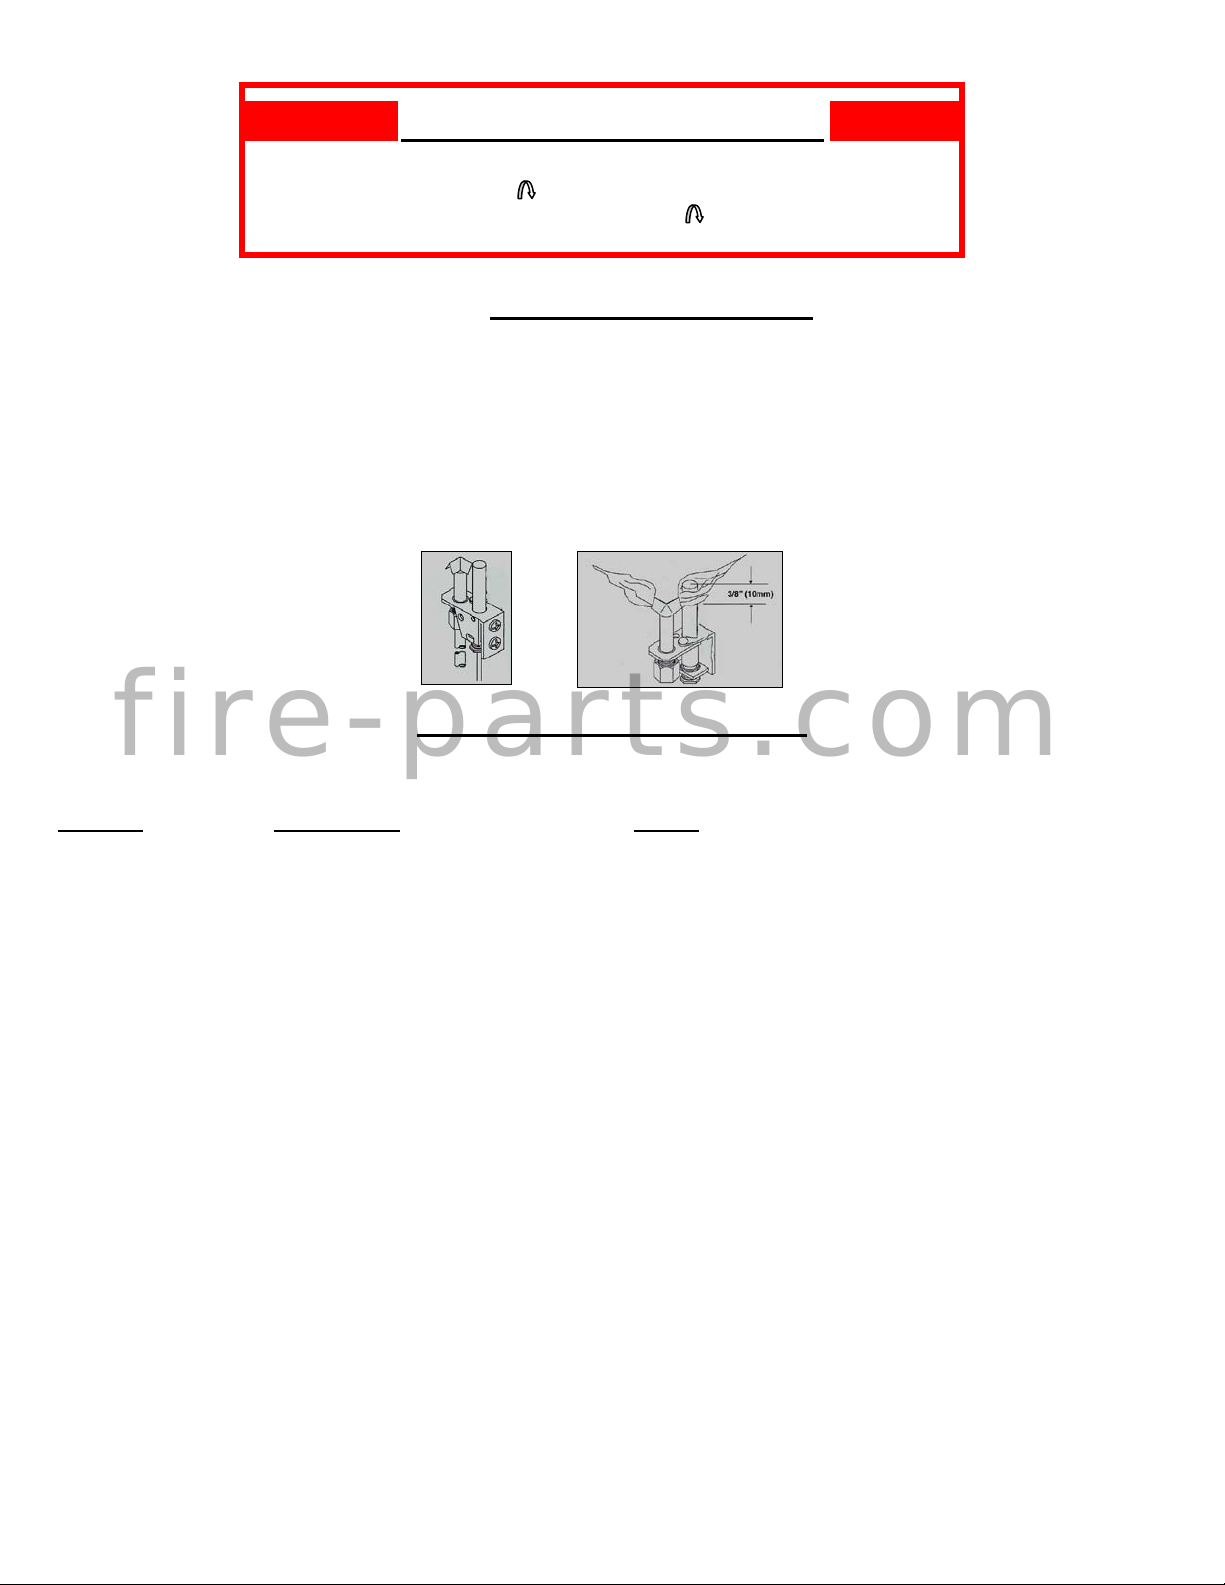
3) Visually inspect the pilot- remove any dust or soot accumulating. The pilot flame should cover 3/8” to 1/2” of the
thermocouple as shown below.
FPSPPK Fire Pit Trouble Shooting
FOR ANY REPALCEMENT PARTS NEEDED, PLEASE CONTACT YOU AUTHORIZED DEALER FOR ORDERING.
Symptoms Possible Cause Solution
Pilot won’t light. 1) Gas line not bled to let gas 1) Bleed lines.
reach pilot.
2) Pilot gas supply tube burned 2) Replace pilot burner assembly.
or crimped. Route away from main burner flame.
3) Knob on valve not being pushed 3) Push in about 1/4".
in far enough.
4) Soot or rust covering outlet 4) Clean thoroughly and open hole with
hole on pilot orifice. pin.
5) Water in pilot orifice. 5) Clean out by air hose- cover pit.
Pilot won’t stay lit 1) Thermocouple is not hot 1) Make sure pilot flame is strong
enough. and is hitting thermocouple.
1a) Make sure thermocouple
is paint, carbon & rust free.
1b) Hold knob on valve in
longer.
Pilot lights but burner 1) Gas not getting to burner. 1) Turn control knob to “ON” position.
will not. 2) Valve control not set to ON 2) Turn to “ON” position.
Position.
Pilot lights, burner 1) Thermocouple cooling- 1) Clean orifice.
lights, but system goes pilot flame weak.
out after a while. 2) Pilot blowing out. 2) Re-arrange lava rock.
3) Thermocouple too hot. 3) Confirm air box window uncovered.
Whistling Sound 1) Seldom caused by pilot. 1) Check log set burner, orifice (if used) and amount of material
covering burner.
2) Flex line bent sharply. 2) Straighten as needed.
812-1 Pg. 4
fire-parts.com
Table of contents
Other HPC Fireplace Accessories manuals
Popular Fireplace Accessories manuals by other brands

Hargrove
Hargrove DEI-PO installation guide

Napoleon
Napoleon LEGEND Series Assembly guide

Muskoka
Muskoka Muskoka MM284SCH Assembly instructions

Superior Fireplaces
Superior Fireplaces DRI3030TEN-CONTF-BLK installation instructions

Escea
Escea DF Series quick start guide

pleasant hearth
pleasant hearth Brunet FA092TB quick start guide

Valor
Valor G3 Series installation instructions

Blue Sky Outdoor Living
Blue Sky Outdoor Living SP2216 owner's manual

Regency
Regency HEAT WAVE 946-556 manual

Town & Country Fireplaces
Town & Country Fireplaces TC54 SERIES DMODULAR instructions

European Home
European Home HVF-42-ST installation guide

Boulevard
Boulevard DFEV60LSS-1 Installation instruction guide