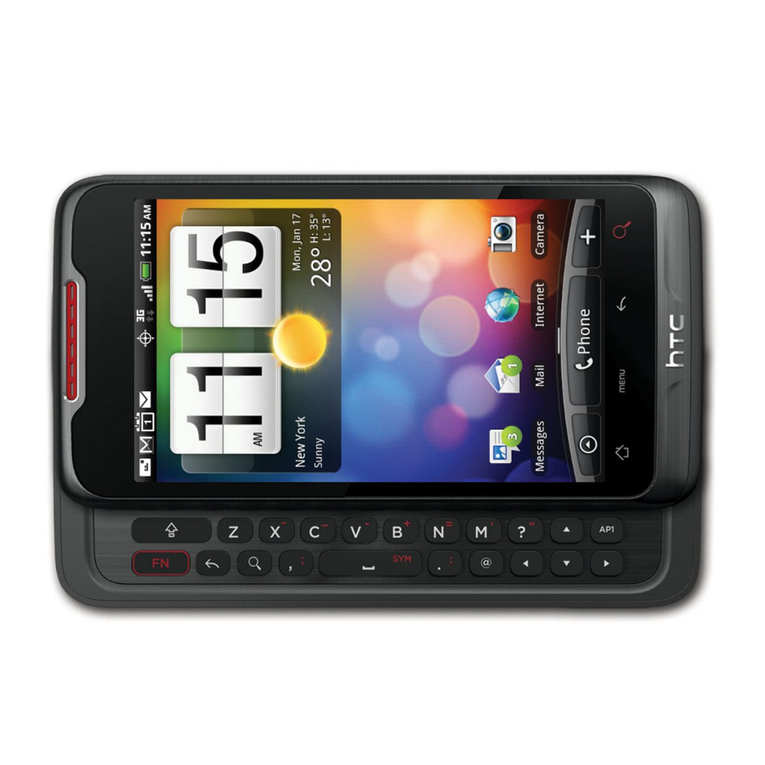
HTC APX325CKT User manual

Solution Matrix –HTC EVO 4G LTE (APX325CKT)
Basic troubleshooting and usage instructions for the HTC EVO 4G LTE (APX325CKT)
Details
Some links in this document launch a specific page in the User Guide.
To go from page to page, click navigation buttons as shown below.
The HTC EVO 4G LTE(APX325CKT) features the Android 4.0 (Ice Cream Sandwich) Operating System
Voice Network: Nationwide Sprint Network
Data Network Speed: Sprint 3G (EVDO Rev A) and Sprint LTE
4G Network
Network Technology: CDMA 800 and CDMA 1900 MHz, LTE
Operating System: Android 4.0 (Ice Cream Sandwich)
Programming Instructions
Fact Sheet
Get Started Guide
User Guide - Android 4.0 Ice Cream Sandwich
Known Issues
Virtual Phone
Menu Matrix
Current Software/PRL Version
oNote: If customer does not have a data plan or does
have a cancelled NAI, refer them to an authorized
Repair center for upgrade.
Accessories
Device / Features
Applications
Social Media and Networking
Device Troubleshooting
Software Troubleshooting
Bluetooth Troubleshooting
Device / Features

Back-Up Contacts /
Content
• Sync Backup and Restore
Contacts for Phones
(CDMA)
• Back Up and Restore
Your Contacts
Basic and Advanced
Features
• Navigate the Home
screen
• Navigation buttons
• Favorites Tray
• Use lock screen
• Set screen lock
• Unlock phone
• Change Wallpaper
• Make phone call
• Working with apps
• Use folders
• Add widgets
• Use Power Control widget
• Manage notifications
• Manage downloads
• Optimize memory usage
• Search phone & the web
• Enter and edit text
• Keyboard tips and
shortcuts
• Touch and type gestures
• Type text by speaking
• Use Voice Actions
• Voice Action commands
• Encrypt phone
• Use accessibility features
• Use TalkBack
• Use Explore by Touch
Battery
• Charge
• Extend Battery Life
• Optimize/extend battery
life
• Airplane mode
Bluetooth
•Turn Bluetooth On or Off
•Change the Phone Name
•Connect a Bluetooth
Headset or Car Kit
•Reconnect a Headset or
Car Kit
•Disconnect or Unpair
Bluetooth
•Send Information Using
Bluetooth
•Where Sent Information is
Saved
•Receive Information Using
Bluetooth
•Use Bluetooth FTP Server
•Share Content with
Android Beam
Camera
• Launch the Camera
•Take a Photo
•Record a Video
•Taking a Photo While
Recording a Video
•Camera Scenes
•Change Camera and
Video Settings
•View Photos and Videos
•Start a Photo Slideshow
•Watch Videos
•Edit Your Photos and
Videos
•View Photos in Your
Social Networks
•Print Your Photos
•Share Your Photos and
Videos
•Wireless Display
•Create a Slideshow with
Movie Editor
•Change the Soundtrack
•Share Your Slideshow
From Gallery
Contacts
• Getting Contacts Into Your
Phone
•Transfer Contacts from
Your Old Phone
• Your People List
•Your People App Profile
•Add a New People Entry
Data Connections
• Launch a Web Connection
•Data Connection Status
and Indicators
•Turn the Data Connection
On or Off
•Switch to CDMA Mode to
Save Battery Power
Device Basics
• Front panel
•Back panel
•Kick stand
•Turn On/Off
• Lock Screen
• Change the Lock Screen
Style
Display Settings
• Turn Screen On/ Off
• Screen Navigation
• Home Screen
• Customize Lock Screen
• Customize Home Screen
• Extended Screens
• Launch Bar
GPS/Location Settings
• Location setting
•HTC Car
•Google Maps
•Google Latitude
•Telenav GPS Navigation

• Find People You Know on
Social Networks
• Import or Copy Contacts
• Merge Entries in People
• Contact Information and
Conversations
• Edit a People Entry
• Delete an Entry
•Delete Multiple Entries
• Create a Contact Group
• Edit a Contact Group
• Send a Message or Email
to a Group
• Rearrange Your Contact
Groups
• Delete Groups
• Add a People Widget
• Set the Default
Communication Method
• Send Contact Information
• Back Up and Restore
Your Contacts
•Enable Data Roaming
•Wi-Fi
•Virtual Private Networks
(VPN)
• Use Your Device as a
Modem
• Sprint Hotspot
• Airplane Mode
• Update Profile
• Wi-Fi and Sprint 4G
Reference Matrix
• HTC Sense Input
Keyboard
• Change Keyboard layout
• Enter Text by Speaking
• Swype Keyboard
• Adjust Swype Settings
• Using Predictive Text
• Add a Word to the
Predictive Text Dictionary
•Edit or Delete a Word in
Your Personal Dictionary
• Back up Your Personal
Dictionary to Your Storage
Card
• Restore Your Personal
Dictionary from Your
Storage Card
• Select Text
• Copy and Paste Text
• Setup Application
• Recent Apps
• Scene
• Auto-rotate Screen
• Animation
• Text Size
• Brightness
• Screen Timeout
• Keep the Screen On
While Charging
• Change the Wallpaper
• Calibrate the Screen
HTC Sync Manager
•Install HTC Sync Manager
•Get Started with HTC
Sync Manager
•Import More Media to the
Library
•Add New Media to Your
Library Automatically
•Check for New Software
Updates
•HTC Sync Manager
Supported File Formats
•Play Music in HTC Sync
Manager
•Create a Playlist in HTC
Sync Manager
Icons on Phone
•Status Bar
•Status Icons
•Notification Icons
•Notification Panel
•Notification LED
Maintenance Releases
• Not yet available
Manufacturer
•
•
Memory
•Insert the microSD Card
•Remove the microSD
Card
•Check the microSD Card
Memory
•Erase the microSD Card
•Unmount the microSD
Card
•Copy Files to or from the
microSD Card

•View Photos and Videos
in HTC Sync Manager
•Set Up HTC Sync
Manager to Recognize
Your Phone
•Set Up Your Phone to
Sync with your Computer
•Syncing Your Phone and
Your Computer
•Ripping Music from a CD
with HTC Sync Manager
Music
•Browse for Music
•Listen to Music
•Make Your Music Sound
Better
•Find Music Videos on
YouTube
•Update Album Covers
•Playlists
•Music and Ringtones
•Share Music Using
Bluetooth
•Use the Music Widget
•FM Radio
Near Field
Communications (NFC)
• Beam screen content
• Turn on NFC
• Turn on Android Beam
Ringers/Sounds
• Silent Mode
• Vibrate
• Volume
• Phone Ringtone
• Other Incoming Call
Options
• Notification Ringtone
• System Sounds
Settings
• Sound Set
• Application Tabs
• Location Settings
• Language Settings
• Date & Time Settings
• Keyboard Settings
• Change the Email
Account Settings
•Text and Multimedia
Message Settings
Software / PRL
• View Software Version on
Phone
• Update Phone Software
• View/Update PRL Version
on Phone
Tools/Productivity
•Calculator
•Clock & Alarm
•Stocks
•Weather
•Create a Task
•Link a Task to a Contact
•Link a Task to a Location
•Manage Tasks
•View the Unified Task List
•Create a Task List
•Manage Task Lists
•Back Up or Restore Tasks
Updates
•Update Your Phone
Firmware
•Update the Operating
System
•Update Your Profile
•Update Your PRL

•Change Tasks Settings
•Dropbox
•SkyDrive
•Voice Recorder
Applications
Applications
• Allow Installation of Third-
Party Programs
• Clear Application Cache
and Data
• Select the App to Open
Data Items
• Stop Applications Using
Task Manager
•Google Play
Browser
• Optimize data usage
• Accessibility settings for
Browser
•Open the Browser
•Private Browsing
•Add and Manage Your
Bookmarks
•Save Web Content For
Later
•Browsing History
•Download File and Apps
from the Web
•Set Browser Options
•Copy Text, Look Up
Information, and Share
Calendar
•Create an Event
•View the Calendar
•Manage Calendar Events
•Accept or Decline a
Meeting Invitation
•Set Reminders for your
Events
•Show or Hide Calendars
and Tasks
•Change Calendar Settings
•About the Calendar
Widget
•Send a Meeting Request
E-mail
• Add a POP3 or IMAP
Email Account
• Add an Exchange
ActiveSync Account
• Check Your Mail Inbox
• Send an Email Message
•Resume a Draft Email
Message
• Save an Email Message
in Tasks
• Print Your Email
Messages
• Search Email Messages
• Work with Exchange
ActiveSync Email
• Set Your Out of Office
Status
• Manage Email Messages
• Sync Email Less
Frequently
• Change the Email
Account Settings
• Delete an Email Account
• Add the Mail Widget
Gmail
• Create a Google Account
• Add Gmail accounts
• Forgot Gmail password
• Sign In to Your Google
Account
• View Your Gmail Inbox
• Send a New Gmail
Message
• Reply To or Forward an
Email Message
• Get Help with Gmail
• Search Gmail inbox
• Change Gmail settings
Google Search
• Use Google Search
• Set searchable items
• Manage privacy settings
• Search tips and& tricks
Google Wallet
• Google Wallet Reference
Matrix
People
• Find People
• Edit details
• Change settings
Phone
• Learn phone app
• Dial using phone app
• Make phone call
• Answer/reject phone call
• Divert calls
Product Known Issues
• Product Known Issues

• Use Quick Responses
• End call
• Call Log
• Place Internet (SIP) call
• Listen to voicemail
• Options during call
• Call Using the Phone
Dialer
• Call From Call History
• Call From People
• Call Using a Speed Dial
Number
• Call a Number in a Text or
Email Message
• Call Emergency Numbers
• Answer an Incoming Call
• Mute the Ringing Sound
• Use the Quiet Ring on
Pickup Feature
• Reject an Incoming Call
• Caller ID
• Call Waiting
• 3-way Calling
• Call Forwarding
• In-call Options
• Add an Internet Calling
Account
• Make an Internet Call
•Speed Dial
•View Call History
•Save a Number From Call
History
•Prepend a Number From
Call History
•Erase Call History
•TTY Mode
•DDTM Mode

SMS/MMS Messaging
• Text Messaging Matrix
•Send a Text Message
(SMS)
•Use Preset Messages
•Send a Multimedia
Message (MMS)
•Create a Slideshow
•Save and Resume
Composing a Draft
Message
•Check Your Messages
Save an Attachment
•Save a text message as a
Task
•Protect a Message from
Deletion
•Delete a Single Message
•Delete Several Messages
Within a Conversation
•Delete a Conversation
•Delete Several
Conversations
•Back Up and Restore
Your Text Messages
•Text and Multimedia
Message Settings
•Add the Messages Widget
Voice
• Google Voice Matrix
Voice Mail
• Set Up Visual Voicemail
• Review Visual Voicemail
• Voicemail Notification
Voice Search
• Use Voice Actions
Security
• Use Face Unlock
• Use a Screen Unlock
Pattern
• Use a Screen Unlock PIN
• Use a Screen Unlock
Password
• Disable the Screen Lock
• Encrypt Data on Your
Phone
Sprint TV
• Watch TV and Movies
• Sprint TV Radio Matrix
NASCAR Sprint Cup
Mobile
• NASCAR
• NASCAR Sprint Cup
Mobile Matrix
HTC Watch
• Create or Sign In to Your
HTC Watch Account
•Rent or Buy a Video with
HTC Watch
•Manage Your HTC Watch
Downloads
•Change the HTC Watch
Settings
•Check What’s Linked to
Sprint NBA Mobile
• Sprint NBA Mobile Matrix

Your HTC Watch Account
•Delete Your HTC Watch
Account
•HTC Watch FAQs
Social Media and Networking
Facebook
•Facebook
•Friend Stream
•Facebook contacts
Support:
www.facebook.com
Flickr
• Support:
www.flickr.com
fring
• Calls
• Contacts
• Login
• Messaging
• Settings
• Troubleshooting
• User Guide
• Support:
www.fring.com
Google
•Google+
•Google Talk
•Google Play
•Google Wallet
Account
•Google Maps
•Google Latitude
Twitter
•Twitter
•Friend Stream
•Support:
www.twitter.com
YouTube
•YouTube
• Support:
www.youtube.com
Device Troubleshooting
Android OS Troubleshooting
Hard Reset
Reset Device (Factory Data Reset)
Reset Unlock Pattern
Ringer / Vibrate / Speaker - Not Working
RTN (##786#)
SCRTN (##72786#)
Update Data Profile
Update Phone Software
View Software Version on Phone
View/Update PRL Version on Phone
Soft Reset
Software Troubleshooting
67 / 1012 Data Error
Error 16
Bluetooth Troubleshooting
Bluetooth Pairing
Turn Bluetooth On or Off

Android OS Troubleshooting
Device Battery Life Issues
Device Charging Port Issues
Device Freezing or Locking Up
Device Powercycling Issues
Device Reset or Power Down
Touchscreen Issues
Back to Top
Ringer/Vibrate/Speaker Not
Working
If ringer, vibrate, or speaker is not working:
1. Confirm ringer, vibrate, or speaker is turned on.
2. Turn off phone for 1 minute.
3. Turn on phone.
4. Has issue been resolved?
If Yes: Tell customer if they continue to have this issue they may need to take their
phone to an authorized Repair center.
If No: Refer customer to an authorized Repair center.
5. Note account.
Back to Top
View Software Version on Phone
1. Tap Home > Apps icon (located in Favorites tray)
2. Tap Settings.
3. Scroll up and tap About.
4. Tap Software information
5. Software version is displayed.
6. Tap Home to return to Home screen.
Back to Top
Update Phone Software
1. Tap Home > Apps icon (located in Favorites tray)
2. Tap Settings.
3. Scroll up and Tap System Updates
4. Tap HTC software update
a. Phone will check for updates and prompt to install them or display Your system is currently
up to date.
5. Tap Home to return to the Home screen.
Back to Top
View/Update PRL Version on
Phone
View PRL Version
1. Tap Home > Apps icon (located in Favorites tray)

2. Tap Settings.
3. Scroll up and tap About
4. In About, tap Software information.
5. In Software information, the PRL version is displayed that is currently on the phone.
Update PRL Version
1. Tap Home > Apps icon (located in Favorites tray)
2. Tap Settings.
3. Scroll up and tap System Updates.
4. Tap Update PRL.
Phone will check for updates and display Attention The PRL has been upgraded.
5. Tap OK to continue.
6. Tap Home to return to the Home screen.
Back to Top
Update Data Profile
1. Tap Home > Apps icon (located in Favorites tray)
2. Tap Settings.
3. Scroll up and tap About.
4. Tap System Updates
5. Tap Update Profile.
oPhone will check for updates and display Attention The profile has been updated.
6. Tap OK to continue.
7. Tap Home to return to the Home screen.
Back to Top
SCRTN (##72786#)
1. Look up the Mobile Subscriber Identification (MSID) and the Master Subsidy Lock (MSL) code.
2. From the Home Screen, Tap Phone.

3. On the phone dial pad press ##72786#.

4. Enter 6-digit MSL. Example: 123456. Tap OK.

5. At the SCRTN Screen, tap Menu, then tap Reset

6. When EPST message appears, tap OK.

7. Phone will clear previous internal programming information, tap OK and the device will reboot

8. After phone reboots, the phone will try Hands Free Activation. Customer can cancel this if the device
has not been activated or customer can continue with activation.

9. When Congratulations! Device has been activated appears, tap OK.
10. On Checking for PRL update screen, the phone will check for and update the PRL.
11. On The PRL has been upgraded screen, tap OK.
oHome screen appears and the setup is complete.
oPhone is now ready to make voice and data calls.
Back to Top
RTN (##786#)
Remember: This will erase all saved data on the phone.
No RTN should be completed on a device that is not in a Sprint Coverage Area.
1. Look up the Mobile Subscriber Identification (MSID) and the Master Subsidy Lock (MSL)
code.
2. Tell customer how to backup contacts prior to RTN.
3. Warn customer that any data they have saved on the phone will be lost.
4. From the Phone dialer, dial ##786#.
5. On RTN screen, tap Reset.
6. On Check MSL screen, tap the blinking cursor to display the keypad.
7. Use the keypad to enter the 6-digit Master Subsidy Lock (MSL), then tap OK.
8. On Reset: Reset the phone to manufacturer’s default? screen, tap Yes.
This operation resets the phone to the factory defaults.

All of the customer’s personal information will be lost.
The phone will power down and reset itself, then turn back on automatically.
9. On Welcome screen, tap Start.
On Hands Free Activation screen, the phone will contact the network and
automatically provision/activate.
10. When Congratulations! Device has been activated appears, tap OK.
On Checking for PRL update screen, the phone will check for and update the PRL.
11. On The PRL has been upgraded screen, tap OK.
12. Customer will follow a series of on screen prompts to link their Google account to the phone
and complete set up.
See Programming –HTC EVO 4G LTE for step-by-step instructions.
13. On the Home screen, tell customer how to import contacts back onto phone.
Back to Top
Reset Device (Factory Data
Reset)
Remember: This will erase all saved data on the phone.
No reset should be completed on a device that is not in a Sprint Coverage Area.
1. Tell customer how to backup contacts prior to reset.
2. Warn customer that any data they have saved on the phone will be lost.
3. Tap Home > Apps icon (located in Favorites tray) > Settings.
4. Scroll up and tap Storage.
5. Scroll up and tap Factory Data Reset
6. Tap Erase all Data.
The phone will power down and reset itself, then turn back on automatically.
7. On the Welcome screen, tap Start.
On Hands Free Activation screen, the phone will contact the network and
automatically provision/activate.
8. When Congratulations! Device has been activated appears, tap OK.
On Checking for PRL update screen, the phone will check for and update the PRL.
9. On The PRL has been upgraded screen, tap OK.
10. Customer will follow a series of on screen prompts to link their Google account to the phone
and complete set up.
See Programming –HTC EVO 4G LTE for step-by-step instructions.
11. On the Home screen, tell customer how to import contacts back onto phone.
Back to Top
Hard Reset
Remember: This will erase all saved data on the phone.
No reset should be completed on a device that is not in a Sprint Coverage Area.
1. Tell customer how to backup contacts prior to reset.
2. Warn customer that any data they have saved on the phone will be lost.

3. Turn off Fast Boot Mode: Tap Apps>Settings>Power, remove the check mark from Fast
Boot.
4. Press and Power button and choose Power Off
5. Once device has booted all the way down, press and hold the Volume DWN and PWR
BUTTON at the same time until the bootloader starts.
6. Use Volume Down button to select factory reset.
7. Press Power button to select.
8. The phone will power down and reset itself, then turn back on automatically.
9. On the Welcome screen, tap Start.
10. Customer will follow a series of on screen prompts to link their Google account to the phone
and complete set up.
See Programming –HTC EVO 4G LTE for step-by-step instructions.
11. On Attention: The profile has been updated screen, tap OK to continue.
12. On the Home screen, tell customer how to import contacts back onto phone.
Back to Top
Soft Reset
A soft reset clears and shuts down all active programs. This can help when the device is running slower than
normal or not performing properly. No data is lost and settings remain the same. To perform a soft reset,
follow these steps:
1. Save any files that are open.
2. Press and hold the Power key at the top of the device.
3. Tap Restart.
a. You may also tap Power off and then press the Power key to turn your device on again.
NOTE: If your device has locked up or is unresponsive, you can perform an alternate reset by pressing and
holding the Power key for 10 seconds. The three keys at the bottom of the device will blink when it is close to
restarting. 1.
Back to Top
Reset Unlock Pattern
When a customer fails to draw the correct unlock pattern on the screen after 5 attempts, they are
prompted to wait for 30 seconds before they can try again.
If the customer forgets their unlock pattern and needs to reset it:
1. On You have incorrectly drawn your unlock pattern warning message, tap OK.
2. Tap Forgot pattern?
3. On Account unlock screen, enter Google email account setup on the phone then tap Sign
in. If customer has forgotten the Google email username and password, a Hard Reset
must be performed on the phone.

4. On Unlock selection screen, tap type of unlock selection preferred.
5. Follow prompts to establish a new unlock pattern or to select a different method of unlocking
the phone.
Back to Top
Software Troubleshooting
Error 16
1. Authenticate the account.
2. Validate if Error 16 UAI note displays.
oIf UAI displays: Follow the instructions in the UAI note.
oIf UAI does not display but caller heard Error 16: Tell the caller to make another call from the
same Sprint phone and to follow the message prompts for assistance.
Back to Top
Error 67 / 1012 (Restore Data
Profile)
1. Tap Home > Apps icon (located in Favorites tray) > Settings.
2. Scroll up and tap About phone.
3. Tap System Updates > Update Profile.
oPhone will check for updates and display Attention The profile has been updated.
4. Tap OK to continue.
5. Tap Home to return to the Home screen.
Back to Top
Bluetooth Troubleshooting
Bluetooth Pairing
1. Tap Home > Apps icon (located in Favorites tray) > Settings.
2. Under Wireless & networks, tap Bluetooth.
3. If Bluetooth isn’t turned on, tap the toggle for Bluetooth to turn it on.
a. The phone scans for and displays the IDs of all available Bluetooth devices in range.
4. If the device the customer wants to pair with isn’t in the list, make the phone discoverable by tapping
on it at the top of the Bluetooth menu.
5. If the phone stops scanning before the other device discoverable, touch Search for devices.
6. In Available Devices section, touch the ID of the other device in the list to pair with phone.
a. The devices pair with each other.
i. If prompted to enter a passcode, try entering 0000 or 1234 (the most common
passcodes), or consult the documentation that came with the device to learn its
passcode.
b. If the pairing is successful, the phone connects to the device.
This manual suits for next models
1
Other HTC Cell Phone manuals

HTC
HTC J BATTERFLY HTL23 Installation guide

HTC
HTC Touch Pro2 TM1630 User manual

HTC
HTC Dash 3G HS S200 User manual

HTC
HTC Sensation XE User manual
HTC
HTC One mini User manual

HTC
HTC Rezound User manual

HTC
HTC Desire Z User manual

HTC
HTC Vivid User manual

HTC
HTC ONE M8 EYE User manual

HTC
HTC One E9 dual sim User manual