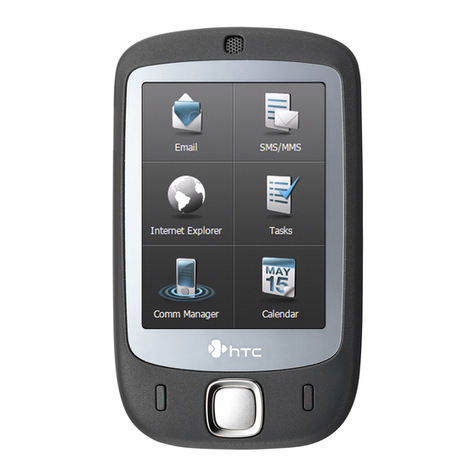
HTC HTC One User manual

Your HTC One
User guide

Contents
Unboxing
HTC One 7
SIM card 8
Charging the battery 10
Switching the power on or off 10
Want some quick guidance on your phone? 11
Setting up your phone
Setting up your new phone for the first time 12
Transferring content from an Android phone 13
Transferring content from an iPhone 14
Transferring content from your old phone through Bluetooth 15
Getting contacts and other content into HTC One 15
Transferring photos, videos, and music between your phone and computer 16
Home screen 16
Getting to know your settings 17
Updating the HTC One software 17
Your first week with your new phone
About your phone 19
Basics 21
Home screen feeds 29
Notifications 30
Working with text 33
Battery 37
Camera and Gallery
Camera 41
Gallery 46
Personalizing
Making HTC One truly yours 56
Changing your wallpaper 56
Adding a widget to your Home screen 56
Adding apps and other shortcuts on your Home screen 58
Rearranging or removing widgets and icons on your Home screen 58
Personalizing the launch bar 59
Grouping apps into a folder 60
Adding a Home screen panel 61
Changing your ringtone, notifications, and sounds 61
2 Contents

Rearranging application tabs 61
Customizing the lock screen style 61
Hiding missed calls and messages on the lock screen 62
Securing HTC One with a personal touch 62
Phone calls
Making a call with Smart dial 63
Returning a missed call 64
Using Speed dial 64
Calling a phone number in a text message 64
Calling a phone number in an email 65
Calling a phone number in a Calendar event 65
Making an emergency call 65
Receiving calls 65
What can I do during a call? 66
Setting up a conference call 67
Checking calls in the Call History 68
Changing ringtone settings 69
Home dialing 69
Messages
Sending a text message (SMS) 71
Sending a multimedia message (MMS) 71
Sending a group message 73
Resuming a draft message 74
Replying to a message 74
Saving a text message in the Tasks app 75
Forwarding a message 75
Viewing and saving an attachment from a multimedia message 75
Moving messages to the secure box 76
Blocking unwanted messages 76
WAP push messages 77
Copying a text message to your SIM card 77
Deleting messages and conversations 77
Search and web browser
Searching HTC One and the Web 79
Getting instant information with Google Now 80
Browsing the Web 81
Bookmarking a webpage 83
Using your browsing history 84
Clearing your browsing history 85
Entertainment
Music 86
TV 90
HTC Watch 94
Wireless display 97
3 Contents

Storage
Phone storage 99
Dropbox integration 101
Sync, backup, and reset
Online sync 106
Backup 108
HTC Sync Manager 112
Reset 116
People
Your contacts list 118
Setting up your profile 119
Adding a new contact 120
Editing a contact’s information 120
Getting in touch with a contact 121
Importing or copying contacts 121
Merging contact information 122
Sending contact information 123
Contact groups 123
Email
Gmail 125
Mail 126
Travel and maps
Location settings 131
Google Maps 131
HTC Car 135
Google Play and other apps
Getting apps 139
Essential apps 141
Fun apps 145
Productivity apps 148
Internet connections
Data connection 153
Managing your data usage 154
Wi‑Fi 155
Connecting to a virtual private network (VPN) 158
Using HTC One as a wireless router 159
Sharing your phone's Internet connection by USB tethering 159
Connecting to the Internet through a computer 160
Wi‑Fi printing 160
4 Contents

Wireless sharing
Connecting a Bluetooth headset 162
Unpairing from a Bluetooth device 163
Where sent information is saved 163
Receiving files using Bluetooth 164
Sharing content with NFC 165
Settings and security
Turning Airplane mode on or off 166
Keeping the screen on while charging 166
Turning automatic screen rotation off 166
Adjusting the time before the screen turns off 167
Adjusting the screen brightness manually 167
Playing a sound when selecting onscreen items 167
Changing the display language 168
Accessibility settings 168
Working with certificates 168
Protecting your SIM card with a PIN 169
Protecting HTC One with a screen lock 169
Checking your phone's HTC Sense version 170
Trademarks and copyrights
Index
5 Contents

Conventions used in this guide
In this user guide, we use the following symbols to indicate useful and important
information:
This is a note. A note often gives additional information, such as what happens
when you choose to do or not to do a certain action. A note also provides
information that may only be applicable to some situations.
This is a tip. A tip gives you an alternative way to do a particular step or procedure,
or lets you know of an option that you may find helpful.
This indicates important information that you need in order to accomplish a certain
task or to get a feature to work properly.
This provides safety precaution information, that is, information that you need to be
careful about to prevent potential problems.
6 Conventions used in this guide

Unboxing
HTC One
1. BACK
2. USB connector
3. HOME
4. Dual speakers
5. VOLUME
6. Front camera
7. 3.5mm headset jack
8. POWER
9. Proximity sensor
10. Notification LED
11. Tray eject hole/SIM card tray
§HTC One is available in either a 3G or LTE version, depending on your region and
mobile operator. You need an LTE plan to use your operator's 4G/LTE network for
voice calls and data services. Check with your operator for details.
§If you want to use a screen protector, please don’t cover and block the proximity
sensor. You can purchase the dedicated screen protector for HTC One that already
has a small opening for the sensor.
7 Unboxing

SIM card
HTC One uses a microSIM card. The microSIM card contains your phone number,
service details, and memory for storing phonebook contacts and/or text messages.
Inserting the SIM card
1. Hold the phone face up.
2. Insert the tip of the SIM eject tool (or a small bent paperclip) into the small hole
next to the SIM card tray slot.
3. Push the tip all the way into the hole until the SIM card tray ejects.
4. Pull the SIM card tray out, and place the SIM card (contacts facing down) into
the tray.
Use a standard microSIM only. Inserting other types (such as nanoSIM with an
adapter or a modified SIM) may cause the card to not fit properly or damage the
card slot.
5. Insert the SIM card tray back into the slot.
8 Unboxing

Removing the SIM card
Make sure to switch off HTC One before removing your SIM card.
1. Hold the phone face up and the top panel facing you.
2. Insert the tip of the SIM eject tool (or a small bent paperclip) into the small hole
next to the SIM card tray slot.
3. Push the tip all the way into the hole until the SIM card tray ejects.
4. Pull the SIM card tray out, and remove the SIM card.
When removing the SIM card, make sure that you insert the empty SIM card tray back
into the slot.
9 Unboxing

Charging the battery
Before you turn on and start using HTC One, it is recommended that you charge the
battery.
Only the power adapter and USB cable provided in the box must be used to charge
the battery.
1. Insert the small end of the USB cable into the USB connector.
2. Insert the other end of the USB cable into the power adapter.
3. Plug in the power adapter to an electrical outlet to start charging the battery.
As a safety precaution, the battery stops charging if it overheats.
Switching the power on or off
Switching the power on
Press the POWER button.
When you turn on HTC One for the first time, you’ll need to set it up.
Switching the power off
1. If the display is off, press the POWER button to turn it back on, then unlock the
screen.
2. Press and hold the POWER button for a few seconds.
3. Tap Power off on the options menu.
10 Unboxing

Want some quick guidance on your phone?
Exploring HTC One
Tips & Help lets you get the most out of HTC One in seconds.
§Ever have the feeling that you're not getting the most out of your phone?
Browse through the friendly walkthroughs on Tips & Help to learn how. The
topics range from intro to advanced and the Tips & Help feed on the Home
screen even recommends topics that you might like.
§Need to know how to do something right away? Just type in some keywords
and get clear, up-to-date answers right on HTC One.
To open Tips & Help from the Home screen, tap > Tips & Help.
If you haven't downloaded Tips & Help content yet, or if there's updated content
available, just tap the download link to get it.
To change the sync settings of Tips & Help, tap > Update settings.
Searching Tips & Help
1. In Tips & Help, tap , and then enter the words you want to search for.
2. Tap a search result to jump straight to that item.
11 Unboxing

Setting up your phone
Setting up your new phone for the first time
When you switch on your new phone for the first time, you’ll be asked to set it up.
Walk through the on-device setup to choose your Internet connection, select how you
want to set up your new phone, and more.
§Select Set up from scratch to set up your accounts and personalize your new
phone from your computer using the HTC Get Started service.
Your phone shows you the URL of the HTC Get Started site and a pair code. On
your computer's web browser, just go to the URL and enter the pair code to
start your web setup. You need an HTC Account to save your accounts and
settings on the Web and download them to your phone.
§If you already finished the HTC Get Started setup before turning on your new
phone, just download your web setup. Choose to import content, and then
select Apply HTC Get Started setup.
§If you have content from an old phone, you can choose to do a direct phone-to-
phone transfer.
§To make it easier for you to back up and restore content from HTC One to
another HTC phone in the future, select Back up phone daily.
§To find out more about HTC Get Started and HTC Account, see the Help and FAQ
on the HTC Get Started site (www.htcsense.com/help/).
§If you transferred content such as wallpaper and ringtone from an old phone, using
HTC Get Started to personalize and download the same content types from the
Web will change your settings on your new phone.
§Some features that need to connect to the Internet such as location-based
services and auto-sync of your online accounts may incur extra data fees. Don’t
worry. You can enable or disable them in Settings later on.
12 Setting up your phone

Transferring content from an Android phone
On your old Android™phone, download the HTC Transfer Tool and use it to transfer
your content to your new HTC phone. The types of locally stored content on your old
phone that the tool can transfer include contacts, messages, calendar events, web
bookmarks, music, photos, and videos. Some settings can also be transferred.
§You need Android version 2.3 or later to use the HTC Transfer Tool on your old
phone.
§If your old phone has Android version 2.2 or an earlier version, you need to use
Bluetooth®transfer. For details, see Transferring content from your old phone
through Bluetooth on page 15.
1. Do one of the following:
§If you're setting up your new HTC phone for the first time, choose to
transfer content, and then select Transfer from old phone on the Set up
phone screen.
§Go to Settings, and then tap Transfer content.
2. Choose whether to transfer from an old HTC phone or other Android phone.
3. Follow the suggestions shown on your new phone to download and install the
HTC Transfer Tool to your old phone.
4. Follow the instructions on the two phones to connect them. When you see a PIN
on your old phone, make sure the same PIN also appears on your new phone
before you continue.
5. On your old phone, choose the types of content you want to transfer, and then
tap Start.
6. Wait for the transfer to finish.
13 Setting up your phone

Don't have an Internet connection on your old phone?
Don't worry. On your old phone, turn on Wi‑Fi®and connect to the hotspot
that you see on your new HTC phone. You'll then need to download the HTC
Transfer Tool from an HTC webpage on your web browser.
1. After turning on Wi‑Fi, connect your old phone to the hotspot that's
shown on your new phone (for example, "HTC Transfer Tool 1234").
2. Go to Settings > Security, and then select the Unknown sources option
to allow the download and installation of the tool through your web
browser.
3. Access the HTC webpage on your web browser. Depending on the type
of Android phone that you have:
§The web browser automatically opens to the HTC webpage if you're
using an HTC phone.
§You need to slide the Notifications panel open, and then tap Sign in
to Wi-Fi network if you're using another Android phone.
4. Tap the download button on the HTC webpage.
5. Slide the Notifications panel open again, and wait until you see a
notification that shows the Transfer_tool.apk has been downloaded.
6. Tap the Transfer_tool.apk notification to install the HTC Transfer Tool.
7. After installation is complete, open the HTC Transfer Tool.
8. Choose the types of content you want to transfer, and then tap Start.
9. Wait for the transfer to finish.
Transferring content from an iPhone
If you have an iPhone®, it's fast and easy to transfer your contacts, messages, and
other content when you use HTC Sync Manager.
To find out how, see Transferring iPhone content to your HTC phone on page 113.
If you only need to migrate your contacts, you can also use Bluetooth transfer. For
details, see Transferring content from your old phone through Bluetooth on page 15.
14 Setting up your phone

Transferring content from your old phone
through Bluetooth
Use Bluetooth to transfer contacts from an iPhone, a phone that has Android version
2.2 (or earlier version), or other types of phones. Depending on the capabilities of your
old phone, you may be able to transfer not only contacts but also other data such as
calendar events and text messages to your new HTC phone.
Use HTC Sync Manager to transfer more types of content from an iPhone.
1. Do one of the following:
§If you're setting up your new phone for the first time, choose to transfer
content, and then select Transfer from old phone on the Set up phone
screen.
§Go to Settings, and then tap Transfer content.
2. Tap iPhone, or tap Other and then choose your old phone's name and model.
3. On your old phone, turn Bluetooth on and set it to discoverable mode.
4. Follow the onscreen instructions on your old and new phones to pair them.
5. Choose the types of data you want to transfer.
6. Wait for the transfer to finish.
Getting contacts and other content into HTC
One
Aside from the HTC Transfer Tool, there are other ways you can add contacts and
other content to HTC One.
Sync with your
computer
Use HTC Sync Manager to sync contacts, documents, playlists,
and more between HTC One and your Windows®or Mac®
computer.
You can also use it to transfer contacts, messages, and other
content from an iPhone to your computer, and then to your HTC
One.
Gmail™Google®contacts are imported to HTC One after you sign in to
your Google Account. You can also create more Google
contacts right from HTC One.
Social network
accounts
Log in to your favorite social networks to sync contact
information from them.
Microsoft®
Exchange
ActiveSync®
HTC One syncs your work contacts from the Microsoft Exchange
ActiveSync Server in your workplace.
15 Setting up your phone

Phone contacts You can create contacts locally on HTC One, if you don't prefer
to store them on your online accounts.
SIM card Copy all your SIM contacts to HTC One.
Transferring photos, videos, and music
between your phone and computer
There are two ways you can transfer your media from or to your computer.
§Connect HTC One to your computer. Your computer will recognize it just like
any removable USB drive, and you can copy your media between them.
§Download and use the HTC Sync Manager software on your computer. You can
set it up to automatically get music, photos, and videos off HTC One to your
computer. You can also sync playlists from your computer to the phone.
If you have an iPhone, you can even connect it and transfer the camera roll
(photos and videos) to your computer. Then reconnect HTC One and copy
them over.
Tired of keeping copies of your media in several places? Use online storage services
to put your media in one place so you can manage them anywhere — on your
computer, HTC One, and other mobile devices.
Check first what online storage accounts are available on HTC One and sign in to the
one you want to use. To sign in to an account, slide the Notifications panel open, and
then tap > Accounts & sync > . Use the Gallery app to access media in your
online storage.
Home screen
Your Home screen is where you make HTC One your own.
§After you've turned on and set up HTC One, you'll see the Feeds view as the
main Home screen. Customize it to show posts from your social networks,
headlines from your favorite news media, and more. For details, see Checking
feeds on your Home screen on page 29.
§You can change the apps on the launch bar at the bottom of the Home screen.
See Personalizing the launch bar on page 59.
§Swipe left and you’ll discover another Home screen panel for adding your
favorite apps, widgets, and more so they’re just a tap away. And if you need
more Home screen panels, you can add more. For details, see Personalizing on
page 56.
Press to return to the main Home screen.
16 Setting up your phone

Getting to know your settings
Want to change the ringtone, set up a Wi‑Fi connection or make HTC One more
secure? Do this and more in Settings.
Slide the Notifications panel open, and then tap . Here are some of the basic
settings you can change:
§Tap the On/Off switch next to an item such as Wi-Fi to turn it on or off. Tap the
item itself to configure its settings.
§Tap Sound to set a ringtone, choose a sound profile, and configure incoming call
sound settings.
§Tap Personalize to change the Home screen wallpaper, lock screen style, and
more.
§Tap Security to secure HTC One, for example with a screen lock.
Updating the HTC One software
HTC One can check and notify you if there’s a new update available. You can also
manually check if there's an available update.
Installing a software update
When Internet connection is on and there's a new software update available, the
update notification icon appears in the status bar.
1. Slide the Notifications panel open, and then tap the system update notification.
2. If you don't want to download the update using your data connection, select
Update over Wi-Fi only.
3. Tap Download.
4. When download is complete, select Install now, and then tap OK.
After updating, HTC One will restart.
17 Setting up your phone

Installing an application update
When Internet connection is on and there's an available update for your HTC or
mobile operator apps, the update notification icon appears in the status bar.
1. Slide the Notifications panel open, and then tap the update notification.
The Updates screen opens with the list of application updates to be installed.
2. Tap an item to view its details, and then tap .
3. When you're done reviewing the updates, tap Install. You'll be asked to restart
HTC One if needed.
Checking for updates manually
1. Slide the Notifications panel open, and then tap .
2. Tap About > Software updates. HTC One checks if updates are available.
If you don't have Internet connection, you'll be prompted to turn on mobile data or
connect to a Wi‑Fi network. Once connected, tap Check now to check for updates.
18 Setting up your phone

Your first week with your
new phone
About your phone
Features you'll enjoy on HTC One
HTC One gives you options for quick and easy setup. Transferring your old phone's
content such as your contacts, messages, and media can be done right from HTC One.
On this phone, enjoy taking shots with the camera, checking personalized content
with HTC BlinkFeed™, and more.
Easy phone setup and transfer
§With our HTC Get Started service, you can set up and personalize HTC One
from your computer, and just download your settings to HTC One. See Setting
up your new phone for the first time on page 12.
§Easily transfer your contacts, messages, music, photos, videos, and more from
an Android phone to HTC One. See Transferring content from an Android phone
on page 13.
By using HTC Sync Manager, you can even migrate content from an iPhone. See
Transferring iPhone content to your HTC phone on page 113.
§Back up HTC One to the cloud so it'll be a lot easier to restore your content to a
new phone next time. See Using HTC Backup on page 109.
Live Home screen
With HTC BlinkFeed, personalize your Home screen with the information and updates
that matter most to you. See a variety of content such as feeds about news and your
interests, social network updates, HTC One tips, and more. The content is constantly
refreshed when you're connected to the Internet. See Checking feeds on your Home
screen on page 29.
HTC Zoe
Experience a whole new way of capturing and retouching photos.
§Capture entire moments with pictures and sound, and watch them come alive
again with HTC Zoe™. See Taking HTC Zoe photos on page 44.
§Retouch your HTC Zoe photos or continuous shots with Object Removal,
Always Smile, and Sequence Shot. See Camera and Gallery on page 41.
19 Your first week with your new phone

New way to share memories
Create highlight videos without editing or share your photos to friends and family on
the fly.
§Show off the excitement of your event. Video Highlights automatically selects
the highlights of an event from your photos to create a half-minute show with a
musical theme. See Viewing the highlights of an event on page 48.
§HTC Share brings together your best photos, regular photos, and a highlight
video so that you can easily share your memories with friends and family. See
Sharing memories through HTC Share on page 54.
Outstanding camera features
§With VideoPic, you can snap a picture while you're shooting video. See Taking a
photo while recording a video (VideoPic) on page 43.
§Switch to Sweep panorama mode and pan the camera to capture a wide-angle
view of the scenery. See Taking a panoramic photo on page 45.
§Use Continuous shooting mode to capture 20 consecutive shots (or more) of a
subject in motion. See Taking continuous camera shots on page 43.
§By just tapping the shutter button, take three shots of your subject at different
exposures and combine them into a nice, evenly exposed photo. Use either the
main or front camera to capture HDR photos.
With the main camera, you can also record HDR videos with authentic sound
quality.
See Using HDR on page 45.
§With Variable Speed Playback, add a cinematic flair to your videos by slowing
down particular scenes. See Changing the video playback speed on page 48.
Immerse in music
§Beats Audio™integration gives you a rich, authentic sound experience, whether
you’re listening to music, watching a video, or playing a game. To find out more,
see Making your music sound better on page 87.
§In our HTC Music app, you'll see a visual animation while you're playing a song.
And if lyrics are available, they'll show onscreen.
20 Your first week with your new phone
Other manuals for HTC One
21
Table of contents
Other HTC Cell Phone manuals