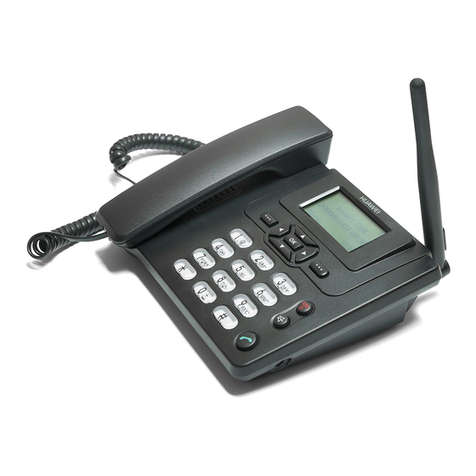
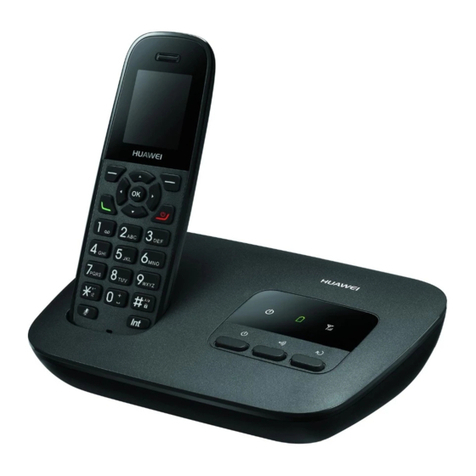
Huawei G2800 User manual

Copyright © Huawei Technologies Co., Ltd. 2011.
All rights reserved.
Trademarks and Permissions
, , and are trademarks or
registered trademarks of Huawei Technologies Co., Ltd.
Other trademarks, product, service and company names
mentioned are the property of their respective owners.
NO WARRANTY
THE CONTENTS OF THIS MANUAL ARE PROVIDED “AS IS”.
EXCEPT AS REQUIRED BY APPLICABLE LAWS, NO WARRANTIES
OF ANY KIND, EITHER EXPRESS OR IMPLIED, INCLUDING BUT
NOT LIMITED TO, THE IMPLIED WARRANTIES OF
MERCHANTABILITY AND FITNESS FOR A PARTICULAR PURPOSE,
ARE MADE IN RELATION TO THE ACCURACY, RELIABILITY OR
CONTENTS OF THIS MANUAL.
TO THE MAXIMUM EXTENT PERMITTED BY APPLICABLE LAW,
IN NO CASE SHALL HUAWEI TECHNOLOGIES CO., LTD BE
LIABLE FOR ANY SPECIAL, INCIDENTAL, INDIRECT, OR
CONSEQUENTIAL DAMAGES, OR LOST PROFITS, BUSINESS,
REVENUE, DATA, GOODWILL OR ANTICIPATED SAVINGS.

i
Table of Contents
1 Getting to Know Your Phone ................................................1
Your Phone ........................................................................................... 1
Keys and Functions ........................................................................... 2
Screen Icons ......................................................................................... 4
2 Getting Started .......................................................................4
Installing the SIM Card and the Battery................................... 5
Removing the Battery and the SIM Card................................. 5
Installing the microSD Card .......................................................... 6
Charging the Battery........................................................................ 6
Using the Function Menu .............................................................. 6
Phone Lock ........................................................................................... 7
PIN and PUK ........................................................................................ 7
Locking the Keypad .......................................................................... 8
File Management............................................................................... 8
3 Call Function ...........................................................................9
Making a Call....................................................................................... 9
Answering a Call...............................................................................10
4 Text Input ............................................................................. 10
Changing the Text Input Mode..................................................10
Entering an English Letter............................................................11
Entering a Digit.................................................................................12

ii
Entering a Symbol ...........................................................................12
5 Messages .............................................................................. 13
Writing and Sending a Text Message .....................................13
Writing and Sending a Multimedia Message ......................13
6 Contacts ................................................................................ 15
Creating a New Contact................................................................15
Searching for a Contact ................................................................15
7 Multimedia ........................................................................... 16
Image Album.....................................................................................16
Audio Player.......................................................................................16
Video Player.......................................................................................17
FM Radio (Optional) .......................................................................17
Sound Recorder................................................................................18
8 WAP....................................................................................... 18
Network Settings ............................................................................. 19
Connecting to a Network.............................................................19
9 Warnings and Precautions ................................................. 20

1
Features marked with "optional" are optional. These
features may vary according to service providers. For
details, contact your service provider.
1 Getting to Know Your Phone
Your Phone
The following figure shows the appearance of your phone and
it is provided for your reference only.
1 Earpiece 7 Torch
2 Screen 8 Number keys

2
3 Navigation keys 9 End/Power key
4 Left soft key 10 Right soft key
5 Call/Answer key 11 Confirm key
6 Microphone
Keys and Functions
Press … To …
zMake a call.
zAnswer an incoming call.
zView All calls in standby mode.
zPower on or power off the phone (by pressing
and holding it for about 3s).
zEnd a call or reject an incoming call.
zReturn to the standby mode.
zAccess the main menu in standby mode.
zSelect the option displayed in the lower left
corner of the screen.
zAccess Contact list in standby mode.
zSelect the option displayed in the lower right
corner of the screen.
zAccess the main menu in standby mode.
zConfirm a selection.

3
Press … To …
zAccess Calendar(),Alarm (),User
profiles (), and Write message ( ) in standby
mode.
zDuring a call, increase the volume ( ) or
decrease the volume ( ).
–
zEnter numbers, letters, and characters.
zCall the voice mail center in standby mode (by
pressing and holding the 1key for about 3s).
zSpeed-dial phone numbers in standby mode (by
pressing and holding the 2–9keys for about 3s).
zSelect a submenu item labeled with the
corresponding number.
zIn standby mode, press the key once to enter *,
twice to enter +, three times to enter P, and four
times to enter W.
zDisplay the symbol list in text input mode.
zTurn on or turn off the torch in standby mode (by
pressing and holding it for about 3s).
zEnter #.
zChange the text input method when editing
texts.
zLock the keypad in standby mode (by pressing
and holding it for about 3s).

4
Screen Icons
Icon Indicates …
Signal strength.
GPRS signal.
General profile.
Meeting profile.
Outdoor profile.
Silence profile.
Headset profile.
Missed call(s).
The call forwarding function is enabled.
A new text message is received.
A new multimedia message is received.
An alarm or the schedule is activated.
The keypad is locked.
Battery power level.
2 Getting Started

5
Installing the SIM Card and the Battery
Ensure that the golden contact area on the SIM card is facing
downward, and the beveled edge is properly aligned with the
SIM card slot.
Removing the Battery and the SIM Card
Before removing the battery and the SIM card, ensure that your
phone is powered off.

6
Installing the microSD Card
Ensure that the memory card is inserted with the golden
contact area facing downward.
Charging the Battery
1. Connect the charger to an AC power socket.
2. Connect the charger to the charger jack on the phone.
3. Wait until the battery is completely charged.
During the charging process, the charging icon is displayed
in animation. When the charging icon becomes static, the
battery is fully charged.
4. Disconnect the charger from the phone.
5. Disconnect the charger from the AC power socket.
Using the Function Menu
1. In standby mode, press (Menu) or .

7
2. Press to select the desired function menu.
3. Press (OK) or to display the selected menu.
4. Press or to select a submenu.
5. Press (OK) or to display the submenu.
6. Press (Back) to return to the previous menu or
exit the function menu.
To return to standby mode, press .
Phone Lock
The phone lock protects your phone from unauthorized use. By
default, the phone lock function is disabled. You can change the
default phone lock code (1234) into any number of four to
eight digits.
Do remember your phone lock code. If you forget it, contact
the service center.
PIN and PUK
The personal identification number (PIN) protects your SIM
card from unauthorized use. The PIN unblocking key (PUK) is
used to unlock the blocked PIN. Both the PIN and the PUK are
provided with the SIM card. For details, contact your service
provider.

8
If you enter wrong PINs for a specified number of times
consecutively, the phone asks you to enter the PUK.
If you enter wrong PUKs for a specified number of times
consecutively, the SIM card becomes permanently invalid. In
this case, contact your service provider for a new SIM card.
Locking the Keypad
To lock the keypad, press and hold in standby mode. To
unlock the keypad, press (Unlock) and then .
If the Auto keypad lock function is enabled, after the phone is
idle for a preset period in standby mode, the keypad is locked
automatically.
When the keypad is locked, you can still press to
answer an incoming call or make an emergency call.
File Management
The File Manager is used to manage the multimedia files saved
in the phone memory or on the microSD card. Through the File
Manager, you can view the size and creation date of an e-book,
image, or audio clip and open a multimedia file.

9
3 Call Function
Making a Call
1. In standby mode, enter the phone number.
zTo make an international call, press twice
consecutively to enter the plus sign (+). Then enter the
international long distance code, country code or region
code, area code, and phone number in sequence.
zTo call an extension, enter the phone number, press
three times consecutively to insert P, and then enter the
extension number.
2. Press to dial the number.
3. Press to end the call.
zYou can also make a call through call logs, contacts,
and messages.
zDuring a call, press or to adjust the
volume.

10
Answering a Call
When there is an incoming call, you can do as follows:
zPress to answer it.
zPress to reject it.
zPress (Mute) to mute the speaker, and then press
(Reject) again to reject it.
zPress (Options), and then select Answer to
answer it.
zIf the Any Key answer function is enabled, you can press any
key except and to answer an incoming
call.
4 Text Input
Changing the Text Input Mode
The indicator of the current text input mode is displayed on the
upper left corner of the screen. You can press to
change the text input mode.

11
Indicator Text Input Mode
ABC and abc Traditional input mode
s ABC and s abc Smart English input mode
S PinYin and
Chinese stroke
input
Chinese input mode
123 Number input mode
zPress (Clear) once to delete the letter on the
left of the cursor. Press and hold (Clear) for
about 3s to clear all the letters.
zIn English input mode, press to display the
commonly used symbol list.
zIn any input mode (except the "123" input mode), press
to enter a space. In "ABC" or "abc" input mode,
press twice to enter 0.
Entering an English Letter
In "ABC" or "abc" input mode, you can press a key labeled with
the desired letter once to enter the first letter on the key, twice
to enter the second letter on the key, and so on.
In "s ABC" or "s abc" input mode, do as follows to enter an
English word:

12
1. Press each key only once according to the spelling sequence
of the desired word.
The phone displays the commonly used words according to
the sequence of key presses.
2. Press to scroll to the desired word.
3. Press to enter the word.
Entering a Digit
In "123" input mode, directly press a number key labeled with
the desired digit.
Entering a Symbol
1. Press to display the symbol list.
2. Press to scroll to the desired symbol.
3. Press to enter the symbol.

13
5 Messages
Writing and Sending a Text Message
1. Press (Menu), and then select Messages >Write
message> SMS.
2. Write the message.
3. Press (Options), select Send to, and enter the
recipient's phone number or add a recipient from Contacts.
To add multiple recipients, repeat this step.
4. Scroll to the desired recipient and press (Options)
for the following options:
zSend: sends the message to the recipient.
zEdit recipient: allows you to change the recipient.
zRemove recipient:removes the recipient from
receiving the message.
zRemove all recipients: removes all recipients from
receiving the message.
zSave to Drafts: saves the message to Drafts.
Writing and Sending a Multimedia
Message
1. Press (Menu), and then select Messages > Write
message > MMS.

14
2. Edit the content of the message.
You can add images, audio clips, and attachments to the
message. You can also preview the message add slides to
the message, and set the playing interval between two
slides.
3. Press (Options), select Send to, and enter the
recipient's phone number or add a recipient from Contacts.
To add multiple recipients, repeat this step.
4. Scroll to the desired recipient and press (Options)
for the following options:
zSend: sends the message to the recipient.
zSend options: allows you to set the sending options.
zEdit recipient: allows you to change the recipient.
zRemove recipient:removes the recipient from
receiving the message.
zRemove all recipients: removes all recipients from
receiving the message.
zChange to CC: copies the message to the recipient.
zChange to Bcc: blind copies the message to the
recipient.
zSave to Drafts: saves the message to Drafts.

15
zContact your service provider for the availability of the
Multimedia Messaging Service (MMS) and the method
for subscribing to this service.
zOpen multimedia messages with caution. Objects in
multimedia messages may contain viruses, such as
malicious software, that can damage your phone.
6 Contacts
Creating a New Contact
1. Press (Menu), and then select Contacts > Add
new contact.
2. Select To SI M, or To phone for saving the contact.
3. Edit the contact information.
4. Press and (Yes) to save the contact.
Searching for a Contact
1. Press (Menu) and select Contacts.
2. Enter the first letter of the contact name in the search bar.
Contacts who have names that start with this letter will be
displayed.

16
7 Multimedia
Image Album
1. Press (Menu) and select Multimedia > Image
Album to launch the image album.
2. Press to view images.
3. Press (Options) for options such as View, Image
information, Browse style, Send, Use as, Rename, Delete,
Sort by, Delete all, and Storage.
Audio Player
1. Press (Menu) and select Multimedia > Audio
Player.
2. Select an audio clip.
3. Press to play the clip.
When the clip is being played:
zPress to pause or continue.
zPress or to adjust the volume.
zPress and hold or to fast-forward or rewind the
clip.

17
zPress or to go back to the previous clip or
advance to the next one.
4. If background playback is enabled, press (Back) to
exit the audio player screen and play the audio clip in the
background.
Video Player
1. Press (Menu) and select Multimedia > Video
player to launch the video player.
2. Select a video clip.
3. Press to start playing the video clip.
4. Press (Options) for options such as Play, Send,
Rename, Delete, Delete all, Sort by, and Storage.
FM Radio (Optional)
1. Press (Menu) and select Multimedia > FM radio
to access the frequency modulation (FM) radio.
2. On the FM radio screen:
zPress to turn the FM radio on or off.
zPress or to adjust the volume.
zPress or to switch to the previous or next channel.
Other manuals for G2800
1
Table of contents
Other Huawei Telephone manuals

Huawei
Huawei F615 User manual

Huawei
Huawei F617 User manual

Huawei
Huawei F203 Instruction Manual

Huawei
Huawei Nova 7i User manual

Huawei
Huawei ETS2252+ User manual

Huawei
Huawei F201 User manual

Huawei
Huawei M920 User manual

Huawei
Huawei F385 User manual

Huawei
Huawei F688 User manual

Huawei
Huawei ETS2526 User manual
Huawei
Huawei F617 User manual

Huawei
Huawei ETS3125i User manual

Huawei
Huawei P9 EVA-L09 User manual

Huawei
Huawei ETS3125i User manual

Huawei
Huawei NEO3000 User manual

Huawei
Huawei ETS2000 Series User manual
Huawei
Huawei Mate20 Pro User manual

Huawei
Huawei F615 User manual

Huawei
Huawei ETS3253 User manual

Huawei
Huawei G Play mini CHC-U23 User manual