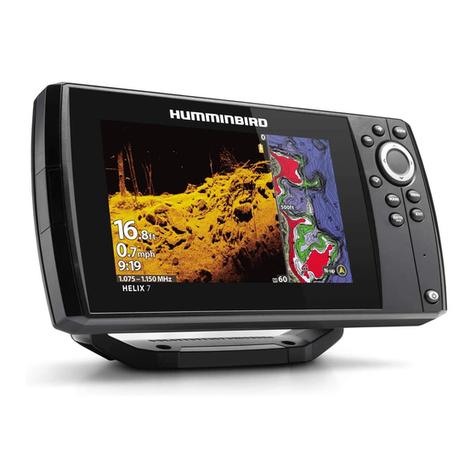
Humminbird SOLIX User manual

SOLIX
Operations Manual
532566-1EN_A

2
THANK YOU!
Thank you for choosing Humminbird®, th #1 nam in marin l ctronics. Humminbird has built its r putation by d signing and
manufacturing top quality, thoroughly r liabl marin quipm nt. Your Humminbird is d sign d for troubl -fr us in v n th harsh st
marin nvironm nt. In th unlik ly v nt that your Humminbird do s r quir r pairs, w off r an xclusiv S rvic Policy. For compl t
d tails, s th s parat warranty card includ d with your unit. W ncourag you to r ad this op rations manual car fully in ord r to g t
th full b n fit from all th f atur s and applications of your Humminbird product.
Contact Humminbird Custom r S rvic at humminbird.com or call 1-800-633-1468.
WARNING! This d vic should not b us d as a navigational aid
to pr v nt collision, grounding, boat damag , or p rsonal injury.
Wh n th boat is moving, wat r d pth may chang too quickly to
allow tim for you to r act. Always op rat th boat at v ry slow
sp ds if you susp ct shallow wat r or subm rg d obj cts.
WARNING! Th l ctronic chart in your Humminbird unit is an
aid to navigation d sign d to facilitat th us of authoriz d
gov rnm nt charts, not to r plac th m. Only official
gov rnm nt charts and notic s to marin rs contain all of th
curr nt information n d d for th saf ty of navigation, and th
captain is r sponsibl for th ir prud nt us .
WARNING! Compass Saf Distanc : Th control h ad must b
install d at l ast 4 f t (1.2 m t rs) from th compass or oth r
magn tic quipm nt on th boat. Also, s your compass
installation guid for d tails.
WARNING! This d vic is grant d for us in Mobil only
configurations in which th ant nnas us d for this transmitt r
must b install d to provid a s paration distanc of at l ast
8 inch s (20 cm) from all p rson and not b co-locat d with any
oth r transmitt rs xc pt in accordanc with FCC and Industry
Canada multi-transmitt r product proc dur s.
WARNING! Humminbird is not r sponsibl for th loss of data
fil s (waypoints, rout s, tracks, groups, r cordings, tc.) that
may occur du to dir ct or indir ct damag to th unit’s
hardwar or softwar . It is important to back up your control
h ad’s data fil s p riodically. Data fil s should also b sav d to
your PC b for r storing th unit’s d faults or updating th
softwar . R vi w th information in this manual for d tails.
WARNING! Disass mbly and r pair of this l ctronic unit should
only b p rform d by authoriz d s rvic p rsonn l. Any
modification of th s rial numb r or att mpt to r pair th
original quipm nt or acc ssori s by unauthoriz d individuals
will void th warranty.
WARNING! This product contains ch micals known to th Stat of
California to caus canc r and birth d f cts or oth r r productiv
harm.
WARNING! Do not trav l at high sp d with th unit cov r
install d. R mov th unit cov r b for trav ling at sp ds
abov 20 mph.
NOTE: Som f atur s discuss d in this manual r quir a
s parat purchas , and som f atur s ar only availabl on
int rnational mod ls. Ev ry ffort has b n mad to cl arly
id ntify thos f atur s. Pl as r ad th manual car fully in
ord r to und rstand th full capabiliti s of your mod l.
NOTE: Th illustrations in this manual may not look th sam as
your product, but your unit will function in a similar way.
NOTE: To purchas acc ssori s or any additional quipm nt
for your control h ad configuration, visit our W b sit at
humminbird.com or contact Humminbird Custom r S rvic at
1-800-633-1468.
NOTE: Th proc dur s and f atur s d scrib d in this manual ar
subj ct to chang without notic . This manual was writt n in
English and may hav b n translat d to anoth r languag .
Humminbird is not r sponsibl for incorr ct translations or
discr panci s b tw n docum nts.
NOTE: Product sp cifications and f atur s ar subj ct to chang
without notic .
NOTE: Humminbird v rifi s maximum stat d d pth in saltwat r
conditions, how v r actual d pth p rformanc may vary du to
transduc r installation, wat r typ , th rmal lay rs, bottom
composition, and slop .
ROHS STATEMENT: Product d sign d and int nd d as a fix d
installation or part of a syst m in a v ss l may b consid r d b yond
th scop of Dir ctiv 2002/95/EC of th Europ an Parliam nt and of
th Council of 27 January 2003 on th r striction of th us of c rtain
hazardous substanc s in l ctrical and l ctronic quipm nt.
ATTENTION INTERNATIONAL CUSTOMERS: Products sold in th U.S.
ar not int nd d for us in th int rnational mark t. Humminbird
int rnational units provid int rnational f atur s and ar d sign d
to m t country and r gional r gulations. Languag s, maps, tim
zon s, units of m asur m nt, and warranty ar xampl s of
f atur s that ar customiz d for Humminbird int rnational units
purchas d through our authoriz d int rnational distributors.
To obtain a list of authoriz d int rnational distributors, pl as visit
our W b sit at humminbird.com or contact Humminbird Custom r
S rvic at (334) 687-6613.

3
© 2017 Jo nson Outdoors Marine Electronics, Inc. All rig ts reserved.
360 Imaging®, AUTOCHART®, AutoC art LIVE™, C artSelect®, Cross Touc ®, Down Imaging®, DualBeam PLUS™, Fis ID+™, Humminbird®, i-Pilot® Link™, LakeMaster®,
MEGA Down Imaging™, MEGA Imaging™, MEGA Side Imaging™, Real Time Sonar™, RTS Window™, SI™, Side Imaging®, SmartStrike™, SOLIX™, Structure ID™, Switc Fire®,
W iteLine™, X-Press™ Menu, and ZeroLine Map Card™ are trademarked by or registered trademarks of Jo nson Outdoors Marine Electronics, Inc.
Airmar is a registered trademark of Airmar Tec nology Corp.
Adobe, Acrobat, Adobe PDF, and Reader are eit er registered trademarks or trademarks of Adobe Systems Incorporated in t e United States and/or ot er countries.
Baekmuk Batang, Baekmuk Dotum, Baekmuk Gulim, and Baekmuk Headline are registered trademarks owned by Kim Jeong-Hwan.
T e Bluetoot ® word mark and logos are registered trademarks owned by t e Bluetoot SIG, Inc. and any use of suc marks by Jo nson Outdoors, Inc. is under license.
Ot er trademarks and trade names are t ose of t eir respective owners.
Gentoo™ is a trademark of Gentoo Foundation, Inc.
Navionics® is a registered trademark of Navionics S.p.A.
NMEA 2000® is a registered trademark of t e National Marine Electronics Association.

4
TABLE OF CONTENTS
Warnings 2
Introduction 6
Getting Started 8
Touch Screen Overview 14
SOLIX Touch Screen and Keypad 15
SOLIX Contro Head 17
SD Card S ots 19
The Home Screen 20
The Menu System 25
Views 32
Edit th On-Scr n Vi w . . . . . . . . . . . . . . . . . . . . . . . . . . . . . . . . . 36
Th Vi w Options M nu . . . . . . . . . . . . . . . . . . . . . . . . . . . . . . . . . . 41
Cr at a N w Vi w . . . . . . . . . . . . . . . . . . . . . . . . . . . . . . . . . . . . . . .43
S t up an Instrum nt Vi w . . . . . . . . . . . . . . . . . . . . . . . . . . . . . . . 47
Chart Overview 49
Map Sourc . . . . . . . . . . . . . . . . . . . . . . . . . . . . . . . . . . . . . . . . . . . . .50
Navigation Alarms Ov rvi w . . . . . . . . . . . . . . . . . . . . . . . . . . . . . . 55
Man Ov rboard (MOB) . . . . . . . . . . . . . . . . . . . . . . . . . . . . . . . . . . . 59
Customiz th Chart Vi w . . . . . . . . . . . . . . . . . . . . . . . . . . . . . . . . 60
Op n th Humminbird S ttings M nu . . . . . . . . . . . . . . . . . . . . . 60
Chang th Chart Vi w Ov rlays . . . . . . . . . . . . . . . . . . . . . . . . . . 65
Chart and Radar . . . . . . . . . . . . . . . . . . . . . . . . . . . . . . . . . . . . . . . . 66
Chang th Chart Mod . . . . . . . . . . . . . . . . . . . . . . . . . . . . . . . . . . 67
Introduction to Navigation 68
Navigation Menu Overview 69
Navigation X-Pr ss M nu . . . . . . . . . . . . . . . . . . . . . . . . . . . . . . . . .69
Mark M nu . . . . . . . . . . . . . . . . . . . . . . . . . . . . . . . . . . . . . . . . . . . . . .70
Go To M nu . . . . . . . . . . . . . . . . . . . . . . . . . . . . . . . . . . . . . . . . . . . . . 70
Info M nu . . . . . . . . . . . . . . . . . . . . . . . . . . . . . . . . . . . . . . . . . . . . . . .72
Cursor M nu . . . . . . . . . . . . . . . . . . . . . . . . . . . . . . . . . . . . . . . . . . . . 74
Waypoints 75
Routes 80
Search 87
Tracks 89
Manage your Navigation Data 92
Manag Waypoints . . . . . . . . . . . . . . . . . . . . . . . . . . . . . . . . . . . . . . 93
Manag Rout s . . . . . . . . . . . . . . . . . . . . . . . . . . . . . . . . . . . . . . . . . 96
Manag Tracks . . . . . . . . . . . . . . . . . . . . . . . . . . . . . . . . . . . . . . . . . . 98
Manag Groups . . . . . . . . . . . . . . . . . . . . . . . . . . . . . . . . . . . . . . . . 101
D l t All Navigation Data . . . . . . . . . . . . . . . . . . . . . . . . . . . . . . .102
Import/Export Navigation Data . . . . . . . . . . . . . . . . . . . . . . . . . . 102
AutoChart LIVE Overview 103
Plan your Map . . . . . . . . . . . . . . . . . . . . . . . . . . . . . . . . . . . . . . . . . .103
Pr par th Control H ad for Mapping . . . . . . . . . . . . . . . . . . . .104
R cord your Custom Map . . . . . . . . . . . . . . . . . . . . . . . . . . . . . . . 107
Stop R cording . . . . . . . . . . . . . . . . . . . . . . . . . . . . . . . . . . . . . . . . 108
Corr ct Data . . . . . . . . . . . . . . . . . . . . . . . . . . . . . . . . . . . . . . . . . . . 109
Display th AutoChart Liv Map . . . . . . . . . . . . . . . . . . . . . . . . . . 110
Adjust th Map Display S ttings . . . . . . . . . . . . . . . . . . . . . . . . . 112
Customiz th Bottom Hardn ss Display S ttings . . . . . . . . . 116
Customiz th V g tation Display S ttings . . . . . . . . . . . . . . . 119
Mosaic Live Overview 122
For B st P rformanc . . . . . . . . . . . . . . . . . . . . . . . . . . . . . . . . . . 122
Op n th Mosaic Liv M nu . . . . . . . . . . . . . . . . . . . . . . . . . . . . . 122
Customiz th Mosaic Liv Display . . . . . . . . . . . . . . . . . . . . . . . 124
Autopi ot Overview 128
Radar Overview 130
Radar Transmission S ttings . . . . . . . . . . . . . . . . . . . . . . . . . . . . 131
Adjust th Transmission Rang . . . . . . . . . . . . . . . . . . . . . . . . . . 134
Radar Alarms . . . . . . . . . . . . . . . . . . . . . . . . . . . . . . . . . . . . . . . . . . 135
Customiz th Radar Vi w . . . . . . . . . . . . . . . . . . . . . . . . . . . . . . 138
Op n th Radar Pr f r nc s M nu . . . . . . . . . . . . . . . . . . . . . . . 138
Chang th Radar Vi w Ov rlays . . . . . . . . . . . . . . . . . . . . . . . . . 140
Adjust Radar Signal S ttings . . . . . . . . . . . . . . . . . . . . . . . . . . . . 142
EBL/VRM . . . . . . . . . . . . . . . . . . . . . . . . . . . . . . . . . . . . . . . . . . . . . . 144
Navigation in Radar Vi w . . . . . . . . . . . . . . . . . . . . . . . . . . . . . . . . 146
AIS and MARPA 148
AIS and MARPA Alarms . . . . . . . . . . . . . . . . . . . . . . . . . . . . . . . . . .148
AIS and MARPA Display S ttings . . . . . . . . . . . . . . . . . . . . . . . . . 150
AIS Overview 152
MARPA Targets 159

5
TABLE OF CONTENTS
Sonar Overview 164
Sonar S tup . . . . . . . . . . . . . . . . . . . . . . . . . . . . . . . . . . . . . . . . . . . 166
Sonar Alarms . . . . . . . . . . . . . . . . . . . . . . . . . . . . . . . . . . . . . . . . . . 167
2D Sonar Overview 168
Customiz th 2D Sonar Vi w . . . . . . . . . . . . . . . . . . . . . . . . . . . 169
Op n th 2D Sonar Pr f r nc s M nu . . . . . . . . . . . . . . . . . . . . 169
Chang th 2D Sonar Vi w Ov rlays . . . . . . . . . . . . . . . . . . . . . . 174
Adjust 2D Sonar Display S ttings . . . . . . . . . . . . . . . . . . . . . . . . 175
Side Imaging Overview 180
Customiz th Sid Imaging Vi w . . . . . . . . . . . . . . . . . . . . . . . . 182
Op n th Sid Imaging Pr f r nc s M nu . . . . . . . . . . . . . . . . 182
Chang th Sid Imaging Vi w Ov rlays . . . . . . . . . . . . . . . . . . 184
Adjust Sid Imaging Display S ttings . . . . . . . . . . . . . . . . . . . . .185
Down Imaging Overview 188
Customiz th Down Imaging Vi w . . . . . . . . . . . . . . . . . . . . . . . 189
Op n th Down Imaging Pr f r nc s M nu . . . . . . . . . . . . . . . 189
Chang th Down Imaging Vi w Ov rlays . . . . . . . . . . . . . . . . . 191
Adjust Down Imaging Display S ttings . . . . . . . . . . . . . . . . . . . .192
Use Cursor and Zoom in Sonar Views (2D, SI, DI) 195
Navigation in Sonar Views (2D, SI, DI) 197
Sonar Recording 199
Images Too 200
Insta ation Information 206
S t up or Chang Transduc r S ttings (optional) . . . . . . . . . . 207
Configur Humminbird Radar (Installation and R pair only) . .214
Configur th Control H ad . . . . . . . . . . . . . . . . . . . . . . . . . . . . . 218
S t up a NMEA 2000 N twork . . . . . . . . . . . . . . . . . . . . . . . . . . . 222
S t up your Humminbird N twork . . . . . . . . . . . . . . . . . . . . . . . . 231
Chang th N twork Nam . . . . . . . . . . . . . . . . . . . . . . . . . . . . . . 237
Manage your Contro Head 239
Update Software 241
Specifications 245
Statements and Acknow edgements 250
Contact Humminbird 256

6
Introduction
INTRODUCTION
Th instructions in this manual d scrib th SOLIX control h ad op rations. SOLIX mod ls provid multi-g stur touch scr n and
kypad capability to adjust m nu s ttings or start actions on th control h ad. Touch scr n and k ypad instructions ar d scrib d
for ach f atur throughout this manual. Also, for an ov rvi w of functions, s th Quick Start Guid includ d with your product.
Build your N twork: Som of th f atur s shown in this manual r quir a s parat purchas . Radar, AIS, Compass/H ading S nsor,
Black Box Sonar, Eth rn t Switch, i-Pilot Link, tc. r quir a s parat purchas . To install ach acc ssory, us th installation guid
provid d with it, or download th guid from our W b sit at humminbird.com.
R gist r and Updat : As you build your Humminbird n twork, it is important to r gist r your products and k p your softwar up to
dat . Visit our W b sit at humminbird.com to s t up an account, updat control h ad and acc ssory softwar , and purchas
additional quipm nt. Also, s Update Software in this manual for mor information.

Introduction
7
USING HU INBIRD ANUALS ON YOUR OBILE DEVICE OR PC
Th Humminbird manuals for your control h ad and acc ssori s can b download d to your mobil d vic or PC. If you pr f r to us
a hard copy for r f r nc , this manual may b print d.
Download the Manual to your Mobile Device
1. Download th fr Adob Acrobat R ad r app to your mobil d vic .
2. Go to our W b sit at humminbird.com, and click Support > Product Manuals.
3. S l ct th PDF for your control h ad mod l or acc ssory, and sav it to your d vic .
4. Op n th Adob Acrobat R ad r app.
5. Op n th Humminbird manual.
Download the Manual to your PC
1. Download th fr Adob Acrobat R ad r softwar from http://g t.adob .com/r ad r/, and install it on your PC.
2. Go to our W b sit at humminbird.com, and click Support > Product Manuals.
3. S l ct th PDF for your control h ad mod l or acc ssory, and sav it to your d vic .
4. Op n Adob Acrobat R ad r.
5. Op n th Humminbird manual.
Jump to a S ction: Click a s ction nam in th Bookmarks pan l. Bookmarks can b xpand d and collaps d by clicking on
th plus (+) or minus (-) icons.
S arch for Words or Phras s: Pr ss and hold th Ctrl F k ys on your PC k yboard. Typ th word(s) into th t xt box.
Print: If you pr f r to us a hard copy for r f r nc , this manual may b print d.
Using the Manual
search for
key words
(Ctrl + F)
bookmarks
panel

8
Getting Started
GETTING STARTED
Th proc dur s in this s ction d scrib how to g t start d with your control h ad. S your control h ad installation guid to
configur th unit for first tim s tup. Also, s Installat on Informat on in this manual for control h ad configuration and n twork
configuration d tails.
NOTE: Wh n th SOLIX control h ad quipm nt and acc ssori s ar first install d, th S tup Guid provid s th prompts to guid
you through configuring th unit. Th S tup Guid includ s important st ps to configur th control h ad with th quipm nt,
including v ss l dim nsions, map sourc s l ction, and offs t m nus. S your control h ad installation guid to configur th
unit for th first tim .
Power On
1. Pr ss th POWER k y.
2. S l ct Start Normal Mod .
3. Wh n th first vi w is display d on th scr n, th control h ad is r ady for op ration.
Start Radar Transmission
If a Radar is conn ct d to th control h ad n twork, us th following instructions to start radar transmission.
WARNING! Th radar should b configur d by a qualifi d radar t chnician aft r installation or quipm nt r pair. S Installation
Information: Configure Humminbird Radar.
1. Confirm th radar pow r sourc is turn d on (br ak r or switch).
2. Pr ss th POWER k y.
3. Humminbird CHIRP Radar: Und r Radar, s l ct Standby. Pr ss th POWER k y again, and s l ct Transmit.
Humminbird Radar: S l ct Radar Transmit. Tap th on/off button, or pr ss th ENTER k y, to turn it on.
NOTE: For mor information about Humminbird CHIRP Radar and Humminbird Radar, s Radar Overview.

9Getting Started
Check Sensor Reception and Connections
If you’v conn ct d oth r s parat -purchas quipm nt to th control h ad n twork, such as AIS, Compass/H ading S nsor, Radar,
i-Pilot Link, 360 Imaging, and mor , us th s instructions to confirm th quipm nt is d t ct d and communicating with th
control h ad.
1. Pr ss th HOME k y.
2. R vi w th top, right corn r of th status bar.
D t ct d and Activ : If a s nsor is activ and transmitting/r c iving, it will b whit . S th tabl b low.
Conn ct d but not D t ct d or Activ : If a s nsor is not d t ct d on th n twork, or not transmitting/r c iving, it will
b compl t ly gray.
Conn ct d but not Transmitting/R c iving: If a s nsor is d t ct d, but is not transmitting/r c iving, th icon will b
partially gray. In this illustration, th GPS r c iv r is d t ct d, but it do sn’t hav a GPS fix. This f atur will vary with
th typ of icon r pr s nt d.
3. If th s nsors ar activ , your syst m is r ady for us on th wat r.
For additional syst m status, s l ct Hom > S ttings > N twork > Syst m Info.
If you hav conn ct d an acc ssory to th control h ad, and th icon is not displaying in th syst m status bar, ch ck th
installation of th acc ssory and th cabl conn ction to th control h ad.
To chang th NMEA 2000 n twork or multi-control h ad n twork sourc s, s Set up a NMEA 2000 Network and Set up
your Humm nb rd Network.
Active Status Icon Sensor Icon Description
AIS AIS is on and r c iving targ ts.
Blu tooth Th Blu tooth wir l ss r mot is conn ct d.
Compass Th s l ct d compass/h ading s nsor is on and h ading data is b ing
r c iv d.
GPS Th GPS r c iv r is d t ct d and a GPS fix has b n obtain d.
i-Pilot Link i-Pilot Link is conn ct d, nabl d, and activ ly navigating.
Radar Th s l ct d radar sourc is d t ct d and transmitting.
2D Sonar Th s l ct d 2D sonar sourc is d t ct d and pinging.
360 Imaging Sonar Th 360 Imaging transduc r is pinging data.

10
Getting Started
Review GPS Reception
In addition to th s nsor icon in th status bar, you can also ch ck th GPS r c ption status in th GPS tool. Th GPS tool provid s
two ways to vi w th sat llit s communicating with th GPS R c iv r. Y llow indicat s that th sat llit is b ing us d to d t rmin
your curr nt position. T al indicat s that th sat llit is b ing monitor d but not us d. Th following data is also display d:
•Position (latitud and longitud )
•GPS Fix Typ : r port d as No Fix, 2D Fix, 3D Fix, or Enhanc d. An Enhanc d fix has b n augm nt d using information from
WAAS, EGNOS, or MSAS. A 3D or Enhanc d Fix is r quir d for navigation.
•HDOP (th Horizontal Dilution of Pr cision): a GPS syst m param t r which d p nds on th curr nt sat llit configuration.
HDOP is us d to calculat th Estimat d Position Error.
pen the GPS Tool
If th r is mor than on control h ad install d on th n twork, s l ct th control h ad that is conn ct d dir ctly to th GPS r c iv r.
1. Pr ss th HOME k y.
2. S l ct th GPS tool.
Review Satellites and Signal Strength
1. Und r GPS (1), s l ct Sat llit s.
2. Und r GPS (1), s l ct Signal Str ngth.
digital
readouts
status bar
satellites
communicating
to GPS (1)
GPS (1) Satellite Sky Chart
GPS (1) Satellites shows a sky chart and numerical data from the selected GPS receiver
selected GPS source GPS status iconfix type
used
satellite
(yellow)
monitored
satellite
(teal)

11 Getting Started
GPS (1) and GPS (2) Sources
You can also manually chang which GPS r c iv r is th s l ct d sourc for GPS (1) or GPS (2). To chang th GPS sourc s, s
Set up your Humm nb rd Network.
GPS (1) provid s position data, Sp d ov r Ground (SOG), Cours ov r Ground (COG), waypoints, rout s, tracks, and navigation
calculations to th control h ad.
GPS (2) provid s position data that is display d in th GPS (2) data box.
boat position
(latitude/
longitude)
status bar
GPS status icon
satellites
signal strength
GPS (1)
Signal Strength (bar graph)
selected GPS source
monitored
satellite
(teal) and
strength
level
used satellite
(yellow) and
strength
level
fix type
Signal Strength (GPS 1/GPS 2): displays vertical bar graphs indicating the satellite
signal strengths with the respecting CN (Carrier-to-Noise) value (0 to 60).
digital
readouts

12
Getting Started
Set Alarms
Wh n an alarm is turn d on, an al rt will sound or display on th control h ad to indicat th thr shold has b n xc d d.
1. Pr ss th HOME k y. S l ct Alarms.
2. Und r S ttings, s l ct Alarms.
If th control h ad is conn ct d to th Humminbird n twork, s l ct Local Alarms (control h ad only) or N twork d Alarms
(alarms shar d across control h ads). S Set up your Humm nb rd Network for mor information.
3. S l ct an alarm cat gory.
4. S l ct an alarm nam .
5. On/Off: Tap th on/off button, or pr ss th ENTER k y, to turn on th alarm.
6. Adjust th alarm thr shold.
Touch Scr n: Pr ss and hold th slid r, or drag th slid r.
K ypad: Pr ss and hold th ENTER k y, or turn th Rotary dial.
7. R p at st ps 3 through 6 for ach alarm you want to s t.
NOTE: S The Menu System: Ti s for Using the Status Bar for mor d tails.
status bar
selected category home close
menu
options
Setting an Alarm

13 Getting Started
Th availabl alarms ar d t rmin d by th conn ct d quipm nt, so your control h ad may provid mor or l ss options than th
information shown h r .
Change System Settings
Your control h ad was configur d during th installation s tup. To chang th syst m s ttings such as th backlight, k y sounds,
units of m asur m nt, and th tim and dat format, s l ct S ttings from th Hom scr n. S Manage your Control Head for
mor information.
1. Pr ss th HOME k y.
2. S l ct S ttings.
3. S l ct G n ral.
NOTE: To r configur th control h ad with th S tup Guid , s l ct th S tup Guid tool from th Hom scr n.
Start Standby ode
To cons rv pow r whil th control h ad is not in-us , start Standby mod .
1. Pr ss th POWER k y.
2. S l ct Standby.
3. Pr ss th RIGHT Cursor k y.
4. Turn off Standby Mod : Pr ss th POWER k y.
Power Off
Many of th control h ad s ttings can b acc ss d quickly from th Pow r X-Pr ss M nu. You can also turn off Radar transmission
and chang th transduc r sourc from this m nu.
Power ff
1. Tap th top, right corn r of th status bar.
OR
Pr ss th POWER k y.
2. S l ct Pow r Off.
Additional K ypad Option
Pr ss and hold th POWER k y.
Syst m Voltag , Lost H ading (compass/h ading s nsor r quir d), tc.
V ss l Drift Limit, SOG (Sp d ov r Ground), STW (Sp d through Wat r), tc. Also, s V ews:
Understand the Data Box D g tal Readouts for mor information.
Navigation S Chart Overv ew: Nav gat on Alarms Overv ew for d tails.
Sonar S Sonar Overv ew: Sonar Alarms for d tails.
Radar S Radar Overv ew: Radar Alarms for d tails.
T mp ratur T mp (High) or T mp (Low). To chang th T mp ratur sourc s, s Installat on Informat on:
Set up your Humm nb rd Network.
Engin Low Fu l, Engin T mp, Oil L v l, Coolant L v l, Ch ck Engin , tc. To chang Engin and Fu l
sourc s, s Installat on Informat on: Set up a NMEA 2000 Network.

14
Touch Screen Overview
TAP OR PRESS AND HOLD
S l ct a Vi w, Tool, M nu, or Icon: Tap th
s l ction onc .
Activat th Cursor: Tap a position on th
vi w. Pr ss and hold a position to op n th
Cursor m nu.
Zoom In: Tap th scr n twic .
PINCH IN/OUT
Zoom In: Touch th scr n with two fing rs
and mov th m apart.
Zoom Out: Touch th scr n with two fing rs
and bring th m clos r tog th r.
SWIPE SIDE TO SIDE
N xt/Pr vious: With a Favorit s Vi w
display d on-scr n, swip (l ft or right) to
vi w th n xt or pr vious vi w availabl .
SWIPE DOWN
Hom Scr n/Vi w Toggl : With a vi w
display d on-scr n, touch th scr n with
two fing rs and swip down to go to th
Hom Scr n. To r turn to th pr vious vi w,
swip down with two fing rs again.
TWO FINGER TAP
Switch to 2D or 3D Vi w: With a 2D Chart
Vi w display d on-scr n, tap twic to
switch to 3D or back to 2D (Navionics only.
S Custom ze the Chart V ew).
Zoom Out: Tap th scr n twic .
ONE FINGER SWIPE
UP OR DOWN
Brows M nus: Swip with on fing r to
scroll through a m nu list (up or down).
ONE FINGER SWIPE
LEFT OR RIGHT
Adjust M nu Slid r: Tap th m nu to s l ct
it. Drag th slid r to adjust th s tting.
S Mor : Swip th Favorit s Vi w bar and
th Tools bar to brows through th icons on
th Hom scr n.
Pan: With a Chart Vi w display d on th
scr n, drag on fing r across th scr n to
s mor of th chart that is display d
off-scr n. With a 2D Sonar Vi w display d
on th scr n, drag on fing r across th
scr n to s mor of th sonar history.
TOUCH SCREEN OVERVIEW
A summary of th touch scr n actions ar shown h r . Th touch scr n actions ar also d t rmin d by th vi w display d on th
scr n.

15 SOLIX Touch Screen and Keypad
SOLIX TOUCH SCREEN AND KEYPAD
SOLIX mod ls allow you to us th touch scr n and th k ypad to s l ct m nus and start actions on th control h ad.
Select a Tool, View, or enu
Touch Screen Keypad
Scroll to See ore
Touch Screen Keypad
Select pen
Tap to Select
Move Left or Right
Swipe Left or Right

16
SOLIX Touch Screen and Keypad
Adjust a enu Setting
Touch Screen Keypad
Activate the Cursor
Touch Screen Keypad
Zoom In, Zoom Out
Touch Screen Keypad
OR
Press
Turn Press and Hold
Move
Tap
Zoom In
Zoom ut
Pinch In/ ut
Tap
Press and Hold R Slide

17 SOLIX Control Head
SOLIX CONTROL HEAD
SOLIX Key Functions
Th functions for ach k y ar d scrib d h r . To apply th k y functions, s ach s ction of this manual. You can also us th touch
scr n to r plac k y functions. S SOLIX Touch Screen and Keypad for mor information.
POWER KEY
Pr ss th POWER k y to pow r on th control h ad.
Pr ss and hold th pow r k y to pow r off.
During op ration, pr ss th POWER k y to op n
th Pow r X-Pr ss M nu: a m nu with start-up
functions, such as Sonar Sourc and Radar Transmit.
Th m nu options d p nd on th acc ssori s
attach d to th syst m.
Th backlight and touch scr n can also b adjust d
from this m nu.
ENTER KEY
Pr ss th ENTER k y to start a command or turn on a
s tting. Th ENTER k y also op ns th Info m nu and
th Cursor m nu. To adjust a m nu s tting, pr ss and
hold th ENTER k y.
EXIT KEY
Pr ss th EXIT k y onc to clos a m nu, clos a dialog
box, turn off an alarm, or xit Cursor mod .
Pr ss and hold th EXIT k y to clos all m nus at onc .

18
SOLIX Control Head
JOYSTICK
Mov th Joystick to s l ct a vi w, tool, or
m nu. Pr ss th Joystick to op n your
s l ction.
Th Joystick is also us d to mov th cursor
across th vi w, pan 2D/3D chart vi ws, and
s l ct m nu options and dialog box
information.
Pr ss th Joystick to mark a Rout Point.
ROTARY DIAL
Turn th Rotary dial to adjust m nu s ttings.
Turn th Rotary dial in Sonar Vi ws to adjust
th s nsitivity. Turn th Rotary dial in Chart
Vi w to zoom in and zoom out.
Pr ss th Rotary dial to op n th Vi ws
X-Pr ss M nu.
GO TO/SCREEN SNAPSHOT KEY
Pr ss this k y onc to op n th Go To m nu for
navigation functions. S Routes for d tails.
Pr ss and hold this k y to sav th scr n imag . S
Images Tool for d tails.
PANE KEY
Pr ss th PANE k y to op n th Vi w Options m nu or
to s l ct a pan in a multi-pan vi w. Th s l ct d
pan is highlight d in y llow. S V ews for d tails.
ARK/ AN OVERBOARD KEY
Pr ss and hold this k y to start Man Ov rboard
Navigation. To mark waypoints, pr ss this k y twic .
S Man Overboard (MOB) and Introduct on to
Nav gat on for d tails.
HO E KEY
Pr ss th HOME k y to display th Hom scr n. Th
Hom scr n allows you to acc ss S ttings, Alarms,
Vi ws, and Tools for th control h ad. S The Home
Screen for d tails.
ZOO IN(+)/ZOO OUT (–) KEYS
Pr ss th individual ZOOM k ys to chang th scal
of th vi w. For a clos r vi w, pr ss th ZOOM IN (+)
k y. For a wid r vi w, pr ss th ZOOM OUT (-) k y.
Pr ss and hold th ZOOM OUT (–) k y to Zoom out all
th way.
ENU KEY
To op n th X-Pr ss M nu for th on-scr n vi w and
op ration mod , pr ss th MENU k y onc . To op n
th Main M nu (S ttings tool), pr ss th MENU k y
twic . To r turn to th last-us d S ttings tool tab,
pr ss and hold th MENU k y. S The Menu System
for d tails.

19 SD Card Slots
SD CARD SLOTS
CAUTION! B for th control h ad softwar is updat d or r stor d to syst m d faults, xport your m nu s ttings, radar s ttings, and
navigation data (s U date Software).
SD CARD SLOTS
Ins rt an SD card with th lab l facing l ft. SD cards can b us d to load additional charts,
import/ xport navigation data, sav scr n snapshots, import/ xport m nu s ttings, and
mor .
Th l ft slot is display d as SD Card (1) in th m nu syst m, and th right slot is display d as
SD Card (2).
Load Maps
Insert the SD card with the label facing left

20
Home Screen
THE HO E SCREEN
Th Hom scr n is th main control c nt r for your control h ad. Us th Hom scr n to acc ss th control h ad s ttings, alarms,
favorit vi ws, and tools. Th tools availabl on th Hom scr n ar d t rmin d by th quipm nt attach d to th control h ad
ntwork.
Open the Home Screen
Touch Screen
1. With a vi w display d on-scr n, touch th scr n with
two fing rs and swip down.
2. Tap a tool or vi w to op n it.
Keypad
1. Pr ss th HOME k y.
2. Us th Joystick to s l ct a tool or vi w. Pr ss th
ENTER k y to op n it.
pen the Home Screen Tap to Select Select pen
OR
Other manuals for SOLIX
1
Table of contents
Other Humminbird Control Unit manuals