MAIN TONE SET
Hyfire Wireless Fire Solutions Limited - Unit B12a, Holly Farm Business Park, Honiley,
Warwickshire, CV8 1NP - United Kingdom
www.hyfirewireless.com
Tone
number Tone description
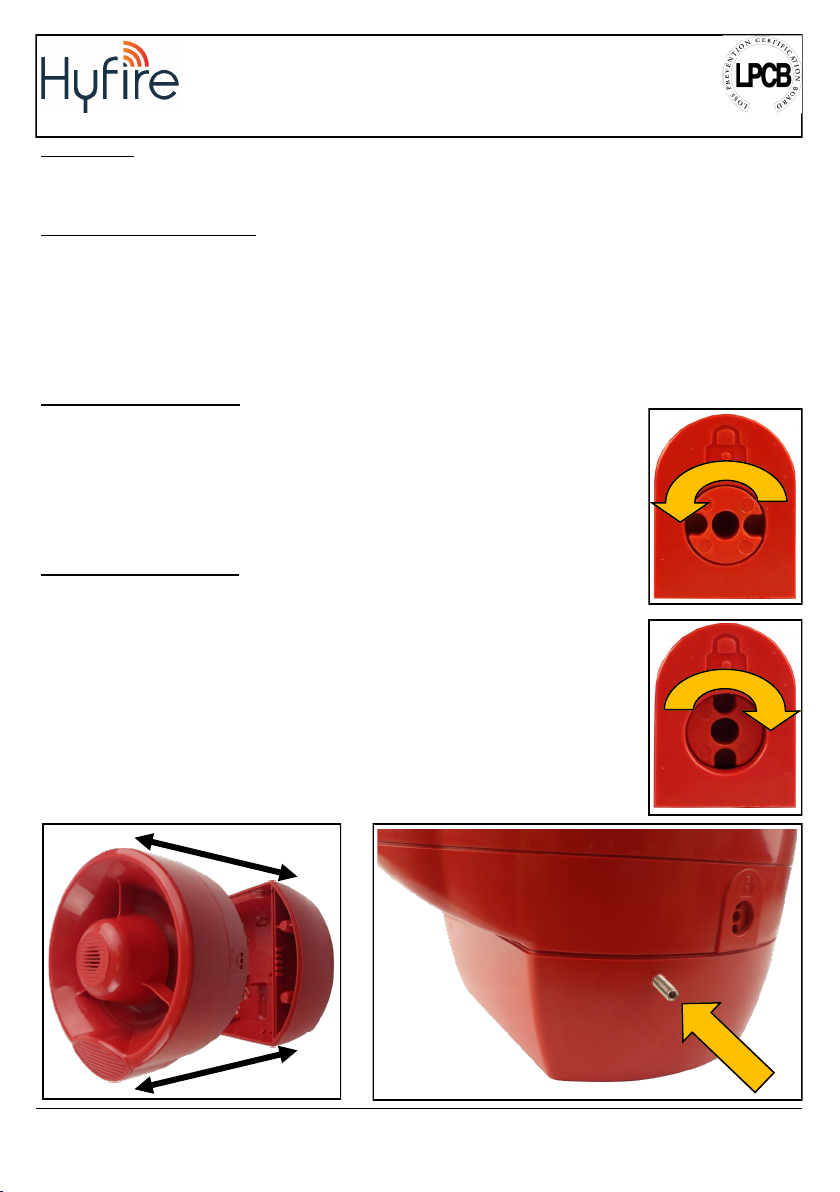
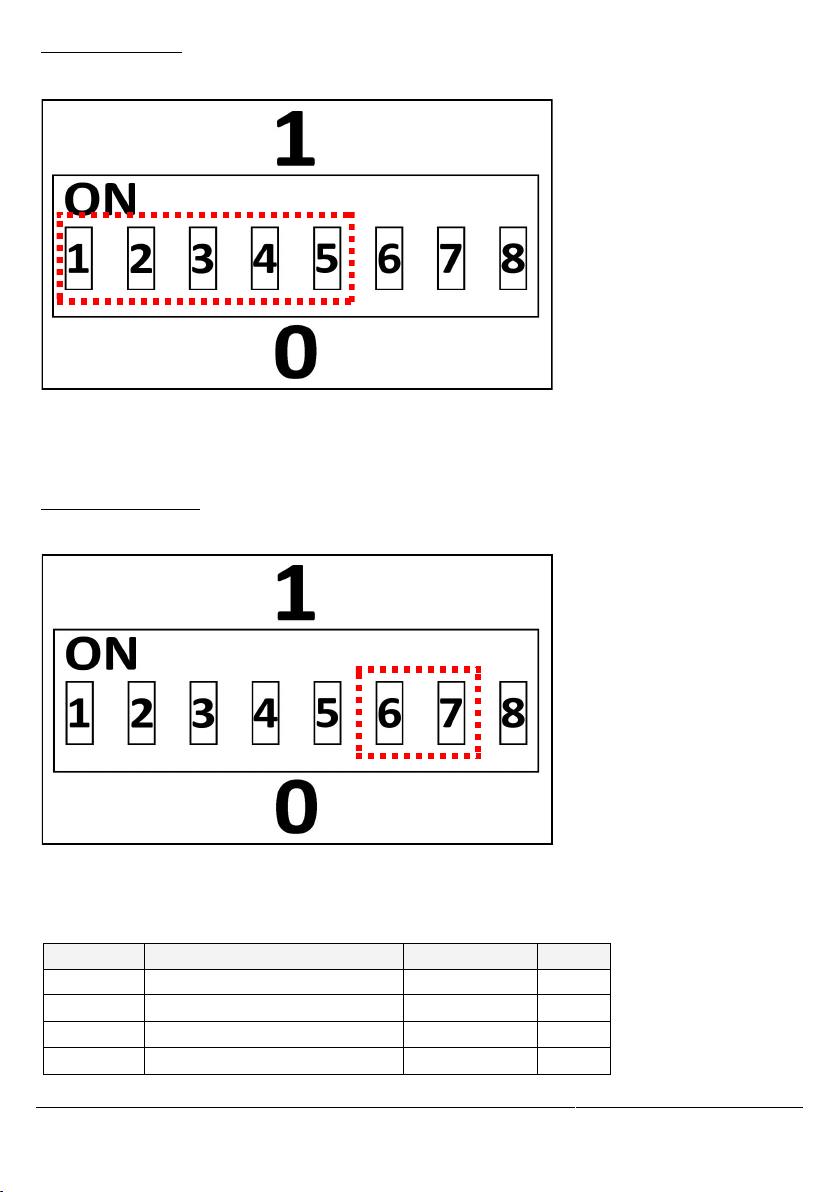
DIP switch
configuration:
1, 2, 3, 4 and 5
Tone designation
1 * 800Hz for 500ms, then 1000Hz for 500ms 11101Warble Tone
2 * 970Hz continuous tone 01011Continuous tone
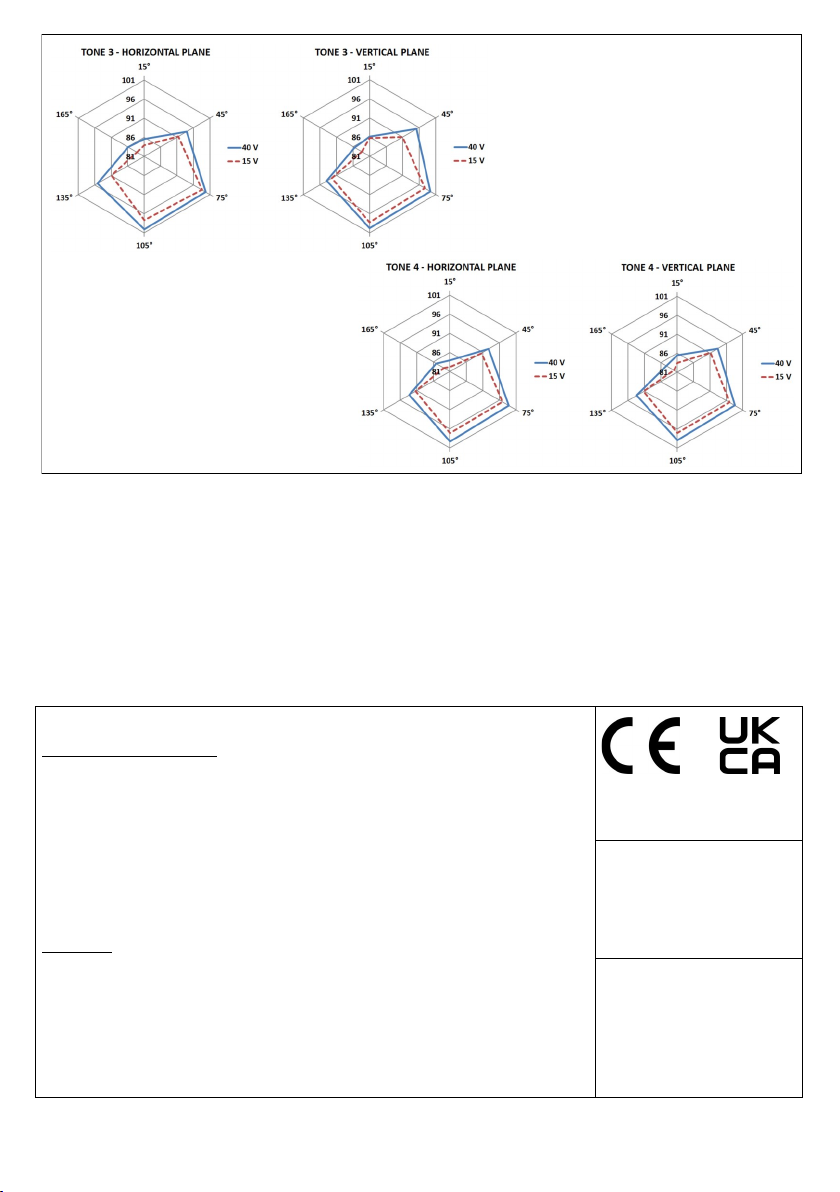
3 * 500-1200Hz for 3500ms, then off for 500ms 10101Slow Whoop (Dutch)
4 * 1200-500Hz swept every 1000ms (1Hz) 00111German DIN tone
52350-2900Hz swept every 333ms (3Hz) 10010Alternate HF slow sweep
6800Hz for 250ms, then 960Hz for 250ms 11110Alternative warble
7500Hz for 250ms, then 600Hz for 250ms 11100Alternative warble
8500-600Hz swept every 500ms (2Hz) 10100Analogue sweep tone
9970Hz for 625ms, then OFF for 625ms 10001Australian Alert (intermittent tone)
10 500-1200Hz sweep for 3750ms, then OFF for 250ms 10110Australian Evac (slow whoop)
11 990Hz for 250ms, then 665Hz for 250ms 00001Alternative warble
12 554Hz for 100ms, then 440Hz for 400ms 00101French tone AFNOR
13 2800Hz for 1s, then OFF for 1s 11011HF Back up interrupted tone
14 2800Hz for 150ms, then OFF for 150ms 11001HF Back up interrupted tone – fast
15 2800Hz continuous 01001HF Continuous
16 800Hz for 500ms,then OFF for 500ms 01111Interrupted tone
17 1000Hz for 250ms, then OFF for 250ms 01101Interrupted tone medium
18 970Hz for 500ms, then OFF for 500ms 01110ISO 8201 LF BS5839 Pt 1 1988
19 2850Hz for 500ms, then OFF for 500ms 01100ISO 8201 HF
20 800Hz for 150ms, then OFF for 150ms 11010LF Back up Alarm
21 800-950Hz swept every 9ms 01010LF Buzz
22 800Hz continuous 11000LF Continuous tone BS5839
23 No sound 11111Silent
24 500-1200Hz rising for 3000ms, then falling for 3000ms 00000Siren 2 way ramp (long)
25 500-1200Hz rising for 250ms, then falling for 250ms 00010Siren 2 way ramp (short)
26 660Hz continuous 00100Swedish all clear signal
27 660Hz for 150ms, then OFF for 150ms 00110Swedish Fire signal
28 800-900Hz swept every 1000ms 10111Sweep tone (1 Hz)
29 800-970Hz swept every 333ms (3Hz) 10011Sweep tone (3 Hz)
30 800-970Hz swept every 111ms (9Hz) 01000Sweep tone (9 Hz)
31 (2900Hz for 500ms ON, 500ms OFF) x3, then 1500ms OFF 00011US Temporal Pattern HF
32 800-1000Hz swept every 500ms (2Hz) 10000LF Sweep (Cranford tone)
Table 3*EN 54-3 certified tones