P1 programmable mode is DIY setting
Long press rotary button for 3s,rotate button to choose , and press button to enter setting interface.then you can orderly
week,temperature and time. By rotate button to adjust range and press button to confirm and enter next setting
Time and temperature can’t be adjusted for P2 ,P3 programmable mode.
P1 manual programmable(default)
P2 setting ,default is 7 days programmable
P3 setting ,default is 5+2 days programmable
Holiday mode
Long press rotary button for 3s,rotate button to choose ,press button to enter into holiday mode.then you orderly set days and
temperature.Rotate button to adjust range,and press button to confirm.when finish,press button to exit.Set temperature range is
5~15℃(default temperature is 10℃)for holiday mode.In the interface of holiday mode ,it can be canceled by press
Evening-saving mode
Long press rotary button for 3s,rotate button to choose ,press button to enter into evening-saving mode,rotate button to set the
temperature(default temperature 17℃),press rotary button to confirm and return to last interface,it will skip to next setting icon
automatically.
Comfortable mode
Rotate button to choose ,press button to enter into comfortable mode.then you can set the temperature(default temperature
17℃),press rotary button to confirm and return to last interface,it will skip to next setting icon automatically.
Query temperature
It will appear when thermostat detects external sensor.then you can choose by rotating button ,and press button to query
floor temperature(temperature of receiver’s external sensor) .
This function is only suitable for electric /water floor heating,boiler heating no this function.
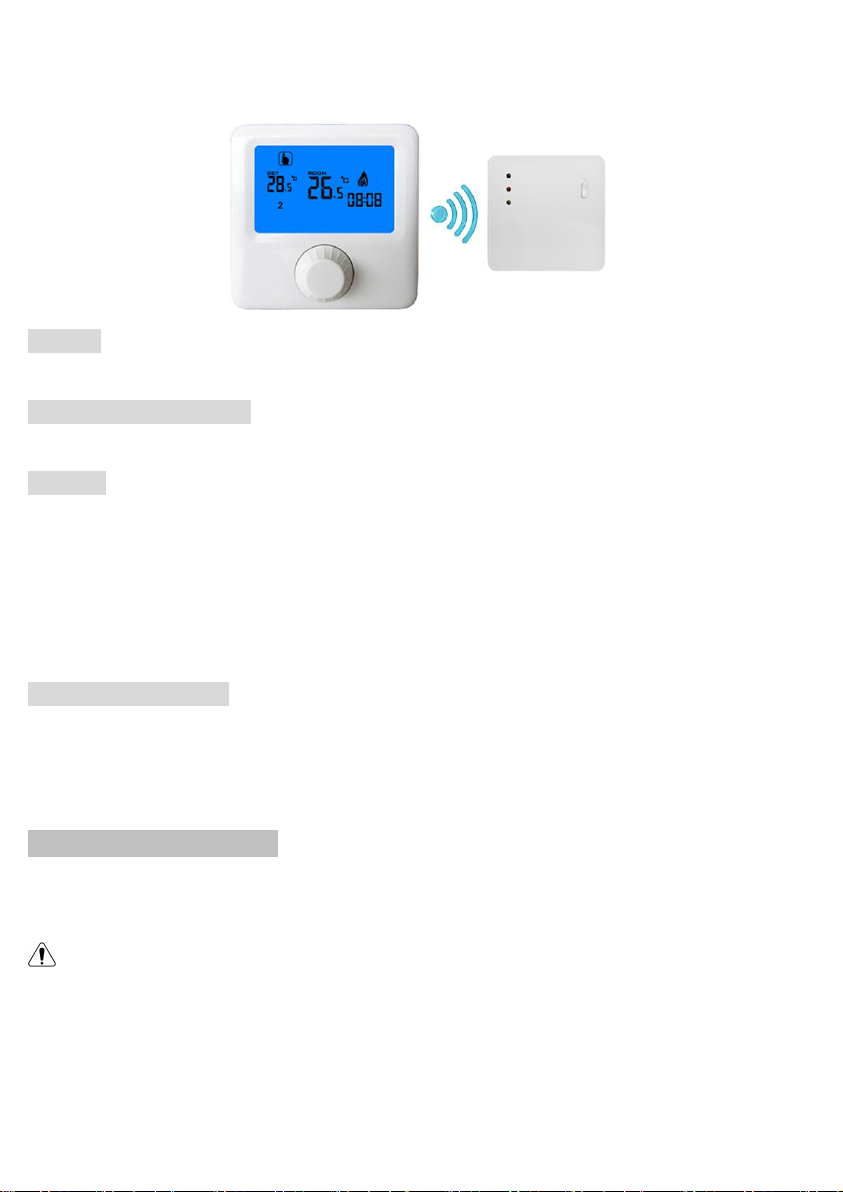
Setting IP code
Power off state,long press button for 3s to enter into setting interface
IP high Setting:rotate button to adjust IP high address ( 1 ~ F F ),press button to IP low address setting
IP low setting:rotate button to adjust IP low address ( 1 ~ F F ),press button to next interface
Write transceiver IP address:show adjusted IP high address and IP low address,within 10 seconds after transceiver power
on,press button to send IP address
Display “55” means that matched successfully
Communication instruction,be long bright display in normal communication and blinking display in abnormal
communication
Transceiver tips
Transceiver LED display instruction: