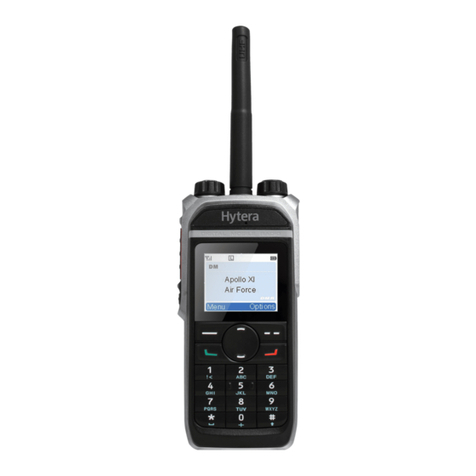
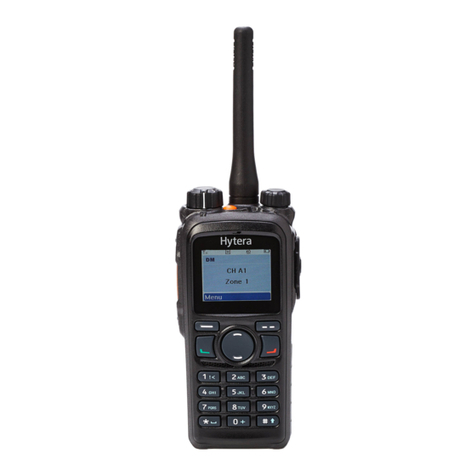
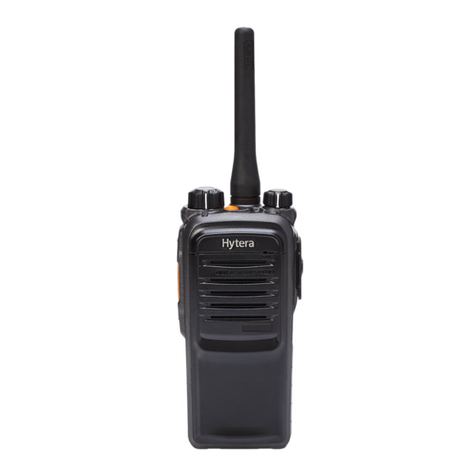
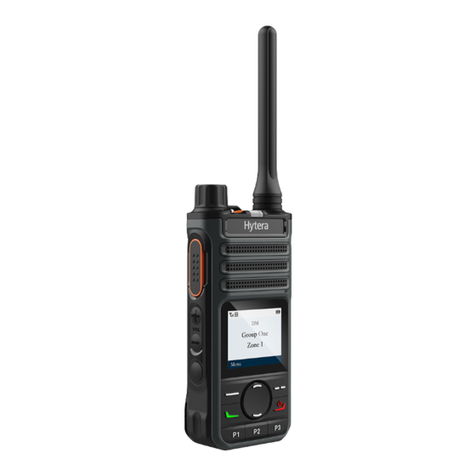
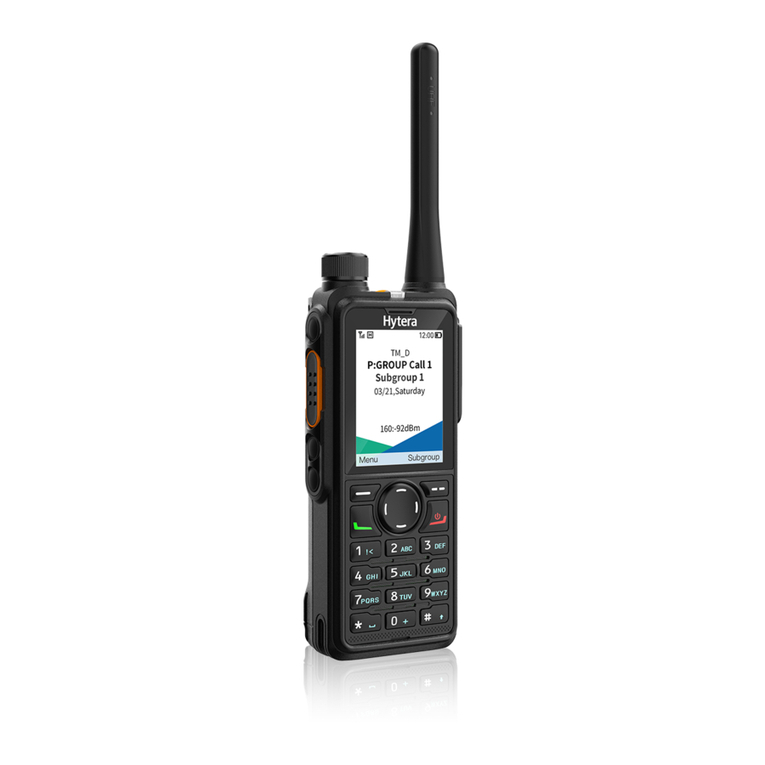
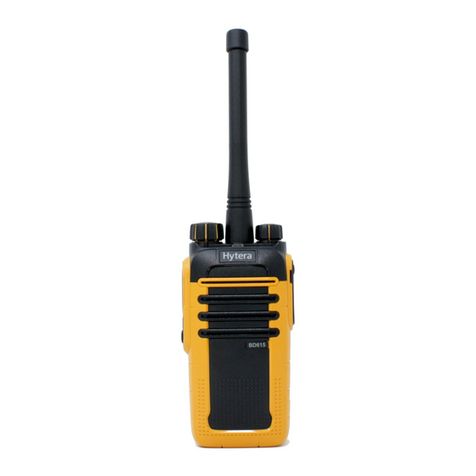
Hytera PD985/G User manual

813PD98000000
Z07142 W17431 L07157
QUICK REFERENCE GUIDE
2016
Hytera Communications Corporation Limited.
Address: Hytera Tower,Hi-Tech Industrial Park North,9108#Beihuan Road,
Nanshan District,shenzhen,People’s Republic of China
DIGITAL PORTABLE RADIO
DIGITAL TRUNKING PORTABLE RADIO
深圳市南山区北环大道9108号
是海能达通信股份有限公司的注册商标或商标
2016 海能达通信股份有限公司。版权所有
快速操作手册
数字手持终端
数字集群手持终端
813PD98000010

Contents
Product Overview 2
Product Controls 2
LCD Icon 2
LED Indicator 3
Basic Operations 4
Turning On/Off the Radio 4
Adjusting the Volume 4
Selecting a Zone 4
Selecting a Channel 4
Inputting via Keypad 4
Locking or Unlocking Keys and Knobs 4
Creating a Private Contact 5
Call Services 5
Private Call 5
Group Call 5
Call on Analog Channel without Signaling 6
Emergency Call 6
Message Services 6
Sending a Text Message 6
Sending a Quick Text Message 6
Viewing a Received Message 6
1

Product Overview
Product Controls
No. Part Name No. Part Name
1Side Key 1 (SK1)12 LED Indicator
2Push-to-Talk (PTT)
Key 13 Antenna
3Side Key 2 (SK2)14 On-Off/Volume
Control Knob
4Top Key (TK)15 Accessory
Connector
No. Part Name No. Part Name
5Channel Selector
Knob 16 Back Key
6Microphone 17 P2 Key
7LCD Display 18 Up Key
8OK/Menu Key 19 Down Key
9P1 Key 20 Battery Latch
10 Speaker 21 Belt Clip
11 Numeric Keypad 22 Battery
You can adapt your radio to use the TK,SK1,
SK2,P1, and P2 as shortcuts to various radio
features by requesting your dealer to program
the keys. For the detailed introduction, refer to
the corresponding Feature Book included with
the product.
LCD Icon
Icon Radio Status
The dual-tone multi-frequency signaling
(DTMF) keypad is enabled.
The GPS feature is enabled, and the radio
receives GPS data.
The GPS feature is enabled, but the radio
receives no GPS data.
The number of bars (0–3) indicates the
charge remaining in the battery.
The radio is set at Low power.
The radio is set at High power.
An accessory is connected.
One or more new work orders are received.
The maximum number of saved work orders
is reached.
DM Direct Mode: In this mode, radios
communicate with each other directly.
RM Repeater Mode: In this mode, radios
communicate with each other via a repeater.
2

Icon Radio Status
The Monitor feature is enabled.
The radio is in emergency mode (excluding
silent emergency mode) or an emergency
call is received.
The radio is roaming.
The Scrambler or Encrypt feature is
enabled.
The radio is scanning.
The radio stays on a non-priority channel.
The radio stays on priority channel 1.
The radio stays on priority channel 2.
The Voice Operated Transmit (VOX)
feature is enabled.
There is/are missed call(s).
There is/are unread message(s).
Icon Radio Status
The Inbox is full.
The BT feature is enabled.
The wireless device is connected.
There is no signal.
The number of bars (1–4) indicates the radio
signal strength.
The speaker is unmuted.
The radio operates in silent mode.
The Loudness and Quality Optimizer (LQO)
feature is enabled.
No Micro SD card is detected.
A private call is in progress or a private
contact is in the contact list.
A group call is in progress or a group contact
is in the contact list.
An all call is in progress or an all call contact
is in the contact list.
LED Indicator
LED Indication Radio Status
Flashes green Being turned on.
Glows green Receiving.
Glows red Transmitting.
Flashes orange
slowly Scanning or roaming.
Flashes orange
rapidly Working in emergency mode.
Glows orange
Call hang time: No voice is
being transmitted or received
on the channel during a call.
Within such a period, you can
press and hold the PTT key to
speak.
Glows blue The BT feature is being
enabled.
Flashes blue every 3s
The BT feature is enabled, but
no wireless device is
connected.
Flashes blue every
1.5s
The wireless device is
connected.
3

LED Indication Radio Status
Flashes blue every
0.1s
The BT feature is being
disabled.
Basic Operations
Turning On/Off the Radio
Adjusting the Volume
Selecting a Zone
A zone is a group of channels within the same
operational area. The radio supports up to 64 zones,
with a maximum of 128 channels per zone.
To select a zone, do one of the following:
·Menu: Go toMenu >Zone, press the Up or
Down key to select an appropriate zone, and then
press the OK/Menu key to switch to the selected
zone.
·Shortcut key: Switch to an appropriate zone by
pressing the Zone Up or Zone Down key
programmed by your dealer.
Selecting a Channel
Data and voice are transmitted and received on the
selected channel. To select a channel, rotate the
Channel Selector knob to the desired channel.
Inputting via Keypad
You can use the keypad to enter user aliases or IDs
and text messages. Here are some useful tips:
·To switch the input method between alphabetic
mode and numeric mode, press .
·To enter special characters, press in the
alphabetic mode or in the numeric mode.
·To enter a space, press in the alphabetic
mode.
Locking or Unlocking Keys and
Knobs
When the keypad is not in use, it is recommended that
you lock it to avoid accidental key presses. To lock or
unlock the keypad, do one of the following:
·Automatically lock or unlock the keypad
The Keypad Lock feature allows the keypad to be
locked automatically if no operation is being
performed within a preset time period.
To enable this feature, go toMenu >Settings >
Radio Set >Keypad Lock, selectEnable, and
4

setDelay Time(s) by pressing the Up or Down
key.
To disable this feature, selectDisable under the
Keypad Lock menu.
·Manually lock or unlock the keypad
To manually lock or unlock the keypad, do one of
the following on the home screen:
Press the Keypad Lock key programmed by
your dealer.
Press the OK/Menu key and then press .
You can go toMenu >Settings >Radio Set
>Optional Key to set whether the keys and
knobs still function when the keypad is locked .
Creating a Private Contact
To add a new contact to the private contact list, go to
Menu >Contact >New Contact, enter the ID and
alias of the new contact, and save it.
The ID and alias of a new contact must be
unique.
Call Services
Once you have selected the required channel, you
can make or receive calls on that channel. To ensure
optimal voice quality on the receiving radio, keep the
microphone about 2.5 to 5 centimeters away from
your mouth when the radio is transmitting.
Private Call
A private call is a call from an individual user to
another individual user.
Initiating a Private Call
On the home screen, press and hold the PTT key to
initiate a call to the private contact preset for the
current channel. In this case, the radio displays
on the screen.
For other ways to initiate a private call, refer to the
corresponding Feature Book included with the
product.
Receiving and Responding to a
Private Call
When you receive a private call, the radio emits a
tone and displays on the screen. You then can
listen to it without any operation.
You can press and hold the PTT key to speak within
the preset time period. Otherwise, the call ends and
the radio displays missed call indications.
Group Call
A group call is a call from an individual user to a
group of users.
5

Initiating a Group Call
On the home screen, press and hold the PTT key to
initiate a group call to the group contact preset for the
current channel. In this case, the radio displays
on the screen.
For other ways to initiate a group call, refer to the
corresponding Feature Book included with the
product.
Receiving and Responding to a
Group Call
When you receive a group call, the radio emits a tone
and displays on the screen. You then can listen to
it without any operation.
You can press and hold the PTT key to speak within
the preset time period. If there is no voice activity
within the preset time period, the call ends.
Call on Analog Channel without
Signaling
To transmit on the analog channel, hold down the
PTT key and speak into the microphone. To receive,
release the PTT key.
For descriptions and operations of calls on the analog
channel with signaling, refer to the corresponding
Feature Book included with the product.
Emergency Call
In case of emergency, you can use the Emergency
Call feature to ask for help from other personnel or
the control center.
This feature needs to be configured and enabled by
your dealer. For details, refer to the corresponding
Feature Book included with the product.
Message Services
Message services allow you to send and receive text
and quick text messages.
Sending a Text Message
To edit and then send a text message, do as follows:
1. Go toMenu >Message >New Msg, and then
edit the text.
2. Press the OK/Menu key, and then selectSend.
3. SelectContact List orManual Dial.
4. Select the required contact or enter the contact
number.
5. Press the OK/Menu key to send the text
message.
Sending a Quick Text Message
Quick text messages are preprogrammed by your
dealer, and you can edit each message before
sending it. To send a quick text message, do as
follows:
1. Go toMenu >Message >Quick Text, and
then select the required quick text.
2. (Optional) Edit the quick text.
3. Press the OK/Menu key, and then selectSend.
4. SelectContact List orManual Dial.
5. Select the required contact or enter the contact
number.
6. Press the OK/Menu key to send the text message.
Viewing a Received Message
To view a received message, do as follows:
1. Go toMenu >Message >Inbox >Inbox List,
and then select the message to be viewed.
2. Press the OK/Menu key to view the details.
6
Contents
Product Overview 2
Product Controls 2
LCD Icon 2
LED Indicator 3
Basic Operations 4
Turning On/Off the Radio 4
Registering with BS 4
Adjusting the Volume 4
Inputting via Keypad 4
Locking or Unlocking Keys and Knobs 5
Selecting a Subgroup 5
Selecting a Group Contact 5
Creating a Private Contact 5
Call Services 5
Group Call 6
Private Call 6
Emergency Call 7
Message Services 7
Sending a Text Message 7
Sending a Quick Text Message 7
Sending a Status Message 7
Viewing a Received Message 7
1

Product Overview
Product Controls
No. Part Name No. Part Name
1Side Key 1 (SK1)12 LED Indicator
2Push-to-Talk (PTT)
Key 13 Antenna
3Side Key 2 (SK2)14 On-Off/Volume
Control Knob
4Top Key (TK)15 Accessory
Connector
No. Part Name No. Part Name
5Group Selector
Knob 16 Back Key
6Microphone 17
BackDial/End/
Home Screen Key
7LCD Display 18 Up Key
8OK/Menu Key 19 Down Key
9Answer/Redial/Call
Key 20 Battery Latch
10 Speaker 21 Belt Clip
11 Numeric Keypad 22 Battery
You can adapt your radio to use the TK,SK1,
and SK2 as shortcuts to various radio features
by requesting your dealer to program the keys.
For the detailed introduction, refer to the
corresponding Feature Book included with the
product.
LCD Icon
Icon Radio Status
The GPS feature is enabled, and the radio
receives GPS data.
The GPS feature is enabled, but the radio
receives no GPS data.
The number of bars (0–3) indicates the
charge remaining in the battery.
The radio is set at Low power.
The radio is set at High power.
An accessory is connected.
One or more work orders are received.
The maximum number of saved work orders
is reached.
TM-
DW
The radio register switch multiple base
stations (BSs) connected via the network.
TM-
DL The radio registers with a single BS.
2

Icon Radio Status
The radio is in emergency alarm mode.
The radio is roaming.
The Encrypt feature is enabled.
The radio is hunting. This icon will not
appear during the Background Hunt,
HomeStation Hunt or Handover.
The Voice Operated Transmit (VOX)
feature is enabled.
There is/are missed call(s).
There is/are unread short message(s).
The Inbox is full.
There is/are unread status message(s).
The BT feature is enabled.
The wireless device is connected.
Icon Radio Status
There is no signal in TM-DW mode.
The number of bars (1–4) indicates the radio
signal strength in TM-DW mode.
There is no signal in TM-DL mode.
The number of bars (1–4) indicates the radio
signal strength in TM-DL mode.
The speaker is unmuted.
The radio operates in silent mode.
The Loudness and Quality Optimizer (LQO)
feature is enabled.
The Call Divert feature is enabled.
A half-duplex private call is in progress.
The Mode Automatic Switch feature is
enabled.
No Micro SD card is detected.
Icon Radio Status
A private call is in progress or a private
contact is in the contact.
A group call is in progress or a group contact
is in the contact.
An all call is in progress.
An include call is in progress.
LED Indicator
LED Indication Radio Status
Flashes green Being turned on.
Flashes green slowly Standby.
Glows green Receiving.
Glows red Transmitting.
Flashes red (on the
calling radio) Establishing a call.
Flashes orange
rapidly (on the called
radio)
Establishing a Full Off Air
Call Set-Up (FOACSU)
private call.
3

LED Indication Radio Status
Flashes orange slowly Hunting.
Glows orange
Call hang time: No voice is
being transmitted or received
on the traffic channel during
a call. Within such a period,
you can press and hold the
PTT key to speak.
Glows blue The BT feature is being
enabled.
Flashes blue every 3s
The BT feature is enabled,
but no wireless device is
connected.
Flashes blue every
1.5s
The wireless device is
connected.
Flashes blue every
0.1s
The BT feature is being
disabled.
Basic Operations
Turning On/Off the Radio
Registering with BS
Upon power-on, the radio automatically hunts the
control channels to find an available BS for
registration. During hunting, the radio displays "Out of
Range" with the icon , the LED indicator flashes
orange slowly, and the radio emits the hunt tone.
The radio automatically registers with the found BS
for communication. If you want the radio to register
with another BS, press the programmed Manual
Current Hunt key to hunt again.
Adjusting the Volume
Inputting via Keypad
You can use the keypad to enter user aliases or IDs
and text messages. Here are some useful tips:
·To switch the input method between alphabetic
mode and numeric mode, press .
·To enter special characters, press in the
alphabetic mode or in the numeric mode.
·To enter a space, press in the alphabetic
mode.
4

Locking or Unlocking Keys and
Knobs
When the keypad is not in use, it is recommended that
you lock it to avoid accidental key presses. To lock or
unlock the keypad, do one of the following:
·Automatically lock or unlock the keypad
The Keypad Lock feature allows the keypad to be
locked automatically if no operation is being
performed within a preset time period.
To enable this feature, go toMenu >Settings >
Radio Set >Keypad Lock, selectEnable, and
setDelay Time(s) by pressing the Up or Down
key.
To disable this feature, selectDisable under the
Keypad Lock menu.
·Manually lock or unlock the keypad
To manually lock or unlock the keypad, do one of
the following on the home screen:
Press the Keypad Lock key programmed by
your dealer.
Press the OK/Menu key and then press .
You can go to Menu >Settings >Radio Set
>Optional Key to set whether the keys and
knobs still function when the keypad is locked .
Selecting a Subgroup
A subgroup is a collection of groups. To select a
subgroup, do as follows:
1. Press the OK/Menu key or the programmed
Subgroup key to access the Subgroup menu.
2. Select the appropriate subgroup.
3. Select Set Default, and press the OK/Menu
key.
Selecting a Group Contact
You can rotate the Group Selector knob to select an
appropriate group contact. If no corresponding group
contact is preset, the radio will emit a tone and display
"No Group Program!" on the screen.
Creating a Private Contact
To add a new contact to the private contact list, go to
Menu >Contact >New Contact, enter the ID and
alias of the new contact, and save it.
The ID and alias of a new contact must be
unique.
Call Services
After the radio is turned on and registered, you can
make and receive calls. To ensure optimal voice
quality of the receiving radio, keep the microphone
about 2.5 to 5 centimeters away from your mouth
when the radio is transmitting.
5

If the radio does not register successfully or an
empty group is selected by the Group Selector
knob, the radio cannot initiate any call.
Group Call
A group call is a call from an individual user to a
group of users. In a group call, both the calling party
and called parties can speak.
Initiating a Group Call
You can press and hold the PTT key to directly
initiate a group call to the group contact selected by
the Group Selector knob. In this case, the radio
displays on the screen.
For other ways to initiate a group call, refer to the
corresponding Feature BookLQFOXGHG with the product.
If your dealer assigns a group contact to the
programmed One Touch Call/Menu key, you
can initiate a group call to the designated group
contact by pressing the key.
Answering a Group Call
You can answer a group call without any operation.
After the group call is established successfully, the
radio emits a tone and displays on the screen.
Ending/Exiting a Group Call
You can press to end an outgoing group call or
exit an incoming group call.
For other situations in which a group call is
terminated, refer to the corresponding Feature Book
LQFOXGHGwith the product.
Private Call
A private call is a call from an individual user to
another individual user.
Initiating a Private Call
1. Go toMenu -> Contact -> Favorites/Private
Contact.
2. Use the Up or Down key to select the contact to
be called.
3. Press and hold the PTT key to initiate a private
call. In this case, the radio displays on the
screen
For other ways to initiate a private call, refer to the
corresponding Feature Book included with the product.
If your dealer assigns a private contact to the
programmed One Touch Call/Menu key, you
can initiate a private call to the designated
contact by pressing the key.
Answering a Private Call
There are two ways to answer a private call.
·FOACSU
When you receive a private call, the radio emits
the incoming call tone and displays on the
screen.
You can press or press and hold the PTT key
within the preset time period to answer the call.
After the call is established successfully, the radio
emits a tone and displays on the screen. If you
do not answer this call, the radio will display
on the screen to notify you of the missed call.
·OACSU
6

You can answer a private call without any
operation. The call is established automatically,
and the radio displays on the screen.
Ending a Private Call
You can press to end a private call.
For other situations in which a private call is
terminated, refer to the corresponding Feature Book
included with the product.
Emergency Call
In case of emergency, you can use the Emergency
Call feature to ask for help from other personnel or
the control center.
This feature needs to be configured and enabled by
your dealer. For details, refer to the corresponding
Feature Book included with the product.
Message Services
Message services allow you to send and receive text
and quick text messages.
Sending a Text Message
To edit and then send a text message, do as follows:
1. Go toMenu >Message >New Msg, and then
edit the text.
2. Press the OK/Menu key, and then selectSend.
3. SelectFavorites,Private Contact,Group
Contact, orManual Dial.
4. Select the required contact or enter the contact
number.
5. Press the OK/Menu key to send the text
message.
Sending a Quick Text Message
Quick text messages are preprogrammed by your
dealer, and you can edit each message before
sending it. To send a quick text message, do as
follows:
1. Go toMenu >Message >Quick Text, and
then select the required quick text.
2. (Optional) Edit the quick text.
3. Press the OK/Menu key, and then selectSend.
4. SelectFavorites,Private Contact,Group
Contact, orManual Dial.
5. Select the required contact or enter the contact
number.
6. Press the OK/Menu key to send the text
message.
Sending a Status Message
Status messages are preprogrammed by your dealer,
and you cannot edit the messages. To send a status
message, do as follows:
1. Go toMenu >Message >Status Msg, and
then select the required status message.
2. Press the OK/Menu key, and then select
Favorites,Private Contact,Group
Contact, orManual Dial.
3. Select the required contact or enter the contact
number.
4. Press the OK/Menu key to send the text
message.
Viewing a Received Message
To view a received message, do as follows:
1. Go toMenu >Message >Inbox >Inbox List,
and then select the message to be viewed.
2. Press the OK/Menu key to view the details.
7

熟悉产品
部件介绍
序号 部件名称 序号 部件名称
1 SK1(侧键1)12 LED指示灯
2PTT键(发射
键) 13 天线
3 SK2(侧键2)14 电源开关/音量控
制旋钮
序号 部件名称 序号 部件名称
4TK键(顶部
键) 15 附件接口
5信道选择旋钮 16 返回键
6麦克风 17 P2键
7 LCD显示屏 18 上移键
8确认/菜单键 19 下移键
9P1键20 电池推钮
10 扬声器 21 皮带夹
11 数字键盘 22 电池
为提升操作便利性,本产品提供的功能快捷
键有【TK】键、【SK1】键、【SK2】键、
【P1】键和【P2】键。具体功能请咨询经销
商,功能的详细介绍可参阅本产品配套的
《功能手册》。
LCD图标
图标 产品状态
已开启DTMF键盘
图标 产品状态
已开启GPS功能,且收到有效GPS数据
已开启GPS功能,但未收到有效GPS数据
条数越多,电池电量越足
当前发射功率为低功率
当前发射功率为高功率
已连接附件
有新的工作任务
工作任务已满
DM 直通模式:本产品与其他终端之间直接通
信
RM 中转模式:本产品与其他终端通过中转台
的转发进行通信
已开启监听功能
紧急报警状态(秘密报警除外)或接收到
紧急报警
2

图标 产品状态
漫游状态
已开启扰频或加密功能
扫描状态
扫描停留于非优先信道
扫描停留于优先信道1
扫描停留于优先信道2
已开启声控功能
有未接呼叫
接收到短消息,或者有未读短消息
收件箱的存储空间已满
已开启蓝牙功能
蓝牙处于连接状态
图标 产品状态
无信号
条数越多,信号越强
已开启扬声器
已开启静音功能
已开启音质音量优化器
未检测到Micro SD卡
·出现在呼叫过程中,表示正在进行个
呼
·出现在联系人列表中,表示个呼联系
人
·出现在呼叫过程中,表示正在进行组
呼
·出现在联系人列表中,表示组呼联系
人
·出现在呼叫过程中,表示正在进行全
呼
·出现在联系人列表中,表示全呼联系
人
LED指示灯
指示灯状态 产品状态
绿色闪烁 正在开机
绿色常亮 正在接收
红色常亮 正在发射
橙色慢闪 正在扫描或者漫游
橙色快闪 紧急状态
橙色常亮 呼叫建立成功,橙色常亮期间
您可以按住【PTT】键讲话
蓝色常亮 正在开启蓝牙功能
蓝 色 闪 烁 (每 3
秒闪烁一次)
已成功开启蓝牙功能,但未连
接蓝牙设备
蓝色闪烁(每1.5
秒闪烁一次) 已连接蓝牙设备
蓝色闪烁(每0.1
秒闪烁一次) 正在关闭蓝牙功能
3

基本操作
开机与关机
调节音量
选择区域
区域是一个信道组,您可以将具有相同属性的信道
列入一个区域中,便于您对现有信道进行有效管
理。本产品支持64个区域,每个区域可以配置128
个信道。
您可通过以下两种方式选择区域:
·菜单:进入“区域”菜单后,按【上移】/【下
移】键来选择所需区域,然后按【确认/菜单】
键切换至所选区域。
·可编程键:若经销商为您设置了【区域上调】/
【区域下调】快捷键,则按此快捷键可切换至
所需区域。
选择信道
如果经销商为本产品开启了语音播报功能,
此处切换信道时本产品将播报信道号。
键盘输入
您可通过本产品的数字键盘输入用户别名、号码和
短信等。
·切换输入法:
·输入特殊字符: (数字输入模式除外,
在数字输入模式下按此键输入的是数字1)
·输入空格: (数字输入模式除外,在数
字输入模式下按此键输入的是特殊字符)
键盘锁定与解锁
当您无需使用键盘时,可锁定键盘以防止误操作键
盘。
·开启/关闭键盘锁功能
待机界面下,按【确认/菜单】键选择“设置 -
>对讲机设置 - > 键盘锁”菜单,选择“允
许”或“禁止”开启或者关闭键盘锁功能。
·解锁/锁定键盘
若经销商设置了【键盘锁定】快捷键,您可
按该键来锁定或解锁键盘。
按“【确认/菜单】+ ”组合键来锁
定或解锁键盘。
您还可以在主菜单中选择“设置->对讲机设
置->可选锁键”,设置键盘锁定范围。
新建联系人
新建联系人是指创建新的个呼联系人,并且保存到
联系人列表中。
4

在主菜单中选择“联系人 -> 新建联系人”,进入
新建联系人界面。根据提示输入所需的信息,完成
创建。
·新建联系人的号码和别名不能与联系人
列表中的其他联系人相同。
·除了通过本菜单创建联系人以外,您还
可以将呼叫记录中的未存储个呼号码保
存到联系人列表中。
呼叫
为保证最佳接收音量,发射时请保持麦克风与嘴的
距离为2.5厘米~5厘米。
个呼
个呼是一对一的呼叫。
发起个呼
在待机界面,按住【PTT】键可对当前数字信道上
预设的个呼联系人直接发起呼叫。呼叫发起时,
LCD显示屏显示 图标。
接听和回复个呼
接收到个呼后,LCD显示屏显示 图标,您无需
任何操作即可接听。
在预设时间内按住【PTT】键可发起回呼。如未进
行回呼,则本产品将显示未接呼叫提示。
组呼
组呼是一对多的呼叫。
发起组呼
在待机界面,按住【PTT】键对当前数字信道上预
设的组呼联系人直接发起组呼。组呼发起时,LCD
显示屏显示 图标。
接听和回复组呼
接收到组呼后,LCD显示 图标。您无需任何操
作即可接听,在预设时间内按住【PTT】键可发送
回呼。
模拟信道呼叫(无信令)
在模拟信道上,如需发射,请按住【PTT】键并对
着麦克风讲话。如需接收,请松开【PTT】键。
使用信令发起呼叫的操作方法请参见本产品配套的
《功能手册》。
紧急报警
遇到紧急情况时,您可通过此功能来向同伴或控制
中心寻求帮助。
紧急报警功能需由经销商为您配置和开启,详情请
参阅本产品配套的《功能手册》。
短消息
您可以编辑和发送新的短消息,也可以直接发送快
捷文本,以及转发收件箱、发件箱、草稿箱中的短
消息。
发送短消息
1. 选择“短消息 -> 新建短消息”,进入短消息
编辑窗口。
2. 编辑短消息内容后按【确认/菜单】键。
完成编辑后,您可以将该短消息直接保存到草
稿箱或者发送给个人和组呼联系人。
3. 选择联系人或手动输入联系人号码。
4. 按【确认/菜单】键发送短消息。
5

发送成功后,LCD界面将提示“发送成功”。
快捷文本
快捷文本是经销商为您预设好的常用快捷短消息。
您可选择一条快捷短消息直接发送,或对快捷短消
息进行编辑后再发送。
收件箱
本产品会将接收到的短消息保存在收件箱中,每条
短消息前有相应图标表示该短消息的查阅状态。
当收件箱已满时,此时如果有新的已收短消息,则
最早的短消息将自动被覆盖。
发件箱
本产品会将发送的短消息保存在发件箱中,每条短
消息前有相应图标表示该短消息的发送状态。
当发件箱已满时,此时如果有新的已发短消息,则
最早的短消息将自动被覆盖。
草稿箱
本产品会将已经编辑好的短消息保存在草稿箱中。
当草稿箱已满时,此时如果有新的短消息保存到草
稿箱中,则最早的短消息将自动被覆盖。当您将草
稿箱中的短消息成功发送出去后,本产品会将此短
消息保存到发件箱中,并删除草稿箱中的这条短消
息。如果发送失败,则草稿箱和发件箱都会保留此
短消息。
6
Other manuals for PD985/G
1
Table of contents
Other Hytera Portable Radio manuals

Hytera
Hytera HP60X User manual

Hytera
Hytera PD602i User manual

Hytera
Hytera PD60X User manual

Hytera
Hytera POWER446 User manual

Hytera
Hytera PD70X Series User manual

Hytera
Hytera MD78XG User manual

Hytera
Hytera TC-508U1 User manual

Hytera
Hytera TC-780 User manual

Hytera
Hytera X1ei User manual

Hytera
Hytera TC-508V User manual

Hytera
Hytera HM78XVHF User manual

Hytera
Hytera PD50X User manual

Hytera
Hytera PD46 Series User manual

Hytera
Hytera X1e User manual

Hytera
Hytera HP70X User manual

Hytera
Hytera TF-515 User manual

Hytera
Hytera TC610 User manual

Hytera
Hytera PD782i User manual

Hytera
Hytera PD40X User manual

Hytera
Hytera X1p User manual