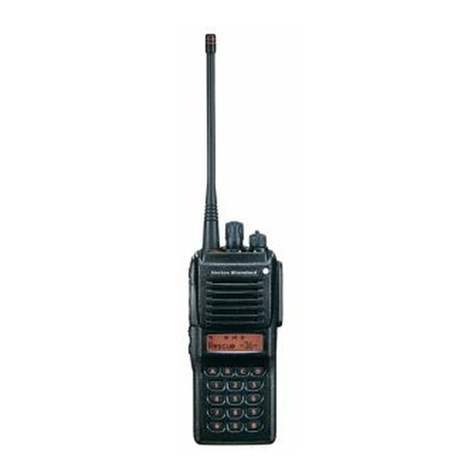
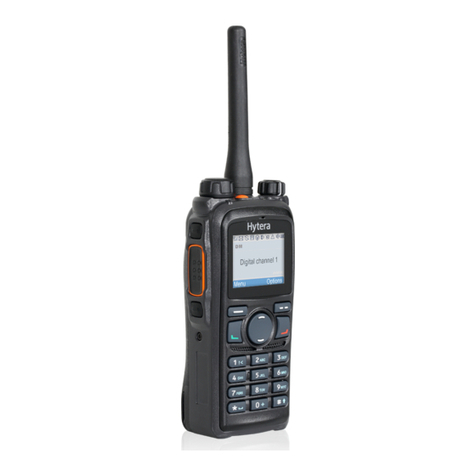
Hytera TETRA PT580H User manual

Preface
Thank you for purchasing Hytera TETRA digital trunking terminal. It has a large
transective TFT color display, and supports both TMO and DMO modes. The
benets that this terminal delivers will refresh your experience and enable you
to be responsive to emergent situations.
To derive optimum performance from the terminal, please read this manual
and the supplied Safety Information Booklet before use.
This manual is applicable to the following model:
PT580H
PT580H Hytera 英文说明书 00(RoHS).ind1 1 2010-12-8 17:26:44

Instructional Icons
The following icons are available through this manual:
Caution: indicates situations that could cause damage to
your product.
Note: indicates tips that can help you make better use of
your product.
Term Explanation
Key Operation
Short press: to press a key and release it quickly.
Long press: to press a key and remain holding it down for a
predened period (1.5 seconds by default).
Hold down: to press a key and remain holding it down.
Individual Call
Individual call is a simplex or duplex call initiated by a single user
to another user, involving the calling party and the called party
only.
Group Call
Group call is a simplex call initiated by a single user to a group of
users, involving the calling party and all the group members.
Telephone Call
Telephone call is usually a full duplex call initiated between
PT580H and a PSTN subscriber (such as telephone user or mo
-
bile phone user).
To send or receive telephone calls, the terminal must operate in
TMO mode, and must be authorized to access public network
through PSTN gateway. Telephone call is a network service. For
more details and availability of the service, please contact your
service provider.
Emergency Call
Emergency call has the highest priority, and is very helpful for
the user to request help when emergency occurs. Generally, it
is set to group call type. Emergency call can break off any non-
emergency calls in progress.
DMO (Direct Mode Operation)
DMO mode allows terminals to communicate directly with each
other in simplex mode, without network restriction. But functions
that require network access such as telephone call will be
disallowed.
TMO (Trunking Mode Operation)
TMO mode allows terminals to communicate with each other via
the TETRA network, in half duplex or full duplex mode. Functions
that require network access are supported.
To operate in TMO mode, the terminal must be granted authori-
zation by your service provider, and must be within the network
coverage.
Air Interface Encryption
An encryption method helpful for protecting message transmitted
over the air. It encrypts data and signaling transmitted between
the base station and terminal, to protect the message from eaves-
dropping.
PT580H Hytera 英文说明书 00(RoHS).ind2 2 2010-12-8 17:26:44
The radio is not intended for use by general population in an
uncontrolled environment. It is only for occupational use and only
applied to work-related conditions.The radio must be only used by
users, who are fully aware of the hazards of the exposure and who
are able to exercise control over their RF exposure to qualify for
the higher exposure limits.

Full Duplex
Full duplex allows the ability to communicate in both directions
simultaneously.
Half Duplex
Half duplex allows the ability to communicate in only one
direction at a time. Two-way communication is possible, but not
simultaneously.
Copyright Information
Hytera is the trademark or registered trademark of Hytera
Communications Co., Ltd. in PRC and other countries and/or
areas. Hytera retains the ownership of its trademarks and product
names. All other trademarks and/or product names that may be
used in this manual are properties of their respective owners.
The Hytera product described in this manual may include Hytera
computer programs stored in memory or other media. Laws in
the PRC and/or other countries or areas preserve for Hytera
exclusive rights for Hytera computer programs. The purchase of
this product shall not be deemed to grant, either directly or by
implication, any rights to the purchaser with respect to Hytera
computer programs. Any Hytera computer programs may not be
copied, modied, distributed, decompiled, or reverse-engineered
in any manner without the prior written consent of Hytera.
Disclaimer
Hytera endeavors to achieve the accuracy and completeness of
this manual, but no warranty of accuracy or reliability is given. All
the specications and designs are subject to change without prior
notice due to continuous technology development. No part of this
manual may be copied, modied, translated, or distributed in any
manner without the express written permission of Hytera.
If you have any suggestions or would like to learn more details,
please visit us at: http://www.hytera.cn.
RF Radiation Information
RF Radiation Prole
Radio Frequency (RF) is a frequency of electromagnetic radiation
in the range at which radio signals are transmitted. RF technology
is widely used in communication, medicine, food processing and
other elds. It may generate radiation during use.
RF Radiation Safety
In order to ensure user health, experts from relevant industries
including science, engineering, medicine and health work
with international organizations to develop standards for safe
exposure to RF radiation. These standards consist of:
United States Federal Communications Commission, Code
of Federal Regulations; 47CFR part 2 sub-part J;
American National Standards Institute (ANSI)/Institute of
Electrical and Electronic Engineers (IEEE) C95. 1-1992;
Institute of Electrical and Electronic Engineers (IEEE) C95.
1 – 1999;
International Commission on Non-Ionizing Radiation
Protection (ICNIRP) 1998;
●
●
●
●
PT580H Hytera 英文说明书 00(RoHS).ind3 3 2010-12-8 17:26:44

FCC Regulations
Federal Communication Commission (FCC) requires that all radio
communication products should meet the requirements set forth in
the above standards before they can be marketed in the U.S, and
the manufacturer shall post a RF label on the product to inform
users of operational instructions, so as to enhance their occupational
health against exposure to RF energy.
Operational Instructions and Training
Guidelines
To ensure optimal performance and compliance with the
occupational/controlled environment RF energy exposure limits in
the above standards and guidelines, users should transmit no more
than 50% of the time and always adhere to the following procedures:
Your product radiates measurable RF energy
only while it is transmitting (during talking),
not when it is receiving (listening) or in standby mode.
Keep the product at least 2.5 centimeters away from your body
during transmission.
EU Regulatory Conformance
As certied by the qualied laboratory, the product is in compliance
with the essential requirements and other relevant provisions of
the Directive 1999/5/EC. Please note that the above information is
applicable to EU countries only.
1.
2.
PT580H Hytera 英文说明书 00(RoHS).ind4 4 2010-12-8 17:26:45

1
Contents
Checking Items in the Package ----------------------- 2
Product Overview----------------------------------------- 3
Product Controls ------------------------------------------- 3
Function Keypad ------------------------------------------- 4
Shortcut Keys ----------------------------------------------- 4
Before Use-------------------------------------------------- 4
Charging the Battery -------------------------------------- 4
Assembling the Accessories ---------------------------- 5
Status Indication ------------------------------------------ 6
LCD Icon ----------------------------------------------------- 6
LED Indicator ----------------------------------------------- 7
Basic Operations------------------------------------------ 7
Turning the Terminal On/Off----------------------------- 7
Adjusting the Volume ------------------------------------- 7
Selecting a Talk Group ----------------------------------- 7
Locking/Unlocking the Keypad ------------------------- 7
Switching Operation Mode ------------------------------ 7
Call ----------------------------------------------------------- 8
Individual Call ----------------------------------------------- 8
Group Call --------------------------------------------------- 8
Telephone Call (TMO only) ------------------------------ 9
Emergency Call -------------------------------------------- 9
Menu Navigation -----------------------------------------10
『Func』Menu ------------------------------------------- 10
『Options』Menu---------------------------------------- 15
Troubleshooting ------------------------------------------ 18
Care and Cleaning --------------------------------------19
Optional Accessories -----------------------------------20
Appendix 1 Input Method ------------------------------21
Appendix 2 SSI&TSI Dialing Rules------------------22
PT580H Hytera 英文说明书 00(RoHS).ind1 1 2010-12-8 17:26:45

2
Please unpack carefully and check that all items listed below are received. If any item is missing or damaged, please contact your dealer.
Note:Theantennamayvarywithdifferentfrequencybands. Andthefrequencyband is markedon thelabelof
antenna;ifnot,pleaserefertothelabelontheterminalforfrequencybandinformation.
Belt Clip Power Adapter Strap User Manuals
Terminal Unit Battery Charger Antenna
Checking Items in the Package
PT580H Hytera 英文说明书 00(RoHS).ind2 2 2010-12-8 17:26:46

3
Product Overview
Product Controls
No. Part Name No. Part Name No. Part Name No. Part Name
1 SK1 (programmable) 2 PTT Key 3 SK2 (programmable) 4 Emergency Key
5LED Indicator 6 Antenna 7Talkgroup Selector
knob 8Receiver
9 LCD Display 10 Function Keypad 11 Speaker 12 Numeric Keypad
13 Duplex Microphone 14 Power On-Off/Volume
Control knob 15 Simplex Microphone 16 Accessory Jack
Cover
17 Accessory Jack 18 Strap Hole 19 Belt Clip 20 Battery
21 Charging Piece 22 Battery Latch
PT580H Hytera 英文说明书 00(RoHS).ind3 3 2010-12-8 17:26:47

4
Function Keypad
Shortcut Keys
Most of the keys, including SK1, SK2, four Navigation Keys,
numeric keys 1-9, , and , can be set as shortcuts
to terminal functions or menus. Then you can quickly access a
menu or function with a key press. For operation details, see
Shortcuts on page 14.
Note:LongandshortpressofSK1orSK2canbe
assignedwithdifferentfunctions.
Product Overview Before Use
Charging the Battery
Only use the charger and battery specied by Hytera. The charge
LED will indicate the charging progress.
■ Procedures:
Connect the power adapter to AC socket. See arrow ①.
Plug the power adapter into the rear jack of charger; See ar-
row ②.
Place the terminal with the battery attached, or the battery
alone, into the charger. See arrow ③.
The charging process begins when the charger LED glows
red.
When charging is complete, the charger LED glows green.
Note:Toachieveoptimalbatteryperformance,
please charge the bat ter y for 5 hours
beforeinitialuse.
1.
2.
3.
4.
5.
1
2
PT580H Hytera 英文说明书 00(RoHS).ind4 4 2010-12-8 17:26:48

5
■ LED Indications and Charging Progress
LED Indicator Status
LED ashes red slowly. Standby (no load)
LED glows red. Charging
LED glows orange. 85% or more charged
LED glows green. Fully charged
LED ashes red rapidly. Failure
Caution: Be sure to read the Safety Information
B o o k l e t , t o g e t n e c e s s a r y s a f e t y
information.
Assembling the Accessories
■ Attaching the SIM Card
1. Loosen the screw xing the SIM card cover, open the cover,
and then place the card into the slot properly, as shown in the
gure below.
2. Close the cover and tighten the screw, as shown in the gure
below.
Before Use
To take out the SIM card, power off the terminal rst, and then do
as instructed in step 1.
Note:SIMcardrelatedservicesshallbeavailable
atlaterstage.
■ Attaching the Antenna
Turn the antenna clockwise to fasten it.
To remove the antenna, rotate it counter-clockwise.
■ Attaching the Battery
Fit the battery into the battery slot properly, as shown in the
gure below.
Slightly press the bottom of the battery until a click is heard.
To remove the battery, turn off the terminal rst. Then slide the
battery latch upwards to unlock the battery.
1.
2.
PT580H Hytera 英文说明书 00(RoHS).ind5 5 2010-12-8 17:26:49

6
■ Attaching the Belt Clip
Remove the two screws as shown in the gure below.
Align the screw holes on the belt clip with those on the
terminal’s body, and then tighten the screws, as shown in the
gure below.
To remove the belt clip, loosen the screws.
■ Attaching the Audio Accessory/Programming
Cable
Loosen the screw on accessory jack cover, and open the
cover as the arrow shows.
Align the plug with the accessory jack.
Tighten the screw on the plug.
To remove the accessory, loosen the screw.
1.
2.
1.
2.
3.
Status Indication
LCD Icon
Icon Name Icon Terminal Status
Battery Strength
Icons
Low battery
More bars indicate more
battery power
RSSI
No signal
More bars indicate better
signal strength
Message Icons
Unread message
Inbox is full of unread
messages
Operation Mode
Icons
The terminal currently
operates in TMO mode
The terminal currently
operates in DMO mode
Prole Icons
Silent
Normal (Ring and vibration
are enabled)
Vibration only
Accessory Icon An audio accessory is
connected
Call Icon A call is in progress
Talkgroup
Selection Icon
Talkgroup selection is in
progress.
Before Use
PT580H Hytera 英文说明书 00(RoHS).ind6 6 2010-12-8 17:26:50

7
LED Indicator
LED Indication Terminal Status
LED glows red. Transmitting a call
LED glows green. Receiving a call
LED ashes red slowly. Low battery
LED ashes green slowly. DMO mode channel free
LED glows orange. DMO mode channel busy
Basic Operations
Turning the Terminal On/Off
To turn the terminal on, rotate the Power On-Off/Volume Control
knob clockwise until a click is heard.
To turn the terminal off, rotate the knob counter-clockwise until a
click is heard.
Adjusting the Volume
In the home screen, rotate the Power On-Off/Volume Control
knob clockwise to increase the call volume, or counter-clockwise
to decrease it.
To adjust the alert tone volume, go to “Func -> Proles ->Normal”.
Selecting a Talk Group
In the home screen, rotate the Talkgroup Selector knob to
switch to select your desired talk group ( appears on the
Status Indication
display). Meanwhile, name of the talk group appears on the
screen.
You can also set a talk group as the default group by going to
“Options->Talk Group->Selected List”. See Selected List on page
15 for more details.
Locking/Unlocking the Keypad
To lock or unlock the keypad, press OK and then . When
the keypad is locked, you can also answer and reply to calls.
After a call is completed, the keypad will return to be locked.
Switching Operation Mode
Go to “Options -> TMO/DMO” to select your desired mode.
Basic Operations
PT580H Hytera 英文说明书 00(RoHS).ind7 7 2010-12-8 17:26:50

8
Call
Individual Call
Transmitting an Individual Call
Operations in DMO mode:
Input the number you want to call through the keypad, or go
to “Func -> PhoneBook” to select the contact you want to
call.
Then hold down the PTT and speak into the microphone, to
transmit a simplex call.
Operations in TMO mode:
Through the menu
Go to “Func -> PhoneBook” to select the contact you want to
call.
Hold down the PTT to transmit a simplex call, or press
to transmit a duplex call.
Through manual input
Input the number you want to call through the keypad.
Set Ctype to Private No (it will appear on the screen).
Hold down the PTT to transmit a simplex call, or press
to transmit a duplex call.
Note:Entryofprivatenumbermustcomplywith
the SSI&TSI dialingrules.SeeAppendix
2SSI&TSI DialingRules onpageXXXfor
moredetails.
Receiving and Responding to an Individual Call
Operations in DMO mode:
When the PTT is released, the terminal is always ready to receive
1.
2.
●
1.
2.
●
1.
2.
3.
calls. When the other party stops talking, you can hold down
the PTT and speak into the microphone to call back.
Operations in TMO mode:
Simplex Call
When a simplex call is received, you can receive without any
operation. When the other party stops talking, you can hold
down the PTT and speak into the microphone to call back.
Duplex Call
When a duplex call is received, you can press to
receive. And then both parties can speak simultaneously
without any key operation.
Group Call
Group call is a simplex call initiated by a single user to all users
in a talk group. Available talk groups are preset by your dealer.
DMO mode supports up to 1024 talk groups, and TMO mode
supports up to 2048 talk groups. Both modes support group call,
and operations are the same.
Transmitting a Group Call
In the home screen, rotate the Talkgroup Selector knob
to switch to your desired talk group ( appears on the
display).
Press OK to conrm your selection.
Hold down the PTT to initiate the call.
●
●
1.
2.
3.
PT580H Hytera 英文说明书 00(RoHS).ind8 8 2010-12-8 17:26:51

9
Note:InTMOmode, you cantransmitagroup
calltoatalkgrouponlyafteritisattached
successfully.Ifyoufailedtoattachatalk
group,thereasonmaybethatthegroup
does notexist inthenetwork,oryouare
outofthenetworkcoverage.
Receiving and Responding to a Group Call
You can listen to an incoming group call without any key
operation. When the other party stops talking, you can hold down
the PTT and speak into the microphone to call back.
Telephone Call (TMO only)
Transmitting a Telephone Call
Input the number you want to call through the keypad.
Set Ctype to PABX or PSTN.
Press to initiate the call.to initiate the call.
Answering a Telephone Call
When there is an incoming telephone call, you can press to
answer. And then both parties can speak simultaneously without
any key operation. To reject or to hang up a telephone call, press
.
Note:Theterminalmustbesetwithappropriate
GatewayNo.Pleasecontactyournetwork
operatorformoredetails.
1.
2.
3.
Call
Emergency Call
Both DMO and TMO modes support emergency call, and
operations are the same.
Long press the Emergency key to initiate an emergency call.
To terminate the call, press . In DMO mode, emergency
calls are transmitted to the current talk group. And in TMO mode,
the target receiver is programmable through the programming
software.
PT580H Hytera 英文说明书 00(RoHS).ind9 9 2010-12-8 17:26:51

10
Menu Navigation
『Func』Menu
In the home screen, Press Func key to access the menu list. The
operations in TMO mode and DMO mode are the same. Here we
are going to introduce all menu items based on TMO mode.
PhoneBook
This menu is used to store your contact information. It can con-
tain up to 512 entries. Each entry consists of contact name and
contact number. To access this menu, go to “Func -> PhoneBook”
in the home screen, and then you can perform these operations:
Create a new contact
●
View a contact
Modify a contact
Delete a contact
Delete all contacts
View phonebook memory
Search a contact (by name)
Call a contact
Message
■ Create Message
Status Message
Status Message is predefined by your dealer. You can
choose to read and send them, but no editing is available.
2. User Message
This option allows you to create a new text message with
140 bytes at most. When creation is done, you can save the
message to Drafts or send it to an individual user or to a talk
group.
■ Inbox
All received messages are saved here. It can contain up to 50
●
●
●
●
●
●
●
1.
PT580H Hytera 英文说明书 00(RoHS).ind10 10 2010-12-8 17:26:51

11
entries. When a new message arrives, the icon and the num-
ber of new messages will appear on the display. Press View to
read the new message now or press Back to view it later. When
the inbox is overowed with unread messages, the icon will
appear. Please sort your inbox in time to receive more messages.
For any message, you can perform these operations:
Reply: to reply to the message sender;
Delete: to delete the current message;
Delete All: to delete all received messages;
Individual: to forward the message to an individual user;
Group: to forward the message to a talk group;
Edit: to edit the message;
Extract No.: to extract numbers involved in the message;
Call: to call the message sender.
■ Outbox
All sent messages are saved here. It can contain up to 20 entries.
The available options are: Delete, Delete All, Individual, Group,
Extract No. and Call.
■ Drafts
You can save up to 10 drafted messages here. For any message,
you can choose to delete, edit or send it.
Call Log
This terminal can save up to 20 entries in the option Dialed,
Received and Missed respectively. When there is a missed call,
appropriate indications will be given on the display. After selecting
an entry, these options are available: Call, View, Save, Delete
and Delete All.
Proles
■ Normal
In this mode, the terminal will alert you to an incoming call or a
new message by giving ring and vibration indication. To match
your actual needs and preferences, you can customize the fol-
lowing parameters:
Alert Volume
You can decrease or increase the volume level using Left or
Right key.
Menu Navigation
PT580H Hytera 英文说明书 00(RoHS).ind11 11 2010-12-8 17:26:51

12
Alert Type
You can use Left or Right key to select your desired alert type
for an incoming call, a new message or keypad press. For an in-
coming call or a new message, the available options include: Off,
Ring, Vibra and Rg & Vb; for keypad press, the available options
include On and Off.
Ring Tone
You can use Left or Right key to select your desired alert tone
for an incoming call or a new message.
■ Silent
In this mode, no ring or vibration indication will be given when a
new call or new message arrives.
■ Vibration
In this mode, only vibration indication will be given when a new
call or new message arrives.
Settings
■ Date and Time
This option allows you to set the current date, time and time for-
mat. The method is as follows:
To set date and time
Press Left or Right key to select the item to be set, and then
input the right value through keypad. When the current time is
displayed in 12 Hour format, press Up or Down key to toggle it
between AM and PM.
To set time format
Menu Navigation
PT580H Hytera 英文说明书 00(RoHS).ind12 12 2010-12-8 17:26:51

13
You can toggle the time format between 24H and 12H using Left
or Right key. When all settings are done, press OK to make them
take effect.
■ Keypad Lock
This option allows you to enable or disable the Auto Keypad Lock
feature. If it is enabled, the keypad will be locked automatically
after the programmed time (10 seconds by default) elapses.
■ Display Saver
This option allows you to enable or disable the screensaver. If
enabled, it will be activated automatically after the programmed
time (15 seconds by default) elapses.
■ Display
Display Invert
This option allows you to invert the displayed information by 180°
so that you can access it easily.
Note:whenthedisplayisinverted,thefunction
ofOKkeyandBackkeyexchanges.
Brightness
You can use Left or Right key to adjust the brightness level.
Menu Navigation
Keypad Light
This option allows you to enable or disable keypad light. The
lighting duration is programmable with the programming software.
■ Security
PIN Code On/ Off
To set PIN code On or Off, you will be required to input the
PIN code. The terminal will be locked when wrong PIN code is
entered up to the predefined times. To unlock it, you need to
enter the right PUK code. Then the terminal will bring you to an
interface, where you can reset your PIN code or press Back key
to restore it to default value. However, when a wrong PUK code is
entered up to the predened times, the terminal will be disabled
temporarily, showing “Radio Disabled”, and then get powered off
automatically.
Note:Thenumberoftimesthatyouareallowed
toinputwrong PIN or PUKcodeispro-
grammable through the programming
software.Whentheterminal isdisabled,
contac t your dealer to activate it. The
defaultPINcodeis1234,andthedefault
PUKcodeis12345678.
PT580H Hytera 英文说明书 00(RoHS).ind13 13 2010-12-8 17:26:52

14
PIN Code Change
This option allows you to change the PIN code. Before changing
it, you need to enter the old PIN code correctly. Then you will be
asked to input your new PIN code twice. Please make sure the
codes you entered are identical; otherwise, you have to reset it
again.
■ Man Down
When this feature is enabled, the terminal will send an emer-
gency call to the predened ID automatically once it falls over or
tilts by 45°. With this feature, you can enjoy enhanced personal
protection.
■ Reset All
This option allows you to restore all settings to default value. To
perform this operation, you need to input the right PIN code.
Others
■ My Information
Under this option you can view some basic information about the
radio, including MCC, MNC and ISSI.
■ Shortcuts
To enhance operation convenience, you can assign your desired
function to a specic key as shortcut. In this way, you can press
the key to access a function easily.
To create a shortcut
Select Shortcuts to access the list of shortcut keys;
Select your desired key, and press Modify to access the list
of assignable functions;
Select your desired function, and press OK to conrm.
To cancel a shortcut
Select Shortcuts to access the list of shortcut keys;
Select the shortcut key to be cancelled, and press Modify to
access the list of assignable functions;
Select Empty, and press OK to conrm.
Note:The def inition of P1, P2, P3 and P4 is
shownbelow:
Keys P1 P2 P3 P4
Denition
Short
press of
SK1
Short
press of
SK2
Long
press of
SK1
Long
press of
SK2
1.
2.
3.
1.
2.
3.
Menu Navigation
PT580H Hytera 英文说明书 00(RoHS).ind14 14 2010-12-8 17:26:52

15
■ Calendar
This option allows you to view calendar information.
『Options』Menu
In the home screen, press Options to access this menu. Here we
are going to introduce all menu items based on TMO mode.
『Options』Menu for TMO 『Options』Menu for DMO
Talk Group
Under this option, you will see Selected List, Scan List, and one
or more static folders created through programming software, as
shown in the following picture:
Selected List
Under this option, you can set a talk group as the default group.
Alternatively, you can do so by rotating the Talkgroup Selector
knob in the home screen. The default group is indicated by the
icon .
In the home screen, you can make a group call to the default
group by pressing PTT key directly. To add groups to the Selected
List, enter a static folder, and select “As SlctList” from Options.
Scan List
You can receive calls only from groups that are included in the
scan list and have been attached successfully (indicated by the
icon ). But you can always receive from the default group and
the emergency group, regardless of the foregoing condition.
After entering the scan list, you can perform the following
operations:
Scan On: to enable Scan feature and to attach all talk groups in
the scan list;
Scan Off: to disable Scan feature and to detach all talk groups
except background group, default group and emergency group.
Scan: to attach all talk groups in the scan list.
To add groups to the Scan List, enter a static folder, and select “As
ScanList” from Options.
Menu Navigation
PT580H Hytera 英文说明书 00(RoHS).ind15 15 2010-12-8 17:26:52

16
Note:ScanListisavailableforTMOmodeonly.
Static Folder
After accessing any of the folders, you can perform the following
operations:
Add: to include a talk group into the current folder;
Delete: to remove a talk group from the current folder;
Delete All: to remove all talk groups from the current folder.
As SltList: to add all talk groups in the current folder to Selected
List;
As ScanList: to add all talk groups in the current folder to Scan
List.
DMO
You can use this option to make your terminal work in DMO
mode. In DMO mode, this option shall be TMO. Likewise, you
can use it to make your terminal work in TMO mode.
Language
This option allows you to select your favorable language.
Currently, this terminal only supports English and Simplified
Chinese.
■ GPSGPS
Display of GPS Data
GPS data includes date, time, longitude, latitude, altitude, and
number of available satellites. Date and time are correlative to
the selected time zone.
Adjust Time
This option allows you to calibrate the time currently displayed on
your terminal with GPS time, and is correlative to the Time Zone
option.
Data Transmit
You may choose to transmit GPS data to an individual user, a
Menu Navigation
PT580H Hytera 英文说明书 00(RoHS).ind16 16 2010-12-8 17:26:53
Other manuals for TETRA PT580H
2
Table of contents
Other Hytera Portable Radio manuals

Hytera
Hytera PD70XI User manual

Hytera
Hytera PD48X User manual

Hytera
Hytera PD702 User manual

Hytera
Hytera DIGITAL PORTABLE RADIO User manual

Hytera
Hytera PD68XIUHF User manual

Hytera
Hytera PD60Xi Um User manual

Hytera
Hytera TC610 User manual

Hytera
Hytera PD782i User manual

Hytera
Hytera PD602 User manual

Hytera
Hytera PD502 User manual

Hytera
Hytera PD46 Series User manual

Hytera
Hytera PD46X User manual

Hytera
Hytera BD51X User manual

Hytera
Hytera POWER446 User manual

Hytera
Hytera TC-508U1 User manual

Hytera
Hytera TF-512 User manual

Hytera
Hytera PD70X Series User manual

Hytera
Hytera HP7 Series User manual

Hytera
Hytera TC610 User manual

Hytera
Hytera X1e User manual