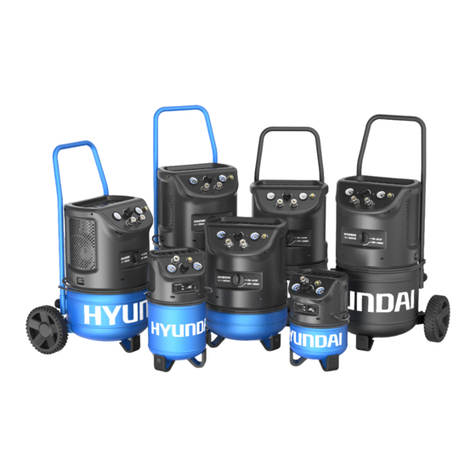
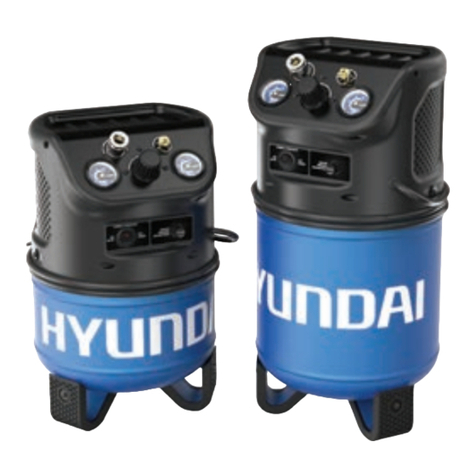
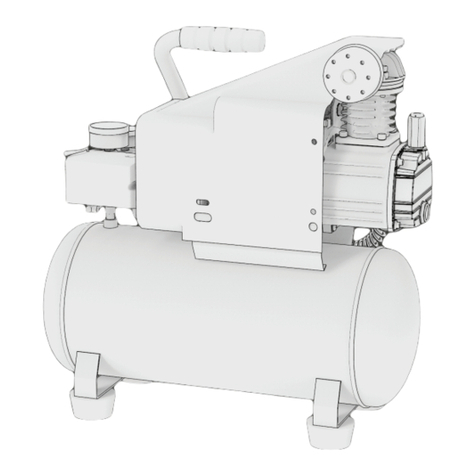
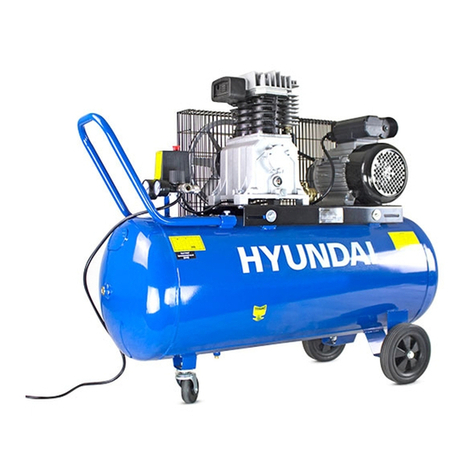
Hyundai HC20V4A-A User manual

1

2
CONTENTS
1. SAFETY INSTRUCTIONS ...................................................................................................................... 3
2. SYMBOLS.............................................................................................................................................10
3. UNPACKING...............................................................................................................................................12
4. FEATURES.......................................................................................................................................................12
5. SPECIFICATIONS......................................................................................................................................13
6. OPERATION .............................................................................................................................................. 13
7. MAINTENANCE.....................................................................................................................................18
8. DISPOSAL............................................................................................................................................ 19
9. TROUBLESHOOTING...........................................................................................................................19
10. DECLARATION OF CONFORMITY.............................................................................................................20
11. WARRANTY..........................................................................................................................................................21
12. PRODUCT FAILURE ...............................................................................................................................22
13. WARRANTY EXCLUSIONS................................................................................................................23

3
1. SAFETY INSTRUCTIONS
WARNING Read all safety warnings, instructions, illustrations and specifications provided with
this power tool. Failure to follow all instructions listed below may result in electric shock, fire and/or serious
injury.
Save all warnings and instructions for future reference.
The term "power tool" in the warnings refers to your mains-operated (corded) power tool or battery-operated
(cordless) power tool.
1) Work area safety
a) Keep work area clean and well lit. Cluttered or dark areas inviteaccidents.
b) Do not operate power tools in explosive atmospheres, such as in the presence of flammable
liquids, gases or dust. Power tools create sparks which may ignite the dust orfumes.
c) Keep children and bystanders away while operating a power tool. Distractions can cause you to lose
control.
2) Electrical safety
a) Power tool plugs must match the outlet. Never modify the plug in any way. Do not use any adapter
plugs with earthed (grounded) power tools. Unmodified plugs and matching outlets will reduce risk of
electric shock.
b) Avoid body contact with earthed or grounded surfaces, such as pipes, radiators, ranges and
refrigerators. There is an increased risk of electric shock if your body is earthed orgrounded.
c) Do not expose power tools to rain or wet conditions. Water entering a power tool will increase the risk
of electric shock.
d) Do not abuse the cord. Never use the cord for carrying, pulling or unplugging the power tool. Keep
cord away from heat, oil, sharp edges or moving parts. Damaged or entangled cords increase the risk of
electric shock.
e) When operating a power tool outdoors, use an extension cord suitable for outdoor use. Use of a
cord suitable for outdoor use reduces the risk of electricshock.
f) If operating a power tool in a damp location is unavoidable, use a residual current device (RCD)
protected supply. Use of an RCD reduces the risk of electricshock.
3) Personal safety
a) Stay alert, watch what you are doing and use common sense when operating a power tool. Do not
use a power tool while you are tired or under the influence of drugs, alcohol or medication. A moment
of inattention while operating power tools may result in serious personalinjury.

4
b) Use personal protective equipment. Always wear eye protection. Protective equipment such as a
dust mask, non-skid safety shoes, hard hat or hearing protection used for appropriate conditions will reduce
personal injuries.
c) Prevent unintentional starting. Ensure the switch is in the off-position before connecting to power
source and/or battery pack, picking up or carrying the tool. Carrying power tools with your finger on the
switch or energising power tools that have the switch on invitesaccidents.
d) Remove any adjusting key or wrench before turning the power tool on. A wrench or a key left
attached to a rotating part of the power tool may result in personalinjury.
e) Do not overreach. Keep proper footing and balance at all times. This enables better control of the
power tool in unexpected situations.
f) Dress properly. Do not wear loose clothing or jewellery. Keep your hair and clothing away from
moving parts. Loose clothes, jewellery or long hair can be caught in movingparts.
g) If devices are provided for the connection of dust extraction and collection facilities, ensure these
are connected and properly used. Use of dust collection can reduce dust-relatedhazards.
h) Do not let familiarity gained from frequent use of tools allow you to become complacent and
ignore tool safety principles. A careless action can cause severe injury within a fraction of asecond.
4) Power tool use and care
a) Do not force the power tool. Use the correct power tool for your application. The correct power tool
will do the job better and safer at the rate for which it wasdesigned.
b) Do not use the power tool if the switch does not turn it on and off. Any power tool that cannot be
controlled with the switch is dangerous and must be repaired.
c) Disconnect the plug from the power source and/or remove the battery pack, if detachable, from
the power tool before making any adjustments, changing accessories, or storing power tools. Such
preventive safety measures reduce the risk of starting the power toolaccidentally.
d) Store idle power tools out of the reach of children and do not allow persons unfamiliar with the
power tool or these instructions to operate the powertool.
Power tools are dangerous in the hands of untrained users.
e) Maintain power tools and accessories. Check for misalignment or binding of moving parts,
breakage of parts and any other condition that may affect the power tool’s operation. If damaged,
have the power tool repaired before use. Many accidents are caused by poorly maintained powertools.
f) Keep cutting tools sharp and clean. Properly maintained cutting tools with sharp cutting edges are less
likely to bind and are easier to control.

5
g) Use the power tool, accessories and tool bits etc. in accordance with these instructions, taking
into account the working conditions and the work to be performed. Use of the power tool for operations
different from those intended could result in a hazardous situation.
h) Keep handles and grasping surfaces dry, clean and free from oil and grease. Slippery handles and
grasping surfaces do not allow for safe handling and control of the tool in unexpectedsituations.
5) Battery tool use and care
a) Recharge only with the charger specified by the manufacturer. A charger that is suitable for one type
of battery pack may create a risk of fire when used with another batterypack.
b) Use power tools only with specifically designated battery packs. Use of any other battery packs may
create a risk of injury and fire.
c) When battery pack is not in use, keep it away from other metal objects, like paper clips, coins,
keys, nails, screws or other small metal objects, that can make a connection from one terminal to
another. Shorting the battery terminals together may cause burns or afire.
d) Under abusive conditions, liquid may be ejected from the battery; avoid contact. If contact
accidentally occurs, flush with water. If liquid contacts eyes, additionally seek medical help. Liquid
ejected from the battery may cause irritation or burns.
e) Do not use a battery pack or tool that is damaged or modified. Damaged or modified batteries may
exhibit unpredictable behaviour resulting in fire, explosion or risk of injury.
f) Do not expose a battery pack or tool to fire or excessive temperature. Exposure to fire or temperature
above 130 °C may cause explosion.
g) Follow all charging instructions and do not charge the battery pack or tool outside the
temperature range specified in the instructions. Charging improperly or at temperatures outside the
specified range may damage the battery and increase the risk offire.
6) Service
a) Have your power tool serviced by a qualified repair person using only identical replacementparts.
This will ensure that the safety of the power tool is maintained.
b) Never service damaged battery packs. Service of battery packs should only be performed by the
manufacturer or authorized service providers.
Device-specific safety instructions
This appliance may not be used by children or people with reduced physical, sensory or mental
capabilities or a lack of experience and knowledge. Children must not use the appliance as a plaything.
Cleaning and user maintenance tasks may not be carried out by children unless they aresupervised.

6
Avoid using the compressor at temperatures below +5 degrees.
Never leave the compressor unsupervised while ills in use.
Ensure that the ON/OFF switch is turned off when connecting to the mains powersupply.
Caution! Operate the compressor only for a short time. The appliance may overheat if operated
continuously for longer than 10 minutes. Switch the appliance off immediately and allow it to cool down
for at least 10 minutes.
Risk of injury! Do not pump any objects up to more than the intended pressure. They could burst and
cause injury and/or material damage.
Do not exceed the permissible output range of the compressor. Do not pump up any lorry, tractor or
other large tires.
Do not work with any materials that are or could be easily inflammable orexplosive.
Never use the appliance for purposes other than the ones for which it wasdesigned.
The appliance must always be kept clean, dry and free from oil orgrease.
Never use gasoline or other inflammable liquids to clean the unit! Vapours remaining in the appliance
could be ignited by sparks and lead to the explosion of theappliance!
Remain alert at all times! Never use the appliance when you are distracted or don’t feel well.
Safety instructions for working with compressed air and blow-out guns
The compressor and hoses can get very hot during operation. Touching them can causeburns.
The gases or vapours sucked in by the compressor intake must be kept free of admixtures that could
lead to fires or explosions inside the compressor.
When removing the hose coupling, always hold the hose coupling firmly to avoid injury caused by the
hose flying off.
When working with the blow-out gun, wear goggles. Foreign bodies and blown out particles can easily
cause injuries.
Do not direct the blow-out gun at people or use it to clean clothing you arewearing.
Check all connections and supply lines. All maintenance units, couplings and hoses must correspond to
the appliance parameters in terms of pressure and air flow. Excessively low pressure will adversely
affect the function of the appliance; excessively high pressure can cause property damage and personal
injury. Protect the hoses against kinking, constriction, solvents and sharpedges.
Ensure that the hose clamps are always tight. Loose or damaged hose clamps can allow air to escape
in an uncontrolled manner.
Replace a damaged hose immediately. A faulty supply line can cause a compressed-air hose to thrash
about and cause personal injury.
Do not breathe in the exhaust air directly. The hose must be designed for at least 150% of the maximum
pressure generated in the system.
The tool and the supply hose must be fitted with a hose coupling that allows the pressure of the coupling
hose to be dispersed completely during disconnection.
WARNING! An undersized compressed air system will reduce the efficiency of yourappliance.
Avoid getting exhaust air in your eyes. The exhaust air from the appliance may contain water, oil, metal
particles or impurities from the compressor. This can cause damage to health.

7
Ensure the secure footing and stable positioning of the compressor. During operation the compressor
shall always be placed on its rubber feet or the bottom side. Never exceed the inclination angle of 10º
(vertical position) or 15º(horizontal position).
The user has to make provision for the installation of the over-current protection of the power circuit.
The installation must be made according the norm EN60204.
The user has to make provision for the installation of the electrical disconnecting device of the power
circuit. The installation must be made according the normEN60204.
User has to make provision for the installation of the pressure relief devices and other protective
devices.
There is a risk of inhalation of harmful gases mists and fumes; do not to be exposed to thesematerials.
In all areas accessible to personnel, the concentration of processed gases that can displace breathing
air shall be kept within acceptable levels. User shall refer to the norm EN 12021 for acceptable levels of
contaminants in breathing air;
Always proceed to pressure relief valve maintenance and testing at regular intervals to confirm their
correct operation at their specified setting.
All hoses and fittings shall be suitable for site use at the maximum allowable pressure of the portable
compressors;
Where a parking brake is not fitted the use of wheel chocks is recommended when parked and inuse.
Always transport the tool by its handle. The tool shall be switched off and cold beforetransportation.
Do not use the tool on excessively hot or cold surfaces.
There is a risk of coke formation in the delivery piping causing a fire or explosion (only reciprocating
compressor).
Separators, traps and draining facilities are required to process liquids produced by the compressor
before putting the compressor unit into use as these are not supplied.
WARNING!
Take care when putting down the appliance. Always put the appliance down so it does not lie on the
ON/OFF switch. Under certain circumstances, this could cause an accidental activation of the appliance
which, in turn, could lead to hazards.
SAFETY INSTRUCTIONS FOR BATTERIES AND CHARGER
Batteries
Never attempt to open for any reason.
Do not store in locations where the temperature may exceed 40°C(104°F).
Charge only at ambient temperatures between 4°C and 40°C (39.2°F and104°F).
Charge only using the charger provided with the tool.
Store your batteries in a cool dry place (5°C-20°C/41°F-68°F). Never store batteries in discharged
state.
It is better for Li-ion batteries to discharge and reload them regularly (at least 4 times a year). The
ideal charge for long-term storage of your Li-ion battery is 40% ofcapacity.
When disposing of batteries, follow the instructions given in the section “Protecting the
environment”.

8
Do not cause short circuits. If connection is made between the positive (+) and negative (-) terminal
directly or via accidental contact with metallic objects, the battery is short circuited and an intense
current will flow causing heat generation which may lead to casing rupture orfire.
Do not heat. If batteries are heated to above 100°C (212°F), sealing and insulating separators and
other polymer components may be damaged resulting in electrolyte leakage and/or internal short
circuiting leading to heat generation causing rupture or file. Moreover do not dispose of the
batteries in fire, explosion and/or intense burning mayresult.
Under extreme conditions, battery leakage may occur. When you notice liquid on the battery,
proceed as follows:
Carefully wipe the liquid off using a cloth. Avoid skincontact.
In case of skin or eye contact, follow the instructions below:
•Immediately rinse with water. Neutralize with a mild acid such as lemon juice or
vinegar.
•In case of eye contact, rinse abundantly with clean water for at least 10 minutes.
Consult a physician.
Fire hazard! Avoid short-circuiting the contacts of a detached battery. Do not incinerate
the battery.
Charger
Use the charger provided with the tool only to charge
the battery.
Never attempt to charge non-rechargeable batteries.
Have defective cords replaced immediately.
Do not expose to water.
Do not open the charger.
Do not probe the charger.
The charger is intended for indoor use only.
This charger can be used by children aged from 8
years and above and persons with reduced physical,
.

9
sensory or mental capabilities or lack of experience
and knowledge if they have been given supervision or
instruction concerning use of the appliance in a safe
way and understand the hazards involved.
Children shall not play with the appliance. Cleaning
and user maintenance shall not be made by children
without supervision.
If the supply cord is damaged, it must be replaced by
the manufacturer, its service agent or similarly
qualified persons in order to avoid a hazard.
CAUTION: Do not recharge non-rechargeable batteries.
INTENDED USE
This product is intended exclusively for generating compressed air for tools operating with compressed air.
The compressor can be used to operate paint sprayers, air tools, grease guns, airbrushes, caulking guns,
sandblasters, inflating tires and plastic toys, grass sprayers and insecticides. Read the manufacturer's
instructions for the attachment that will be used with the machine.
The compressor should not be used for any other purpose.
If the product is used for purposes other than those intended or in the event of unauthorized modification,
the legal warranty and liability for defects, as well as any liability of the manufacturer, will be void.
This product is not intended for commercial or industrial use. We do not accept any liability if the product is
used under these conditions or under comparable conditions.

10
2. SYMBOLS
Wear hearing protection
Wear eye protection
Conforms to relevant safety standards
To reduce the risk of injury, the user must read and understand this manual
before using this product.
Do not dispose of old appliances with domestic rubbish .
Class II, double insulation (only for charger)
General warning!
Type of fuse
This product is suitable for indoor use
Do not expose batteries to temperatures exceeding 40 degrees.

11
Do not dispose of batteries in fire. They could explode and cause injury
Do not dispose of batteries in water.
Recycling
Guarantee sound power level
Prohibition: Do not open the cock before the air hose is attached
Prohibition: Do not start
Do not use the tool under rain and in damp environment
The accessible surfaces can be hot –Do not touch
Warning: Compressor unit may start without warning

12
3. UNPACKING
This tool has been shipped completely assembled.
Carefully remove the tool and any accessories from thebox.
Inspect the tool carefully to make sure no breakage or damage occurred during shipping.
Do not discard the packing material until you have carefully inspected and satisfactorily operated the tool.
If any parts are damaged or missing, please call: +33 (0)9.70.75.30.30
•https://services.swap-europe.com/contact
4. FEATURES
20V d.c. Lithium-Ion Battery Power
Portable and Cordless Power
Easy to Read Gauges
Durable Rubber Feet
Safety and Ball Drain Valves
1. Pressure gauge(Deliver air pressure)
2. Regulator
3. Pressure gauge(Tank air pressure)
4. Handle
5. Quick connector
6. Tank
7. ON/OFF switch
8. Battery connection
9. Safety valve
10. Battery
11. Charger
12. Support foot

13
5. SPECIFICATIONS
Tank.............................................3.8 l
Voltage........................................20V d.c.
Max Pressure ..............................120 psi (8.27 bar)
Weight..........................................6.40 kg
Air Delivery.
0.020m³ /min @ 2.76bar (276 Kpa)
0.014m³ /min @ 6.20bar (620 Kpa)
Charger model: ............HFC20U (.Input: :220-240V~ ,50/60Hz, Max 0.6A;Output20V d.c., 2.0A)
Battery model:..............HBA20U4 (20V d.c.4.0Ah Lithium-ion)
Charge time..................................120-130 minutes
Sound pressure level: LpA=83.26dB(A),K=1.12dB(A)
Sound power level: LwA=84.38dB(A)
Guarantee sound power declared: LwA=87dB(A)
Speed: 4600/min
6. OPERATION
CHARGING THE BATTERY PACK
Warning !
Only charge in compatible 20V chargers. Use of other chargers may result in fire, damage or serious
personal injury. The battery pack has been shipped in a low charge condition to prevent possible problems.
Therefore, you should charge it until the green LED on the charger comes on.
1) Check that your mains voltage is the same as that marked on the rating plate of the battery charger.
Insert the power plug of the charger into the socket outlet. The GREEN LED will then beginto light.
2) Insert the battery pack into the battery charger, and then the LED on charger will come inRED.
3) When the charge is finished, the light indicator of the charger will come back ingreen.
3) You will find a label with “Charger indicator” of the LED indicator on the charger.
The battery pack can become a little warm during the charging. This is normal.
If the battery pack fails to charge, check:
Voltage at the power socket
Whether there is good contact at the charging contacts.
Whether the battery pack is warm or not, the battery protection system will not allow the battery to be
charged if the battery temperature is over 40°C after use, allow the battery pack to cool to room
temperature before commencing with the charging.

14
(FIG.A)
If the battery pack still fails to charge, send the charging unit and the battery pack to our customer service
center.
Toensure that the battery pack provides long service, you should take care to recharge it promptly. You must
recharge the battery pack when you notice that the power of the cordless vacuum drops. Never allow the
battery pack to become fully discharged. This will cause it to develop a defect.
Battery capacity indicator
Press the switch for the battery capacity indicator. The battery capacity indicator shows the charge status of
the battery using 3 LEDs as following:
All 3 LEDs are lit:
The battery is fully charged.
2 LED(s) are lit:
The battery has approx. 50-75% remaining charge.
1 LED is lit:
The battery will be empty soon, it shall berecharged
INSTALLING/REMOVING BATTERY PACK(FIG.A)
Make sure the air compressor is turned off.
Insert the battery pack and make sure the latch on the battery snaps in place and battery pack is
secured to the tool.
Toremove, depress the latch and pull out the battery pack.

15
(FIG.B)
CONNECTING / DISCONNECTING THE AIR HOSE
To connect an air hose:
Make sure the air compressor is turned off and the battery pack is notinstalled.
Rotate pressure regulator knob fully in the counterclockwise direction so that the outlet pressure is at
zero (0) bar/PSI.
Attach hose with quick connect air fitting to the ¼ in. quick coupler on the air compressor. Make sure to
push the hose adapter end fully into the coupler until the sleeve springs forward to lock it inplace.
Confirm that the outlet pressure is at zero (0)bar/PSI.
When disconnecting a hose from the ¼ in quick coupler, always firmly hold the release end of the hose.
Pull back on the release sleeve on the ¼ in. quick coupler.
With a firm grip, pull out the quick-connect air fitting that is attached to the quickcoupler.
BREAK-IN PERIOD
Before first use, install the fully charged 4.0Ah battery pack. Run the air compressor at zero tank pressure
with the drain valve fully open for 30 minutes or until the battery pack is completely discharged, whichever
happens first.
TURNING THE AIR COMPRESSOR ON/OFF (FIG.B)
Install the battery pack.
Move the ON/OFF switch to the “ I ” position to power the compressor.
Toturn the air compressor off, move the ON/OFF switch to the “O” position.
NOTE: When the compressor is in the ON position, the air compressor will automatically turn back on when
the designated tank air pressure drops below the preset pressure limit. It will also shut off again when the
cut-off pressure is reached.

16
USING THE AIR COMPRESSOR
Ensure that the ON/OFF switch is in the OFF position and the battery packs are notinstalled.
Attach air hose following the instructions in Connecting/Disconnecting Air Hose (hose not provided).
Attach 1/4 in. NPT quick-connect air fitting to the accessory or tool you intend to use. Insert the other
end of the quick-connect air fitting to the quick coupler on the open end ofhose.
Install the battery packs.
Move the ON/OFF switch to the ONposition.
Set the amount of air pressure desired using the pressure regulator knob. Pull the knob out, then turn
clockwise to increase or counterclockwise to decrease the air pressure through the hose. When the
desired pressure is set, push the knob back in to lock.
When finished, always drain the tank, turn the unit off, and remove the battery packs. Never leave the
unit on and/or running unattended.
NOTE:Always use the minimum amount of pressure necessary for your application. Using a higher pressure
than needed will drain air from the tank more rapidly, cause the unit to cycle on more frequently, and reduce
battery run time between charges. Following all safety precautions in this manual and the manufacturer's
instructions in the air tool manual, you may now proceed to use your air-poweredtool.
DRAINING THE TANK (FIG.C)
To help prevent tank corrosion and keep moisture out of the air used, the air tank of the compressor should
be drained daily.
To drain:
Turn the air compressor off and remove the batterypacks.
Pull the ring on the safety valve to release air until tank pressure gauge reads less than20psi.
Release the ring.
Turn the drain valves 90°counterclockwise to the ON (open)position.
Tilt tank to drain moisture from tank into a suitablecontainer.
If a drain valve is clogged, release all air pressure, remove and clean valve, thenreinstall.
Turn the drain valves 90°clockwise to the OFF (closed) position.

17
(FIG.C)
NOTE: Condensate is a polluting material and should be disposed of in compliance with local regulations.
CHECKING THE SAFETY VALVE
WARNING!
Do not attempt to tamper with the safety valve. Anything loosened from this device could fly up and hit you.
Failure to heed this warning could result in death or serious personal injury.
Install the battery pack.
Turn the air compressor ON and allow the tank to fill. The compressor will shut off when the pressure
reaches the cut-out pressure.
Turn the air compressor OFF

18
Turn the knob of safety valve counterclockwise for 3-5 circles to release air for three to five seconds to
allow pressurized air to escape. Then turn it clockwise tightly. The safety valve must hold pressure
before all compressed air is exhausted from the tank/pressurevessel.
Pull the ring on the safety valve to release air for three to five seconds to allow pressurized air to escape.
Release the ring. The safety release valve must reset and hold pressure before all compressed air is
exhausted from the tank/pressure vessel.
Any continued loss of air after performing the above steps indicates a problem with the safety valve.
Discontinue use and seek service before continued use of the aircompressor.
WARNING! If air leaks after the ring has been released or if the valve is stuck and cannot be
actuated by the ring, do not use the air compressor until the safety valve has been replaced. Use of the air
compressor in this condition could be result in serious personalinjury.
7. MAINTENANCE
GENERAL MAINTENANCE
Avoid using solvents when cleaning plastic parts. Most plastics are susceptible to damage from various
types of commercial solvents and maybe damaged by their use.
Use clean cloth to remove dirt, dust, oil, grease, etc.
WARNING!
Remove the battery from the tool for any inspection, maintenance, and cleaning.
REPLACING THE AIR FILTER
Grasp the tabs on the air filter cover and pull away from thehousing.
Remove the air filter.
Install new air filter.
Replace the air filter cover by pushing it into the housing until it clicks intoplace.
STORING THE AIR COMPRESSOR
Place the ON/OFF switch in the off position.
Remove battery packs.
Disconnect air hose and air tool from the compressor.
Drain air tanks according to instructions.
Thoroughly clean air compressor and any accessories.

19
8. DISPOSAL
Electrical products should not be discarded with household products. According to the
European Directive 2012/19/EU on waste electrical and electronic equipment and its
implementation into national law, electrical products used must be collected separately and
disposed of at collection points provided for this purpose. Talk with your local authorities or
dealer for advice on recycling.
9. TROUBLESHOOTING

20
10. DECLARATION OF CONFORMITY
BUILDER SAS
32, rue Aristide Bergès - ZI 31270 Cugnaux - France,
Declares that,
Product: CORDLESS COMPRESSOR
Trade mark: HYUNDAI
Model: HC20V4A-A
Serial number: 20210128450-20210129949
is in conformity with the essential requirements and other relevant provisions of the applicable European
Directives, based on the application of European harmonized standards.Any unauthorized modification of
the apparatus voids this declaration.
European Directives (including, if applicable, their amendments up to the date of signature):
Rohs Directive (EU) 2015/863 amending 2011/65 / EU
“Machine” directive 2006/42 / EC
EMC Directive 2014/30 / EC
LVD Directive 2014/35/UE
European harmonized standards (including, if applicable, their amendments up to the date of signature):
EN 1012-1:2010; EN60204-1:2018
Cugnaux, 31/10/2020
Philippe MARIE / PDG
Responsible of the technical file: Mr Olivier Patriarca
Table of contents
Other Hyundai Air Compressor manuals

Hyundai
Hyundai AirPower User manual

Hyundai
Hyundai HY70100P User manual

Hyundai
Hyundai HY2524 User manual

Hyundai
Hyundai HHC2GNK User manual

Hyundai
Hyundai H50CV-A User manual

Hyundai
Hyundai HY 2550 User manual

Hyundai
Hyundai HC100L-A User manual

Hyundai
Hyundai HYSC75300 User manual

Hyundai
Hyundai HYAC6-07S User manual

Hyundai
Hyundai HY3100P User manual

Hyundai
Hyundai HY27550 User manual

Hyundai
Hyundai HY70100P User manual

Hyundai
Hyundai HY55200-3 User manual

Hyundai
Hyundai HY3050 User manual

Hyundai
Hyundai HY0808 User manual

Hyundai
Hyundai HHC315C User manual

Hyundai
Hyundai HY3050V User manual

Hyundai
Hyundai HHC4GAC User manual

Hyundai
Hyundai HCP9100 User manual

Hyundai
Hyundai HY3150S User manual