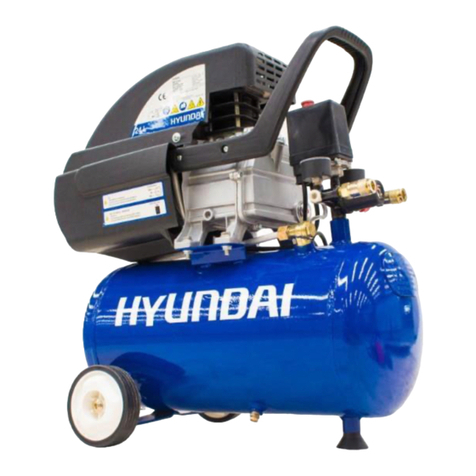
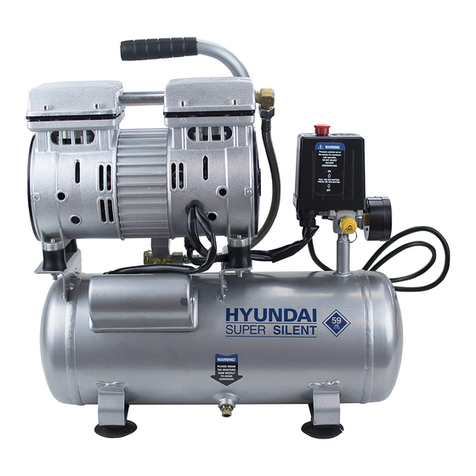
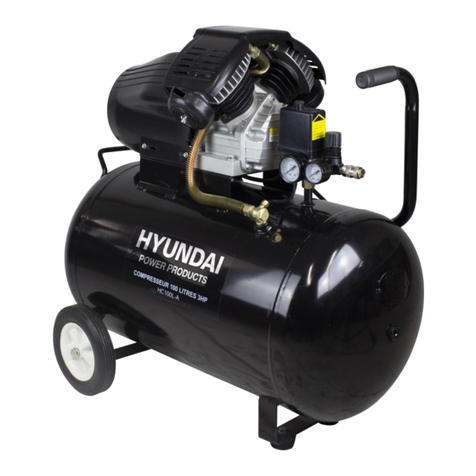
Hyundai H50CV-A User manual

1
AIR COMPRESSOR
H50CV-A
WARNING: Read thoroughly the instruction manual before use.

2
IMPORTANT NOTICE
THINGS TO DO BEFORE OPERATING
YOUR NEW COMPRESSOR FOR THE
FIRST TIME
1. On the top front of the compressor you will find a white plastic shipping plug
inserted into the oli filler hole, Remove the shipping plug and replace by pressing
the red oil filler plug(Supplied in the parts bag) into the oil filler hole.
2. Also, supplied in the parts bag you will find a black air breather assembly.Screw
the assembly into the hole on the side and at the top of the compressor head.
3. Using the sight-glass built into the lower front area of the compressor (just behind
the regulator), check the oil level. It should be at the halfway mark on the sight-
glass for normal operation, If it is necessary to add oil,please use any standard
air compressor oil available at home centers and other major retailers.
4. There are two air outlet fittings on the regulator.
Air flow for one fitting is operated by turning the regulator handle. The other is a
free flow directly from the tank.Screw either a metal cap or a quick-coupler (not
supplied) onto the free-flowing fitting before starting the compressor.Use nylon
thread-seal tape when working with air fittings to prevent leakage.

3
CONTENTS
1. INTRODUCTION……………………………………………………………………4
2. SAFETY GUIDELINES……………………………………………………………4
3. BRIEF DESCRIPTION……………………………………………………………6
4. GENERAL VIEW AND MAIN COMPONENTS…………………………………6
5. MAIN TECHNICAL PARAMETER………………………………………………6
6. PREPARATION FOR STARTING………………………………………………7
7. OPERATION AND ADJUSTMENT………………………………………………7
8. CAUTIONS…………………………………………………………………………8
9. MAINTENANCE……………………………………………………………………9
10.TROUBLES AND REMEDIES……………………………………………………10
11. PARTS ILLUSTRATION …………………………………………………………11
PARTS LIST………………………………………………………………………12
12. LIST OF GOODS…………………………………………………………………13
13. DECLARATION OF CONFORMITY………………………………………………14
14. WA R R A N T Y…………………………………………………………………15
15.P R O D U C T FA I L U R E……………………………………………………16
16.WA R R A N T Y E X C L U S I O N S…………………………………………17

4
1. INTRODUCTION
Read this manual carefully before operating or servicing this, air compressor
to familiarize with proper safety, operating, and maintenance procedures.
Failure to comply with instructions in this manual could result in personal
injury, property damage, and voiding of your warranty. Following the
instructions in this manual will provide a longer and safer service life for your
air compressor.
2. SAFETY GUIDELINES
DANGER- AN IMMEDIATE HAZARD THAT WILL CAUSE
SERIOUS INJURY OR LOSS OF LIFE.
1. TO REDUCE THE RISK OF FIRE OR EXPLOSION,NEVER SPRAY FLAMMABLE
LIQUIDS IN A CONFINDED AREA. It is normal for the motor and pressure switch to
produce sparks while operating.If sparks come into contact with vapors from gasoline or
other solvents, they,may ignite causing fire or explosion.Always operate the compressor in a
well-ventilated area. Do not smoke while spraying.Do not spray where sparks or flame are
present. Keep compressor as far from spray area as possible..
2. The solvents Trichloroethane and Methylene Chloride can chemically react with
aluminum used in paint spray guns, paint pumps, etc. and cause an explosion. If you are
using these solvents,use only stainless steel spray equipment.This does not affect your air
compressor,but many affect the equipment being used.
3. Never directly inbale the compressed air produced by a compressor. It is not suitable for
breathing purposes.
WARNING: A POTENTIAL HAZARD THAT COULD CAUSE
SERIOUS INJURY OR LOSS OF LIFE
1. Do not weld on the air tank of this compressor.Welding on the air compressor tank
strength and cause an extremely hazardous condition.Welding on the tank in any manner
will void the warranty.
2. Never use an electric air compressor outdoors when it is raining or on a wet surface,as
it may cause an electric shock.
3. This unit starts automatically.ALWAYS shut off the compressor,remove the plug from
the outlet, and bleed all pressure from the system before servicing the compressor, and
when the compressor is not in use.
4. Check the manufacturer's maximum pressure rating for air tools and
accessories.Compressor outlet pressure must be regulated so as to never exceed the
maximum pressure rating of the too
5. High temperatures and moving parts are present under the shield.To prevent burns or
other injuries,DO NOT operate with the shield removed. Allow the copmpressor parts to
cool before handing or servicing.
6 Be certain to read all labels when you are spraying paints or toxic materials, and follow
the safety instructions. Use a respirator mask if there is a chance of inhaling anything you
are spraying .Read all insrtuctions and be sure that your respirator mask will protect you.

5
7. Always wear safety goggles or glasses when using an air compressor. Never point any
nozzle or sprayer toward a person or any part of the body.
8. Do not adjust the pressure switch or regulating valve for any reason. Doing so voids all
warraanties.They have been pre-set at the factory for the maxinum pressure of this unit.
8. Read the operating instructions
9. Risk of electric shock
10. Do not open the valve before connecting the air hose.
11. Risk of high temperature
CAUTION: A POTENTIALL HAZARD THAT MAY CAUSE
MODERATE INJURY OR DAMAGE TO EQUIPMENT.
1. Drain the mositure from the tank on a daily basis. A clean , dry tank will help prevent
corrosion
2. Pull the pressure relief valve ring daily to ensure that the valve is functioning properly,
and to clear of any possible Obstructions
3. To provide proper ventilation for cooling , the compressor must be kept a minimum of
31cm (12inches) from the nearest wall ,in a well-ventilated area.
4. Fasten the compressor down securely if transporting is necessary . Pressure must be
released from the tank before transporting..
5. Protect the air hose and electrical wire from damage and puncture. Inspect them
weekly for weak or worn spots, and replace them if necessary..
WARNING!
DISCONNECT POWER AND RELE ASE
ALL PRESSURE FROM THE SYSTEM
BEFORE ATTEMPTING TO INSTALL,
SERVICE, RELOCATE OR PERFORM
ANY MAINTENANCE.
1. Follow all local electrical and safety
codes as well as National Electrical
Codes(NEC) and Occupational Safetyand
Health Act(OSHA). .
2. Electric motors and starters must be
securely and adequately grounded using a
three-pronged Outlet.
CAUTION!
Never use an extension cord with this
product.
Use additional air hose instead of an
extension cord to avoid power loss and
permanent motor damage.Use of an
extension cord voids the warranty.
Record the Model NO.,Serial No. and Date
of Purchase in the space below.
Model № ___________________________
Serial № _________________________
Date of Purchase
_________________________
Retain these number for future reference

6
3. BRIEF DESCRIPTION
This micro air compressor is of novel design and excellent workmanship.Having the
advantages of compact construction,fine appearance,light weight,easy operation,high safety
and low noise,it can be widely used in machinery,chemical industry,spray and
decoration,automatic control system and other fields where compressed air is required.
4. GENERAL VIEW AND MAIN COMPONENTS(Fig.1)
(1) Main compressor
(2) Pressure switch
(3) Outlet Valve
(4) Regulating Valve
(5) Pressure gauge
(6) Check Valve
(7) Drain cock
(8) Wheel
(9) Discharge pipe
(10) Air tank
(11)Fan cover
5. MAIN TECHNICAL PARAMETER
Model H50CV-A
Power 3HP
Voltage 220V
Frequency 60HZ
Current 7.5A
Rated Speed 3400tr/min
Displacement 250L/min
Max.Working Pressure 0.8Mpa
Tank Capacity 50L
Net weight 26kgs
L*W*H(cm) 70*31*66

7
6. PREPARATION FOR STARTING
(1)The place to set the compressor should be clean,dry and ventilated.
(2)Keep the use voltage within±5% of rated.
(3)Keep the oil level in the red circle leveler.
(4)Recommend compressor oil use SAE30 or L-DAB 100 over 10℃,and use SAE10 or L-DAB68
below 10℃.
(5)Open the outlet valve,set the knob of pressure switch in position on (Fig.2),let the compressor run
10 minutes without load to ensure lubricating the moving parts before regular serivce.
7. OPERATION AND ADJUSTMENT
(1)Open the drain cock under the tank first and then close it.
(2)The compressor is controlled by pressure switch when normal working.It can be
stoped automatically as pressure increasing to the maximum and restart as pressure
decreasing to the minimum.The rated pressure has been adjusted when
produced.Don't change it carelessly.As soon as motor switched off the compressed
air in the discharge pipe should be released through the outlet valve under the
switch.This is the necessary condition for restart,or the motor will be damaged.The
rated pressure can be adjusted by turning the adjusting bolt of the switch(Fig.2).
(3) The outlet pressure of compressed air can be adjusted by regulating valve.(Fig.2). Pull up
the knob of regulation valve and turn it clockwise to increase the pressure.
(4) When the compressor needs to be stopped as it is running, only to set the knob of
pressure switch in position off

8
8. CAUTIONS
1) Put the cover off first and put on the breath pipe and air filter before running the
compressor(Fig.3)
2) Never unscrew any connecting part when the tank is in pressure condition.
3) Never disassemble any electrical part before disconnecting the plug.
4) Never adjust the safety valve carelessly.
5) Never use the compressor when voltage is too low or too high.
6) Never use electrical wire more than 5m long with less than the section shown in Table 1
7) Never disconnect the plug to stop compressor,set the switch knob in position off instead
8) If the outlet valve doesn't work as motor stopped,search for the cause immediately so as
not to damage the motor
9) Lubricating oil must be clean,oil level should be kept in the red circle leveler also
10)Disconnect the plug to cut off power supply and open the outlet valve.
Table 1
Motor output
(HP/kw)
220V/230V/240V Single-
phase
100V/110V/127V Single-
phase
Wire(mm2)
Fuse(A)
Wire(mm2)
Fuse(A)
1/0.75
1.5
16
2.0
20
1.5/1.1
1.5
16
2.5
20
2/1.5
1.5
16
2.5
20
2.5/2
2.0
20
2.5
20

9
9. MAINTENANCE
(1) Clean crankcase and renew lubricating oil after the first 10 working hours.
(2) Clean the oil level after every 20 working hours,and replenish it if necessary(Fig.4.)
(3) Open drain cock under the tank to exhaust condensate after every 60 working hours.
(4)Clean crankcase every 120 working hours and renew the oil,clean air filter,and check safety
valve and pressure gauge

10
10. TROUBLES AND REMEDIES
Table 2
Trouble
Possble causes
Remedies
Motor unable running,
Running too Slow, or
Getting hot
(1) Fault in line,or voltage
insufficient
(2)Power wire is too thin or
too long
(3)Fault in pressure switch
(4)Fault in motor
(5)Sticking of main
compressor
(1) Check the line
(2) Replace the wire
(3) Repair or replace
(4) Repair or replace
(5)Check and repair
Sticking of main
compressor
(1) Moving parts burnt due
to the oil insufficient
(2)Moving parts
damaged,or stuck by
foreign body
Check crankcase, bearing,
connecting
rod,piston,piston
ring,etc.and replace if
necessary
Terrible shake Or abnormal
noise
(1) Connecting part loosed
(2) Foreign body got into
main compressor
(3) Piston knocking valve
seat
(4)Moving parts seriously
worn
(1) Check and retighten
(2) Check and clean away
(3) Replace with thicker
paper gasket
(4)Repair or replace
Pressure insufficient or
discharge capacity
decreased
(1) Mortor runs too slow
(2) Air filter choked up
(3) Leakage of safety valve
(4) Leakage of discharge
pipe
(5) Sealing gasket
damaged
(6) Valve plate
damaged,carbon build
up or stuck
(7)Piston ring and cylinder
worn of damaged
(1) Check and remedy
(2) Clean or replace the
cartridge
(3) Check and adjust
(4) Check and repair
(5) Check and replace
(6) Replace and clean
(7)Repair or replace

11
11. PARTS ILLOSTRATION

12
PARTS LIST
No.
Designation
Q'ty.
No.
Designation
Q'ty.
1
Bolt M8×100
4
25
Motor bracket
1
2
Cylinder head
1
26
Nut M8
1
3
Cylinder head gasket
1
27
Capacitor
1
4
Valve plate
1
28
Fan
1
5
Valve gasket
1
29
Circlip
1
6
Cylinder
1
30
Fan cover
1
7
Cylinder gasket
1
31
Circlip
2
8
Piston ring
3
32
Valve clack
1
9
Piston pin
1
33
Air filter
1
10
Piston
1
34
Connector
1
12
Breath pipe
1
35
Discharge pipe
1
13
Connecting rod
1
36
Release pipe
1
14
Rubber gasket
1
37
Pressure switch
1
15
Screw M5×14
6
38
Pressure gauge
1
16
Crank case cover
1
39
Outlet valve
2
17
Oil leveler
1
40
Switch bracket
1
18
Bolt M8×22
1
41
Check valve
1
19
Crank
1
42
Air tank
1
20
Crank case
1
43
Bolt M8×25
1

13
12. LIST OF GOODS
№
Designation
amount
1
Air compressor
1
2
Air filter
1
3
Breath pipe
1
4
Rubber gasket
1
5
Operation manual
1
21
Motor
1
44
Washer foot
1
22
Sealing ring
1
45
Nut 8
1
23
Bearing 6204RS
1
46
Drain cock
1
24
Bearing6202RS
1
47
Wheel
2

14
13.DECLARATION OF CONFORMITY
BUILDER SAS
ZI, 32 rue aristide Bergès – 31270 Cugnaux – France
Declares that the machinery designated below:
COMPRESSOR
H50CV-A
Also complies with the following European directives:
EMC Directive 2014/30/EU
Directive LVD 2014/35/EU
RoHS Directive (EU)2015/863 amending 2011/65/EU
Noise emission Directive 2000/14/EC Annex VI and Directive 2005/88/EC
Notified Body 0036
TÜV SÜD Industrie Service GmbH • Westendstrasse 199 • 80686 München •
Deutschland
Also complies with European standards, national standards and provisions following
techniques:
EN ISO 12100:2010, EN 1012-1:2010,
EN 60204-1:2006+A1:2009+AC:2010,
EN 61000-6-1:2007,
EN 61000-6-3:2007+A1:201 1+AC:2012,
EN 61000-3-2:2014, EN 61000-3-3:2013
Sound power level: 95.2dB(A),K=1.96dB(A)
Guaranteed sound power level: 97dB(A)
Philippe MARIE/CEO
S/N : 2021050002858~ 2021050002907
Complies with the provisions of the Directive "machinery" 2006/42/EC and regulations
National transposing it;
Cugnaux: 29/03/2021

WARRANTY
The manufacturer guarantees the product against defects in material and workmanship for a period of 2
years from the date of the original purchase. The warranty only applies if the product is for household use.
The warranty does not cover breakdowns due to normal wear and tear.
The manufacturer agrees to replace parts identied as defective by the designated distributor. The
manufacturer does not accept responsibility for the replacement of the machine, in whole or in part , and/or
ensuing damage.
The warranty does not cover breakdowns due to:
• insucient maintenance.
• abnormal assembly, adjustment or operations of the product.
• parts subject to normal wear and tear.
The warranty does not extend to:
• shipping and packaging costs.
• using the tool for a purpose other than that for which it was designed.
• the use and maintenance of the machine done in a manner not described in the user manual.
Due to our policy of continuous product improvement, we reserve the right to alter or change specications
without notice. Consequently, the product may be dierent from the information contained therein, but a
modication will be undertaken without notice if it is recognized as an improvement of the preceding
characteristic.
READ THE MANUAL CAREFULLY BEFORE USING THE MACHINE.
When ordering spare parts, please indicate the part number or code, you can nd this in the spare parts list
in this manual. Keep the purchase receipt; without it, the warranty is invalid. To help you with your product,
we invite you to contact us by phone or via our website:
• +33 (0)9.70.75.30.30
• https://services.swap-europe.com/contact
You must create a "ticket" via the web platform.
• Register or create your account.
• Indicate the reference of the tool.
• Choose the subject of your request.
• Describe your problem.
• Attach these les: invoice or sales receipt, photo
of the identication plate (serial number), photo
of the part you need (for example: pins on the
transformer plug which are broken).
15
14. WARRANTY

WHAT TO DO IF MY MACHINE BREAKS DOWN?
If you bought your product in a store:
a) Empty the fuel tank.
b) Make sure that your machine is complete with all accessories supplied, and clean! If this is not the case,
the repairer will refuse the machine.
Go to the store with the complete machine and with the receipt or invoice.
If you bought your product on a website:
a) Empty the fuel tank.
b) Make sure that your machine is complete with all accessories supplied, and clean! If this is not the case,
the repairer will refuse the machine.
c) Create a SWAP-Europe service ticket on the site: https://services.swap-europe.com When making the
request on SWAP-Europe, you must attach the invoice and the photo of the nameplate (serial number).
d) Contact the repair station to make sure it is available before dropping o the machine.
Go to the repair station with the complete machine packed, accompanied by the purchase invoice and the
station support sheet downloadable after the service request is completed on the SWAP-Europe site
For machines with engine failure from manufacturers BRIGGS & STRATTON, HONDA and RATO, please
refer to the following instructions.
Repairs will be done by approved engine manufacturers of these manufacturers, see their site:
• http://www.briggsandstratton.com/eu/fr
• http://www.honda-engines-eu.com/fr/service-network-page;jsessionid=5EE8456CF39CD572AA2AEEDFD
290CDAE
• https://www.rato-europe.com/it/service-network
Please keep your original packaging to allow for after-sales service returns or pack your machine
with a similar cardboard box of the same dimensions.
For any question concerning our after-sales service you can make a request on our website https://
services.swap-europe.com
Our hotline remains available at +33 (9) 70 75 30 30.
16
15. PRODUCT FAILURE

THE WARRANTY DOES NOT COVER:
• Start-up and setting up of the product.
• Damage resulting from normal wear and tear of the product.
• Damage resulting from improper use of the product.
• Damage resulting from assembly or start-up not in accordance with the user manual.
• Breakdowns related to carburetion beyond 90 days and fouling of carburetors.
• Periodic and standard maintenance events.
• Actions of modication and dismantling that directly void the warranty.
• Products whose original authentication marking (brand, serial number) has been degraded, altered or
withdrawn.
• Replacement of consumables.
• The use of non-original parts.
• Breakage of parts following impacts or projections.
• Accessories breakdowns.
• Defects and their consequences linked to any external cause.
• Loss of components and loss due to insucient screwing.
• Cutting components and any damage related to the loosening of parts.
• Overload or overheating.
• Poor power supply quality: faulty voltage, voltage error, etc.
• Damages resulting from the deprivation of enjoyment of the product during the time necessary for repairs
and more generally the costs related to the immobilization of the product.
• The costs of a second opinion established by a third party following an estimate by a SWAP-Europe repair
station
• The use of a product which would show a defect or a breakage which was not the subject of an immediate
report and/or repair with the services of SWAP-Europe.
• Deterioration linked to transport and storage*.
• Launchers beyond 90 days.
• Oil, petrol, grease.
• Damages related to the use of non-compliant fuels or lubricants.
* In accordance with transport legislation, damage related to transport must be declared to carriers within 48
hours maximum after observation by registered letter with acknowledgement of receipt.
This document is a supplement to your notice, a non-exhaustive list.
Attention: all orders must be checked in the presence of the delivery person. In case of refusal by the
delivery person, it you must simply refuse the delivery and notify your refusal.
Reminder: the reserves do not exclude the notication by registered letter with acknowledgement within 72
hours.
Information:
Thermal devices must be wintered each season (service available on the SWAP-Europe site). Batteries must
be charged before being stored.
17
16. WARRANTY EXCLUSIONS

15
Table of contents
Other Hyundai Air Compressor manuals

Hyundai
Hyundai HY3150S User manual

Hyundai
Hyundai HY3050 User manual

Hyundai
Hyundai HY 2550 User manual

Hyundai
Hyundai HY0808 User manual

Hyundai
Hyundai HY27550 User manual

Hyundai
Hyundai HYAC6-07S User manual

Hyundai
Hyundai HY70100P User manual

Hyundai
Hyundai HYSC75300 User manual

Hyundai
Hyundai HY2524 User manual

Hyundai
Hyundai HC20V4A-A User manual

Hyundai
Hyundai HHC2GNK User manual

Hyundai
Hyundai HY70100P User manual

Hyundai
Hyundai HHC series User manual

Hyundai
Hyundai HHC315C User manual

Hyundai
Hyundai HCP9100 User manual

Hyundai
Hyundai HC100L-A User manual

Hyundai
Hyundai AirPower User manual

Hyundai
Hyundai HY55200-3 User manual

Hyundai
Hyundai HY3200S User manual

Hyundai
Hyundai HY3100P User manual