IBA ibaPADU-S-IT-16 User manual

1
Issue 1.10
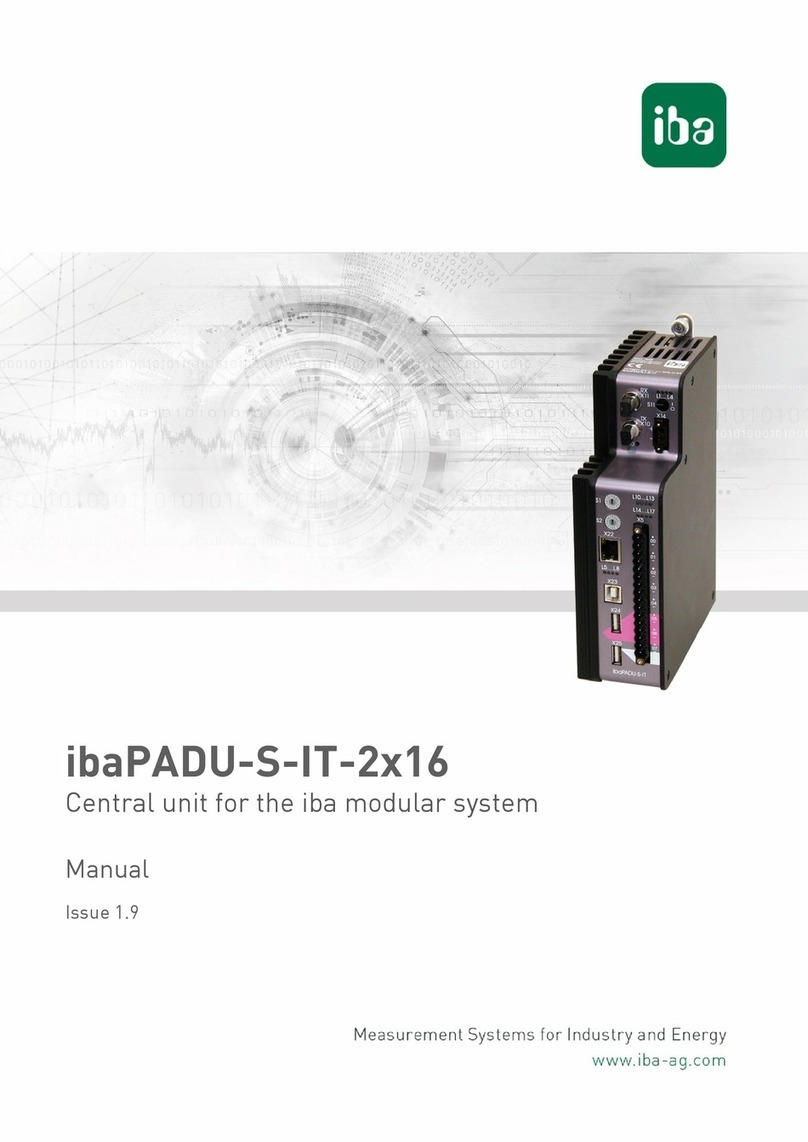
ibaPADU-S-IT-16
Manual
Issue 1.10
Central unit for the ibaPADU-S family

Manual
ibaPADU-S-IT-16
Manufacturer
iba AG
Koenigswarterstr. 44
90762 Fuerth
Germany
Contacts
Head office +49 911 97282-0
Fax +49 911 97282-33
Support +49 911 97282-14
Technology +49 911 97282-13
Web: www.iba-ag.com
This manual must not be circulated or copied, or its contents utilized and disseminated, without
our express written permission. Any breach or infringement of this provision will result in liability
for damages.
© iba AG 2015, All rights reserved.
The content of this publication has been checked for compliance with the described hardware
and software. Nevertheless, deviations cannot be excluded completely so that the full compli-
ance is not guaranteed. However, the information in this publication is updated regularly. Re-
quired corrections are contained in the following regulations or can be downloaded on the Inter-
net.
The current version is available for download on our web site www.iba-ag.com.
Copyright notice
Windows®is a label and registered trademark of the Microsoft Corporation. Other product and
company names mentioned in this manual can be labels or registered trademarks of the corre-
sponding owners.
Certification
The product is certified according to the European standards and directives. This product meets
the general safety and health requirements.
Further international customary standards and directives have been observed.
Note: This equipment has been tested and found to comply with the limits for a Class A digital de-
vice, pursuant to part 15 of the FCC Rules. These limits are designed to providereasonable protec-
tion against harmful interference when the equipment is operated in a commercial environment.
This equipment generates, uses, and can radiate radio frequency energy and, if not installed and
used in accordance with the instruction manual, may cause harmful interference toradiocommuni-
cations. Operation of this equipment in residential area is likely to cause harmful interference in
which case the user will be required to correct the interference at his own expense.
Issue
Date
Revision
Chapter
Author
Version HW / FW
1.10
07/20/2015
Reset to factory defaults
11.2.3
ms

ibaPADU-S-IT-16
Manual
Issue 1.10
3
Contents
1About this manual.............................................................................................6
1.1 Target group ....................................................................................................7
1.2 Notations .........................................................................................................7
1.3 Used symbols..................................................................................................8
2Introduction.......................................................................................................9
3Scope of delivery ............................................................................................10
4Safety instructions..........................................................................................11
4.1 Proper use.....................................................................................................11
4.2 Special safety instructions..............................................................................11
5System Requirements ....................................................................................12
5.1 Hardware.......................................................................................................12
5.2 Software ........................................................................................................12
6Mounting, Connecting, Dismounting ............................................................13
6.1 Mounting........................................................................................................13
6.2 Dismounting...................................................................................................13
7Device description..........................................................................................14
7.1 Views.............................................................................................................14
7.2 Indicator elements .........................................................................................15
7.2.1 Operating status ............................................................................................15
7.2.2 LEDs L5 … L8 ...............................................................................................15
7.2.3 Status of digital inputs L10 … L17..................................................................16
7.3 Operating elements .......................................................................................16
7.3.1 ON/OFF switch S11.......................................................................................16
7.3.2 Rotary switches S1 and S2............................................................................16
7.3.3 System function pushbutton S10 ...................................................................17
7.4 Communication interfaces .............................................................................17
7.4.1 Connections FO cables X10 and X11 ............................................................17
7.4.2 Network connection X22................................................................................17
7.5 Digital inputs X5.............................................................................................17
7.5.1 Connection diagram / Pin assignment............................................................17
7.5.2 Debounce filters.............................................................................................18
7.6 Voltage supply...............................................................................................20
7.6.1 Voltage supply X14........................................................................................20
7.6.2 Buffer voltage X30 .........................................................................................20
8System integration..........................................................................................21
8.1 Application examples.....................................................................................21
8.1.1 Measuring systems with ibaPDA....................................................................21

Manual
ibaPADU-S-IT-16
4
Issue 1.10
8.1.2 Measuring system with ibaPDAand ibaLogic................................................21
8.1.3 Standalone systems with ibaLogic.................................................................22
8.1.4 ibaPADU-S-IT-16 in hierarchical automation systems....................................22
8.2 FO cascading................................................................................................22
8.3 Supported ibaNet transfer protocols..............................................................23
9Initial start-up..................................................................................................24
9.1 Default settings..............................................................................................24
9.1.1 User accounts ...............................................................................................24
9.1.2 Network parameters......................................................................................24
9.1.3 Host name.....................................................................................................24
9.1.4 Set back to default settings ...........................................................................25
9.2 Network settings............................................................................................25
9.2.1 Establish communication to the device via the network.................................25
9.2.2 Establishing communication to the device via FO cable ................................27
9.2.3 Network settings on the Web interface ..........................................................28
9.2.4 Network settings directly on the device..........................................................28
9.3 Time settings.................................................................................................31
9.3.1 System time ..................................................................................................31
9.3.2 Time synchronization of the local ibaPADU-S-IT-16 system ..........................32
9.4 Make settings on the Website........................................................................34
9.4.1 Accessing the Website..................................................................................34
9.4.2 Website structure ..........................................................................................35
10 Updates............................................................................................................41
10.1 Update via Web Interface..............................................................................41
10.2 Update via ibaPDA........................................................................................42
10.3 Updating the modules....................................................................................42
11 iba applications...............................................................................................43
11.1 ibaLogic-V4...................................................................................................43
11.1.1 Configuring ibaPADU-S-IT-16 as platform .....................................................43
11.1.2 Automatic update of the ibaLogic version......................................................46
11.1.3 Configuring signals........................................................................................47
11.1.4 DAT_FILE_WRITE function block..................................................................53
11.1.5 Configuring the debounce filter......................................................................54
11.1.6 Saving the ibaLogic program on runtime .......................................................55
11.1.7 Deleting an ibaLogic program in ibaPADU-S-IT-16........................................56
11.2 ibaPDA-V6 ....................................................................................................57
11.2.1 Configuration in the I/O Manager...................................................................57
11.2.2 PADU-S –General tab ..................................................................................59
11.2.3 PADU-S –Diagnostics tab.............................................................................60
11.2.4 PADU-S –Analog tab....................................................................................61
11.2.5 PADU-S –Digital tab.....................................................................................62
11.2.6 ibaPADU-S-IT-16 –General tab.....................................................................63
ibaPADU-S-IT-16
Manual
Issue 1.10
5
11.2.7 ibaPADU-S-IT-16 –Digital tab........................................................................65
12 Technical Data.................................................................................................66
12.1 Main data.......................................................................................................66
12.2 Interfaces.......................................................................................................67
12.3 Digital inputs..................................................................................................67
12.4 Dimensions....................................................................................................68
12.5 Connection diagram.......................................................................................74
12.5.1 Pin assignment voltage supply 24 V (X14).....................................................74
12.5.2 Pin assignment digital inputs (X5)..................................................................74
13 Accessories and related products.................................................................75
14 Appendix..........................................................................................................78
14.1 Acronyms ......................................................................................................78
14.2 Index..............................................................................................................79
15 Support and contact .......................................................................................80

Manual
ibaPADU-S-IT-16
6
Issue 1.10
1 About this manual
In this manual, you learn a lot about the design of the ibaPADU-S-IT-16device and how to
use and operate it. You can find a general description of the systems of the ibaPADU-S
family and further information about thedesignof the modules andhowtouseandoperate
them in separate manuals.
Note
The documentation for the ibaPADU-S family is part of the CD that is included in
delivery.
The documentation of the ibaPADU-S family comprises the following manuals:
Central units
The manuals of the ibaPADU-S-IT-16 central units and ibaPADU-S-CM contain the
following information:
Scope of supply
System requirements
Description of the device
Mounting/Demounting
Start-up
Configuration
Technical data
Accessories
Modules
The manuals for the single modules contain specific information about the module.
There are the following information classes:
Short description
Scope of delivery
Product characteristics
Configuration
Description of the functions
Technical data
Connection diagram

ibaPADU-S-IT-16
Manual
Issue 1.10
7
1.1 Target group
This manualaddresses in particular thequalified professionalswho arefamiliar withhand-
ling electrical and electronic modules as well as communication and measurement tech-
nology. A person is regarded to as professional if he/she is capable of assessing safety
and recognizing possible consequences and risks on the basis of his/her specialist train-
ing, knowledge and experience and knowledge of the standard regulations.
1.2 Notations
In this manual, the following notations are used:
Action
Notations
Menu command
Menu „Logic diagram“
Call of menu command
„Step 1 – Step 2 –Step 3 –Step x”
Example:
Select menu „Logic diagram –Add –New logic di-
agram”
Keys
<Key name>
Example: <Alt>; <F1>
Press keys simultaneously
<Key name> + <Key name>
Example:
<Alt> + <Ctrl>
Buttons
<Button name>
Example:
<OK>; <Cancel>
File names, Paths
„File name“, „Path”
Example:
„Test.doc“

Manual
ibaPADU-S-IT-16
8
Issue 1.10
1.3 Used symbols
If safety instructions or other notes are used in this manual, they mean:
The non-observance of this safety information may result in an imminent risk of death
or severe injury:
By an electric shock!
Due to the improper handling of software products which are coupled to input and
output procedures with control function!
If youdonot observethesafety instructions regarding theprocess andthe systemor ma-
chine to be controlled, there is a risk of death or severe injury!
The non-observance of this safety information may result in a potential risk of death or
severe injury!
The non-observance of this safety information may result in a potential risk of injury or
material damage!
Note
A note specifies special requirements or actions to be observed.
Important note
Note if some special features must be observed, for example exceptions from the rule.
Tip
Tip or example as a helpful note or insider tip to make the work a little bit easier.
Other documentation
Reference to additional documentation or further reading.

ibaPADU-S-IT-16
Manual
Issue 1.10
9
2 Introduction
The modular concept of the ibaPADU-S device family is designed on the basis of a back-
plane. You can plug on this backplane not only the CPU, but also up to 4 input/output
modules. The ibaPADU-S-IT-16 CPU offers 8 digital inputs.
ibaPADU-S-IT-16 is a fast CPU for fast applications in the fields of measurement techno-
logy, signal processing and controls. When equipped with the right input/output modules
and combined with the ibaPDA or ibaLogic software products, ibaPADU-S-IT-16 can be
used for several applications. The range of applications is as follows:
Capturing of measuring signals with and without pre-processing
Condition Monitoring
Data logger (Transient Fault Recorder)
Noise recognition and excentricity analysis
Power Quality Monitoring
Signal management
Control
Fast drive and position control
Due to the integrated processor, a RAMand theWindows CE operating system, ibaLogic
applications can be loaded intothe device as compiled runtime version. With these types
of applications, the measuring signals canbe pre-processed in the device andthentrans-
mitted to the ibaPDA system.
An ibaPADU-S-IT-16 system with input/output modules andanibaLogicapplication canlo-
cally control processes and machines, either as a separate control unit connected to a
master control or independently.
As the device has got a robust housing, no fan and no rotating parts, it is almost free of
maintenance.
This manual applies to ibaPADU-S-IT-16 beginning with Firmware version V02.05.001.

Manual
ibaPADU-S-IT-16
10
Issue 1.10
3 Scope of delivery
Afterhaving unpacked the delivery, pleasecheck it for completeness andhavea look if the
parts might be damaged.
The scope of delivery comprises:
ibaPADU-S-IT-16 device
Covering caps for FO cables, USB and Ethernet
16-pin terminal block with spring terminals (Digital input channels)
2-pin terminal block with spring terminals (Voltage supply)
Manual (German and English)
DVD ”iba Software & Manuals”

ibaPADU-S-IT-16
Manual
Issue 1.10
11
4 Safety instructions
4.1 Proper use
The device is an electrical apparatus. It is only allowed to use the device for the following
applications:
Capturing of measuring data
Automation of industrial plants
Applications with iba products (ibaPDA, ibaLogic etc.)
The device is only to be applied as shown in the Technical Data in Chapter 12.
4.2 Special safety instructions
Strictly observe the operating voltage range!
Never supply the device with a voltage other than 24 V DC ±10%!
A higher voltage may destroy the device or be dangerous to life!
Modules and CPU must NOT be attached or detached to/from the rack under voltage!
Switch off ibaPADU-S-IT-16 or disconnect power supply before attaching/detaching the
modules.
Important note
Do not open the device! Opening the device leads to a loss of warranty!
Make sure that the cooling fins get optimal ventilation!
Note
Clean the device only onthe outside with a dry or slightly damp and statically discharged
cloth.

Manual
ibaPADU-S-IT-16
12
Issue 1.10
5 System Requirements
5.1 Hardware
For operation
Power supply 24 V DC ±10%, 3 A (fully equipped)
Backplane unit, e.g. ibaPADU-B4S (see chap. 13, „Accessories and related pro-
ducts“)
For parametrization of the device and for measuring:
PC with the following minimum equipment
One free PCI slot, or
One free PCI Express slot, or
One ExpressCard/54 slot (Notebook).
For further information about PC equipment, please see
http://www.iba-ag.com.
An FO input card of the ibaFOB-D type (Firmware version beginning with V2.00
build 170):
ibaFOB-io-D / ibaFOB-io-Dexp
ibaFOB-2io-D / ibaFOB-2io-Dexp
ibaFOB-2i-D / ibaFOB-2i-Dexp with ibaFOB-4o-D add-on module
ibaFOB-4i-D / ibaFOB-4i-Dexp with ibaFOB-4o-D add-on module
ibaFOB-io-ExpressCard (for Notebooks)
FO cable (bidirectional) and/or Ethernet cable
5.2 Software
ibaPDA-V6 beginning with version 6.30.0
ibaLogic-V4 beginning with version 4.2.2
Note
The licensefor ibaLogic-V4 in connection withtheibaPADU-S-IT-16runtimesystemissup-
plied with ibaPADU-S-IT-16 and does not need to be ordered separately.

ibaPADU-S-IT-16
Manual
Issue 1.10
13
6 Mounting, Connecting, Dismounting
Works on the device must NOT be done when it is under voltage!
6.1 Mounting
1. Mount the backplane on an appropriate construction.
2. Connect the ground terminal.
3. Attach the device to the left slot.
Please take intoaccount that theguiding bolts on the rear sideof thedevicehave to be
inserted into the corresponding holes on the backplane.
4. Press the device firmly against the backplane and secure it with the fixing screws.
Important note
Always screw tight the device and the modules. If you do not screw it tight, connecting or
disconnecting the connectors for the inputs and outputs might cause damages.
Figure 1: Mounting the device
6.2 Dismounting
1. Switch off the device.
2. Remove all cables.
3. Hold tight the device and remove the both fixing screws on the upper and the lower
side of the device.
4. Pull the device straight from the backplane.

Manual
ibaPADU-S-IT-16
14
Issue 1.10
7 Device description
7.1 Views
1
2
3
4
5
6
7
8
9
10
11
12
Operating status indicators L1 … L4
ON/OFF switch S11
Connector for power supply 24 V X14
Status LED digital inputs L10 … L17
Connection for digital inputs X5
Fixing screws
Indicators L5 … L8
Network interface X22
Rotary switches S1, S2
System function pushbutton S10
Connection FO output (TX) X10
Connection FO input (RX) X11
X23 for service purposes only
X24, X25 USB host interfaces for future func-
tions
Figure 2: Front view
X30 Buffer voltage connector 9…15 V DC
(HW B3 or higher)
Figure 3: Bottom view

ibaPADU-S-IT-16
Manual
Issue 1.10
15
7.2 Indicator elements
7.2.1 Operating status
The operating status of the device is shown by colored status LEDs.
LED
Status
Description
L1
Green
Flashing
(0.5 Hz, every
2 s)
Device is working
Deviations in the flashing period point out overload or
booting of the device. Booting can take up to 90 s.
On or Off
Controller halted, device „crashed“, device 100 % pro-
cessor load (constantly on)
Fast flashing
(about. 10 Hz,
every 100 ms)
System programming mode
Update mode (v02.06.001 or higher)
L2
Yellow
Off
ibaLogic PMAC (Programmable Measurement and Au-
tomation Controller, runtime system) not started
Flashing
ibaLogic PMAC started and program is running
On
ibaLogic PMAC started
L3
White
Off
No FO reception on RX
Flashing
FO reception existing, FO protocol detected, but does
not match the internally defined FO protocol
On
FO reception OK
L4
Red
Off
Normal status, no faults
Flashing
Disturbance, applications internal to the device do not
run.
On
Device failure (during start up)
Important note
When the LED L4 indicates a failure, please contact the iba Support.
7.2.2 LEDs L5 … L8
The LEDs L5 … L8 have the following functions:
Status indication when setting the network parameters via the rotary switches S1
and S2. For further information, please see chapter 9.2.4 „Network settings directly
on the device
Status and progress indication when installing an update, see chapter 10 „Update“.

Manual
ibaPADU-S-IT-16
16
Issue 1.10
7.2.3 Status of digital inputs L10 … L17
The green LEDs show whether a digital input is on or off.
LED
Status
Description
L10 … L17
On
Off
Input is true, Signal ok, logical 1
Input is false, no signal, logical 0
For further information see chapter 7.5 “Digital inputs X5“
7.3 Operating elements
7.3.1 ON/OFF switch S11
Position
Status
Description
I
0
On
Off
Switched on, voltage applied
Switched off, no voltage applied
When switching off the device and then on again, the supply voltage is switched off and
on and the device is rebooted.
7.3.2 Rotary switches S1 and S2
With the S1 rotary switch, you can define the iba-FO-transfer protocol and the cascading
addresses in the FO network:
Position „0“:
all previous ibaNet protocols (except 32Mbit Flex), only in cooperation with ibaLogic
Position „1“ - „F“:
ibaNet 32Mbit Flex; the position of the switch defines the device address within the
cascade.
For further information see chapter 8.2 “FO cascading“.
With the two rotary switches S1 and S2, you can define different parameters like
e.g. network addresses, subnet mask, default gateway, resetting values to default
values.
For further information, see chapters
9.1.4 “Set back to default settings“
9.2.4 “Network settings directly on the device“
11.1.7 “Deleting an ibaLogic program in ibaPADU-S-IT“

ibaPADU-S-IT-16
Manual
Issue 1.10
17
7.3.3 System function pushbutton S10
The system function pushbutton S10 is needed for the settings that are made directly on
the device. For further information, please see chapters
9.1.4 “Set back to default settings“
9.2.4 “Network settings directly on the device“
11.1.7 “Deleting an ibaLogic program in ibaPADU-S-IT“
7.4 Communication interfaces
7.4.1 Connections FO cables X10 and X11
Process data between ibaPADU-S-IT-16 and the connected iba systems are transferred
via FO cables. Using the 32Mbit Flex transfer protocol, also configuration data can be
transferred via FO cable.
Connection
Description
X10 output (TX)
FO send interface
X11 input (RX)
FO receive interface
7.4.2 Network connection X22
Via the X22 network connection, you can integrate the device into an Ethernet network.
For further information, please see chapter 9.2.1 „Establish communication to the
device via the network“
7.5 Digital inputs X5
7.5.1 Connection diagram / Pin assignment
Here, you can connect eight input signals (0…7), each bipolar and electrically isolated.
Each channel is connected by means of two-wire connection. Due to the reverse polarity
protection, themeasuring signal is indicated logically correct, even if the connectionis po-
larity-reversed.
See chapter 12 „Technical Data“

Manual
ibaPADU-S-IT-16
18
Issue 1.10
Figure 4: Connection diagram for digital inputs X5
7.5.2 Debounce filters
For the digital inputs, there are four debounce filters for each. These can be chosen and
configuredfor eachsignal independently. You have got thefollowing filters atyour dispos-
al:
„Off“(without filter)
„Stretch rising edge“
„Stretch falling edge“
„Stretch both edges“
„Delay both edges“
For each filter, a debounce time has to be defined in µs. This debounce time can have a
value between [1µs…65535µs].
Off
The measured input signal is transferred without filtering.

ibaPADU-S-IT-16
Manual
Issue 1.10
19
„Stretch rising edge“
With the first rising edge, the input signal (red) switches to logical 1 and keeps this value
for the defined debounce time. Thereafter, the channel is transparent again and waits for
the next rising edge.
Figure 5: Debounce filter: „Stretch rising edge“
„Stretch falling edge“
With the first falling edge, the output signal (green) switches to logical 0 and keeps this
value for the defined debounce time. Thereafter, the channel is transparent again and
waits for the next falling edge.
Figure 6: Debounce filter: „Stretch falling edge“
„Stretch both edges“
With the first edge, the output signal (ocher) follows the initial signal (blue) and keeps the
logical level for the duration of the defined debounce time. Thereafter, the channel is
transparent again and waits for the next edge –be it rising or falling.
Figure 7: Debounce filter: „Stretch both edges“

Manual
ibaPADU-S-IT-16
20
Issue 1.10
„Delay both edges“
Beginning with the firstedge, the output signal (purple) blocksthe input andkeepsthe log-
ical value of the edge for the duration of the defined debounce time. Thereafter, the chan-
nel is transparent again, directly assumes the logical level of the input signal and waits for
the next edge –be it rising or falling.
Figure 8: Debounce filter: „Delay both edges“
7.6 Voltage supply
7.6.1 Voltage supply X14
The external voltage supply is connected by a 2-pin connector.
Only connect the device to an external voltage supply 24 V DC (±10 % unregulated)!
Pay attention to polarity!
7.6.2 Buffer voltage X30
The connection of a buffer voltage is supported with hardware version B3 and software
version 02.06.001 or higher. The following functions can be buffered in case of a power
failure:
Time
FO line: incoming ibaNet telegrams are transmitted, the FO line is not interrupted.
For this purpose, a buffer voltage of typ. 12 V DC (9…15 V) is applied at the X30 connect-
or. In case of buffering, the current consumption is approx. 70 mA at 12 V.
Table of contents
Other IBA Computer Hardware manuals
Popular Computer Hardware manuals by other brands

Sensory
Sensory NLP-5 Demo Series manual

Roland
Roland VP-9000 user guide

Freescale Semiconductor
Freescale Semiconductor i.MX31 PDK 1.4 quick start guide

Thermaltake
Thermaltake Pacific Core P8 DP-D5 Plus quick start guide

ekwb
ekwb EK-FC Strix RTX 2080 Ti Backplate Classic installation manual

Rohm
Rohm BD9P208MUF-TSB-001 user guide