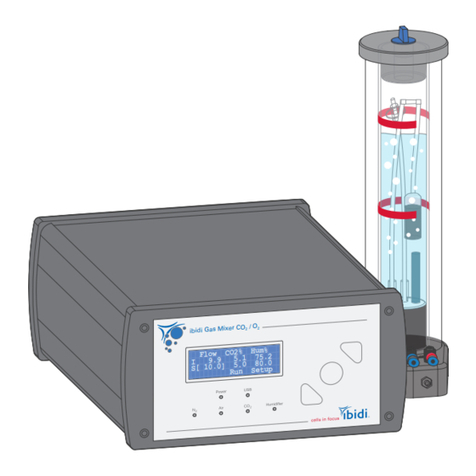
ibidi 11920 User manual

11920 ibidi Gas Incubation System for CO2
Version 2.2
Instruction Manual
ibidi Gas Incubation System
11922 ibidi Gas Incubation System for CO2and O2
www.ibidi.com
Flow
I 9.9
S[ 10.0] Run
CO2% Hum%
5.1
5.0 75.2
80.0
Setup

Gas Incubation System
Contact
ibidi GmbH
Lochhamer Schlag 11
82166 Gr¨
afelfing
Germany
Phone: +49 89 / 520 46 17 - 0
Fax: +49 89 / 520 46 17 - 59
E-mail: [email protected]
Internet: ibidi.com
Instruction Manual 3 Version 2.2 (May 15, 2019)

Gas Incubation System
Contents
1 Preamble 6
1.1 Introduction ........................................... 6
1.2 Safety Symbols ......................................... 6
1.3 Nomenclature .......................................... 7
1.4 Specifications .......................................... 7
1.5 Disclaimer ............................................ 10
1.6 Safety Considerations ...................................... 10
1.7 Regulatory Statement ...................................... 11
1.8 Limited Warranty ........................................ 12
1.9 Transporting the Gas Incubation System ........................... 12
1.10 Repairing the Gas Incubation System ............................. 13
1.11 Waste Disposal – WEEE/RoHS Compliance Statement .................. 13
1.11.1 EU Directive WEEE ................................... 13
1.11.2 EU Directive RoHS ................................... 13
2 Intended Use 14
3 Principle 14
4 Equipment 15
4.1 Components of the Gas Incubation System ......................... 15
4.2 Gas Mixer CO2or CO2/O2................................... 17
4.3 Humidifying Column ...................................... 18
4.4 Heated Tubing Package .................................... 18
4.5 Humidity Sensor ........................................ 19
Version 2.2 (May 15, 2019) 4 Instruction Manual

Gas Incubation System
5 Operation 21
5.1 Installation and Connection .................................. 21
5.1.1 Connection to the Gas Supply ............................. 22
5.1.2 Connection of the Heated Tubing Package and the Humidifying Column . . . 23
5.1.3 Connection of Humidity Sensor Cable ........................ 24
5.1.4 Connection of Power Supply (and USB optionally) ................ 25
5.2 (Re)-Filling the Humidifying Column ............................ 25
5.3 Switching on the System .................................... 26
5.4 Setting Parameters in the Front Display ........................... 27
5.4.1 Run/Stop Mode .................................... 27
5.4.2 Incubation Parameters ................................. 28
5.4.3 Setup Menu ....................................... 29
6 IncuControl Software 31
7 Maintenance 32
7.1 CO2Sensor Auto-Recalibration ................................ 32
7.2 Disinfection and Cleaning ................................... 32
7.2.1 Wiping the Outer Surface ............................... 32
7.2.2 Cleaning the Column’s Inner Face .......................... 32
7.3 Influence of Surrounding Temperature and Airflow .................... 32
8 Troubleshooting 33
8.1 Focus not Stable ......................................... 33
8.2 Evaporation Is too High .................................... 33
8.3 Gas Flow too Low ........................................ 33
8.3.1 Gas Input Open Without Connected Gas ...................... 33
8.3.2 Gas Pressure too Low ................................. 34
8.3.3 Set Values Are too High or too Low ......................... 34
8.4 Condensation Inside the Stage Top Incubator ........................ 34
Instruction Manual 5 Version 2.2 (May 15, 2019)

Gas Incubation System
1 Preamble
1.1 Introduction
This manual is your guide to using the Gas Incubation System for cell culture experiments on an
optical microscope. It instructs first-time users how to use the instrument, and serves as a reference
for experienced users.
Before using the Gas Incubation System, please read this instruction manual carefully and make
sure that the contents are fully understood. This manual should be easily accessible to the oper-
ator at all times during instrument operation. If this manual gets lost, order a replacement from
www.ibidi.com.
To ensure safe operation, the Gas Incubation System must only be operated with the supplied com-
ponents and according to the instruction manual.
1.2 Safety Symbols
Note that the signal words WARNING,CAUTION and NOTE have specific meanings in this man-
ual. Do not proceed beyond a signal word until you have performed the indicated actions.
WARNING! A potentially hazardous situation which, if not avoided, could result in se-
rious injury or even death. Warning messages in the text are displayed in a
gray shaded box.
CAUTION A potentially hazardous situation which, if not avoided, could result in minor
or moderate injury. It is also used to alert against damaging the equipment
or the instrument.
NOTE Additional information to help achieve optimal instrument and assay perfor-
mance.
Symbols on the product identification label and back panel of the device:
CE Marking: This symbol indicates the product’s compliance with EU legis-
lation.
This label is positioned on the back of the device and prompts you to read the
manual before using the device.
Product disposal: The symbol indicates that this product must be recy-
cled/disposed of separately from other household waste. See page 13 for
details.
Version 2.2 (May 15, 2019) 6 Instruction Manual

Gas Incubation System
1.3 Nomenclature
Gas Mixer Humidifying Column Heated Tubing Package
1.4 Specifications
Table 1 – Specifications of the Gas Incubation System
Electrical Specifications Power Supply
Protection class I
International protection marking
(IEC 60529)
IP 20
Overvoltage category II
External power supply AC 100-240 V, 50/60 Hz, 1.4 A
Input line voltage Gas Mixer DC 24 V, 5 A, 120 W
Output voltage (to Humidifying
Column)
DC 24 V, max. 3.6 A
Operating Conditions
Operating site Indoor use only
Operating temperature 18-30°C/64-86°F
Operating humidity max. 80% relative humidity (RH)
Operating altitude max. 2000 m (atmospheric pressure 800–1060 hPa/11.6–15.4
psi)
Storage Conditions -5-50°C/23-122°F, humidity <60% relative humidity (RH)
Outer Dimensions and Characteristics of the Components
Gas Mixer 90 × 170 × 230 mm3
2230 g/4.9 lbs
Humidifying Column 70 × 110 × 300 mm3
660/710/790 g /1.45/1.57/1.74 lbs (empty/min/max)
Heated Tubing Package 0.6 m (between Controller and Column)
Instruction Manual 7 Version 2.2 (May 15, 2019)

Gas Incubation System
Table 1 – (continued)
1.5 m (between Column and Heated Lid)
82 g/0.18 lbs
Cable for Humidity Sensor 1.5 m
USB cable 1.8 m
Power supply cable 2.0 m (power supply to wall)
1.2 m (power supply to device)
Gas Connections
Gas tubing material Polyurethane, hydrolysis resistant
Gas tubing connections Push-in fittings
Gas Mixer input ID 4 mm
OD 6 mm
Gas Mixer output and Humidify-
ing Column connection
ID 2.5 mm
OD 4 mm
Connection to the Heated Lid Male Luer Lock
Gas Input Requirements
Compressed air Purity class: ISO 8573-1:2010 [1:2:1]
1 bar/14.5 psi optimum (0.8–1.2 bar / 11.6–17.4 psi)
Carbon dioxide (CO2) Purity: >99% CO2
1 bar/14.5 psi optimum (0.8–1.2 bar / 11.6–17.4 psi)
Nitrogen (N2)* Purity: >99% N2
1 bar/14.5 psi optimum (0.8–1.2 bar / 11.6–17.4 psi)
*only for the CO2/O2version
CO2Control
Control range 0-15%
Accuracy ±(0.2%vol. + 3% of reading) e.g. ±0.35% at 5% CO2concen-
tration
Resolution 0.1%
Self-calibration At least once per week the Gas Mixer must be either turned
off for five minutes or the CO2concentration must be set to
0% for five minutes This is necessary for the sensor’s on-
board automatic calibration routine, which needs an atmo-
spheric CO2measurement to combat sensor drift.
O2Control∗
Control range 1-21% (Note: Settings below 1% are less accurate and a typi-
cal minimum value in an ibidi Heating Chamber is 0.5% O2)
Accuracy ±0.2% (typical)
±0.5% (max.)
Resolution 0.1%
Heat-up time Five minutes before proper operation of sensor
Version 2.2 (May 15, 2019) 8 Instruction Manual

Gas Incubation System
Table 1 – (continued)
CO2cross sensitivity The O2sensor has some cross–sensitivity to CO2gas at 0%
O2concentrations. This manifests as an offset in the mea-
sured O2concentration, with typical values shown in the ta-
ble below:
CO2Conc. Set O2Conc. Displayed
O2Conc.
Actual
O2Conc.
0% 0% 0.1% 0.1%
5% 0% 0.5% 0.1%
10% 0% 0.6% 0.1%
Lifetime Sensor lifetime is three years under continuous operation.
*only for the CO2/O2version
Humidity Control
Humidity sensor type Sensirion SHT31
Control range 20–99% (lower limit dependent on environment and gas
supply, min. set humidity is 0%)
Sensor accuracy ±2.5% (max.)
Resolution 0.1%
Humidifying Column Temperature Control*
Control range Ambient water temperature to 55°C (min set temp 0°C)
Accuracy ±2°C
Resolution 0.1%
*only controllable on the Gas Mixer, not in IncuControl
Flow Control Mixed Gas
Control range 0–20 l/h
Accuracy ±25%
Resolution 0.1%
Humidifying Column
Liquid Ultra-pure water
Minimum volume 50 ml
Maximum volume 130 ml
Refilling 80 ml (approximately after 7 days at 10 l/h)
Instruction Manual 9 Version 2.2 (May 15, 2019)

Gas Incubation System
1.5 Disclaimer
• ibidi shall not be held liable, either directly or indirectly, for any damage incurred as a result of
product use.
• The contents of this manual are subject to change without notice for product improvement.
• This manual is considered complete and accurate at publication.
• This manual does not guarantee the validity of any patent rights or other rights.
• If an ibidi software program doesn’t function properly, this may be caused by a conflict from
another program operating on the computer. In this case, take corrective action by uninstalling
the conflicting product(s).
• ibidi is a registered trademark of ibidi GmbH in Germany and other countries.
1.6 Safety Considerations
WARNING!
• Only operate the Gas Incubation System with the supplied components.
• Only use the cables and plugs delivered with the system. The power plug of the control unit
must be inserted in an outlet with a ground (earth) contact.
• Do not replace detachable power cables by power cables with inadequate specifications. By
violating these instructions you risk electric shock and fire.
• Only use extension cables that have a protective ground wire.
• Do not operate the Gas Incubation System under conditions that pose a risk of explosion, implo-
sion, or the release of gases. Only operate the Gas Incubation System with aqueous solutions.
• Do not operate a damaged Gas Incubation System. If the housing seems damaged or something
is rattling inside the controller, contact the ibidi service hotline for repair.
• Some accessible parts of the Gas Incubation System (Humidifying Column base, water inside
the column, and Heated Tubing Package) can reach temperatures up to 55°C/131°F (60°C/140°F
the water inside the column). Avoid touching the temperature-controlled parts of the system
when hot.
CAUTION
• Ensure that the external power supply is easily accessible. The Gas Incubation System must be
installed in a manner such that none of its components hinders access to the external power
supply.
• Immediately replace damaged cords, plugs, or cables to avoid risk of personal injury or damage
to the instrument.
Version 2.2 (May 15, 2019) 10 Instruction Manual

Gas Incubation System
• Only ibidi technical staff and technical staff instructed by ibidi are permitted to open and ser-
vice the Gas Incubation System.
• The external power supply should not be brought into contact with moisture. If the housing is
damaged, the external power supply should not be used.
• Avoid strong magnetic fields and sources of high frequency. The Gas Incubation System might
not function properly when located near a strong magnetic field or high frequency source.
• Avoid vibrations from vacuum pumps, centrifuges, electric motors, processing equipment, and
machine tools.
• Avoid dust and corrosive gas. Do not install the Gas Incubation System where it could be
exposed to high levels of dust or to outside air or ventilation outlets.
• Install the Gas Incubation System in a horizontal and stable position, such as a table, bench, or
desk upon which the instrument is installed.
• Install the Gas Incubation System in a location that enables easy access for maintenance.
• Do not place heavy objects on the instrument.
• The Gas Mixer needs a gas input of 1 bar/14.5 psi. Only operate the Gas Mixer with the pressure
indicated in the specifications on page 7.
1.7 Regulatory Statement
The Gas Incubation System has been designed, produced and tested in compliance with the European
standard DIN EN 61010-1 (IEC 61010-1, ”Safety requirements for electrical equipment for measure-
ment, control and laboratory use”). Furthermore it meets the IEC 61326-1 (”Electrical equipment
for measurement, control and laboratory use - EMC requirements”) and CISPR 11 (”International
Standard for electromagnetic emissions (disturbances) from Industrial, Scientific and Medical (ISM)
Equipment”) standards .
The device carries the CE mark.
The Gas Incubation System meets the Low Voltage Directive 2014/35/EU and the
EMC Directive 2014/30/EC.
Instruction Manual 11 Version 2.2 (May 15, 2019)

Gas Incubation System
1.8 Limited Warranty
Products manufactured by ibidi, unless otherwise specified, are warrantied for a period of one year
from the date of shipment to be free of defects in materials and workmanship. If any defects in the
product are found during this warranty period, ibidi will repair or replace the defective part(s) or
product free of charge.
This warranty does not apply to defects resulting from the following:
1. Improper or inadequate installation.
2. Improper or inadequate operation, maintenance, adjustment, or calibration.
3. Unauthorized modification or misuse.
4. Use of unauthorized tubing or fluidic connectors.
5. Use of consumables, disposables, and parts not supplied by an authorized ibidi distributor.
6. Corrosion due to the use of improper solvents, samples, or due to surrounding gases.
7. Accidents beyond ibidi’s control, including natural disasters.
This warranty does not cover consumables, such as cell culture chambers and dishes, tubes, fluidic
connectors, reagents etc.
The warranty for all parts supplied and repairs provided under this warranty expires on the warranty
expiration date of the original product.
1.9 Transporting the Gas Incubation System
The weight of the Gas Mixer is approx. 2.2 kg/4.9 lbs. The weight of the Humidifying Column is
approx. 0.66 kg/1.5 lbs. Moving the devices during operation will pose a risk of personal injury or
damage to the instrument.
For transport, switch off the Gas Mixer, close all gas input lines and then disconnect all cables and
tubing from the controller and peripheral components. Leave the instrument to cool down for ap-
proximately five minutes. Carry the devices carefully and avoid mechanical shocks.
WARNING!
Close all gas input lines before disconnecting the gas tubing from the Gas Mixer!
Version 2.2 (May 15, 2019) 12 Instruction Manual

Gas Incubation System
1.10 Repairing the Gas Incubation System
For inquiries concerning repair service, contact the ibidi service personnel and provide the model
name and serial number of your system.
ibidi GmbH
CAUTION
Do not try to repair the Gas Incubation System by yourself. Disassembly of the Gas Incubation
System is not allowed. Disassembly poses a risk of personal injury or damage to the devices.
Contact ibidi service personnel if there is a need to disassemble a device.
1.11 Waste Disposal – WEEE/RoHS Compliance Statement
The European Union (EU) has enacted two directives, the first on product recycling (Waste Electrical
and Electronic Equipment, WEEE) and the second on limiting the use of certain substances (Restric-
tion on the use of Hazardous Substances, RoHS).
1.11.1 EU Directive WEEE
The Gas Incubation System must be disposed of in compliance with the WEEE Directive 2012/19/EC.
This symbol on the product is in accordance with the European Union’s Waste Electrical and Elec-
tronic Equipment (WEEE) Directive. The symbol indicates that this product must be recycled/dis-
posed of separately from other household waste. It is the end user’s responsibility to dispose of this
product by taking it to a designated WEEE collection facility for the proper collection and recycling of
the waste equipment. The separate collection and recycling of waste equipment will help to conserve
natural resources and protect human health and the environment. For more information about recy-
cling, please contact your local environmental office, an electrical/electronic waste disposal company
or distributor where you purchased the product.
1.11.2 EU Directive RoHS
Two Categories of products covered by the WEEE Directive are currently exempt from the RoHS
Directive – Category 8, medical devices (with the exception of implanted or infected products) and
Category 9, monitoring and control instruments.
All of our products fall into either Category 8 or 9, and are currently exempt from the RoHS Directive.
Nevertheless, the Gas Incubation System meets the requirements set forth in the RoHS Directive
2011/65/EC.
Instruction Manual 13 Version 2.2 (May 15, 2019)

Gas Incubation System
2 Intended Use
The Gas Incubation System provides defined gas control for live cell imaging experiments. It is
intended to be used with stage top incubators and can be applied on various microscopes. The Gas
Incubation System mixes the required gas ratios in the output and actively humidifies this mixed gas
output before the gas enters the incubation chamber.
Two versions of the Gas Incubation System are available: the ibidi Gas Incubation System for CO2
and the ibidi Gas Incubation System for CO2and O2. Both versions can control the CO2concentration
and humidity. The O2version can additionally downregulate the amount of O2in the gas mixture to
create hypoxia.
The ibidi Gas Incubation System can be combined with the Heating System, providing a fully con-
trolled stage top chamber.
3 Principle
Physiological Conditions in Live Cell Imaging
Whereas the Heating System1controls the temperature of the incubation chamber, the Gas Incuba-
tion System provides a controlled atmosphere of gas (CO2and optionally O2) as well as a defined
humidity in the emitted gas. The humidified atmosphere prevents the samples with living cells from
evaporation of the culture medium.
The gas stream is flushed continuously through the stage top incubator and evades through the gaps
of the incubation chamber.
Heated Plate
Heated Lid
40°C37°
Gas mixture,
Humidity
Humidity Sensor
Humidity
O2
Levels
CO
2
Levels
Temperature
Cell culture vessel
Figure 1 – Schematic cross-sectional view of the Gas Incubation System combined with the Heating
System.
1Details about the Heating System are given in the Heating System instructions.
Version 2.2 (May 15, 2019) 14 Instruction Manual

Gas Incubation System
4 Equipment
Both versions of the Gas Incubation System are delivered with the complete set of cables and tubing
needed for the operation of their system.
4.1 Components of the Gas Incubation System
An overview of the different Gas Incubation System versions is given in this section. Table 2lists all
available options of the Gas Incubation System and Table 3shows all included components.
Table 2 – Overview of the available Gas Mixer Systems
Cat. No. Description Components
11920 Gas Incubation System for CO2Gas Mixer CO2
Humidifying Column
Heated Tubing Package
Gas Tubing for CO2and Air
Humidity sensor
Humidity sensor cable
USB cable
Power cable
USB flash drive
Wrench for humidity sensor
11922 Gas Incubation System for CO2and O2Gas Mixer CO2/O2
Additional to all parts of #11920:
Gas Tubing for N2
Dead end tubing
Table 3 – Overview of the components of the ibidi Gas Incubation System for CO2/O2and ibidi Gas
Incubation System for CO2. The parts that are only available in the CO2/O2version are marked with
an asterisk (*). The drawings are not to scale.
Component Name Drawing
Gas Mixer
Instruction Manual 15 Version 2.2 (May 15, 2019)

Gas Incubation System
Table 3 – (continued)
Component Name Drawing
Humidifying Column
Heated Tubing Package: cables and tubing to connect the gas outlet
of the Gas Mixer, gas ports of the Humidifying Column and the gas
inlet of the Heated Lid
1
2
Gas tubing for CO2, Air and N2*
Dead end tubing to close the N2gas inlet*
Humidity sensor with counter nut to fix on the Heated Lid
Humidity sensor cable: Cable to connect the Gas Mixer to the hu-
midity sensor
USB cable to connect the Gas Mixer with a computer
External power supply for the Gas Mixer
Country specific power cord to connect the external power supply
to the wall socket
USB flash drive with IncuControl software
Wrench to fix the humidity sensor on the Heated Lid
*only for the CO2/O2Version
Version 2.2 (May 15, 2019) 16 Instruction Manual

Gas Incubation System
4.2 Gas Mixer CO2or CO2/O2
The Gas Mixer is the gas mixing and control unit of the ibidi Gas Incubation System. There are two
versions of the Gas Mixer controlling either the amount of CO2or the amount of both CO2and O2.
Using the CO2/O2version, hypoxia conditions can be created by replacing O2with nitrogen (N2).
In addition to the gas mixture, the humidity within the incubation chamber is controlled by a feed-
back loop using a humidity sensor located in the incubation chamber. The humidity is increased by
streaming the gas through a water column if the atmosphere is too dry.
Figure 2 – Front view of the Gas Mixer.
The LEDs on the front indicate the status of the channels: connection to the power supply, connection
to the USB, gas control, and humidity control (Figure 2).
Table 4 – Control LEDs of the Gas Mixer
LED Mode Significance
LED off Channel inactive
LED on Channel active
LED fast blinking Channel error
On the back of the Gas Mixer, all connections for cables and tubing are provided (Figure 3). In the
CO2version, the N2port is closed inside the instrument and thus non-functional.
The Gas Incubation System takes as input pure CO2gas and pressurized air, as well as pure N2gas
(only Gas Mixer CO2/O2). Pressurized air can be supplied by the lab gas line or a small air pump or
compressor. Purity information is given on page 8.
Instruction Manual 17 Version 2.2 (May 15, 2019)

Gas Incubation System
Figure 3 – Back view of the Gas Mixer.
4.3 Humidifying Column
The Humidifying Column provides a water
reservoir to humidify the mixed gas. Part
of the mixed gas output is guided through
the column. The water inside the column
is warmed up for higher humidity uptake.
The different flow rates of the humidified
and dry gas mixture control the humidity in
the incubation chamber.
Caution!
The Humidifying Column base heats up
to 50°C/122°F when in operation.
The Humidifying Column has two gas
connections (input and output) as well as an
electric plug for the heating of the column
(connection see Section 5.1.2). On top of
the column is an opening for filling it with
water (filling see Section 5.2). The maximum
(∼130 ml) and minimum (∼50 ml) levels
are indicated by the red labels inside the
column (see Figure 4). Figure 4 – Humidifying Column.
4.4 Heated Tubing Package
The Heated Tubing Package connects the gas output of the Gas Mixer to the Humidifying Column
and to the Heated Chamber on the microscope stage. To actively control the humidity, two gas
outputs are needed. One leads to the Humidifying Column and the other bypasses it. Both streams
Version 2.2 (May 15, 2019) 18 Instruction Manual

Gas Incubation System
are combined in the tubing leading to the stage top incubator. By varying the flow rates of the two
gas streams, the humidity can be controlled.
The gas tubing carrying humidified gas is heated up to avoid condensation. For this purpose, a
heating wire is inserted in the tubing. The wire is split off of the electrical cable under the insulating
jacket enclosing the tubing. The exact connection of the tubing is shown in Figure 5.
A
B
C
D
E
FG
HI 1
2
Figure 5 – Heated Tubing Package: Electrical cable for the heating of the Humidifying Column (A),
Insulating jacket (B), Mixed gas output white and yellow (C and D), heated wire split off the electrical
cable (E), gas input to Humidifying Column (F), gas output from Humidifying Column (G), merging
point, where the heating wire is led into the tubing (H), gas tubing to the Heated Chamber (I).
Caution!
Do not bend or cut the Heated Tubing. The heating wire inside the tubing may be damaged and
become non-functional.
4.5 Humidity Sensor
The humidity sensor is fixed in the side wall of the Heated Lid of the Heating System and measures
the humidity inside the incubation chamber. It sits inside a small cavity in a black polymer block
(Figure 6). This cavity must not be obstructed (e.g. covered with tape, pressed flat against the wall of
a disposable, etc.) for the sensor to function properly. The humidity sensor is connected with a cable
to the Gas Mixer and measures the humidity inside the incubation chamber, enabling fast, active
humidity control.
Humidity sensor
Spacer nut
Counter nut
Polymer block
Figure 6 – Polymer block with humidity sensor and nuts for fixation in the Heated Lid side wall.
Instruction Manual 19 Version 2.2 (May 15, 2019)

Gas Incubation System
To ensure accurate humidity measurements , the humidity sensor must be mounted securely in the
plastic through-hole in the side of the Heated Lid. To do this, please follow the steps below:
1. Check that the spacer nut is fixed on the humidity sensor’s threaded connector.
2. Place the threaded part of the sensor through the opening in the Heated Lid’s wall, so that the
sensor is inside the chamber (Figure 7). The spacer nut fits into the cavity of the wall.
3. Screw the counter nut from the outside onto the thread and tighten it snugly against the outer
wall of the Heated Lid using the wrench provided with the Gas Mixer. The flat cut-away on
the counter nut should be facing away from the lid, allowing the wrench to fit properly over
the nut. Be careful not to over tighten the nut.
Counter nut
Through-hole
Polymer block with
humidity sensor
Spacer nut
Figure 7 – Installation of the humidity sensor in the side wall of the Heated Lid.
Caution!
Make sure that the polymer block is not in contact with the Heated Lid. Heat transfer from the
Heated Lid to the sensor can lead to low relative humidity readings, which in turn can lead to
condensation in the chamber.
The connection of the humidity sensor with the Gas Mixer is shown in Section 5.1.3.
Version 2.2 (May 15, 2019) 20 Instruction Manual
Other manuals for 11920
1
This manual suits for next models
1
Table of contents
Other ibidi Laboratory Equipment manuals
Popular Laboratory Equipment manuals by other brands

Funke Gerber
Funke Gerber ColonyStar manual

Four E's Scientific
Four E's Scientific Ironman III operating instructions

Thermo Scientific
Thermo Scientific Sorvall Legend X1R instruction manual

SYSMEX
SYSMEX XE-5000 quick guide

Easypix
Easypix SteriBox SB1 user manual

Bio-Tek
Bio-Tek 800TSI Instructions for use