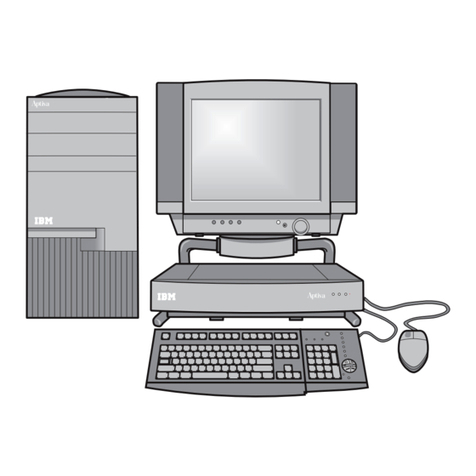
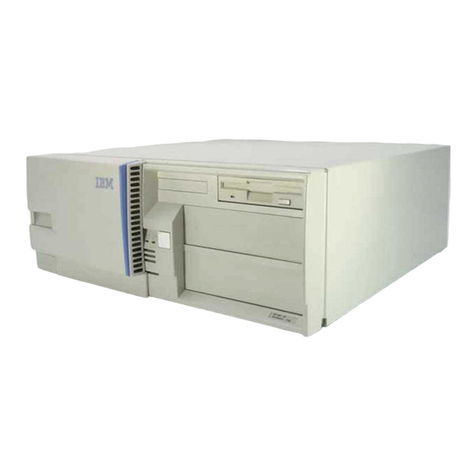
IBM NetVista A22p User manual

Quick Reference
Inside:
- Safety, warranty, and other notices
- Computer setup
- Software recovery
- Troubleshooting and diagnostics
- IBM help and service


Quick Reference

Note
Before using this information and the product it supports, be sure to read “Safety
notices” on page v, “Appendix A. Warranty information” on page 31 and
“Appendix B. Notices” on page 47.
First Edition (August 2001)
© Copyright International Business Machines Corporation 2001. All rights reserved.
US Government Users Restricted Rights – Use, duplication or disclosure restricted by
GSA ADP Schedule Contract with IBM Corp.

Contents
Safetynotices.....................v
Lithium battery notice...................vii
Modem safety information .................vii
Lasercompliancestatement.................viii
Additional help .....................xi
Chapter 1. Preparing your computer..............1
Completing important tasks .................1
Arranging your workspace .................1
Comfort.......................1
Glareandlighting...................2
Aircirculation.....................3
Electrical outlets and cable lengths ..............3
Chapter 2. Setting up your computer .............5
Turningonpower ....................9
Finishingthesoftwareinstallation...............9
Using the Software Selections CD ..............9
Installing other operating systems ..............10
Shutting down the computer ................10
Recording your computer information .............11
Chapter 3. Product recovery ................13
Performing a recovery ...................13
Software recovery after a hard disk failure ............14
Solvingrecoveryproblems.................14
F11 will not start the Product Recovery program .........15
The Product Recovery CD does not start ...........15
TheF11promptisnotdisplayed..............15
Changing the startup sequence ................16
Recovering or installing device drivers .............16
Chapter 4. Troubleshooting and diagnostics ..........19
Basictroubleshooting...................19
IBM Enhanced Diagnostics .................20
Running IBM Enhanced Diagnostics from the Product Recovery program 21
Creating an IBM Enhanced Diagnostics diskette .........21
Running the IBM Enhanced Diagnostics diskette .........22
Errorandbeepcodes...................22
POST beep codes ...................23
© Copyright IBM Corp. 2001 iii

Chapter 5. Getting information, help, and service.........25
Getting information ...................25
UsingtheWorldWideWeb................25
Getting information by fax ................25
Getting help and service ..................26
Using the documentation and diagnostic programs ........26
Calling for service ...................26
Other services ....................28
Purchasing additional services ................29
Appendix A. Warranty information ..............31
Warranty period .....................31
Warranty service and support ................33
Before you call for service ................34
Calling for service ...................34
IBM Statement of Limited Warranty Z125-4753-06 8/2000 .......35
Part1-GeneralTerms..................35
Part 2 - Country-unique Terms ...............38
Appendix B. Notices ...................47
Television output notice ..................48
Trademarks......................48
Electronic emissions notices .................48
Class B notices ....................49
Class A notices ....................51
Federal Communications Commission (FCC) and telephone company
requirements.....................52
Canadian Department of Communications certification label .....53
Étiquette d’homologation du ministère des Communications du Canada 54
Power cord notice ....................55
iv Quick Reference

Safety notices
DANGER
Electrical current from power, telephone, and communication cables is
hazardous.
To avoid a shock hazard:
vDo not connect or disconnect any cables or perform installation,
maintenance, or reconfiguration of this product during an electrical storm.
vConnect all power cords to a properly wired and grounded electrical
outlet.
vConnect to properly wired outlets any equipment that will be attached to
this product.
vWhen possible, use one hand only to connect or disconnect signal cables.
vNever turn on any equipment when there is evidence of fire, water, or
structural damage.
vDisconnect the attached power cords, telecommunications systems,
networks, and modems before you open the device covers, unless
instructed otherwise in the installation and configuration procedures.
vConnect and disconnect cables as described in the following table when
installing, moving, or opening covers on this product or attached devices.
To connect:
1. Turn everything OFF.
2. First, attach all cables to devices.
3. Attach signal cables to connectors.
4. Attach power cords to outlet.
5. Turn device ON.
To disconnect:
1. Turn everything OFF.
2. First, remove power cords from outlet.
3. Remove signal cables from connectors.
4. Remove all cables from devices.
DANGER
Le courant électrique provenant de l’alimentation, du téléphone et des câbles
de transmission peut présenter un danger.
Pour éviter tout risque de choc électrique :
vNe manipulez aucun câble et n’effectuez aucune opération d’installation,
d’entretien ou de reconfiguration de ce produit au cours d’un orage.
vBranchez tous les cordons d’alimentation sur un socle de prise de courant
correctement câblé et mis à la terre.
© Copyright IBM Corp. 2001 v

vBranchez sur des socles de prise de courant correctement câblés tout
équipement connectéàce produit.
vLorsque cela est possible, n’utilisez qu’une seule main pour connecter ou
déconnecter les câbles d’interface.;
vNe mettez jamais un équipement sous tension en cas d’incendie ou
d’inondation, ou en présence de dommages matériels.
vAvant de retirer les carters de l’unité, mettez celle-ci hors tension et
déconnectez ses cordons d’alimentation, ainsi que les câbles qui la relient
aux réseaux, aux systèmes de télécommunication et aux modems (sauf
instruction contraire mentionnée dans les procédures d’installation et de
configuration).
vLorsque vous installez, que vous déplacez, ou que vous manipulez le
présent produit ou des périphériques qui lui sont raccordés, reportez-vous
aux instructions ci-dessous pour connecter et déconnecter les différents
cordons.
Connexion:
1. Mettez les unités hors tension.
2. Commencez par brancher tous les
cordons sur les unités.
3. Branchez les câbles d’interface sur des
connecteurs.
4. Branchez les cordons d’alimentation
sur des prises.
5. Mettez les unités sous tension.
Déconnexion:
1. Mettez les unités hors tension.
2. Débranchez les cordons d’alimentation
des prises.
3. Débranchez les câbles d’interface des
connecteurs.
4. Débranchez tous les câbles des unités.
vi Quick Reference

Lithium battery notice
CAUTION:
Danger of explosion if battery is incorrectly replaced.
When replacing the battery, use only IBM Part Number 33F8354 or an
equivalent type battery recommended by the manufacturer. The battery
contains lithium and can explode if not properly used, handled, or disposed
of.
Do not:
vThrow or immerse into water
vHeat to more than 100°C (212°F)
vRepair or disassemble
Dispose of the battery as required by local ordinances or regulations.
ATTENTION
Danger d’explosion en cas de remplacement incorrect de la batterie.
Remplacer uniquement par une batterie IBM de type ou d’un type
équivalent recommandépar le fabricant. La batterie contient du lithium et
peut exploser en cas de mauvaise utilisation, de mauvaise manipulation ou
de mise au rebut inappropriée.
Ne pas :
vLancer ou plonger dans l’eau
vChauffer àplus de 100°C (212°F)
vRéparer ou désassembler
Mettre au rebut les batteries usagées conformément aux règlements locaux.
Modem safety information
To reduce the risk of fire, electrical shock, or injury when using telephone
equipment, always follow basic safety precautions, such as:
vNever install telephone wiring during a lightning storm.
vNever install telephone jacks in wet locations unless the jack is specifically
designed for wet locations.
vNever touch uninsulated telephone wires or terminals unless the telephone
line has been disconnected at the network interface.
vUse caution when installing or modifying telephone lines.
vAvoid using a telephone (other than a cordless type) during an electrical
storm. There may be a remote risk of electric shock from lightning.
Safety notices vii

vDo not use the telephone to report a gas leak in the vicinity of the leak.
Consignes de sécuritérelatives au modem
Lorsdel’utilisation de votre matériel téléphonique, il est important de
respecter les consignes ci-après afin de réduire les risques d’incendie,
d’électrocution et d’autres blessures :
vN’installez jamais de cordons téléphoniques durant un orage.
vLes prises téléphoniques ne doivent pas être installées dans des endroits
humides, exceptési le modèle a étéconçuàcet effet.
vNe touchez jamais un cordon téléphonique ou un terminal non isoléavant
que la ligne ait étédéconnectéeduréseau téléphonique.
vSoyez toujours prudent lorsque vous procédez àl’installation ou àla
modification de lignes téléphoniques.
vSi vous devez téléphoner pendant un orage, pour éviter tout risque de choc
électrique, utilisez toujours un téléphone sans fil.
vEn cas de fuite de gaz, n’utilisez jamais un téléphone situéàproximitéde la
fuite.
Laser compliance statement
Some IBM Personal Computer models are equipped from the factory with a
CD-ROM drive or a DVD-ROM drive. CD-ROM drives and DVD-ROM drives
are also sold separately as options. CD-ROM drives and DVD-ROM drives are
laser products. These drives are certified in the U.S. to conform to the
requirements of the Department of Health and Human Services 21 Code of
Federal Regulations (DHHS 21 CFR) Subchapter J for Class 1 laser products.
Elsewhere, these drives are certified to conform to the requirements of the
International Electrotechnical Commission (IEC) 825 and CENELEC EN 60 825
for Class 1 laser products.
When a CD-ROM drive or a DVD-ROM drive is installed, note the following
handling instructions.
CAUTION:
Use of controls or adjustments or performance of procedures other than
those specified herein might result in hazardous radiation exposure.
Removing the covers of the CD-ROM drive or DVD-ROM drive could result in
exposure to hazardous laser radiation. There are no serviceable parts inside the
CD-ROM drive or DVD-ROM drive. Do not remove the drive covers.
Some CD-ROM drives and DVD-ROM drives contain an embedded Class 3A
or Class 3B laser diode. Note the following statement.
viii Quick Reference

DANGER
Laser radiation when open. Do not stare into the beam, do not view directly with
optical instruments, and avoid direct exposure to the beam.
DANGER:
Certains modèles d’ordinateurs personnels sont équipésd’origine d’une unité
de CD-ROM ou de DVD-ROM. Mais ces unités sont également vendues
séparément en tant qu’options. L’unitéde CD-ROM/DVD-ROM est un
appareil àlaser. Aux État-Unis, l’unitéde CD-ROM/DVD-ROM est certifiée
conforme aux normes indiquées dans le sous-chapitre J du DHHS 21 CFR
relatif aux produits àlaser de classe 1. Dans les autres pays, elle est certifiée
être un produit àlaser de classe 1 conforme aux normes CEI 825 et CENELEC
EN 60 825.
Lorsqu’une unitéde CD-ROM/DVD-ROM est installée, tenez compte des
remarques suivantes:
ATTENTION: Pour éviter tout risque d’exposition au rayon laser, respectez
les consignes de réglage et d’utilisation des commandes, ainsi que les
procédures décrites.
L’ouverture de l’unitéde CD-ROM/DVD-ROM peut entraîner un risque
d’exposition au rayon laser. Pour toute intervention, faites appel àdu
personnel qualifié.
Certaines unités de CD-ROM/DVD-ROM peuvent contenir une diode àlaser
de classe 3A ou 3B. Tenez compte de la consigne qui suit:
DANGER
Rayonnement laser lorsque le carter est ouvert. Évitez toute exposition directe des
yeux au rayon laser. Évitez de regarder fixement le faisceau ou de l’observer àl’aide
d’instruments optiques.
Safety notices ix

xQuick Reference

Additional help
This Quick Reference provides the information for installing your IBM®
computer and starting the operating system. This publication also includes
basic troubleshooting information, software recovery procedures, help and
service information, and warranty information.
The User Guide for your computer has information about installing optional
hardware. This Portable Document Format (PDF) file is available through
Access IBM. Use Adobe Acrobat Reader to read and print your User Guide for
use when installing optional hardware.
Access IBM contains more detail about the following topics:
vUsing your computer
vInstalling software from the Software Selections CD
vInstalling hardware options
vConnecting communication cables
vTroubleshooting common problems
vRegistering your computer
If you have Internet access, you can get the most up-to-date hints, tips,
Frequently Asked Questions, and discussion forums, as well as the User Guide
for your computer from the World Wide Web. For computer service
technicians, the Hardware Maintenance Manual is also available. To access any of
this information, point your browser to http://www.ibm.com/pc/support/.
Type your machine type and model number in the Quick Path field, and click
Go.
© Copyright IBM Corp. 2001 xi

xii Quick Reference

Chapter 1. Preparing your computer
Before you begin
Be sure to read “Safety notices”on page v and “Appendix B. Notices”on
page 47.
Completing important tasks
After you have set up your computer and before you start using it, take the
time to complete these important tasks. Performing these tasks at the
beginning will save you time and trouble later:
vCreate a Recovery Repair diskette. Your computer has a built-in program, the
Product Recovery program, that restores the operating system. Normally this
program can be accessed with the F11 key during computer startup. If the
F11 prompt becomes unusable or not visible, the Recovery Repair diskette will
restore access to the Product Recovery program. See “Creating a Recovery
Repair diskette”on page 15.
vCreate an Enhanced Diagnostics diskette. The Enhanced Diagnostics tool can
isolate hardware problems and is part of the Product Recovery program.
Making an Enhanced Diagnostics diskette ahead of time assures you use of
the Enhanced Diagnostics tool if the Product Recovery program becomes
inaccessible. See “Creating an IBM Enhanced Diagnostics diskette”on
page 21.
vRecord your computer machine type, model, and serial number. If you need
service or technical support, you will likely be asked for this information.
See “Recording your computer information”on page 11.
vKeep this Quick Reference in a safe place. It is the only publication that has
important information about reinstalling your software. “Chapter 3. Product
recovery”on page 13 contains the information about recovering software.
Arranging your workspace
To get the most from your computer, arrange both the equipment you use and
your work area to suit your needs and the kind of work you do. Your comfort
is of foremost importance, but light sources, air circulation, and the location of
electrical outlets also can affect the way you arrange your workspace.
Comfort
Although no single working position is ideal for everyone, here are a few
guidelines to help you find a position that suits you best.
© Copyright IBM Corp. 2001 1

Sitting in the same position for a long time can cause fatigue. A good chair can
make a big difference. The backrest and seat should adjust independently and
provide good support. The seat should have a curved front to relieve pressure
on the thighs. Adjust the seat so that your thighs are parallel to the floor and
your feet are either flat on the floor or on a footrest.
When using the keyboard, keep your forearms parallel to the floor and your
wrists in a neutral, comfortable position. Try to keep a light touch on the
keyboard and your hands and fingers relaxed. You can change the angle of the
keyboard for maximum comfort by adjusting the position of the keyboard feet.
Viewing Distance
Lower
Back
Support
Seat
Height
Adjust the monitor so the top of the screen is at, or slightly below, eye level.
Place the monitor at a comfortable viewing distance, usually 51 to 61 cm (20 to
24 in.), and position it so you can view it without having to twist your body.
Also position other equipment you use regularly, such as the telephone or a
mouse, within easy reach.
Glare and lighting
Position the monitor to minimize glare and reflections from overhead lights,
windows, and other light sources. Even reflected light from shiny surfaces can
cause annoying reflections on your monitor screen. Place the monitor at right
angles to windows and other light sources, when possible. Reduce overhead
lighting, if necessary, by turning off lights or using lower wattage bulbs. If you
install the monitor near a window, use curtains or blinds to block the sunlight.
You might have to adjust the Brightness and Contrast controls on the monitor
as the room lighting changes throughout the day.
Where it is impossible to avoid reflections or to adjust the lighting, an antiglare
filter placed over the screen might be helpful. However, these filters might
affect the clarity of the image on the screen; try them only after you have
exhausted other methods of reducing glare.
2Quick Reference

Dust buildup compounds problems associated with glare. Remember to clean
your monitor screen periodically using a soft cloth moistened with a
nonabrasive liquid glass cleaner.
Air circulation
Your computer and monitor produce heat. The computer has a fan that pulls in
fresh air and forces out hot air. The monitor lets hot air escape through vents.
Blocking the air vents can cause overheating, which might result in a
malfunction or damage. Place the computer and monitor so that nothing blocks
the air vents; usually, 51 mm (2 in.) of air space is sufficient. Also, make sure
the vented air is not blowing on someone else.
Electrical outlets and cable lengths
The location of electrical outlets and the length of power cords and cables that
connect to the monitor, printer, and other devices might determine the final
placement of your computer.
When arranging your workspace:
vAvoid the use of extension cords. When possible, plug the computer power
cord directly into an electrical outlet.
vKeep power cords and cables neatly routed away from walkways and other
areas where they might get kicked accidentally.
For more information about power cords, see “Power cord notice”on page 55
of this book.
Chapter 1. Preparing your computer 3

4Quick Reference

Chapter 2. Setting up your computer
Note: Your computer might not have all of the connectors that are described in
this chapter.
Use the following information when setting up your computer. Look for the
small connector icons on the back of your computer.
If your computer cables and connector panel have color-coded connectors,
match the color of the cable end with the color of the connector. For example,
match a blue cable end with a blue connector, a red cable end with a red
connector.
1. Check the position of the voltage-selection switch on the rear of the
computer. Use a ballpoint pen to slide the switch, if necessary.
vIf the voltage supply range is 90–137 V ac, set the switch to 115 V.
vIf the voltage supply range is 180–265 V ac, set the switch to 230 V.
2. Your keyboard cable might have a standard keyboard connector1 or a
Universal Serial Bus (USB) connector2. Connect the keyboard cable to
the appropriate keyboard connector.
3. Your mouse cable might have a standard mouse connector1 or a USB
connector 2. Connect the mouse cable to the appropriate mouse
connector.
© Copyright IBM Corp. 2001 5

4. Connect the monitor cable to the monitor connector, and tighten the
screws.
5. If you have a modem, connect the modem using the following
instructions.
LINE
LINE
LINE
LINE
PHONE
PHONE
PHONE
PHONE
LINE
LINE
PHONE
PHONE
LINE
LINE
PHONE
PHONE
1 Use this dual connection on the back of the computer to set up your
modem.
2 Attach one end of the telephone cable to the telephone and the other end to
the telephone connector on the back of the computer. Attach one end of the
modem cable to the modem connector on the back of the computer and the
other end to the telephone outlet.
3 In some cases, a splitter or converter is required to attach the cables to the
telephone outlet, as shown in this illustration. You can also use the splitter
without the telephone, as shown in the bottom of the illustration.
6. If you have audio devices, attach them using the following instructions.
For more detailed information about speakers, see item 7 on page 7.
6Quick Reference
Other manuals for NetVista A22p
27
Table of contents
Other IBM Desktop manuals

IBM
IBM NetVista A21 Operating instructions

IBM
IBM NetVista X40 Setup guide

IBM
IBM 5150 User manual

IBM
IBM PC 300GL Types 6275 Technical document

IBM
IBM PC 300 User manual

IBM
IBM 3270 Manual

IBM
IBM NetVista S42 Technical document

IBM
IBM NetVista A20 Troubleshooting guide

IBM
IBM RT PC User manual

IBM
IBM NetVista A21 User manual

IBM
IBM PC 300PL Types 6862 Quick start guide

IBM
IBM NetVista A40 Setup guide

IBM
IBM RT Application guide

IBM
IBM 3179 User manual

IBM
IBM 8862 - Eserver xSeries 365 Operating instructions

IBM
IBM NetVista Owner's manual

IBM
IBM NetVista A22p User manual

IBM
IBM 3270 Installation manual

IBM
IBM ThinkCentre 8123 User manual

IBM
IBM 2274 User manual