manuals.online logo
Brands
  1. Home
  2. •
  3. Brands
  4. •
  5. IBM
  6. •
  7. Desktop
  8. •
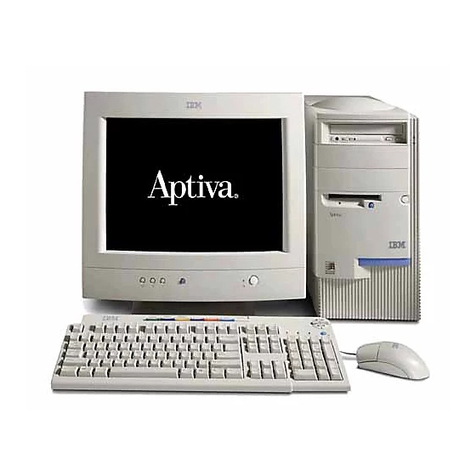
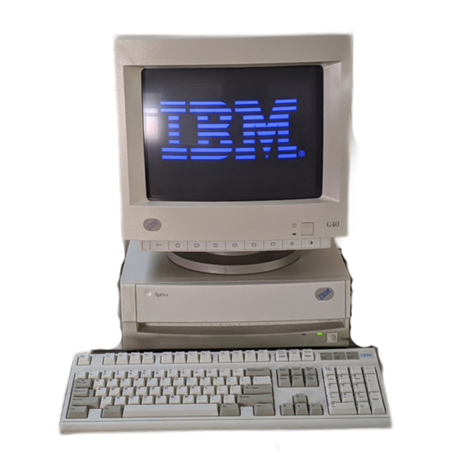
  9. IBM Aptiva 2140 Manual

IBM Aptiva 2140 Manual

Other manuals for Aptiva 2140

1

This manual suits for next models

1

Other IBM Desktop manuals

IBM System i User manual

IBM

IBM System i User manual

IBM NetVista A22p User manual

IBM

IBM NetVista A22p User manual

IBM PC 300PL Types 6862 Technical document

IBM

IBM PC 300PL Types 6862 Technical document

IBM NetVista A21 User manual

IBM

IBM NetVista A21 User manual

IBM 5110 Manual

IBM

IBM 5110 Manual

IBM NetVista A20 User manual

IBM

IBM NetVista A20 User manual

IBM IntelliStation Z Pro 6223 User manual

IBM

IBM IntelliStation Z Pro 6223 User manual

IBM NetVista 6826 Owner's manual

IBM

IBM NetVista 6826 Owner's manual

IBM NetVista A22p Quick start guide

IBM

IBM NetVista A22p Quick start guide

IBM 5114 Setup guide

IBM

IBM 5114 Setup guide

IBM X40i - NetVista - 2179 User manual

IBM

IBM X40i - NetVista - 2179 User manual

IBM Aptiva User manual

IBM

IBM Aptiva User manual

IBM Aptiva 2144 Owner's manual

IBM

IBM Aptiva 2144 Owner's manual

IBM Types 2193 Manual

IBM

IBM Types 2193 Manual

IBM 3278 Use and care manual

IBM

IBM 3278 Use and care manual

IBM 8862 - Eserver xSeries 365 Operating instructions

IBM

IBM 8862 - Eserver xSeries 365 Operating instructions

IBM NetVista A40 Guide

IBM

IBM NetVista A40 Guide

IBM NetVista A30 User manual

IBM

IBM NetVista A30 User manual

IBM NetVista A20 Troubleshooting guide

IBM

IBM NetVista A20 Troubleshooting guide

IBM 6151 Manual

IBM

IBM 6151 Manual

IBM PS/2 90 XP 486 Owner's manual

IBM

IBM PS/2 90 XP 486 Owner's manual

IBM Aptiva Series User manual

IBM

IBM Aptiva Series User manual

IBM 2283 Owner's manual

IBM

IBM 2283 Owner's manual

IBM RT PC User manual

IBM

IBM RT PC User manual

Popular Desktop manuals by other brands

StarTech.com ARMSTSL manual

StarTech.com

StarTech.com ARMSTSL manual

Dell Inspiron 5720 quick start guide

Dell

Dell Inspiron 5720 quick start guide

GÜDE WERKBANK GW 6/2 XL Translation of the original instructions

GÜDE

GÜDE WERKBANK GW 6/2 XL Translation of the original instructions

Lenovo ThinkCentre M62z Vodič za uporabnika

Lenovo

Lenovo ThinkCentre M62z Vodič za uporabnika

Lenovo ThinkCentre M71z user guide

Lenovo

Lenovo ThinkCentre M71z user guide

Fujitsu ESPRIMO C7xx operating manual

Fujitsu

Fujitsu ESPRIMO C7xx operating manual

Bosch DCU 130 operating instructions

Bosch

Bosch DCU 130 operating instructions

Zotac VR GO quick start guide

Zotac

Zotac VR GO quick start guide

HP 260 G2 DM Product End-of-Life Disassembly Instructions

HP

HP 260 G2 DM Product End-of-Life Disassembly Instructions

Sony VAIO VGC-LS21 Specifications

Sony

Sony VAIO VGC-LS21 Specifications

HP ProOne 400 G1 specification

HP

HP ProOne 400 G1 specification

Acer Aspire SA60 Service guide

Acer

Acer Aspire SA60 Service guide

Lenovo ThinkCentre M71z Uživatelská příručka

Lenovo

Lenovo ThinkCentre M71z Uživatelská příručka

Sony PCV-LX810 - Vaio Slimtop Computer System reference manual

Sony

Sony PCV-LX810 - Vaio Slimtop Computer System reference manual

Dell Precision U3525 Quick reference guide

Dell

Dell Precision U3525 Quick reference guide

MicroTouch IC-215P-AW2 user guide

MicroTouch

MicroTouch IC-215P-AW2 user guide

HP ZX2000 Start here

HP

HP ZX2000 Start here

HP m9060n - Pavilion - Elite Quick setup

HP

HP m9060n - Pavilion - Elite Quick setup

manuals.online logo
manuals.online logoBrands
  • About & Mission
  • Contact us
  • Privacy Policy
  • Terms and Conditions

Copyright 2025 Manuals.Online. All Rights Reserved.

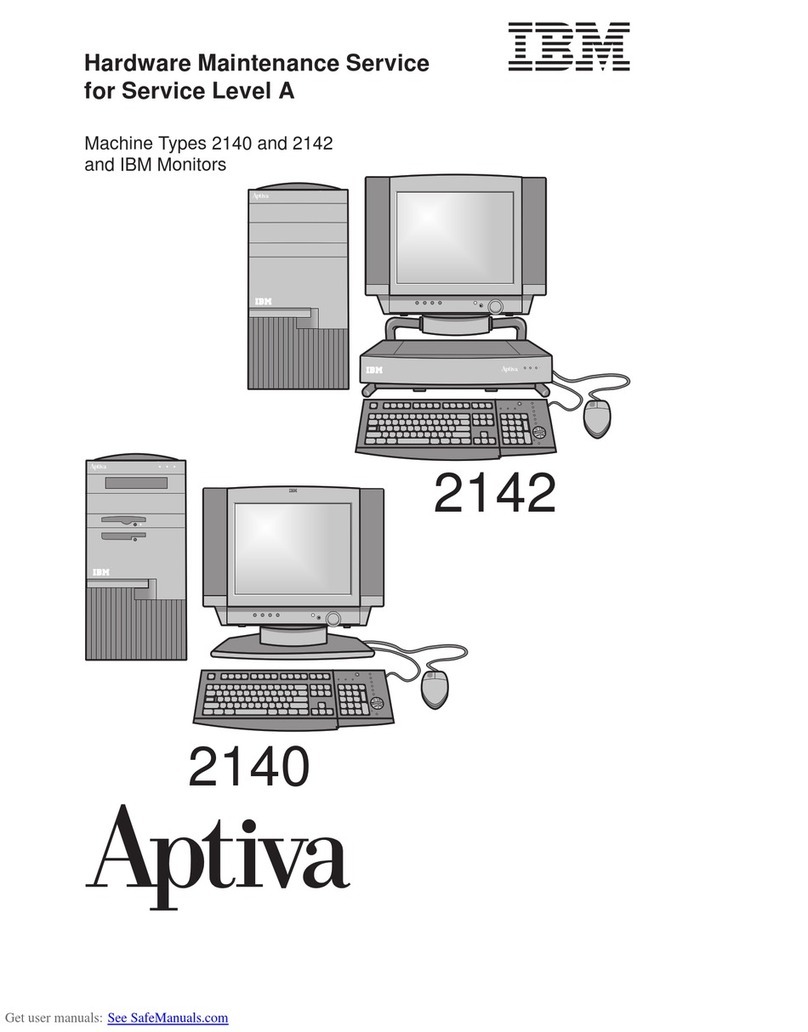
2140
2142
Hardware Maintenance Service
for Service Level A
Machine Types 2140 and 2142
and IBM Monitors
2140
2142
Hardware Maintenance Service
for Service Level A
Machine Types 2140 and 2142
and IBM Monitors
Second Edition (January 1998)
The following paragraph does not apply to any state or country where such
provisions are inconsistent with local law: INTERNATIONAL BUSINESS
MACHINES CORPORATION PROVIDES THIS PUBLICATION “AS IS” WITHOUT
WARRANTY OF ANY KIND, EITHER EXPRESS OR IMPLIED, INCLUDING, BUT
NOT LIMITED TO, THE IMPLIED WARRANTIES OF MERCHANTABILITY OR
FITNESS FOR A PARTICULAR PURPOSE. References to IBM products, programs,
or services do not imply that IBM intends to make them available outside the United
States.
This publication could include technical inaccuracies or typographical errors. Changes
are periodically made to the information herein; these changes will be made in later
editions. IBM may make improvements and/or changes in the product(s) and/or the
program(s) at any time.
For copies of publications related to this product, call toll free 1-800-879-2755 in the
Continental U.S.A. In Alaska, call 1-414-633-8108. In Canada, call toll free
1-800-465-7999. In British Columbia, call toll free 112-800-465-1234.
Copyright International Business Machines Corporation 1997, 1998. All rights
reserved.
Note to U.S. Government Users — Documentation related to restricted rights — Use,
duplication or disclosure is subject to restrictions set forth in GSA ADP Schedule
Contract with IBM Corp.
Contents
Notices . . . . . . . . . . . . . . . . . . . . . . . . . . . . . . . . . . vii
Voltage Supply Switch Settings .................... vii
Positionnement du sélecteur de tension ............... viii
Safety Information . . . . . . . . . . . . . . . . . . . . . . . . . . . ix
Safety Notices (Multi-Lingual Translations) .............. x
Laser Compliance Statement ....................... xiv
Federal Communications Commission (FCC) Notice ........ xvii
Canadian Department of Communications Compliance Statement . xviii
Trademarks . . . . . . . . . . . . . . . . . . . . . . . . . . . . . . . . xxi
Preface . . . . . . . . . . . . . . . . . . . . . . . . . . . . . . . . . xxiii
General Information . . . . . . . . . . . . . . . . . . . . . . . . . . 1-1
Chapter Description . . . . . . . . . . . . . . . . . . . . . . . . . . . 1-2
Diagnostic Information . . . . . . . . . . . . . . . . . . . . . . . . 1-2
Diagnostic Aids . . . . . . . . . . . . . . . . . . . . . . . . . . . 1-3
Repair Information . . . . . . . . . . . . . . . . . . . . . . . . . . 1-4
Parts/Test Point Locations ..................... 1-4
Safety Inspection Guide ....................... 1-4
Parts Catalog . . . . . . . . . . . . . . . . . . . . . . . . . . . . 1-4
Part Number Index ......................... 1-4
Appendix: Model Configurations and FRU Part Numbers ..... 1-5
Product Description . . . . . . . . . . . . . . . . . . . . . . . . . . . 1-6
Hardware Interfaces . . . . . . . . . . . . . . . . . . . . . . . . . . 1-12
Refresh Rates and Monitor Frequencies .............. 1-13
Power-On Password, CMOS Reset .................. 1-14
Flash (BIOS) Update Procedure .................... 1-15
Amplifier Card BIOS .......................... 1-16
Amplifier Card BIOS Setting ..................... 1-16
Updating Amplifier Card BIOS ................... 1-17
Setup Utility . . . . . . . . . . . . . . . . . . . . . . . . . . . . . . . 1-18
Using the Setup Utility ........................ 1-18
Making Changes with the Setup Utility ............... 1-20
Using Power Management Utilities ................... 1-24
Power Management Utility Features ................ 1-24
POST Error History ........................... 1-26
System Memory . . . . . . . . . . . . . . . . . . . . . . . . . . . . 1-27
DIMM Identification . . . . . . . . . . . . . . . . . . . . . . . . . 1-27
Specifications . . . . . . . . . . . . . . . . . . . . . . . . . . . . . . 1-28
Operating Requirements . . . . . . . . . . . . . . . . . . . . . . . . 1-30
Special Tools . . . . . . . . . . . . . . . . . . . . . . . . . . . . . . 1-30
Copyright IBM Corp. 1997, 1998 iii
Check Procedures . . . . . . . . . . . . . . . . . . . . . . . . . . . 2-1
Start . . . . . . . . . . . . . . . . . . . . . . . . . . . . . . . . . . . 2-2
Index of Symptoms, Messages, Error Codes, or Beeps ........ 2-9
Power Supply . . . . . . . . . . . . . . . . . . . . . . . . . . . . . . 2-34
Memory . . . . . . . . . . . . . . . . . . . . . . . . . . . . . . . . . 2-37
Keyboard . . . . . . . . . . . . . . . . . . . . . . . . . . . . . . . . 2-39
Mouse . . . . . . . . . . . . . . . . . . . . . . . . . . . . . . . . . . 2-42
Diagnostics and Utilities Device Presence Test ............ 2-43
Media Console Drive Devices ..................... 2-46
Factory-Installed Drive Devices .................... 2-47
33.6 Kbps and 56 Kbps DSVD Modem Adapters ........... 2-50
Monitor . . . . . . . . . . . . . . . . . . . . . . . . . . . . . . . . . 2-53
Undetermined Problem . . . . . . . . . . . . . . . . . . . . . . . . . 2-56
Diagnostic Aids . . . . . . . . . . . . . . . . . . . . . . . . . . . . 3-1
Introduction . . . . . . . . . . . . . . . . . . . . . . . . . . . . . . . 3-2
Power-On Self Test ........................... 3-2
Diagnostics and Utilities CD ...................... 3-3
Creating a Diagnostics Bootable Diskette ............... 3-4
Diagnostic Test Programs ....................... 3-6
Error Messages . . . . . . . . . . . . . . . . . . . . . . . . . . . 3-7
Using the Advanced Diagnostic Test Programs ............ 3-8
Program Navigation . . . . . . . . . . . . . . . . . . . . . . . . . 3-8
Hard Disk Drive Boot Error ..................... 3-10
File Editor . . . . . . . . . . . . . . . . . . . . . . . . . . . . . . 3-11
Display Self Test ............................ 3-12
Repair Information . . . . . . . . . . . . . . . . . . . . . . . . . . 4-1
Removals and Replacements—Machine Type 2140, 2142 ...... 4-2
2005—Service Panel . . . . . . . . . . . . . . . . . . . . . . . . 4-3
2010—Cover . . . . . . . . . . . . . . . . . . . . . . . . . . . . 4-4
2020—3.5-In., 5.25-In. Cage .................... 4-5
2030—Media Console . . . . . . . . . . . . . . . . . . . . . . . . 4-7
2040—Power Supply . . . . . . . . . . . . . . . . . . . . . . . . 4-12
2051—Memory (DIMM) . . . . . . . . . . . . . . . . . . . . . . . 4-13
2080—Lithium Battery . . . . . . . . . . . . . . . . . . . . . . . . 4-14
2090—System Board . . . . . . . . . . . . . . . . . . . . . . . . 4-15
Handling ESD-Sensitive Parts ..................... 4-16
Home Director . . . . . . . . . . . . . . . . . . . . . . . . . . . . . 4-17
Software Installation Procedure .................... 4-20
Parts/Test Point Locations ...................... 5-1
System Board Layout—Type A-1 ................... 5-2
System Board Locations—Type A-1 ................ 5-3
iv
Pentium MMX Processor Speed—Type A-1 ............ 5-4
System Board Layout—Type A-2 ................... 5-5
System Board Locations—Type A-2 ................ 5-6
Processor Bus Factor—Type A-2 .................. 5-7
Factory-Installed Modem Card ..................... 5-8
Hard Disk Drive Jumper Settings .................... 5-10
CD/DVD-ROM Drive Jumper Settings ................. 5-13
Zip Drive . . . . . . . . . . . . . . . . . . . . . . . . . . . . . . . . 5-14
Detachable Monitor I/O Signal Cable Connector Test Points ..... 5-15
Media Console Cable .......................... 5-16
System Board Connector Specifications ................ 5-17
Safety Inspection Guide ....................... 6-1
Parts Catalog . . . . . . . . . . . . . . . . . . . . . . . . . . . . . 7-1
Assemblies (Service Level A) ..................... 7-2
Catalog Section . . . . . . . . . . . . . . . . . . . . . . . . . . . . . 7-3
Assembly 1: Machine Type 2140 System Unit - Exterior (SL-A) .. 7-3
Assembly 2: Machine Type 2140 System Unit - Interior (SL-A) .. 7-4
Assembly 3: Machine Type 2142 System Unit - Exterior (SL-A) .. 7-7
Assembly 4: Machine Type 2142 System Unit - Interior (SL-A) .. 7-8
Assembly 5: Diskette, Hard Disk Drives, and Zip Drive ...... 7-11
Assembly 6: Media Console (Type 2142) ............. 7-13
Assembly 7: CD/DVD-ROM Drive, Modem, and TV Cards .... 7-15
Assembly 8: Monitor and Power Cord (Linecord) ......... 7-18
Assembly 9: Keyboard and Mouse ................. 7-20
Assembly 10: Software . . . . . . . . . . . . . . . . . . . . . . . 7-22
Part Number Index .......................... 8-1
Appendix A. Online Support Information .............. A-1
Appendix B. Model/Monitor Configurations and FRU Part Numbers B-1
Index . . . . . . . . . . . . . . . . . . . . . . . . . . . . . . . . . . X-1
Contents v
vi
Notices
References in this publication to IBM products, programs, or services do not
imply that IBM intends to make these available in all countries in which IBM
operates. Any reference to an IBM product, program, or service is not
intended to state or imply that only IBM’s product, program, or service may
be used. Any functionally equivalent product, program, or service that does
not infringe any of IBM’s intellectual property rights or other legally
protectable rights may be used instead of the IBM product, program, or
service. Evaluation and verification of operation in conjunction with other
products, programs, or services, except those expressly designated by IBM,
are the user’s responsibility.
IBM may have patents or pending patent applications covering subject
matter in this document. The furnishing of this document does not give you
any license to these patents. You can send license inquiries, in writing, to
the IBM Director of Commercial Relations, IBM Corporation, Purchase, NY
10577.
Voltage Supply Switch Settings
Your IBM Aptiva Personal Computer
might
have voltage switches, which
must be set correctly for your voltage supply. If your monitor or system unit
has a voltage switch, complete these steps to make sure each switch is set
correctly:
1. Determine the correct voltage switch setting for your area:
2. Locate the voltage switch on the back of your monitor or system unit. If
the setting shown on the switch is:
Correct, start setting up your IBM Aptiva computer.
Incorrect, change the voltage switch setting. (You may need a
small screwdriver.)
Voltage Supply
Range Voltage Switch
Setting
100–127 V 115 V or 115
200–240 V 230 V or 230
Copyright IBM Corp. 1997, 1998 vii
Positionnement du sélecteur de tension
Votre Aptiva IBM
peut
comporter des sélecteurs de tension qui doivent être
positionnés correctement en fonction de la tension adéquate. Si votre écran
ou votre unité centrale sont équipés d’un sélecteur de tension, vérifiez-en le
positionnement en procédant de la manière suivante :
1. Le tableau ci-dessous permet de déterminer le positionnement correct
du ou des sélecteurs de tension :
2. Repérez le ou les sélecteurs de tension situés à l’arrière de votre écran
ou de votre unité centrale. S’ils sont positionnés de façon :
Correcte, démarrez la configuration de votre Aptiva IBM.
Incorrecte, modifiez leur position. (Vous pouvez vous aider d’un
petit tournevis.)
Tensions Positionnement du
sélecteur de tension
100–127 V 115 V ou 115
200–240 V 230 V ou 230
viii