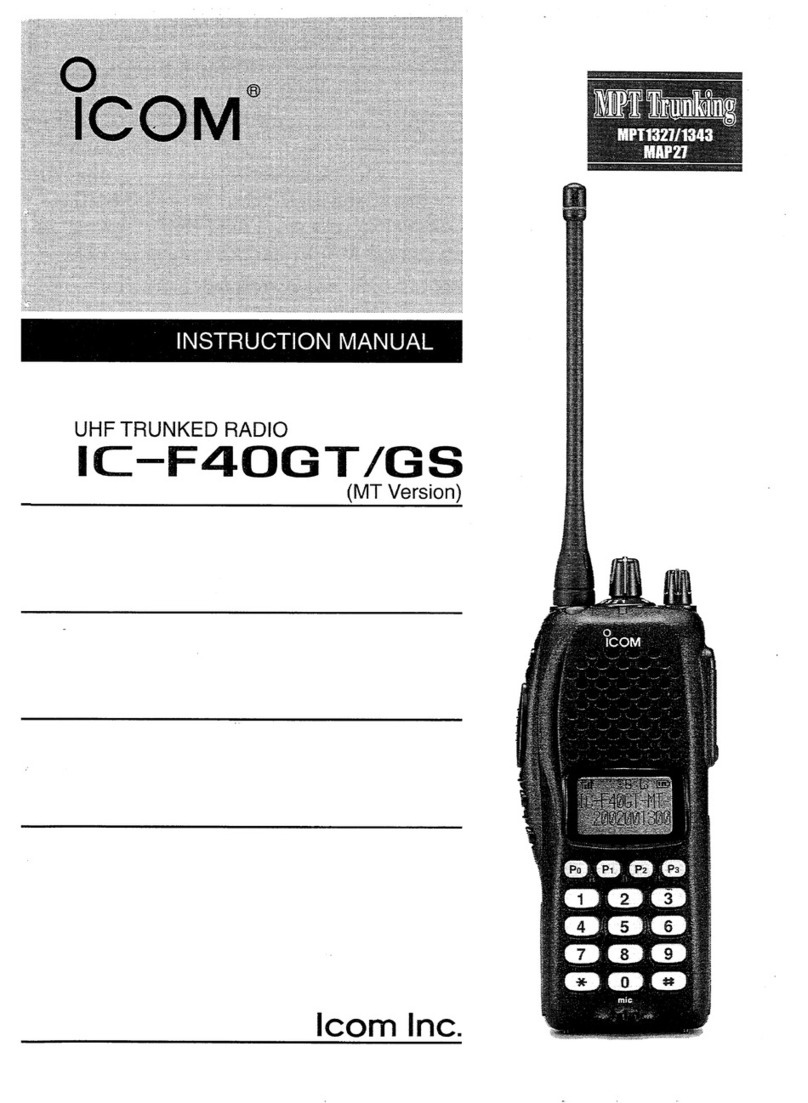
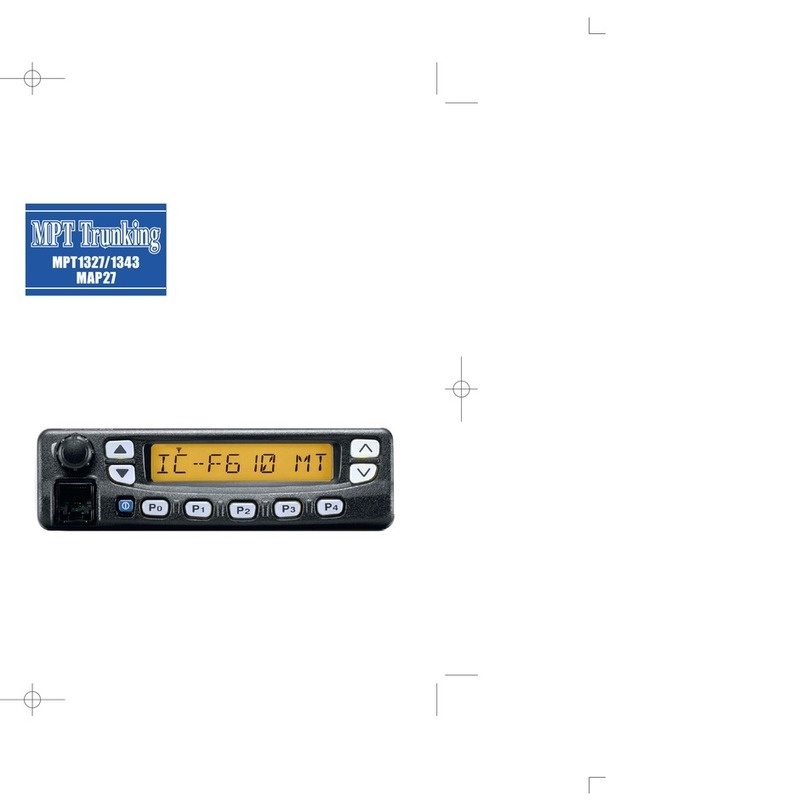
Icom F3161 Series Operating instructions

f3161/f5061 series
enhanced features
idas programming guide
(Includes Trunking)

i
Table of Contents
What is Covered in this Guide.........................................................................................................................................1
Explaining Digital Squelch...............................................................................................................................................1
Setting Squelch with RAN codes and IDs....................................................................................................................2
Selecting Digital Features................................................................................................................................................4
Programming Digital Features.........................................................................................................................................5
Programming for a Select Call using Individual IDs ....................................................................................................5
Programming a Talk Group for Selective Calls............................................................................................................6
Programming for Status Messages .............................................................................................................................7
Programming for Short Data Messages (SDM) ...........................................................................................................8
Programming for Call Alert.........................................................................................................................................10
Programming for Radio Check ..................................................................................................................................11
Programming for Stun................................................................................................................................................12
Programming for Revive ............................................................................................................................................13
Programming for Kill ..................................................................................................................................................14
Programming for Remote Monitor .............................................................................................................................15
Programming for Digital Encryption ...........................................................................................................................16
Programming LTR Operation ........................................................................................................................................17
Programming Emergency Operation.............................................................................................................................18
Programming for IDAS Trunking ...................................................................................................................................19
Program Settings...........................................................................................................................................................22
Memory CH Window ..................................................................................................................................................22
Digital/Option Window................................................................................................................................................22
Expert Window...........................................................................................................................................................23
Emergency Window ...................................................................................................................................................24

What is Covered in this Guide
This guide provides simplified step by step instructions for programming the enhanced digital/analog features in your
F3161/F4161 or F5061/F6061 radio. The programming information covers IDAS 6.25kHz digital programming,
including IDAS trunking.
IDAS (Icom Digital Advanced System) is a digital and analog land mobile radio system, using the NXDN™ 6.25kHz
digital modulation and common air interface protocol.
To use the digital features, your radio must have the UT-119/UT-126 accessory board installed and enabled, with the
current radio and UT firmware upgraded to the latest revision. Check the Icom knowledge base (from the B-B
website) for more details.
Explaining Digital Squelch
There are several settings that enable the squelch to open up in your digital radio:
RAN Codes
RAN Codes are digital equivalents to CTCSS tones used in analog radios. The codes are decimal, and range from 0
to 63. If you want squelch set so that it can receive all RAN codes, enter 0. This code allows all RAN calls to be
received and will transmit using the code that is programmed for transmit in that channel.
Unit (Individual) IDs
Individual IDs allow for selective calling and identification of who is calling.
Talk Groups
Talk Group IDs allow for selective calling to a preprogrammed group of radios. The “all call” ID is “0”.
1

Setting Squelch with RAN codes and IDs
Squelch levels are set in the programming software and are activated in the Memory CH »Squelch Type field. The
figure on the following page shows how squelch opens with digital frequencies.
When the squelch type is set to OFF, only the frequencies have to match for two radios to open squelch and
communicate. RAN codes, Talk groups, and Individual radio IDs are ignored.
Using RAN squelch is similar to setting CTCSS tones in an analog radio. The frequency and the RAN code must
match before squelch will open. Set the squelch type to RAN to enable this feature.
To enable communication to be selective for Talk Group IDs or Individual IDs, set the squelch type to SEL. With this
setting the frequency, the RAN code, and talk group ID (or Individual ID) must match before squelch will open. If you
want to call an Individual radio that is also part of a talk group, you can press a key that has been programmed with
an Individual ID function.
2

3

Selecting Digital Features
The figure below shows the sequence for selecting digital features. Note: the UT-126 DSP option board must be
installed and the digital features enabled in the cloning software. The following table shows the digital features
available for an individual or talk group call. Note: All options display for both Individual and Talk Group calls.
Individual Call Di
g
ital Features Talk Grou
p
Call Di
g
ital Features
Select Call Select Call
Status Status
Short Data Message Short Data Message
Call Alert Call Alert
Radio Chec
k
Stun/Revive
Kill
Remote Monitor
Key Press Sequence for Digital Features
Note: The sequence is the same for the F5061/F6061 radios.
4

5
Programming Digital Features
Programming for a Select Call using Individual IDs
Individual IDs allow you to call a particular radio, excluding any others that are on the same frequency. Program your
radio with the following settings. All frequencies need to be entered and the squelch level must be set before
performing this procedure.
Memory CH Window / Zone Operation Window
Field Setting/Description
Zone Operation » Zone Type Set to Conventional (the field will show blank).
Memory CH Window / Zone Window
Field Setting/Description
CH Type Set to Digital.
Digital »Unit ID Set to this radio’s ID for the applicable channels. Points to the
ID setting in the Individual ID List window.
Digital »Squelch Type Set to SEL if you want the squelch to open with the proper
RAN and Talk Group or Individual ID.
Individual ID List Window
Field Setting/Description
ID Enter all Individual IDs. This is a look-up (alias) table for every
Individual ID in the system. Refers to the Unit IDs set in the
Memory CH.
ID Name Enter an Individual ID. This ID will display on the RX radio
during a selective call.
Individual Setting Window
Field Setting/Description
Log for Individual Call Set to Enable.
Option Window
Field Setting/Description
Unit ID Display on Receive Set to ON if you want the target radio to show the Individual ID
of the transmitting radio.
Reset Timer(Sec) Enter a time value in seconds. For the duration of this timer,
the radio will stay in selective call mode. If this is set to OFF,
the last selected Individual or Talk Group will remain as the
default call when pressing PTT.
Common Window
Field Setting/Description
Key & Display»Key Set one of the programmable keys to Digital Button.
To Make an Individual Select Call
1. Press and hold the key assigned for Digital calls. The display will briefly show INDIVIDUAL or TALKGROUP.
If the selection is TALKGROUP, press and hold the key again, then press and hold to select INDIVIDUAL.
2. Press the Digital key quickly to bring up the list of Individual IDs.
3. Scroll to the desired radio ID by pressing the Up/Down keys, then press PTT.
6
Programming a Talk Group for Selective Calls
Talk groups allow you to call a selected group of radios, excluding others that are on the same frequency. Program
your radio with the following settings. All frequencies need to be entered and the squelch level must be set before
performing this procedure.
Memory CH Window / Zone Operation Window
Field Setting/Description
Zone Operation » Zone Type Set to Conventional (the field will show blank).
Memory CH Window / Zone Window
Field Setting/Description
CH Type Set to Digital
Digital »Talk Group ID Set to desired Talk Group for each channel.
Digital »Squelch Type Set to SEL if you want the squelch to open with the proper
RAN and Talk Group or Individual ID.
Talk Group ID List Window
Field Setting/Description
ID Enter all Talk Group IDs. This is a look-up (alias) table for
every Talk Group ID in the system. Refers to the Talk Group
IDs set in the Memory CH.
ID Name Enter a Talk Group ID. This ID will display on the RX radio
during a selective call.
Talk Group Setting Window
Field Setting/Description
Log for Individual Call Set to Enable.
Option Window
Field Setting/Description
Talkgroup Display on Receive Set to ON if you want the target radio to show the Talk
Group ID of the transmitting radio.
Reset Timer(Sec) Enter a time value in seconds. For the duration of this timer,
the radio will stay in selective call mode. If this is set to OFF,
the last selected Individual or Talk Group will remain as the
default call when pressing PTT.
Common Window
Field Setting/Description
Key & Display»Key Set one of the programmable keys to Digital Button.
To Make a Talk Group Select Call
1. Press and hold the key assigned for Digital calls. The display will briefly show INDIVIDUAL or TALKGROUP.
If the selection is INDIVIDUAL, press and hold the key again, then press and hold to select TALKGROUP.
2. Press the Digital key quickly to bring up the list of Talk Group IDs.
3. Scroll to the desired radio ID by pressing the Up/Down keys, then press PTT.
7
Programming for Status Messages
You can set your personal status to send to another radio, or group of radios, or allow your status to be accessed
(polled) by other radios. Status messages can be sent and received using either Individual IDs or Talk Group IDs.
Program your radio with the following settings. All frequencies need to be entered and the squelch level must be set
before performing this procedure.
Memory CH Window / Zone Operation Window
Field Setting/Description
Zone Operation » Zone Type Set to Conventional (the field will show blank).
Memory CH Window / Zone Window
Field Setting/Description
CH Type Set to Digital
Digital »Unit ID Set to this radio’s ID for the applicable channels. Points to
the ID setting in the Individual ID List window.
Digital »Talkgroup ID Set to desired Talk Group for each channel.
Digital »Squelch Type Set to SEL if you want the squelch to open with the proper
RAN and Talk Group or Individual ID.
Status List Window
Field Setting/Description
RX Status » Display Text Enter the text you want displayed on other radios.
RX Status » RX Set to Enable.
TX Status » Display Text Enter the text you want to send to other radios
Status Setting Window
Field Setting/Description
Allow Poll Set to Enable if you want other radios to read your radio’s
status.
Poll TX Set to Enable if you want to be able to find out the status
(poll) of other radios.
Common Window
Field Setting/Description
Key & Display »Key Set one of the programmable keys to Digital Button.
To Send a Status Message
1. Press and hold the key assigned for Digital calls. The display will briefly show INDIVIDUAL or TALKGROUP.
If you want to change from either INDIVIDUAL or TALKGROUP, press and hold the key to return to the
memory channel display, then press and hold to select the option you want.
2. Press the Digital key quickly to bring up the list of Talk Group IDs.
3. Scroll to the desired radio ID by pressing the Up/Down keys.
4. Press PTT. Your status message and your Individual or Talk Group ID will show on the target radio’s display.

8
Programming for Short Data Messages (SDM)
You can send short, pre-programmed data messages (12 characters long) to another radio, or a group of radios.
Program your radio with the following settings. All frequencies need to be entered and the squelch level must be set
before performing this procedure.
Memory CH Window / Zone Operation Window
Field Setting/Description
Zone Operation » Zone Type Set to Conventional (the field will show blank).
Memory CH Window / Zone Window
Field Setting/Description
CH Type Set to Digital
Digital »Unit ID Set to this radio’s ID for the applicable channels. Points to
the ID setting in the Individual ID List window.
Digital »Talkgroup ID Set to the desired Talk Group for each channel.
Digital »Squelch Type Set to SEL if you want to squelch to open with the proper
RAN and Talk Group or Individual ID.
SDM List Window
Field Setting/Description
SDM Enter the text you want displayed on other radios.
SDM Setting Window
Field Setting/Description
RX Set to Enable if you want to receive short data messages.
Common Window
Field Setting/Description
Key & Display»Key Set one of the programmable keys to Digital Button.

9
To Send a Short Data Message
1. Press and hold the key assigned for Digital calls. The display will briefly show INDIVIDUAL or TALKGROUP.
If you want to change from either INDIVIDUAL or TALKGROUP, press and hold the key to return to the
memory channel display, then press and hold again to select the option you want.
2. Press the up/down keys to select MSG.
3. Press the Digital key quickly to bring up the list of messages.
4. Scroll to the desired message by pressing the Up/Down keys.
5. Press the key again to bring up the list of IDs.
6. Scroll to the desired ID by pressing the Up/Down keys.
7. Press PTT. Your status message and your Individual ID or Talk Group ID will show on the target radio’s
display.
Programming Short Data Messages (SDM) from the Front Panel
In addition to sending pre-programmed Short Data Messages, you can also edit or enter new messages from the
keypad.
1. Press and hold the key assigned for Digital calls. The display will briefly show INDIVIDUAL or TALKGROUP.
If you want to change from either INDIVIDUAL or TALKGROUP, press and hold the key to return to the
memory channel display, then press and hold to select the option you want.
2. Press the up/down keys to select MSG.
3. Press the Digital key quickly to bring up the list of messages.
4. Scroll to a message you want to change by pressing the Up/Down keys. You can also start a new message
by scrolling to a blank display.
Note: There must be at least one message already programmed to be able to create a new one from a blank
display.
5. Press # to edit the message. Enter the message using the keypad and the following keys:
•Press the Up key to add a space.
•Press the Down key to delete a space or a letter.
•Press the * (star) key to move left.
•Press the # (pound) key to move right.
6. Press and hold the digital key to save the new message.

10
Programming for Call Alert
Call Alert allows you to send an alert signal to another radio, or group of radios, so that it can respond back. Program
your radio with the following settings. All frequencies need to be entered and the squelch level must be set before
performing this procedure.
Memory CH Window / Zone Operation Window
Field Setting/Description
Zone Operation » Zone Type Set to Conventional (the field will show blank).
Memory CH Window / Zone Window
Field Setting/Description
CH Type Set to Digital
Digital »Unit ID Set to this radio’s ID for the applicable channels. Points to
the ID setting in the Individual ID List window.
Digital »Talkgroup ID Set to the desired Talk Group for each channel.
Digital »Squelch Type Set to SEL if you want to squelch to open with the proper
RAN and Talk Group or Individual ID.
Call Alert Window
Field Setting/Description
RX Set to Enable to be able to receive a Call Alert.
TX Set to Enable to be able to transmit a Call Alert.
Log for Call Alert Set to Enable if you want to save the record (log) of all
received Call Alerts.
Common Window
Field Setting/Description
Key & Display »Key Set one of the programmable keys to Digital Button.
To Send a Call Alert
1. Press and hold the key assigned for Digital calls. The display will briefly show INDIVIDUAL or TALKGROUP.
If you want to change from either INDIVIDUAL or TALKGROUP, press and hold the key to return to the
memory channel display, then press and hold to select the option you want.
2. Press the up/down keys to select CALALERT.
3. Press the Digital key quickly to bring up the list of IDs.
4. Scroll to the desired radio ID by pressing the Up/Down keys.
5. Press PTT. The target radio will show CALLALRT and show your radio’s ID. If successful, your display will
show CA OK. If it failed, your display will show CA FAIL.

11
Programming for Radio Check
Radio Check enables you to check whether a target radio is powered on and within range. This feature is active for
Individual radios, not for Talk Groups. Program your radio with the following settings. All frequencies need to be
entered and the squelch level must be set before performing this procedure.
Memory CH Window / Zone Operation Window
Field Setting/Description
Zone Operation » Zone Type Set to Conventional (the field will show blank).
Memory CH Window / Zone Window
Field Setting/Description
CH Type Set to Digital
Digital »Unit ID Set to this radio’s ID for the applicable channels. Points to
the ID setting in the Individual ID List window.
Digital »Squelch Type Set to SEL if you want to squelch to open with the proper
RAN and Individual ID.
Radio Check Window
Field Setting/Description
RX Set to Enable to be able to receive a Radio Check.
TX Set to Enable to be able to transmit a Radio Check.
Common Window
Field Setting/Description
Key & Display »Key Set one of the programmable keys to Digital Button.
To Send a Radio Check
1. Press and hold the key assigned for Digital calls. The display will briefly show INDIVIDUAL or TALKGROUP.
If the selection is TALKGROUP, press and hold the key again, then press and hold to select INDIVIDUAL.
2. Press the up/down keys to select RADIOCHK.
3. Press the Digital key quickly to bring up the list of IDs.
4. Scroll to the desired radio ID by pressing the Up/Down keys.
5. Press PTT. If successful, your display will show CHK ACK. If it failed, your display will show CHK FAIL.

12
Programming for Stun
Targeted radios can be rendered inoperable remotely. A stunned radio can also be revived remotely. This feature is
active for Individual radios, not for Talk Groups. Program your radio with the following settings. All frequencies need
to be entered and the squelch level must be set before performing this procedure.
Memory CH Window / Zone Operation Window
Field Setting/Description
Zone Operation » Zone Type Set to Conventional (the field will show blank).
Memory CH Window / Zone Window
Field Setting/Description
CH Type Set to Digital
Digital »Unit ID Set to this radio’s ID for the applicable channels. Points to
the ID setting in the Individual ID List window.
Digital »Squelch Type Set to SEL if you want to squelch to open with the proper
RAN and Talk Group or Individual ID.
Stun Window
Field Setting/Description
RX Set to Enable to allow your radio to be stunned.
TX Set to Enable to be able stun a target radio.
Mode This setting allows you to specify whether you want a
stunned radio to be inhibited from transmitting only, or both
transmitting and receiving.
Common Window
Field Setting/Description
Key & Display »Key Set one of the programmable keys to Digital Button.
To Send a Stun Signal
1. Press and hold the key assigned for Digital calls. The display will briefly show INDIVIDUAL or TALKGROUP.
If the selection is TALKGROUP, press and hold the key again, then press and hold to select INDIVIDUAL.
2. Press the up/down keys to select STUN.
3. Press the Digital key quickly to bring up the list of IDs.
4. Scroll to the desired radio ID by pressing the Up/Down keys.
5. Press PTT. If successful, your display will show STN TX, then STN ACK. If it failed, your display will show
STN FAIL.

13
Programming for Revive
Targeted radios can be revived remotely after they have been stunned. This feature is active for Individual radios, not
for Talk Groups. Program your radio with the following settings. All frequencies need to be entered and the squelch
level must be set before performing this procedure.
Memory CH Window / Zone Operation Window
Field Setting/Description
Zone Operation » Zone Type Set to Conventional (the field will show blank).
Memory CH Window / Zone Window
Field Setting/Description
CH Type Set to Digital
Digital »Unit ID Set to this radio’s ID for the applicable channels. Points to
the ID setting in the Individual ID List window.
Digital »Squelch Type Set to SEL if you want to squelch to open with the proper
RAN and Individual ID.
Revive Window
Field Setting/Description
RX Set to Enable to allow your radio to be revived.
TX Set to Enable to be able revive a target radio.
Common Window
Field Setting/Description
Key & Display »Key Set one of the programmable keys to Digital Button.
To Send a Revive Signal
1. Press and hold the key assigned for Digital calls. The display will briefly show INDIVIDUAL or TALKGROUP.
If the selection is TALKGROUP, press and hold the key again, then press and hold to select INDIVIDUAL.
2. Press the up/down keys to select REVIVE.
3. Press the Digital key quickly to bring up the list of IDs.
4. Scroll to the desired radio ID by pressing the Up/Down keys.
5. Press PTT. If successful, your display will show REV TX, then REV ACK. If it failed, your display will show
REV FAIL.

14
Programming for Kill
Targeted radios can be rendered inoperable remotely. This feature is active for Individual radios, not for Talk Groups.
Program your radio with the following settings. All frequencies need to be entered and the squelch level must be set
before performing this procedure.
Important: A radio that has received a Kill signal can only be made operable again by having a new cloning file
programmed into the radio. There is no way that a radio can restore the operation of a radio that has received a Kill
signal.
Memory CH Window / Zone Operation Window
Field Setting/Description
Zone Operation » Zone Type Set to Conventional (the field will show blank).
Memory CH Window / Zone Window
Field Setting/Description
CH Type Set to Digital
Digital »Unit ID Set to this radio’s ID for the applicable channels. Points to
the ID setting in the Individual ID List window.
Digital »Squelch Type Set to SEL if you want to squelch to open with the proper
RAN and Individual ID.
Kill Window
Field Setting/Description
RX Set to Enable to allow your radio to be killed.
TX Set to Enable to be able kill a target radio.
Common Window
Field Setting/Description
Key & Display »Key Set one of the programmable keys to Digital Button.
To Send a Kill Signal
1. Press and hold the key assigned for Digital calls. The display will briefly show INDIVIDUAL or TALKGROUP.
If the selection is TALKGROUP, press and hold the key again, then press and hold to select INDIVIDUAL.
2. Press the up/down keys to select KILL.
3. Press the Digital key quickly to bring up the list of IDs.
4. Scroll to the desired radio ID by pressing the Up/Down keys.
5. Press PTT. If successful, your display will show KIL TX, then KIL ACK. If it failed, your display will show KIL
FAIL.

15
Programming for Remote Monitor
The Remote Monitor feature allows one radio to open the mic of a targeted radio and hear any audio in the vicinity of
that radio. This feature is active for Individual radios, not for Talk Groups. Program your radio with the following
settings. All frequencies need to be entered and the squelch level must be set before performing this procedure.
Memory CH Window / Zone Operation Window
Field Setting/Description
Zone Operation » Zone Type Set to Conventional (the field will show blank).
Memory CH Window / Zone Window
Field Setting/Description
CH Type Set to Digital
Digital »Unit ID Set to this radio’s ID for the applicable channels. Points to
the ID setting in the Individual ID List window.
Digital »Squelch Type Set to SEL if you want to squelch to open with the proper
RAN and Individual ID.
Remote Monitor Window
Field Setting/Description
RX Set to Enable to allow your radio to be monitored.
TX Set to Enable to be able to monitor a target radio.
TX Timer(Sec) Set the time that you want your radio to be monitored by
another radio.
Common Window
Field Setting/Description
Key & Display »Key Set one of the programmable keys to Digital Button.
To Monitor Another Radio
1. Press and hold the key assigned for Digital calls. The display will briefly show INDIVIDUAL or TALKGROUP.
If the selection is TALKGROUP, press and hold the key again, then press and hold to select INDIVIDUAL.
2. Press the up/down keys to select REM MON.
3. Press the Digital key quickly to bring up the list of IDs.
4. Scroll to the desired radio ID by pressing the Up/Down keys.
5. Press PTT. If successful, your display will show REM TX, then REM ACK. If it failed, your display will show
REM FAIL. The green RX light on you radio will stay on as long as the mic is open on the target radio (the
duration set in the TX Timer(Sec) field).

Programming for Digital Encryption
Digital encryption uses an encryption key that you create and assign to the desired channel. Note that this encryption
method is not AES/DES encryption.
Memory CH / Zone Operation Window
Fiel
d
Settin
g
/
Description
Zone Type Set to Conventional.
Memory CH / Zone Window
Fiel
d
Settin
g
/
Description
Scrambler/Encryption » ON/OFF Set to ON.
Encryption Key List No. Set to point to the line in the Encryption Key(Dec) table that
matches the desired key for the selected channel.
Digital / Encryption Window
This window is for digital encryption only. Use this when the CH Type is set to Digital.
Fiel
d
Settin
g
/
Description
Encryption Key(Dec) Set to a code from 1 to 32767 for each encryption key. Each key
line can be referenced to channels in the Memory Ch window.
Common Window
Field Setting/Description
Key & Display »Key Set one of the programmable keys to Scrambler/Encryption.
To Make an Encrypted Call
1. Press the key programmed for Encryption. The display will show the encryption icon.
2. Press PTT or select an Individual or Talk Group ID. The receiving radio(s) must also have encryption
enabled to receive the transmission (a key has to be programmed and the encryption icon must be present
on the display).
16

Programming LTR Operation
To use LTR, the model must be set to LMR. LTR operation can also be used with the MDC 1200 signaling protocol.
Memory CH / Zone Operation Window
Fiel
d
Settin
g
/
Description
Zone Type Set to LTR.
Repeater ch Double-click to access Repeater Settings (following table).
Text Enter text name for the LTR zone.
Zone Operation/Repeater Setting Window
Fiel
d
Settin
g
/
Description
Frequency (MHz) Enter the desired frequencies for each repeater.
Atr Set one channel to H, Home Repeater.
Save Table…
You can save this file as a .icr repeater file by clicking Save
Table… This file contains only the settings in this window.
Load Table… To open a saved .icr file, navigate to Zone Operation and set the
Zone Type to LTR and double-click the Repeater ch field to open
the Repeater Settings window. Click Load Table… and select the
.icr file you want to load.
Memory CH /Zone Window
Fiel
d
Settin
g
/
Description
TGID »RXID, TXID Enter the desired Talk Group IDs for RX and TX. Can be
numbered from 1 to 250.
17

Programming Emergency Operation
Emergency operation is enabled using a signaling protocol. This feature can be programmed in 2-tone, 5-tone, MDC,
and Digital mode. Program your radio with the following settings. All frequencies need to be entered and the squelch
level must be set before performing this procedure.
Memory CH / Zone Operation Window
Fiel
d
Settin
g
/
Description
Zone Type Set to Conventional (the field will be blank).
Memory CH / Zone Window
Fiel
d
Settin
g
/
Description
Atr Set to E at the emergency channel.
Emergency / Window
Fiel
d
Settin
g
/
Description
Emergency Text Enter the desired text to display on the TX radio.
Alert Level Set the alarm volume level. If set to linked, the volume knob will
control the volume level.
Repeat Cycle Set to the desired number of times you want the emergency signal
repeated. The range is 0 to infinity.
Silent Set to make the emergency alarm Silent or Audible. If set to
Silent, there will be no alarm or change in the display for the TX
radio. The RX radio will show the normal emergency response and
the alarm will sound.
Start Timer Set the delay time before the alarm signal is sent. The delay time
will count down with a beep every second for the interval set in this
timer.
Repeat Timer Set the time between each repeat emergency transmission. This is
in seconds and will not be audible.
Common / Key & Display Window
Fiel
d
Settin
g
/
Description
Key »Emer Set the key to Emergency.
To Make an Emergency Call
Press the key programmed for emergency. After the Start Timer has elapsed, the radio will transmit the emergency
signal. If the transmission is successful, the TX radio display will show STAT OK.
18
This manual suits for next models
5
Table of contents
Other Icom Radio manuals

Icom
Icom IC-F4TR Guide

Icom
Icom IC-F43TR User manual

Icom
Icom IC-F3001 Installation and operating instructions

Icom
Icom IC-2200H User manual

Icom
Icom IC-706MKIIG User manual

Icom
Icom IC-F1020 User manual

Icom
Icom IC-SAT100M Installation guide

Icom
Icom IC2e/a User manual

Icom
Icom IP501H User manual

Icom
Icom IC-V80 Operating instructions

Icom
Icom M302 Instruction manual

Icom
Icom IC-2720H Operating instructions

Icom
Icom IC-F4TR User manual

Icom
Icom IC-F4TR User manual

Icom
Icom IC-R70 User manual

Icom
Icom IC-F3160 SERIES Manual

Icom
Icom IC-2720 Product information sheet

Icom
Icom IP100H User manual

Icom
Icom IC-211 Manual

Icom
Icom F70 Series Installation guide