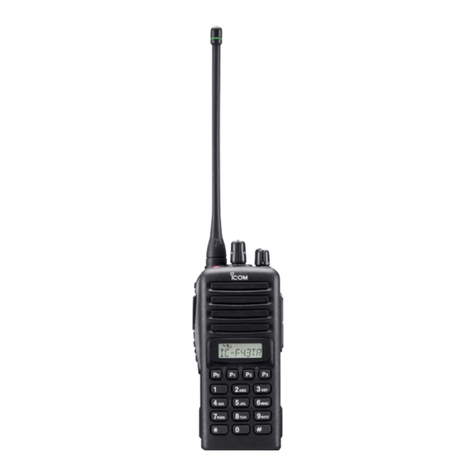
Icom IC-4008A User manual

=1 PANEL DESCRIPTION
. Switches, controls, keys and connectors
0ANTENNA ~
0SPEAKER
PANELDESCRIPTION
0 ANTENNA
Extend the antenna completely when using the transceiver.
.The antenna folds completely into the transceiver body for carryin
purposes.
.The antenna can be adjusted 90 degrees from the regular positiol
when operating the transceiver in a horizontal position.
f) PH SWITCH [PH]
.Push and hold to transmit; release to receive.
.While pushing [PTT], push [POWER] to activate the "PTT hold func
tion". (p.16)
. CHANNEL UP SWITCH [UP]/[.&]
.Push to increase the operating channel.
.Push and hold to increment the operating channel continuously.
0CHANNEL DOWN SWITCH [DOWN]/[~]
.Push to decrease the operating channel.
.Push and hold to decrement the operating channel continuously.
0SPEAKER
0MODE SWITCH [MODE] (Squelch)
.Push to toggle between Group mode and Normal mode. (p. 11)
.Push and hold for 1 sec. to force the squelch open; push and hold for
sec. to close it again. (p. 8)
f) POWERSWITCH[POWER](Key lock)
.Push to tum the power ON.
.Push and hold this key for 2 sec. to toggle the key lock functio
ON/OFF. (p. 16)
~NOTE: Do not push this key for too long when tuming the power m
~otherwise the key lock function will be tumed ON. (p. 16)
(1) FUNCTION DISPLAY (p. 3)
0 VOLUME CONTROL [VOL]
Rotate clockwise to increase and counterclockwise to decrease volum
4D)EXTERNAL SPEAKER AND MICROPHONE JACKS
Connect an optional speaker-microphone or headset, if desired.

1PANELDESCRIPTION
. Functiondisplay
~T-T-T-T-~
I"" o-.r ~~
~
~
~i',-J CI
...:1 , , ~
~-$-'-.-
0TRANSMIT INDICATOR
Appears during PTT on.
eBUSY INDICATOR
Appears while receiving a signal or when the squelch is open.
S KEY LOCK INDICATOR
Appears during key lock function ON.
eAUTO POWER OFF INDICATOR
Appears while the auto power off function is ON. (see p. 15)
0 LOW BATTERY INDICATOR
Appears or flashes when battery power hasdecreased to a specified
level.
.GROUP NUMBER INDICATION
One of 01 to 38 appear while the Group function is turned ON.
t) CHANNEL NUMBER INDICATOR
Indicates operating channel number.
«\) POWER ON INDICATOR
Appears while the power is ON.
eANSWER BACK INDICATOR (see p. 17)
.Appears when you and your group are in the conversation area.
.Blinks when you or your group is out of the conversation area.
«i> PTT HOLD INDICATOR (see p. 16)
.Appears when the "PTT HOLD" function is turned ON.
.Blinks while the transceiver is transmitting.
':l
2=
ACCESSORIES
. Accessoryattachment
0 Antenna
Adjust the antenna position as
shown at right.
Keep the jack cover attached
when jacks are not in use to
avoidbadcontacts.
0 Belt clip
Attach the belt clip using the
supplied screws. Conveniently
attaches to your belt.
A.

=3 BATTERY PACKS
.Installing batteries in the battery
case
Install 3 AA(R6) size alkaline, dry cell batteries or the BP-202 BAT-
TERY PACKas illustrated below.
CDRemove the battery
cover from the trans-
ceiver.
WInstall 3xAA(R6) size
dry cell, alkaline bat-
teries or the BP-202.
.Be sure to observe
the correct polarity.
NOTE: Keep battery con-
tacts clean. It's a good
idea to clean battery ter-
minals once a week.
-.-
BATTERYPACKS 3
. Battery pack charging
The optional BP-202 BATTERYPACKincludes rechargeable Ni-Cd
batteries and can be charged approx. 300 times. Charge the battery
pack before first operating the transceiver or when the battery pack
becomes exhausted.
If you want to be able to charge the battery pack more than 300
times, the following points should be observed:
1.Avoid overcharging. The charging period should be less than 48
hours.
2. Use the battery until it becomes almost completely exhausted
under normal conditions. We recommend battery charging just
after transmitting becomes impossible.
. Charging precautions
Recommended temperature range for charging: + 50°F to +104of
(+1O°Cto + 40°C or).
. About the battery pack
0 Battery pack life
If your battery pack seems to have no capacity even after being
fully charged, completely discharge it by leaving the power ON all
day. Then, fully charge the battery pack again.
If the battery pack still does not retain a charge (or very little), a new
battery pack must be purchased.

3BATTERYPACKS
. Charging connections
~ Rapid charging with the BC-119UBC-119+AD-89
Q) Insert the optional AD-89 DESKTOP CHARGER ADAPTER into
the charging slot of the BC-119.
'The BC-119L comes preinstalled with the AD-89 CHARGING
ADAPTER.
@ Insert the battery pack, either by itself or attached to the trans-
ceiver, into the charger.
(See BC-119/L instructions.)
411
BASIC OPERATION
. PowerON
.. Push [POWER] for 1sec. to turn the
power ON.
.The power on indicator and oper-
ating channel number appear on
the display.
. Adjusting the volume
Q)Push and hold [MODE] for <1)
1sec. to open the squelch. BusyindicatorYf ~
. Busy indicator appears on appears. ~
the d"play while the 'q"eleh " ~;jj
open. l!:LJ
@ Adjust the audio to a suitable level ~-
.[0]6"'-0
using V L. (Q~
CIDPush and hold [MODE] for 1sec. to ~Q)ICID
closethe squelch. ",-"'="'",
V' What;s squelch?
A squelch circuit allows you to mute undesired noise while re-
ceiving no signal and emit audio while receiving signals.
This provides quiet standby. The [MODE] key changes the
squelch setting. This is useful to listen to weak signals that do
not open the squelch. ~,

4BASIC OPERATION
. Selecting the operating channel
Push [UP]/[A] or [DOWN]/["'] keys sev-
eral times until the desired operating
channel number appears on the dis-
play.
.While pushing and holding [UP]/[A] or
[DOWN]/["'] keys, the displayed chan-
nel changes continuously until chan-
nel number" 1 " appears.
If you want to keep the automatic se-
lection, release the [UP]/[A] or
[DOWN]/["'] keys then push and hold them again.
.When displayed channel stops at channel number "01", a warn-
ing beep is emitted.
c,-c,=c,"
~NOTE:
~.The transceiver has 14 operating frequency channels.
~.The selected channel is memorized when you turn off the
~transceiver.
9--- -- - - --
5111
RECEIVEAND TRANSMIT
CD Push and hold [MODE] 1sec.
to open the squelch. Busy indicatorTT ~
.Adjust volume to the desired appears.~0----.
audiolevel.(Seep. 8) f/~e]
0Select a desired operating channel. l!!U
When a signal is received: ~ .....
.Squelch opens and audio is emitted :1J:tr ce/D
fromthespeaker. ~,.
.Further adjustment of [VOL] may be c,-c,=c",
necessary at this point.
. "BUSY" indicator appears on the dis-
play.
W Push and hold [PH] to transmit" then
speak into the microphone.
.Do not hold the transceiver too close
to your mouth or speak too loudly.
This may distort the signal.
.The transmit indicator"" "appears
on the display.
@)Release [PTT] to return to receive. c,-c,=c",
~IMPORTANT:
~To maximize the readability of your transmitted signal, pause a
~few sec. afterpushing[PTT],holdthe transceiver2 to 4 inches
~(5 to 10 cm) from your mouth and speak at a normal voice level.
~NOTE:
~The transceiverhas an auto powersave functionto conserve
~the battery power. The power save function activates automati-
'l} cally when no signal is received for 5 sec.
10
---

.
-6GROUP MODE (CTCSS)
. Setting the group code
The IC-4008A is equipped with 38 group codes. Group mode op-
eration provides communication with silent standby since you will
only receive calls from group members using the same group num-
ber.
First of all, set the same group code number for all group member's
transceivers.
Turn ON the group mode operation:
CD Push [MODE] to enter set mode.
."--- " (group mode OFF) appears on
the display.
enPush [UP]/[A] or [DOWN]/["'] to select
the desired code number.
WPush [MODE] to set the group code
number.
Cancel the group mode operation:
CD Push [MODE] to enter set mode.
.Code number disappears on the dis-
play.
enPush [UP]/[A] or [DOWN]/["'] to select
"---" (groupmodeOFF).
W Push [MODE] to cancel the group
mode.
~
~nI
~-Lf I
eJ
~"-'- -:'I
B
.f r J-
~NOTE: Only stations with the same group channel number can
~be heard during group mode operation, even when the busy in-
~dicator appears on the display.
11
CTCSS: Continuous Tone Coded Squelch System 6
II' What is CTCSS(Continuous ToneCoded Squelch Sys-
tem) GROUP MODE?
~
J
CTCSS (Continuous Tone Coded Squelch System) GROUP
MODE allows communication with silent stand by. Only signals
containing your group code can open the squelch.
This conveniently eliminates unwanted audio and is useful in
group activities or security related activities where unwanted
output can be a problem. Note that CTCSS group mode is not
private-anyone can receive your calls.
The IC-4008A is equipped with 38 tone codes for CTCSS
GROUP MODE use. Selecting a code applies it to all 14 oper-
ating channels. Each push of [PTT] superimposes your group
code over your transmit signal; and, only signals containing the
same code can open your squelch. To temporarily hear all sig-
nals (including noise) push and hold [MODE]. Do not use
CTCSS GROUP MODE if you want to be able to hear signals
on all channels.
'\
J

tI' Talk Range
The IC-4008A is designed to maximize performance and im-
prove transmission range in the field. However, the single
most important factor in transmit range (talk power) is your
surrounding environment. These radios are "line of sight" ra-
dios and as such, transmission range is influenced by the de-
gree to which you can "see" the other communicating party.
Large concrete structures and heavy foliage or transmission
from inside a building or vehicle will reduce your talk power.
. Optimal range: wide, open areasfree of obstructions. (up to
2 miles)
. Medium range: large buildings or trees blocking your line of
sight.
. Minimum range: mountainous areas or areas of heavy fo-
liage.
13
- --
711
. Smart-Ring
RING FUNCTION
The ring function has an answer back feature. This allows you to
confirm whether or not a call has reached the receiving party even
if the operator is temporarily away from the transceiver. (This func-
tion available between IC-4008As only.)
CDSet the same group channel number for
all of your group transceivers. (See left.)
@ While pushing [PH], push~UP]/[A] .
0A beep is emitted and" ." blinks on
the display.
Q) Release the [PH].
0When a member of your group an-
swers your call, the transceiver emits
beep tones for 10 sec. and blinks" i".
0When no answer comes back, the transceiver emits 3 short
faint beep tones.
@)Push [PH] to answer and to stop the beeps and flashing.
c.c=ca
~NOTE: This function is available only when the called station
~has set the same group number and the same operating chan-
~nelsasyou.
. Call-Ring
Sends the ring tones during transmit
mode.
.. While pushing [PH], push [DOWN]/[T]
to send a ring tone.
0The ring tone is emitted while pushing
[DOWN]/[T].
0The microphone signal is automati-
cally cut while pushing [DOWN]/[T].
14
6CTCSS: Continuous Tone Coded Squelch System
0 CTCSS code table
01 67.0 11 97.4 21 136.5 31 192.8
02 71.9 12 100.0 22 141.3 32 203.5
03 74.4 13 103.5 23 146.2 33 210.7
04 77.0 14 107.2 24 151.4 34 218.1
05 79.7 15 110.9 25 156.7 35 225.7
06 82.5 16 114.8 26 162.2 36 233.6
07 85.4 17 118.8 27 167.9 37 241.8
08 88.5 18 123.0 28 173.8 38 250.3
09 91.5 19 127.3 29 179.9 --- OFF
10 94.8 20 131.8 30 186.2 "(unit: Hz)
18 OTHER FUNCTIONS
. Initial set mode
Initial set mode is accessed at power ON and allows you to set sel-
dom changed settings. In this way you can "customize" transceiver
operations to suit your preferences and operating style.
0Auto power OFF
This function sets the transceiver to auto-
matically turn OFF after 2 hours elapse.
CDWhilepushing[MODE],push[POWER]
ON to toggle the function ON or OFF.
@ "E]" appears on the display.
. "Auto power OFF" function retains its
setting after power OFF.
0 Ring tone type ~
You can select the ring tone from one of
10 sounds.
CD While pushing [UP]/[.], push [POWER] ~
ON. @CD..~~-''t1.
@Push[UP]/[.] or[DOWN]/["']to select S_~
I
CD
the ring sound. 4"'~~",
0 Beep tones ON/OFF
Confirmation beep tones normally sound
when you push a ke~ These can be
turned ON or OFF.
..While pushing
[POWER]. [DOWN]/["'], push
.~
-
OTHER FUNCTIONS 8
0 PTT hold function
This function frees you from having to constantly push [PTT] during
conversation.
CD While pushing [PTT], push [POWER]
ON to toggle the function ON or OFF.
@ " ~" appears on the display when the
"PTThold"functionisactivated. ..
Q) Once [PTT] is pushed, you need not
hold it any longer during your conversa-
tion.
.""" appearsand"~ " blinkson the
display.
@ Push [PTT] to end the conversation.
. ,," " disappears and "~ " stops blinking.
~1\1 [!J
-~~ "-'.=1Q
/It'I , r-,L.
0 Key lock function
This function electronically locks ~
all keys and switches to prevent Lockindicator
accidental channel changes and appears.~~
function access. ff~
QI'-/
..Push and hold [POWER] for 2 sec. to ~~ """~.
turn the lock function ON and OFF. ~ (0
f
" " appears on the display. ~'"
- Only [POWER] and [PTT] are func- ",-"="'"
tional.
- The Ring function is also available. (See p. 14)
~NOTE: This function is available only when turning the power
~ ON.

8OTHER FUNCTIONS
. ATS (Automatic Transponder System)
This allows you to confirm whether or not a call has reached the re-
ceiving party even if the operator is temporarily away from the
transceiver. No "Ring" tone is emitted with this function.
.. Push [MODE], while [PTT] is
ON to turn the function
ON/OFF.
."iii..,"appearsonthedisplay. ..
.The transceiver starts to send a
searching signal every 60 sec.
- When the transceiver receives an
answer back signal, "iii " stays on
the display until the next search
transmit.
- Ifno reply is received, "iii " blinksuntilthe nextsearch transmit.
- A caution beep is emitted when the condition changes.
0_0_00
~NOTE: Above setting is for the calling station only. A called party
~automatically sends an answer back signal without any preset-
~tings.
~AIIIC-4008A's operating on the same operating channel will an-
~swer back to your call in your communication area.
. Low battery indicator
.. Appears when the battery is nearing
exhaustion.
.A warning beep is emitted at power
ON.
.. Appears and blinks when battery re-
placement is necessary.
--- -
OTHERFUNCTIONS 8
. LCD backlight
.. Automatically turns ON for 5 sec. when you push any key, ex-
cept [PTT].
.Auto power save
.. The power save function reduces the current drain to conserve
battery power.
- The function automatically turns ON when no operation is per-
formed or no signal is received for 5 sec.
. Resetting the transceiver
Initialize the operating conditions before
using the transceiver for the first time, or if
the function display shows erroneous in-
formation.
.. While pushing [DOWN]/["'] and
[MODE], push [POWER] ON to initial-
ize the transceiver.
~CAUTION: Resetting the transceiver returns all settings to their
~ defaults.

8OTHER FUNCTIONS
. Optional HM-75A functions
The optional HM-75A allows you to remotely select operating chan-
nels, open the squelch, etc. The switches on the HM-75A function
as follows.
~CAUTION: When connecting the HM-75A to the transceiver,
~make sure that power to the transceiver is turned OFF, other-
~wise the transceiver may malfunction.
PTTswitch ~O@
Lock switch:
Locks all
switches
except [PH]
911SPECI FICATIONS
GENERAL
. Frequencycoverage: 462.5625-467.7125 MHz
. Mode : FM(8K50F3E)
. No.of operatingch. : 14(simplex)
.Frequencystability: :1:4ppm;:1:1.7kHz
. Frequencyresolution: 25 kHz
. Powersupplyrequirement:4.5 V (AAx 3)or BP-202
. Currentdrain : 400mAtypical
. Operatingtemp.range: +14'F to +122'F(-10'C to +50'C)
. No.of CTCSSfreq. : 38
. Dimensions :55.5(W)x102.5(H)x26.5(D)mm
(projections not included)
. Weight : 180g (including3AAbatteries)
TRANSMITTER
.Outputpower
. Maximum deviation
. Spurious emissions
. Ext. mic. connector
: Less than 500 mW ERP
::1:2.5kHz
:Less than -40dB
: 3-conductor 2.5 (d) mm/2.2 kQ
RECEIVER
. Receive system
. Sensitivity
(12 dB SINAD)
.Selectivity : More than 8.5 kHz/-6 dB
.Spurious and image rejection ratio: More than 40 dB
.Adjacent ch. selectivity: More than 40 dB
. Intermodulation rejection ratio: More than 40 dB
.Audio output power : More than 100 mW at 10 %
(at 4.5 V DC) distortion with an 8 Q load
.Ext. speaker connector: 2-conductor 3.5 (d) mm/8 Q
: Double-conversion superheterodyne
: Less than 0.2 ~V
All stated specifications are subject to change without
notice or obligation,
SWITCH NORMAL While holding [PTT]
ASmart-Ring Nofunction
BOpensquelch Nofunction
UP Changethe oper-
6ating channel Smart-Ring
numberup.
DOWN Changethe oper-
\l ating channel Call-Ring
number down.

.
-10OPTIONS
0 Battery packs
BP-202 Ni-Cd BATTERY PACK
3.6V/700 mAh rapid charge battery pack. (p. 6-7)
0 Chargers
BC-119 DESKTOP CHARGER + AD-89 DESKTOP CHARGER
ADAPTER
Rapidly charge battery packs in 1 to 1.5 hrs. An AG' adapter is
packed with the BC-119. The AD-89 must be used with the BC-119
for charging the battery pack. The CP-17L or OPC-515 can be used
instead of the supplied AC adapter. (p. 7)
BC-119L DESKTOPCHARGER
AD-89 BATTERY PACK ADAPTER attached to BC-119 DESKTOP
CHARGER. (p. 7)
0 Speaker-microphones
HM-46
~M~4
GJ HS_85HEADSET
.PTT switch
".VOX
. One-touch PTT for
- ",,' , hands-free operation
Remote control
capability.
(see p. 17 for details)
21
--
1111
MEMO
. Channelnumberand group
number
Use this page to record your group operating channel number
(see p. 9) and group channel number (p. 11)for your reference.
Operating channel number
Group code number
~ Channel frequency list
1
2
3
4
5
6
7
8
9
10
11
12
13
14
462.5625
462.5875
462.6125
462.6375
462.6625
462.6875
462.7125
467.5625
467.5875
467.6125
467.6375
467.6625
467.6875
467.7125
22

..
-12WARRANTY
ICOM LIMITED WARRANTY
ICOrv], Incorporated, is proud of the technology within and workmanship
quality of its products.
ICOM AMERICA, INC., the authorized ICOM distributor, warrants this ICOM
FRS (Family Radio Service) radio, to be free from defects in material or
workmanship for a period of one (1) year from the date of purchase. The
authorized distributor will, at its option, replace or repair parts found defective
and return the equipment or parts to the owner.
The above-stated warranty is for the original owner and the undertaking to
repair does not apply to an ICOM FRS radio which, in ICOM America's ex-
clusive judgment, has failed due to misuse, corrosion, accident, natural dis-
aster, alteration, unauthorized or improper installation, repair, or modification.
The owner is responsible for the transportation costs of the equipment to
and from the distributor for the warranty repairs set out above.
ANY IMPLIED WARRANTIES, INCLUDING WARRANTiES OF MER-
CHANTABILITY AND FITNESS FOR A PARTiCULAR PURPOSE,
SHALL BE LIMITED IN DURATiON TO THE PERIOD OF TIME SET
FORTH ABOVE. ICOM AMERICA, INC., SHALL NOT BE RESPON-
SIBLE FOR INCIDENTALOR CONSEQUENTIAL DAMAGES. SOME
STATESDO NOTALLOW LIMITATIONSON HOW LONGAN IMPLIED
WARRANTY LASTS OR THE EXCLUSION OR LIMITATIONOF INCi-
DENTALOR CONSEQUENTIAL DAMAGES, SO THE ABOVE LIMITA-
TIONS OR EXCLUSION MAYNOTAPPLYTO YOU. Thiswarrantygives
youspecificlegalrights,andyoumayalsohaveotherrightswhichvaryfrom
statetostate.ThisistheonlyexpresswarrantyapplicableandICOMAMER-
ICA,INC.neitherassumesnor authorizesanyonetoassumefor it anyother
expresswarranty.
23
WARRANTY 12
WARRANTY SERVICE INSTRUCTIONS
1. If you have any difficulty, send your equipment to the appropriate address
below or to the nearest Authorized ICOM Warranty Service Center; (how-
ever, service address and return address must be within boundaries of
the same country). Equipment should be sent preferably in the original
carton, without accessories, prepaid, with a copy of the dated pur-
chase receipt and a brief explanation of the difficulty you have experi-
enced. Prior authorization is not required. Send to the attention of the
Service Department.
2. In order to qualify for warranty service, you must be the original owner
and the unit returned for service must include proof of purchase (i.e., copy
of dated invoice).
3. Include accessories only if your specific situation indicates an accessory
related difficulty exists, otherwise the ICOM Service Center shall assume
no liability for the loss or safe return of any accessory items. Itemize these
accessories on the note of explanation.
4. If the requested repairs or services are within the terms of the warranty,
your equipment will be returned after repair to any designated point within
the boundaries of the country in which the unit was sent for repair.
5. If the requested repairs or services are not within the terms of the war-
ranty or if you fail to provide acceptable evidence of date of purchase,
then service costs, parts, and return freight will be charged.
Model
Date of Purchase
Serial Number
Dealer Name
ICOMAMERICA, INC.
2380 - 116th Ave. N.E., Bellevue, WA 98004
425-454-8155
web address: www.icomamerica.com 24
Other manuals for IC-4008A
3
Table of contents
Other Icom Radio manuals

Icom
Icom IC-F43TR User manual

Icom
Icom IC-7100 User manual

Icom
Icom IC-2A User manual

Icom
Icom iF610 User manual

Icom
Icom Two-Way Radios Instruction Manual

Icom
Icom IC-F4TR User manual

Icom
Icom IC-R71A User manual

Icom
Icom IC-SAT100M Installation guide

Icom
Icom 9000 F70 Series Installation guide

Icom
Icom IC-2200H User manual

Icom
Icom IC-F14 Installation and operating instructions

Icom
Icom ID-800H User manual

Icom
Icom RMK-4 User manual

Icom
Icom F70 Series Installation guide

Icom
Icom IC-F1020 User manual

Icom
Icom IC-910H User manual

Icom
Icom IC-F1010 User manual

Icom
Icom M302 Instruction manual

Icom
Icom F3021 Owner's manual

Icom
Icom IC-R70 User manual