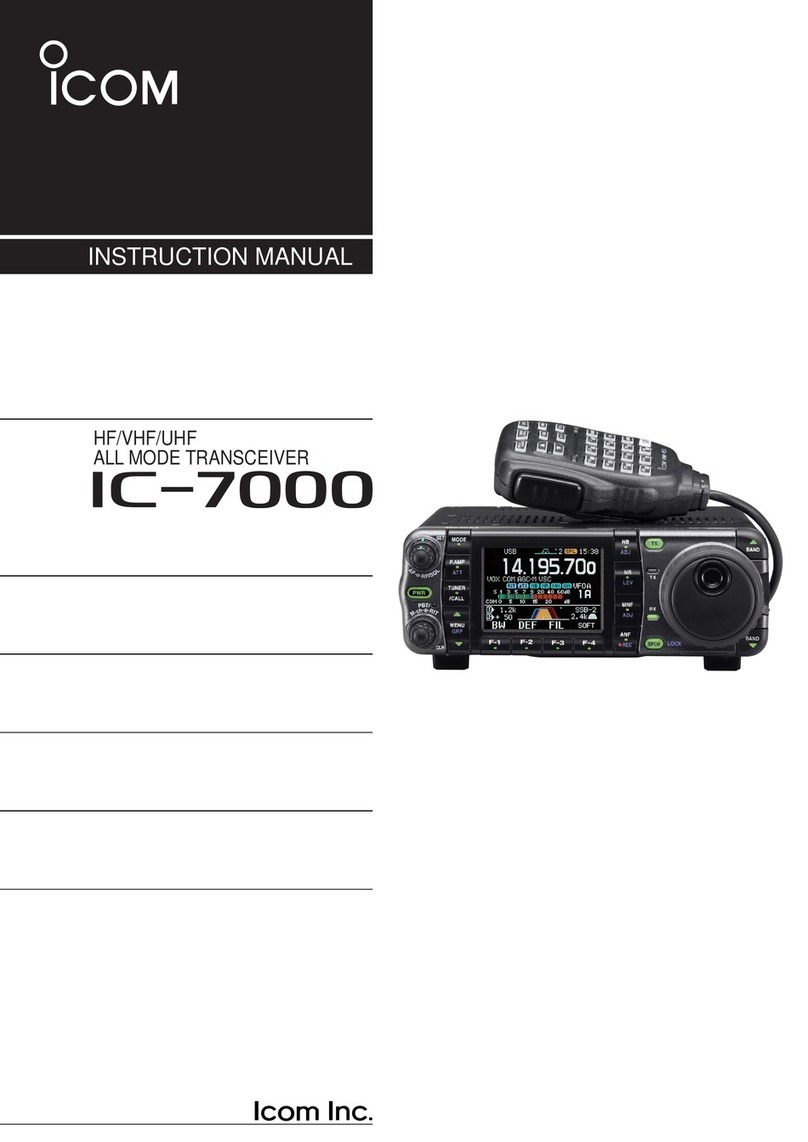
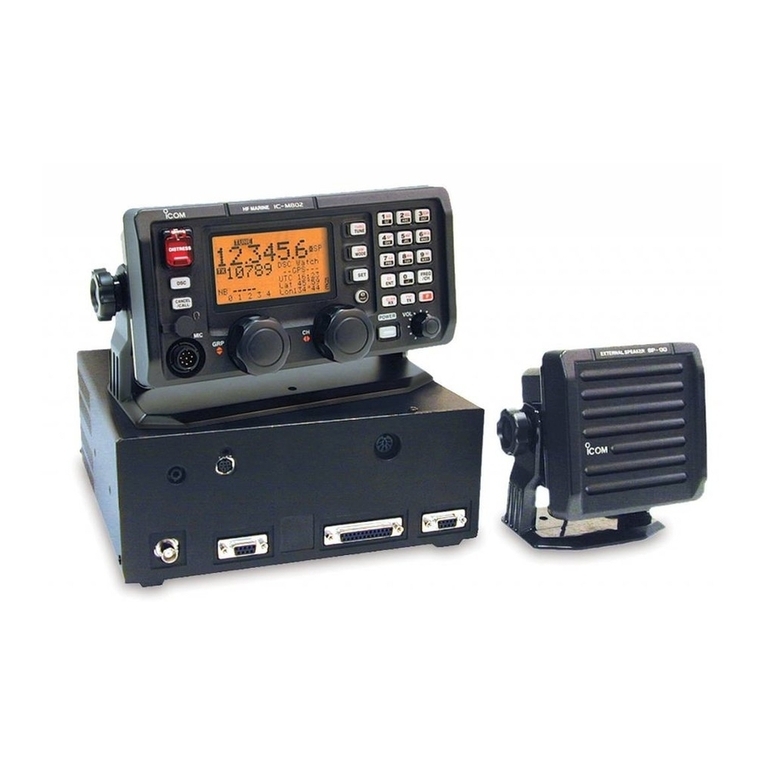
Icom i9100 User manual

HF/VHF/UHF TRANSCEIVER
i9100
INSTRUCTION MANUAL

i
FOREWORD
Thank you for making the IC-9100 your radio of
choice. We hope you agree with Icom’s philosophy of
“technology first.” Many hours of research and devel-
opment went into the design of your IC-9100.
FEATURES
❍The IC-9100 fully covers HF to 1200 MHz*1multi-
band in one transceiver
❍Independent dual receivers in one radio; receives
two different bands simultaneously
❍Optional D-STAR (Digital Smart Technology for Am-
ateur Radio) allows you to operate in the DV mode*2
for digital voice and low speed data communication.
Linking of D-STAR repeaters over the Internet al-
lows you to communicate virtually anywhere.
❍Satellite mode operation
*1
The optional UX-9100 is required for 1200 MHz fre-
quency band operation.
*2
The optional UT-121 is required for the DV mode opera-
tion.
IMPORTANT
READ THIS INSTRUCTION MANUAL
CAREFULLY before attempting to operate the
transceiver.
SAVE THIS INSTRUCTION MANUAL. This
manual contains important safety and operating
instructions for the IC-9100.
EXPLICIT DEFINITIONS
WORD DEFINITION
RDANGER! Personal death, serious injury or an ex-
plosion may occur.
RWARNING! Personal injury, fire hazard or electric
shock may occur.
CAUTION Equipment damage may occur.
NOTE If disregarded, inconvenience only.No risk
of personal injury, fire or electric shock.
Spurious signals may be received near some fre-
quencies.
These are created in the internal circuit and does not
indicate a transceiver malfunction.
SUPPLIED ACCESSORIES
The transceiver comes with the following accessories.
Qty.
q Hand microphone ............................................ 1
w DC power cable*1............................................ 1
e Spare fuse (ATC 5 A) ...................................... 1
r Spare fuse (ATC 30 A) .................................... 2
tACC cable.........................................................1
y6.3 (d) mm plug.................................................1
uDouble-sided tape (see page 176)....................1
iFerrite bead*2....................................................1
*1D iffers depending on the version.
*2Not supplied with the non-European versions.
q
e
y
t
w
r
u
wi
For European versions
(see p. 27 for installation details)
FCC INFORMATION
• FOR CLASS B UNINTENTIONAL RADIATORS:
This equipment has been tested and found to comply
with the limits for a Class B digital device, pursuant to
part 15 of the FCC Rules. These limits are designed
to provide reasonable protection against harmful
interference in a residential installation. This equip-
ment generates, uses and can radiate radio frequency
energy and, if not installed and used in accordance
with the instructions, may cause harmful interference
to radio communications. However, there is no guar-
antee that interference will not occur in a particular
installation. If this equipment does cause harmful
interference to radio or television reception, which can
be determined by turning the equipment off and on,
the user is encouraged to try to correct the interfer-
ence by one or more of the following measures:
•Reorientorrelocatethereceivingantenna.
•Increasetheseparationbetweentheequipment
and receiver.
•Connecttheequipmentintoanoutletona
circuit different from that to which the receiver is
connected.
•Consultthedealeroranexperiencedradio/TV
technician for help.

PRECAUTIONS
RDANGER HIGH RF VOLTAGE! NEVER
attach an antenna or internal antenna connector
during transmission. This may result in an electrical
shock or burn.
RWARNING! NEVER operate the transceiver
with a headset or other audio accessories at high
volume levels. Hearing experts advise against continu-
ous high volume operation. If you experience a ringing
in your ears, reduce the volume or discontinue use.
RWARNING! NEVER operate or touch the
transceiver with wet hands. This may result in an
electric shock or damage to the transceiver.
RWARNING! NEVER apply AC power to the
[DC13.8V] socket on the transceiver rear panel. This
could cause a fire or damage the transceiver.
RWARNING! NEVER cut the DC power cable
between the DC plug and fuse holder. If an incorrect
connection is made after cutting, the transceiver may
be damaged.
RWARNING! NEVER apply more than 16 V
DC to the [DC13.8V] socket on the transceiver rear
panel, or use reverse polarity. This could cause a fire
or damage the transceiver.
RWARNING!
NEVER let metal, wire or other
objects protrude into the transceiver or into connectors
on the rear panel. This may result in an electric shock.
RWARNING! Immediately turn OFF the trans-
ceiver power and remove the power cable if it emits
an abnormal odor, sound or smoke. Contact your
Icom dealer or distributor for advice.
RWARNING! NEVER put the transceiver in
any unstable place (such as on a slanted surface or
vibrated place). This may cause injury and/or damage
to the transceiver.
CAUTION: NEVER change the internal settings of
the transceiver. This may reduce transceiver perfor-
mance and/or damage to the transceiver.
In particular, incorrect settings for transmitter circuits,
such as output power, idling current, etc., might
damage the expensive final devices.
The transceiver warranty does not cover any prob-
lems caused by unauthorized internal adjustment.
CAUTION: NEVER block any cooling vents on
the top, rear, sides or bottom of the transceiver.
CAUTION: NEVER expose the transceiver to
rain, snow or any liquids.
CAUTION:
NEVER install the transceiver in a
place without adequate ventilation. Heat dissipation
may be reduced, and the transceiver may be damaged.
DO NOT use harsh solvents such as benzine or
alcohol when cleaning, as they will damage the trans-
ceiver surfaces.
DO NOT push the PTT switch when you don’t actu-
ally desire to transmit.
DO NOT use or place the transceiver in areas with
temperatures below ±0°C (+32°F) or above +50°C
(+122°F).
DO NOT place the transceiver in excessively dusty
environments or in direct sunlight.
DO NOT place the transceiver against walls or
putting anything on top of the transceiver. This may
overheat the transceiver.
Always place unit in a secure place to avoid inadver-
tent use by children.
BE CAREFUL! If you use a linear amplifier, set
the transceiver’s RF output power to less than the
linear amplifier’s maximum input level, otherwise, the
linear amplifier will be damaged.
BE CAREFUL! The transceiver will become hot
when operating the transceiver continuously for long
periods of time.
USE only the specified microphone. Other manufac-
turers’ microphones have different pin assignments,
and connection to the IC-9100 may damage the
transceiver or microphone.
During maritime mobile operation, keep the trans-
ceiver and microphone as far away as possible from
the magnetic navigation compass to prevent errone-
ous indications.
Turn OFF the transceiver’s power and/or disconnect
the DC power cable when you will not use the trans-
ceiver for long period of time.
For U.S.A. only
CAUTION: Changes or modifications to this device,
not expressly approved by Icom Inc., could void your
authority to operate this device under FCC regula-
tions.
Icom, Icom Inc. and the Icom logo are registered trademarks of
Icom Incorporated (Japan) in Japan, the United States, the United
Kingdom, Germany, France, Spain, Russia and/or other countries.
Microsoft, Windows and Windows Vista are registered trademarks
of Microsoft Corporation in the United States and/or other countries.
All other products or brands are registered trademarks or trade-
marks of their respective holders. ii
1
2
3
4
5
6
7
8
9
10
11
12
13
14
15
16
17
18
19
20
21

iii
DAbout the D-STAR system
In the original D-STAR (Digital Smart Technologies for
Amateur Radio) plan, JARL envisioned a system of
repeaters grouped together into Zones. A zone would
be a group of up to 4 repeaters, linked by 10 GHz
“backbone” microwave Link repeaters.Each individual
repeater would be call an Area repeater, and would
be the Access repeater to begin communications.
Calls could be made to other Area repeaters within
the Zone, using the backbone Link repeater system.
One of the repeaters in the Zone would have an In-
ternet connection, and so in addition to being an Area
repeater, it also became the Zone Gateway repeater.
The Internet gateway provided a way to communicate
to other Zones, giving access to the Area repeaters
within them, and eventually to the entire world.
Call signs are the heart of D-STAR operation.Four call
signs are used:
•MY :Thisisyourowncallsign.Youenteritonceand
then basically leave it set, with only a few ex-
ceptions.
•UR :ThisisyourDestinationcallsign;thatoftheac-
tual ham or repeater you wish to contact.CQC-
QCQ can also be used to make a general call.
•R1 :ThisistheArea/Accessrepeatercallsign;the
one you enter to begin your D-STAR repeater
communication.
•R2 :This is the Link/Gateway repeater call sign;
the repeater and Internet connection you go
through when you want contact a ham, or an-
other repeater, anywhere else in the world.
Call sign routing, one of the main features of D-STAR,
allows hams to contact other hams, or other repeat-
ers using just the ham’s or repeater’s call sign. The
D-STAR system will automatically route your signal to
the desired ham or repeater. Call sign capture allows
hams using an Icom radio to “capture” a call sign and
automatically program their radio for a reply.
Like other communication modes, you can operate
simplex D-STAR with other hams, for direct commu-
nication.
See pages 85 to 120 for the D-STAR operation de-
tails.
NOTE: The optional UT-121 is required for the D-
STAR operation with the IC-9100.
• D-STAR system outline
Station A
Station C Station D
Repeater A
Repeater D
440 MHz
440 MHz
Repeater C
10 GHz
Zone
Zone
Area
Station B
Repeater B
10 GHz
440 MHz
440 MHz
Internet
Internet
D-STAR INTRODUCTION

iv
1
2
3
4
5
6
7
8
9
10
11
12
13
14
15
16
17
18
19
20
21
Area 1
Zone A
Repeater 1 Area 2 Repeater 2 Area 3 Repeater 3 Area 4 Repeater 4
Zone B
Area 7
Repeater 6
Area 6
Repeater 7
Area 8
Repeater 8
Area 5
Repeater 5
InternetInternet
(Gateway)
(Gateway)
Area:
The Area is the communication range
that is covered by a single repeater.
The repeater is called an area, or
access repeater in the D-STAR system.
Zone:
The Zone is composed of several areas, that are linked
by a 10 GHz microwave link.
Areas 1 to 4 and 5 to 8 make up a zone in the example
above.
Link repeater:
The microwave (10 GHz) link repeater
provides linking with another repeater
site (Area) for zone construction.
Gateway repeater:
Gateway repeaters provide communications between
different zones via the internet.
Repeater 3 and 6 are gateway repeaters at the
example above.
D D-STAR system description

v
TABLE OF CONTENTS
FOREWORD..............................................................i
IMPORTANT...............................................................i
EXPLICIT DEFINITIONS............................................i
SUPPLIED ACCESSORIES.......................................i
FCC INFORMATION..................................................i
PRECAUTIONS......................................................... ii
D-STAR INTRODUCTION........................................ iii
D About the D-STAR system ................................iii
D D-STAR system description..............................iv
TABLE OF CONTENTS ............................................v
1 PANEL DESCRIPTION...................................1–21
■ Front panel........................................................1
■ Rear panel.......................................................10
DACC socket information ..............................13
DDATA2 socket information ...........................14
■ LCD display.....................................................15
■ Function display ..............................................19
DM1 (Menu 1) display....................................19
DM2 (Menu 2) display....................................19
DM3 (Menu 3) display....................................19
DD1 display...................................................19
DD2 display...................................................19
DFunction keys on M1 (Menu 1) display .......20
DFunction keys on M2 (Menu 2) display .......20
DFunction keys on M3 (Menu 3) display .......21
DFunction keys on D1 display.......................21
DFunction keys on D2 display.......................21
2 INSTALLATION AND CONNECTIONS........22–30
■ Selecting a location.........................................22
■ Grounding .......................................................22
■
Electronic keyer and microphone connections
..22
■ Antenna connection ........................................23
■ Required connections .....................................24
DRear panel..................................................24
■ Advanced connections....................................25
DFront panel..................................................25
DRear panel..................................................25
■ External keypad connections..........................26
■ Optional and the external units connections...26
■ Power supply connections...............................27
■ Connecting a DC power supply.......................27
DConnecting the PS-126
DCPOWERSUPPLY .................................27
DConnecting a non-Icom
DCPOWERSUPPLY .................................27
■ Linear amplifier connections ...........................28
DConnecting the IC-PW1/PW1EURO...........28
DConnecting a non-Icom linear amplifier......29
■ External antenna tuner connection.................29
DConnecting the AH-4 ..................................29
■ Microphone connector information..................30
■ Microphones....................................................30
DHM-36.........................................................30
DSM-50 (Option)...........................................30
3 BASIC OPERATION.....................................31–46
■ Before first applying power..............................31
■ Turning ON (Partial resetting)..........................31
■ MAIN and SUB Bands.....................................32
DMAIN/SUB Band selection..........................32
DSUB Band display.......................................32
DSUB Band setting mode operation .............33
DThe SUB Dial function.................................33
■ VFO description...............................................34
D Selecting the VFO A/B ...............................34
D VFO equalization........................................34
■ Selecting VFO/memory mode.........................34
■ Selecting a frequency band.............................35
DUsing the band stacking registers...............35
■ Frequency setting............................................37
DTuning with [MAIN DIAL].............................37
DDirect frequency entry with the keypad.......37
DQuick Tuning function..................................38
DSelecting ‘kHz’ step.....................................38
DSelecting 1 Hz step.....................................39
DAuto tuning step function............................39
D1⁄4tuning step function................................39
DAbout the 5 MHz frequency band operation
(only USA version)......................................40
DBand edge warning beep............................41
DProgramming the user band edge..............42
■ Operating mode selection...............................43
■ Squelch and receive (RF) sensitivity...............44
■ Volume setting.................................................45
■ Voice synthesizer operation.............................45
■ Meter Display selection...................................45
■ Basic transmit operation..................................46
DTransmitting.................................................46
DMicrophone gain adjustment.......................46
4 RECEIVE ANDTRANSMIT..........................47–68
■ Operating SSB................................................47
■ Operating CW .................................................48
DAbout the CW reverse mode.......................49
DAbout CW pitch control...............................49
DAbout keying speed.....................................49
DCW sidetone function..................................49

TABLE OF CONTENTS
vi
1
2
3
4
5
6
7
8
9
10
11
12
13
14
15
16
17
18
19
20
21
■Electronic keyer functions ...............................50
DMemory keyer menu construction...............50
DMemory keyer send menu...........................51
DEditing a memory keyer..............................52
DContest number Set mode..........................53
DKeyer Set mode ..........................................54
■OperatingRTTY(FSK)....................................56
■RTTYfunctions................................................57
DConstructionofRTTYmenu .......................57
DAboutRTTYreversemode .........................58
DTwin Peak Filter...........................................58
DRTTYdecoder.............................................59
DRTTYSetmode ..........................................60
■ Operating AM/FM............................................61
■ Tone squelch operation ...................................62
■ DTCS operation ..............................................63
■ Tone scan/DTCS code scan operation............64
■Repeater operation .........................................65
DRepeater access tone frequency setting.....65
DOne-touch repeater function.......................66
DTransmit frequency monitor check...............66
D1750 Hz tone burst......................................66
DSetting the Auto Repeater ranges
(U.S.A. and Korea versions only) ................67
DTurning ON the Auto Repeater function
(U.S.A. and Korea versions only) ................68
DStoring a non standard repeater ................68
5 FUNCTIONS FOR RECEIVE........................69–77
■ AFC operation.................................................69
■ RIT function.....................................................69
DRIT monitor function....................................69
■ Simple band scope..........................................70
■ Preamplifier.....................................................71
■ Attenuator........................................................71
■ AGC function...................................................72
DAGC speed selection..................................72
DSetting the AGC time constant....................72
■ IF filter selection..............................................73
DIF filter selection..........................................73
DFilter passband width setting ......................73
D1st IF filter selection....................................74
DIF (DSP) filter shape...................................74
■ Twin PBT operation .........................................75
■ Noise Blanker..................................................76
DNB Set mode...............................................76
■ Meter peak hold function.................................76
■ Noise Reduction..............................................77
■ Dial Lock function............................................77
■ Notch function.................................................77
6 FUNCTIONS FORTRANSMIT.....................78–84
■ VOX function....................................................78
DUsing the VOX function...............................78
DAdjusting the VOX function..........................78
■ Break-in function.............................................79
DSemi Break-in operation .............................79
DFull Break-in operation................................79
■ Speech compressor........................................80
■
Transmit filter width selection ............................80
■ ∂TX function ...................................................81
D∂TX Monitor function..................................81
■ Monitor function...............................................81
■ Split frequency operation ................................82
■ Quick Split function .........................................83
DSplit frequency offset setting.......................83
DSplit Lock function.......................................83
■ Measuring SWR..............................................84
DSpot measurement......................................84
DPlot measurement.......................................84
7 DV MODE PROGRAMMING........................ 85–92
■ Call sign programming....................................85
D“MY”(Yourowncallsign)programming ......85
D“UR” (Destination call sign) programming...86
D“R1” (Access/Area repeater call sign) and
“R2” (Link/Gateway repeater call sign)
programming...............................................87
■ Repeater list....................................................88
DRepeater list contents.................................88
■
Repeater list programming..................................89
■ Editing a repeater list ......................................91
■
Clearing a repeater list........................................92
8 DV MODE OPERATION .............................93–120
■ Digital mode operation....................................93
■ Call sign setting...............................................93
■ Receiving a D-STAR repeater.........................94
■ Received call signs..........................................95
DDesired call record display..........................95
DOne-touch reply using the call record.........96
■ Copying the call sign.......................................97
DCopying the call sign memory contents......97
DCopying the call record contents
into call sign memory..................................98
■ DR (D-STAR Repeater) mode operation.........99
DCommunication Form..................................99
DAccess repeater scan ...............................100
■ Calling CQ.....................................................101
DStoring the set data...................................102
vii
TABLE OF CONTENTS
■Calling a specific station................................103
DConfirming the setting...............................105
DSettings for “UR” and “R2,” depending on the
communication form..................................105
■ Simplex operation using the VFO..................106
DMaking a simplex CQ call or a call to
an individual station ..................................106
■ Repeater operation using the VFO................107
DMaking a CQ call or a call to an individual
station through your local area (access)
repeater (Local Area call)..........................107
DMaking a CQ call or a call to an individual
station through a link repeater in the same
zone (Zone call)........................................108
DMaking a CQ call or a call to an individual
station through gateway repeaters
(Gateway call)...........................................109
DSettings for “UR” and “R2,” depending on the
communication form..................................110
■ Message operation........................................111
DTX message programming........................111
DMessage Transmission..............................112
DRX message display.................................112
■ DV automatic detection.................................113
■ Automatic Reply function...............................113
■ Digital squelch functions ...............................114
■ EMR communication.....................................115
DAdjusting the EMR AF level ......................115
■ BK mode communication..............................116
■ Low-speed data communication....................117
DConnection................................................117
DLow-speed data communication application
setting .......................................................117
D
Low-speed data communication operation
. 117
■ Packet loss indication....................................117
■ DV Set mode description...............................118
DDV Set mode settings ...............................118
9 GPS/GPS-A OPERATION........................ 121–137
■ GPS operation...............................................121
DGPS screen construction..........................121
DGPS data communication.........................122
DSentence formatter setting........................122
DPosition display.........................................123
D
Saving your own or received position data
. 124
DDisplay the Grid Locator information.........124
DGPS automatic transmission.....................124
DGPS message programming.....................125
DReceived GPS message display...............126
■GPS memory operation.................................127
DAdd a GPS memory..................................127
DEdit a GPS memory..................................129
DGPS alarm setting.....................................130
DGPS memory clearing...............................131
■ GPS Set mode..............................................132
■ GPS-A operation...........................................137
DGPS-A function.........................................137
DGPS-A code details...................................137
10MEMORY OPERATION............................138–144
■ General description.......................................138
DMemory channel contents.........................138
■ Memory channel selection............................139
DSelection in the VFO mode.......................139
DSelection in the Memory mode.................139
■Call channel selection...................................139
■ Memory channel programming .....................140
DProgramming in theVFO mode ................140
DProgramming in the Memory mode...........140
■Call channel programming............................141
■ Memory clearing ...........................................141
■ Memory contents copying.............................142
DCopying in the VFO mode.........................142
DCopying in the Memory mode...................142
■Memory name programming.........................143
■Memo pad function........................................144
D
Writing the displayed data into memo pads
. 144
DCalling up the memo pads........................144
11SCANS .....................................................145–152
■ Scan types ....................................................145
■ Preparation....................................................146
■ Voice Squelch Control function .....................146
■ Scan set mode..............................................147
■Scan edges programming.............................148
■ Programmed scan/Fine programmed scan
(VFO mode) ..................................................149
DAbout the Fine programmed scan.............149
■ Memory scan (Memory mode)......................150
DMemory scan............................................150
DMode Select scan .....................................150
D
Setting/Cancelling Select Memory channels
. 151
DSelect Memory scan.................................151
■ ∂F scan and Fine ∂F scan ...........................152
DAbout the Fine ∂F scan............................152

viii
1
2
3
4
5
6
7
8
9
10
11
12
13
14
15
16
17
18
19
20
21
TABLE OF CONTENTS
12SATELLITE OPERATION.........................153–157
■ Satellite communications outline...................153
■ Satellite notes................................................153
■ Selecting the satellite mode..........................153
DTransferring the VFO frequencies to the
satellite VFO..............................................153
■ Setting the satellite VFO................................154
■ Tracking selection..........................................154
DNormal tracking.........................................154
DReverse tracking.......................................154
■ Satellite memory ...........................................155
DSatellite memory selection........................155
DSatellite memory programming.................155
■ Preparation....................................................156
■ Satellite operation .........................................157
13ANTENNATUNER OPERATION ............. 158–160
■ Antenna connection and selection................158
■ Antenna tuner operation................................159
DTuner operation.........................................159
DManual tuning ...........................................159
■ Optional external tuner operation..................160
14SET MODE...............................................161–170
■ Set mode description ....................................161
DThe Set mode settings..............................161
■ Tone control Set mode description................169
DThe Tone control Set mode settings..........169
15DATA COMMUNICATION.........................171–173
■ Connections..................................................171
DWhen connecting to [DATA2].....................171
DWhen connecting to [ACC]........................171
DWhen connecting to [MIC].........................171
■ Packet (AFSK) operation...............................172
D
Frequency display during AFSK operation
..172
■ Data transmission speed...............................173
■ Adjusting the TNC output level......................173
DUsing a level meter or synchroscope........173
DNot using a measuring device...................173
16OPTION INSTALLATION ......................... 174–176
■ Opening the transceiver’s case.....................174
■ UX-9100 1200 MHz b a n d u n i t installation......175
■ FL-430/FL-431 1s t if f i lt e r installation........176
■ UT-121 digital u n i t installation.....................176
17MAINTENANCE .......................................177–182
■ Troubleshooting.............................................177
DTransceiver power.....................................177
DTransmit and receive.................................177
DScanning...................................................178
DDisplay......................................................178
■ Frequency calibration (approximate).............179
■ Main dial tuning tension adjustment..............179
■ Fuse replacement .........................................180
DDC power cable fuse replacement............180
DCircuitry fuse replacement........................180
■ Resetting the CPU ........................................181
DPartial reset...............................................181
DAll reset.....................................................181
■ Data cloning..................................................182
DCloning between transceivers...................182
DCloning using a personal computer ..........182
18CONTROL COMMAND............................183–196
■ Remote jack (CI-V) information.....................183
DCI-V connection example..........................183
DData format...............................................183
DCommand table ........................................184
DData content description...........................190
19SPECIFICATIONS....................................197–198
■ General .........................................................197
■ Transmitter.....................................................197
■ Receiver........................................................198
■ Antenna tuner................................................198
20OPTIONS..................................................199–200
21CE.............................................................201–202

1
1
PANEL DESCRIPTION
qPOWER SWITCH [POWER] (p.31)
➥Push to turn ON the transceiver power.
•First,conrmtheDCpowersourceisturnedON.
➥Hold down for 1 second to turn OFF the power.
wTRANSMIT SWITCH [TRANSMIT] (p.46)
Push to select transmit or receive.
•While transmitting, the MAIN Band’sTX/RX indica-
tor (i) lights red. Only on the satellite mode, the SUB
Band’s TX/RX indicator (!6) lights red.
•Whilereceivingorwhenthesquelchopens,theindica-
tor lights green.
eANTENNATUNER SWITCH [TUNER] (p. 159)
(Frequency band: HF/50 MHz)
➥Push to turn the internal antenna tuner ON or
OFF (bypass).
•“ ” appears when the tuner is turned ON.
•Theinternalantennatunersettingscanbememo-
rized in each frequency band.
➥Hold down for 1 second to manually start the an-
tenna tuner.
•Ifthetunercannottunetheantennawithin20sec-
onds, the tuning circuit is automatically bypassed.
r
ANTENNA•METER SWITCH [ANT•METER]
ANTENNA SWITCH Operation
(p. 158)
(Frequency band: HF/50 MHz)
➥Push to select either the ANT1 or ANT2 connec-
tor.
METER SWITCH Operation
(p. 45)
(Frequency band: ALL)
➥Hold down for 1 second to toggle the transmit
meter function between ALC, COMP and SWR.
tHEADPHONE JACK [PHONES]
Plug in standard stereo headphones (impedance: 8
to 16 ø).
•Outputpower:Morethan5mWwithan8øload.
•Whenheadphonesareconnected,theinternalspeaker,
and any external speaker, are disabled.
•TheMAINandSUBBandaudiocanbemixedorsepa-
rated when using stereo headphones, depending on
the
“Phone Separate” option in the Set mode
. (p. 166)
yELECTRONIC KEYER JACK [ELEC-KEY]
Plug in a bug or paddle type key to use the internal
electronic keyer for CW operation. (p.22)
•SetthekeyertypetoELEC-KEY,BUGKEYorStraight
key in the “KeyerType” item of the Keyer Set mode.
•Whenastraightkeyisconnected,“Straightkey”must
be selected in the “Keyer Type” item of the Keyer Set
mode. (p. 55)
•Astraightkeyjackislocatedontherearpanel.See
[KEY]onpages11and22.
•You can reverse the keyer paddle polarity (dot and
dash) in
the “Paddle Polarity” item
of
the Keyer Set mode.
(p. 55)
•Fourkeyermemorychannelsareavailableforyourcon-
venience. (p. 51)
(dot)
(com)
(dash)
uMICROPHONE CONNECTOR [MIC]
Plug in the supplied or an optional microphone.
•Seepage199forappropriatemicrophones.
•Seepage30formicrophoneconnectorinformation.
i MAIN BAND TX/RX INDICATOR
➥Lights green when the squelch opens, or a signal
isreceivedontheMAINBand;lightsredduring
transmit.
➥Blinks green when an off-frequency signal is re-
ceived, depending on the “FM/DV Center Error”
option in the Set mode.(p. 162)
■ Front panel
t
i !0
y
q
e
r
u
o
!2!1
w

2
1
PANEL DESCRIPTION
1
2
3
4
5
6
7
8
9
10
11
12
13
14
15
16
17
18
19
20
21
o MAIN BAND RF GAIN CONTROL/
SQUELCH CONTROL [RF/SQL]
(outercontrol;p.44)
Rotate to adjust the RF gain and squelch threshold
level for the MAIN Band.
The squelch removes noise output to the speaker
when no signal is received. (closed condition)
•ThesquelchisparticularlyeffectiveforAMandFM,but
also works in other modes.
•The12to1o’clockpositionisrecommendedfor the
most effective use of the [RF/SQL] control.
•[RF/SQL] operates as only an RF gain control in SSB,
CWandRTTY(Squelch is fixed open), or a squelch
control in AM, FM and DV (RF gain is fixed at maxi-
mum sensitivity), when “Auto” is selected as the
“RF/
SQL Control” item option in
the Set mode. (p. 162)
• When used as an RF gain/squelch control
Maximum
RF gain
S-meter
squelch
Noise squelch (FM/DV modes)
Squelch is
open.
RF gain
adjustable
range
Recommended level
• When used as an RF gain control
(Squelchisxedopen;SSB,CWandRTTYonly)
Minimum RF gain
Adjustable
range
Maximum
RF gain
While rotating the RF gain control, a faint noise may
be heard. This comes from the DSP unit and does
not indicate an equipment malfunction.
• When used as a squelch control
(RF gain is fixed at maximum.)
Squelch is
open. S-meter
squelch
S-meter squelch
threshold
Noise squelch
threshold
(FM mode)
Shallow Deep
Noise squelch (FM/DV modes)
!0 MAIN BAND AF CONTROL [AF]
(innercontrol;p.45)
Rotate to adjust audio output level to the speaker or
headphones on the MAIN Band.
Increases
Decreases
!1 NOTCH SWITCH [NOTCH] (p. 77)
(Mode = Auto notch : SSB/AM/FM
Manual notch : SSB/CW/RTTY/AM)
➥In the SSB and AM modes, push to toggle the
notch function between auto, manual and OFF.
•EithertheAutoorManualnotchfunctioncanbe
turned OFF in
the “[NOTCH] SW” item
of the Set
mode. (p. 36)
➥In the FM mode, push to turn the Auto Notch
function ON or OFF.
➥In the CWorRTTY mode, push to turn the Man-
ual Notch function ON or OFF.
•“MNF”appearswhentheManualNotchfunctionis
ON.
•“ANF”appearswhentheAutoNotchfunctionisON.
•NoindicatorappearswhenthenotchlterisOFF.
➥Hold down for 1 second to switch the manual
filter characteristics from wide, mid and narrow,
when the Manual Notch function is selected.
✔What is the notch filter?
The notch filter is a narrow filter that eliminates un-
wanted CW or AM carrier tones, while preserving
the desired voice signal.The DSP circuit automati-
cally adjusts the notch frequency to effectively elim-
inate unwanted tones.
!2 MANUAL NOTCH FILTER CONTROL [NOTCH]
(outercontrol;p.77)
Rotate to adjust the notch frequency to reject an
interfering signal while the manual function is ON.
•Notchltercenterfrequency:
SSB/RTTY :–1040Hzto+4040Hz
CW : CW pitch freq. –2540 Hz to
CW pitch freq. +2540 Hz
AM : –5060 Hz to +5100 Hz
Higher frequency
Lower frequency
The optional UX-9100 is required for 1200 MHz frequency
band operation.
The optional UT-121 is required for DV mode operation.

!3 MENU SWITCH [MENU] (p.19)
➥Push to change the set of functions assigned to
switches ([F-1] to [F-5]).
•Toggles the function display menu between M1
(Menu 1), M2 (Menu 2), M3 (Menu 3), D1 and D2.
➥Hold down for 1 second to enter the Set mode.
Push to return to the previous screen display.
!4 NOISE REDUCTION LEVEL CONTROL [NR]
(innercontrol;p.77)
Rotate to adjust the DSP noise reduction level
when the noise reduction function is in use. Set for
maximum readability.
•Tousethiscontrol,rstpush[NR] (!5).
Increases
Decreases
!5 NOISE REDUCTION SWITCH [NR] (p. 77)
Push to turn DSP noise reduction ON or OFF.
•“NR”appearswhennoisereductionisON.
!6 SUB BAND TX/RX INDICATOR
Lights green when the squelch opens, or a signal is
receivedontheSUBBand;lightsredduringtrans-
mit in the satellite mode.
➥Blinks green when an off-frequency signal is re-
ceived, depending on the “FM/DV Center Error”
option in the Set mode.(p. 162)
!7 SUB BAND RF GAIN CONTROL/
SQUELCH CONTROL [RF/SQL]
(outercontrol;p.44)
Rotate to adjust the RF gain and squelch threshold
level on the SUB Band.
The squelch stops noise output to the speaker
when no signal is received.(closed condition)
See oon page 2 for details.
!8
SUB BAND AF CONTROL [AF] (innercontrol;p.45)
Rotate to adjust audio output level to the speaker or
headphones on the SUB Band.
!9 MIC GAIN CONTROL [MIC GAIN] (p.46)
Rotate to adjust the microphone gain.
•ThetransmitaudiotoneintheSSB,AMandFMmodescan
be independently adjusted in the tone control Set mode.
(p. 169)
✔How to set the microphone gain.
Set the meter function to ALC. (p. 45) While speak-
ing at normal voice level, adjust the [MIC GAIN]
control so that in the SSB or AM modes, the ALC
meter swings within the ALC range.
Recommended level for
Icom microphones
IncreasesDecreases
@0 RF POWER CONTROL [RF POWER] (p.46)
Rotate to continuously vary the RF output power.
IncreasesDecreases
Frequency band RF output power range
HF/50 MHz 2 to 100 W (AM: 2 to 30 W)
144 MHz 2 to 100 W
430 MHz 2 to 75 W
1200 MHz 1 to 10 W
@1 CW PITCH CONTROL [CW PITCH]
(outercontrol;p.49)
(Mode: CW)
Rotate to shift the received CW audio pitch and the
CW sidetone pitch without changing the operating
frequency.
•Thepitchcanbeadjustedfrom300to900Hzinap-
proximately 5 Hz steps.
Higher pitchLower pitch
■Front panel (continued)
3
1PANEL DESCRIPTION
!6 !8!7
!4
!5
!9 @0 @1 @2 @3 @4 @5 @6 @7 @8
!38

@2 ELECTRONIC CW KEYER SPEED CONTROL
[KEY SPEED] (p. 49)
(Mode: CW)
Rotate to adjust the keying speed of the internal
electronic CW keyer to between 6 wpm (minimum)
and 48 wpm (maximum).
FastSlow
@3 PREAMP•ATTENUATOR SWITCH [P.AMP•ATT]
PREAMP SWITCH Operation (p. 71)
(Frequency band: HF/50 MHz)
➥Push to select one of two receive RF preampli-
fiers, or to bypass them.
•“P.AMP ” is a wide dynamic range preamplifier. It is
most effective for the 1.8 to 21 MHz bands.
•“P.AMP ” is a high-gain preamplifier. It is most ef-
fective for the 24 to 50 MHz bands.
•Noindicatorappearswhenthepreampliersarenot
selected.
(Frequency band: 144/430/1200 MHz)
➥Push to turn an optional AG-25, AG-35 or AG-
1200* preamplifier unit ON or OFF, if installed.
•“P.AMP”appearswhenthepreamplierunitisON.
*AG-1200 has been discontinued, but it can be still be
used.
✔What is the preamplifier?
The preamplifier amplifies signals in the front end to
improve the S/N ratio and sensitivity.Select “P.AMP
” or “P.AMP ” when receiving weak signals.
ATTENUATOR SWITCH Operation (p. 71)
➥Hold down for 1 second to turn ON the attenua-
tor.
•“ATT”appearswhentheattenuatorisON.
➥Push to turn OFF the attenuator.
•“ATT”disappears.
✔What is the attenuator?
The attenuator prevents a desired signal from being
distorted when very strong signals are near it, or
when very strong electromagnetic fields, such as
from a broadcasting station, are near your location.
@4 NOISE BLANKER SWITCH [NB] (p. 76)
➥Push to turn the noise blanker ON or OFF. The
noise blanker reduces pulse-type noise such as
that generated by vehicle ignition systems. The
noise blanker is not effective for non-pulse-type
noise.
•“NB”appearswhenthenoiseblankerisON.
➥Hold down for 1 second to display the “NB”
screen. Push to return to the previous screen
display.
@5 VOX/BK-IN SWITCH [VOX/BK-IN]
VOX SWITCH Operation (p. 78)
(Mode: SSB/AM/FM/DV)
➥Push to turn the VOX function ON or OFF.
➥Hold down for 1 second to display the “VOX”
screen. Push to return to the previous screen
display.
✔What is theVOX function?
The VOX function (voice operated transmission)
automatically starts transmission when you speak
intothemicrophone;thenautomaticallyreturnsto
receive when you stop speaking.
BK-IN SWITCH Operation (p. 79)
(Mode: CW)
➥Push to toggle the break-in operation between
semi break-in and full break-in, or to turn OFF
the break-in function.
➥Hold down for 1 second to display the “BKIN”
screen (Break-in). Push to return to the previous
screen display.
✔What is the break-in function?
The break-in function automatically switches be-
tween transmit and receive with your CW keying.
Using Full break-in function (QSK), you can hear
the receive frequency in-between keying.
@6 MONITOR SWITCH [MONITOR] (p. 81)
➥Push to turn the Monitor function ON or OFF to
listen to your own transmitted audio.
•“MONI”appearswhenthisfunctionisON.
•InCWmode,theCWsidetonecanbeheard,regard-
less of the [MONITOR] switch setting.
➥Hold down for 1 second to display the “MONI”
screen (Monitor) to set the monitor level. Push to
return to the previous screen display.
@7 CALL•GPS SWITCH [CALL•GPS]
CALL SWITCH Operation (p. 139)
Push to select the call channel.
GPS SWITCH Operation (p. 121)
Hold down for 1 second to display the “GPS” screen.
Push to return to the previous screen display.
@8 FUNCTION SWITCHES [F1]–[F5]
Push to select the function which is indicated on the
LCD display above each switch. (p.19)
•Thefunctionsvary,dependingontheselectedmenu
and the operating mode.
4
1
PANEL DESCRIPTION
1
2
3
4
5
6
7
8
9
10
11
12
13
14
15
16
17
18
19
20
21
The optional UX-9100 is required for 1200 MHz frequency
band operation.

@9 MODE SWITCHES
Push to select your desired operating mode.(p. 43)
•Thebuilt-inspeechsynthesizerannouncestheselected
mode when the “SPEECH [MODE] SW” item is set to
“ON” in the Set mode. (p.164)
[SSB] (p. 47)
➥
Push to alternately select the USB or LSB modes.
•“USB”or“LSB”appears.
➥
In the SSB mode,
hold down for 1 second to s
e-
lect the SSB data mode (USB-D, LSB-D).
•“D” appears in addition to “USB” or “LSB.”
➥
In the SSB data mode, push to return to the normal
SSB mode.
[CW/RTTY] (pp. 48, 56)
➥Push to alternately select the CW or RTTY
modes.
•“CW”or“RTTY”appears.
➥Hold down for 1 second to switch between the
CW and CW-R (CW reverse) modes, in the CW
mode.
•“CW-R”appearswhentheCWreversemodeis
selected.
➥Hold down for 1 second to switch between the
RTTYandRTTY-R(RTTYreverse)modesin
theRTTYmode.
•“RTTY-R”appearswhentheRTTYreversemodeis
selected.
[AM/FM] (p. 61)
➥
Push to alternately select the AM or FM modes.
•“AM”or“FM”appears.
➥Hold down for 1 second to select the AM or FM
data mode (AM-D/FM-D).
•“D” appears in addition to “AM” or “FM.”
➥In the data mode, push to return to the normal
AM or FM mode.
NOTE:
•IntheAMmode,youcantransmitononlythe
HF/50MHz frequency bands.
•TheAMmodecannotbeselectedonthe1200
MHz frequency band.
[DV•DR] (p. 85)
➥Push to select the DV mode.
•“DV”appears.
➥Hold down for 1 second to select the DR mode.
•“ ” appears.
➥In the DR mode, push to cancel it.
•“ ” disappears.
#0 FILTER SWITCH [FILTER] (p. 73)
➥Push to select one of three IF filter settings ( / /
).
•Theselectedlterpassbandwidthandshiftingvalue
are displayed for 2 seconds on the LCD display.
➥Hold down for 1 second to display the “FIL”
screen (Filter) to set the filter passband width.
➥
When the “FIL” screen is displayed, hold down for
1 second to return to the previous screen display.
#1
TRANSMIT FREQUENCY CHECK SWITCH [XFC]
➥During split frequency or repeater operation, hold
down to listen to the transmit frequency. (p.82)
•While holdingdown this switch,thetransmitfre-
quency can be changed with the main dial, keypad
or memo pad.
•When the split lock function is turned ON, push
[XFC] to cancel the dial lock function.(pp.82, 162)
➥When the RIT function is turned ON, hold
down to listen to the receive frequency. (RIT is
temporarily cancelled.) (p.69)
➥When the ∂TX function is turned ON, hold down
to listen to the transmit frequency (including ∂TX
frequency offset). (p.81)
➥In the simplex operation, hold down to listen to
the receive frequency.
•Thesquelchisclosedandtheinterferencereject
function is temporary OFF while holding down this
switch.
➥In the DV mode, the RX monitoring mode is se-
lected by holding down this switch. (p.118)
■Front panel (continued)
5
1PANEL DESCRIPTION
@9 #0
#2#3#4 #5 #6 #7#1

#2 VFO SELECT SWITCH [A/B] (pp. 32, 34)
➥Push to select either VFO A or VFO B.
➥
Hold down for 1 second to equalize the undis-
played VFO settings to that of the displayed VFO.
#3 SPLIT SWITCH [SPLIT] (p. 82)
➥Push to turn the split function ON or OFF.
•“SPLIT”appearswhenthesplitfunctionisON.
•The split function is not selectable on the SUB
Band.
➥Hold down for 1 second to activate the quick split
function.
•Thetransmitfrequencyshiftsfromthereceivefre-
quency according to the “SPLIT Offset” option in the
Set mode. (p. 162)
•ThequicksplitfunctioncanbeturnedOFFin
the
“Quick SPLIT” item
of the Set mode.(p.162)
#4 SUB SWITCH [SUB]
➥Push to turn the SUB Band setting mode ON or
OFF. (p. 33)
•“ ”appears when the SUB Band setting mode is
ON.
➥Hold down for 1 second to turn the SUB Band
display ON or OFF. (p. 32)
#5 MAIN/SUB•BAND SWITCH [MAIN/SUB•BAND]
➥Push to toggle between the MAIN Band and the
SUB Band. (p. 32)
➥
Hold down for 1 second one or more times to se-
lect HF/50 MHz, 144 MHz, 430 MHz or 1200 MHz
frequency band as your operating band. (p.35)
•Thefrequencyband,selectedineithertheMAINor
SUB Band, cannot be selected on the other Band.
#6 SATELLITE SWITCH [SATELLITE] (p. 153)
➥Push to enter the satellite mode (receive on
MAIN Band, transmit on SUB Band).
•“ ” appears.
•Thelastoperatedfrequencies(downlinkanduplink)
and tracking icon (“ ”/“ ”) appears.
➥In the satellite mode, push to return to the previ-
ous screen display.
NOTE: In the DR mode, pushing [SATELLITE]
cancels DR, and then switches the transceiver to
the satellite mode.
If you want to operate in the DR mode after
exiting the satellite mode, you must hold down
[DV•DR]for1second.
➥Hold down for 1 second to transfer the uplink and
downlink frequencies into the satellite VFO.
•Thesatellitemodeisautomaticallyselectedafter
transferring.
•“ ” appears.
•Thelastoperatedtrackingicon(“ ”/“ ”)
appears.
•Totogglethetrackingoperationbetweennormaland
reverse, push [NOR/REV] (7 3).
➥In the satellite mode, hold down for 1 second to
return to normal operation using the displayed
frequencies.
#7 BAND KEYS/KEYPAD
BAND KEYS Operation (pp. 35, 36)
When the HF/50 MHz frequency band is not se-
lected in both the MAIN or SUB Band, you can se-
lect the HF/50 MHz frequency band by just holding
down the band key for 1 second.
(Frequency band: HF/50 MHz)
➥Push to select the operating band.
•[GENE•]selectsthegeneralcoverageband.
➥Pushing the same key two or three times calls
up other stacked frequencies in the frequency
band.
•Icom’striplebandstackingregistermemorizesthree
frequencies in each frequency band.
(Frequency band: 144/430/1200 MHz)
➥Pushing[GENE•]twoorthreetimescallsup
other stacked frequencies in the frequency
band, after selecting the 144 MHz, 430 MHz
or 1200 MHz frequency band by holding down
[BAND](MAIN/SUB) for 1 second.
➥Hold down for 1 second to switch the operating
band to the HF/50 MHz frequency band.
•[GENE•]selectsthegeneralcoverageband.
•Pushing the same key two or three times calls up
other stacked frequencies in the frequency band.
KEYPAD Operation (p. 37)
After pushing [F-INP ENT], push the keys on the
keypad to enter a frequency. After entering, push
[F-INP ENT] to set the frequency.
•Example:Toenter14.195MHz;
Push[F-INPENT][1][4][•][1][9][5][F-INPENT].
NOTE: The frequency band, selected in either
the MAIN or SUB Band, cannot be selected on
the other Band.
While in the satellite mode, the keypad operation is
different than described above. See page 154 for
details.
6
1
PANEL DESCRIPTION
1
2
3
4
5
6
7
8
9
10
11
12
13
14
15
16
17
18
19
20
21
The optional UX-9100 is required for 1200 MHz frequency
band operation.
The optional UT-121 is required for DV mode operation.

#8 VFO/MEMORY SWITCH [VFO/MEMO]
➥Push to switch between the VFO and memory
modes. (pp. 34, 139)
➥Hold down for 1 second to copy the memory con-
tents to the displayed VFO on the MAIN Band.
(p. 142)
#9 MEMO PAD-WRITE SWITCH [MP-W] (p. 144)
Push to write the displayed data into a memo pad.
•The5mostrecententriesremaininthememopads.
•Thememopadcapacity canbe extendedfrom5to
10 in
the “Memopad Numbers” item
of the Set mode.
(p. 164)
$0 MEMORY WRITE SWITCH [MW] (p. 140)
Hold down for 1 second to store VFO data into the
selected memory channel.
•ThiscanbedoneinboththeVFOandmemorymodes.
$1 MEMO PAD-READ SWITCH [MP-R] (p. 144)
Push to sequentially call up the contents from the
memo pads.
The 5 (or 10) most recently programmed frequen-
cies and operating modes can be recalled, starting
from the most recent.
•Thememopadcapacitycanbeincreasedfrom5to
10 in
the “Memopad Numbers” item
of the Set mode.
(p. 164)
$2 MEMORY CLEAR SWITCH [M-CLR] (p. 141)
In the Memory mode, hold down for 1 second to
clear the memory channel.
•Thechannelbecomesablankchannel.
•This switch is disabled in theVFO mode.
$3 TUNING STEP•REPEATER GROUP SWITCH
[TS•GRP]
TUNING STEP SWITCH Operation (p. 38)
➥
Push to toggle between the kHz and MHz* quick
tuning step, or turn OFF the quick tuning.
*When the HF/50 MHz frequency band is selected,
MHz step cannot be selected.
•Whenthe“Z” quick tuning icon is displayed above
the kHz or MHz digit, the frequency is changed in
programmed quick tuning steps or 1 MHz steps.
•When the quick tuning is OFF, the frequency is
changed in 10 Hz steps.
➥When the quick tuning is ON, hold down for
1 second to display the
“
TS
”
screen (Tuning Step)
to select the quick tuning step. (p.38)
•0.1,1,5,6.25,9,10,12.5,20,25,50and100kHz
steps are independently selectable for each operat-
ing mode.
➥When the quick tuning is OFF, hold down for
1 second to turn the minimum tuning step of
1 Hz ON or OFF. (p.39)
CALL SIGN GROUP SWITCH Operation (p. 93)
(Mode: DV) (Only when “ ” is displayed.)
➥
Push to switch the call sign group.
➥
Hold down for 1 second to enter the repeater call
sign group selection mode.
•“≈” blinks.
➥
When in the repeater group selection mode,
push to cancel it.
■Front panel (continued)
7
1PANEL DESCRIPTION
$6
$4
$3#8 #9$0 $1$2
$7
$8
$9
%0
$5

$4 PBT CLEAR SWITCH [PBT-CLR] (p. 75)
(Mode: SSB/CW/RTTY/AM)
➥
Push to display the filter passband width and
shifting value for 1 second on the function dis-
play.
➥
Hold down for 1 second to reset the PBT set-
tings.
$5 PASSBAND TUNING CONTROLS [TWIN-PBT]
(p. 75)
(Mode: SSB/CW/RTTY/AM)
Adjusts the receiver’s IF filter passband width
using the DSP circuit.
•Rotate this control or push [PBT-CLR] to display the
PBT settings (passband width and shifting value) for 1
second on the function display.
•Holddown[PBT-CLR]for1secondtoclearthePBT
settings.
•ThePBTisadjustablein50HzstepsintheSSB/CW/
RTTYmodes,and200HzintheAMmode.Inthistime,
the shift value changes in 25 Hz steps in the SSB/CW/
RTTYmodes,and100HzintheAMmode.
•ThesecontrolsfunctionasanIFshiftcontrol.
✔What is the PBT control?
The PBT function electronically modifies the IF passband
width to reject interference.This transceiver uses the DSP
circuit for the PBT function.
PBT2
PBT1
–+
Low cutHigh cut Center
$6 SUB DIAL SWITCH [SUB DIAL] (p. 33)
Push to turn the SUB Dial function ON or OFF.
•“ ” appears when the SUB Dial function is ON.
$7 SUB DIAL CONTROL
(outercontrol;p.33)
Rotate to change the SUB Band frequency.
Increases
Decreases
The [SUB DIAL] control’s tuning Band (MAIN or
SUB) and frequency steps differ, depending on
the combination of the SUB Dial function and
SUB Band setting mode status, and the status of
the quick tuning function. See page 33 for de-
tails.
$8 MEMORY CHANNEL CONTROL [M-CH]
(innercontrol;p.139)
Select a memory channel.
•Rotateclockwisetoselectahighermemorychannel
number;rotatecounterclockwisetoselectalowermem-
ory channel number.
Higher channel
Lower channel
$9 RIT SWITCH [RIT] (p. 69)
➥Push to turn the RIT function ON or OFF.
•Use[RIT/∂TX] control to vary the RIT frequency.
➥Hold down for 1 second to add the shift frequency
of the RIT function to or subtract it from the dis-
played frequency.
✔What is the RIT function?
The RIT (Receiver Incremental Tuning) shifts the receive
frequency without shifting the transmit frequency.
This is useful for fine tuning stations calling you off-fre-
quency or when you prefer to listen to slightly different-
sounding voice characteristics, etc.
%0 ∂TX SWITCH [∂TX] (p. 81)
➥Push to turn the ∂TX function ON or OFF.
•Use[RIT/∂TX] control to vary the ∂TX frequency.
➥Hold down for 1 second to add the shift fre-
quency of the ∂TX function to or subtract it from
the displayed frequency.
✔What is the ∂TX function?
∂TX shifts the transmit frequency without shifting the re-
ceive frequency. This is useful for simple split frequency
operation in CW, etc.
8
1
PANEL DESCRIPTION
1
2
3
4
5
6
7
8
9
10
11
12
13
14
15
16
17
18
19
20
21
The optional UT-121 is required for DV mode operation.

%1 MAIN DIAL (pp. 37, 161)
Rotate to change the displayed frequency, select
the Set mode settings, etc.
When the SUB Band setting mode is ON, rotat-
ing [MAIN DIAL] changes the SUB Band fre-
quency. (p. 33)
%2 CLEAR SWITCH [CLEAR] (pp. 69, 81)
Hold down for 1 second* to clear the RIT/∂TX shift
frequency.
* When the
“
Quick RIT Clear
” item
in the Set mode is
ON, push momentarily to reset the shift frequency.
(p.164)
%3 RIT/∂TX CONTROL [RIT/∂TX] (pp. 69, 81)
When either or both the RIT/∂TX functions are ON,
rotate to adjust the RIT/∂TX frequency shift.
•Rotatethecontrolclockwisetoincreasethefrequency,
or counterclockwise to decrease the frequency.
•Thefrequencyshiftrangeis±9.99kHzin10Hzsteps.
The control tunes in 1 Hz steps when the operating fre-
quency readout is set to the 1 Hz step readout. How-
ever, the 1 Hz digit is not displayed on the frequency
shift readout. Shift high
Shift low
%4 SPEECH/LOCK SWITCH [SPEECH/LOCK]
SPEECH SWITCH Operation (p. 45)
➥Push to audibly announce the S-meter level, the
displayed frequency and the operating mode.
•The S-Level announcement can be turned OFF
in the “SPEECH S-Level” item of the Set mode.
(p. 164)
•WhenRITand/or∂TX are ON, the RIT/∂TX offset is
not included in the frequency announcement.
LOCK SWITCH Operation (p. 77)
➥Hold down for 1 second to turn the Dial Lock
function ON or OFF.
•ThefunctionelectronicallylockstheMaindial.
•“ ” appears when the function is ON.
NOTE: The [SPEECH/LOCK] switch operation to
activate the voice synthesizer or the dial lock
functions can be replaced in the “[SPEECH/
LOCK] SW” item of the Set mode.(p. 164)
■Front panel (continued)
9
1PANEL DESCRIPTION
%3
%4
%2
%1

10
1
PANEL DESCRIPTION
1
2
3
4
5
6
7
8
9
10
11
12
13
14
15
16
17
18
19
20
21
■ Rear panel
qANTENNA CONNECTOR 1 [ANT1]
wANTENNA CONNECTOR 2 [ANT2]
(pp. 24, 25, 158)
Connect a 50 øantenna with a PL-259 plug con-
nector for the HF/50 MHz frequency band.
When using an optional AH-4 h f /50 m h za u t o -
matic antenna tuner, connect it to the [ANT1]
connector. Connecting the AH-4 switches the in-
ternal antenna tuner from [ANT1] to [ANT2].
e 1200 MHz BAND ANTENNA CONNECTOR
[1200MHz ANT] (pp. 24, 158)
Connect a 1200 MHz 50 øantenna with a type-N
connector, when the optional UX-9100, 1200 MHz
band unit, is installed.
r
MAIN BAND EXTERNAL SPEAKER JACK
[EXT-SP (MAIN)]
t
SUB BAND EXTERNAL SPEAKER JACK
[EXT-SP (SUB)]
(p. 25)
Connect to an external speaker (4 to 8 ø).
By connecting an external speaker to each or both
jacks, the audio output for both the MAIN and SUB
Bands can be configured as shown below.
External speaker
connection MAIN AF SUB AF
No connection Internal speaker
To the MAIN jack External speaker Internal speaker
To the SUB jack Internal speaker External speaker
Both External speakers
y 430 MHz ANTENNA CONNECTOR [430MHz ANT]
(pp. 24, 25, 158)
Connect a 50 øantenna with a type-N connector
for the 430 MHz frequency band.
u 144 MHz ANTENNA CONNECTOR [144MHz ANT]
(pp. 24, 25, 158)
Connect a 50 øantenna with a PL-259 connector
for the 144 MHz frequency band.
iDC POWER SOCKET [DC 13.8V] (p. 27)
Connect 13.8 V DC through the supplied DC power
cable.
Rear panel view
i u y
e trwq

oGROUNDTERMINAL [GND] (p. 22)
Connect this terminal to a ground to prevent electri-
cal shocks, TVI, BCI and other problems.
!0 TUNER CONTROL SOCKET [TUNER] (p. 29)
Connect the control cable from an optional AH-4 h f /
50 m h za u t o m a t i c a n t e n n a t u n e r .
!1 DATA1 JACK [DATA1] (pp. 26, 168)
➥Connect a PC through the optional OPC-1529R
d a t a communication cable, for low-speed data
communication in the DV mode. (p.117)
➥Connect a GPS receiver through the optional
OPC-1529R d a t a communication cable, for
GPS operation. (p. 121)
!2 DATA2 SOCKET [DATA2] (pp. 26, 171)
Connect a TNC (Terminal Node Controller), etc. for
high speed data communications.
!3 STRAIGHT KEY JACK [KEY] (p. 24)
Connect a straight key or external electronic keyer
output using a standard 1⁄4inch plug.
•To use the internal electronic keyer for CW operation,
connectto[ELEC-KEY]onthefrontpanel.(p.1)
(+)
(_)
!4 ALC INPUT JACK [ALC] (p. 25)
Connect to the ALC output jack of a non-Icom linear
amplifier.
!5 SEND CONTROL JACK [SEND] (p. 25)
When transmitting, goes to ground to control an ex-
ternal unit, such as a non-Icom linear amplifier.
!6 ACCESSORY SOCKET [ACC]
Connect control lines for external equipment such
as a linear amplifier, an automatic antenna selector/
tuner, a TNC for data communications, etc.
•Seepage13forsocketinformation.
!7 CI-V REMOTE CONTROL JACK [REMOTE]
(pp. 26, 183)
➥Connect
a PC, using the optional CT-17 c i -vl e v e l
c o n v e r t e r , for external control of the transceiver.
➥Use for transceive function with another Icom
CI-V transceiver or receiver.
When the transceive function is set to ON,
changing the frequency, operating mode, etc.
on the IC-9100 automatically changes those
settings on other Icom transceivers or receivers,
and vice versa. (p. 167)
➥Connect another IC-9100, using a mini plug
cable*, for transceiver to transceiver cloning.
* Purchase separately
11
1PANEL DESCRIPTION
!8!6 !7!5!4
!3!2!1
o
■Rear panel (Continued)
!0
This manual suits for next models
1
Table of contents
Other Icom Transceiver manuals