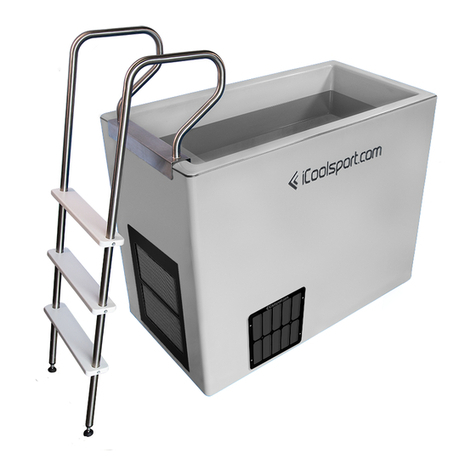
iCoolsport 2 Series User manual

Series 2
Owner’s Manual
MiPod Range
www.icoolsport.com | support@icoolsport.com


O1 Your MiPod
O2 Quick Set Up
O3 Get Started
O4 Safety Procedures
O5 Technical Support
Table of contents

Your
MiPod
O1

Superfast Cooling
The MiPod is the quickest all-in-one automatic ice bath
capable of cooling or heating your water down to 5ºC or
up to 40ºC. Depending on the model chosen, it can cool
or heat your pool in as little as a few hours where other
products advertise cooling times of as much as 24h to 72h.
Premium Quality
Made entirely from hand laid carbon fibre for strength,
quality & class leading appearance. Each MiPod is
embedded with high standard 65mm thick insulation foam
to maximise heat retention and provide super low running
costs. With a 5 star energy rating, MiPods cost less than
40c/day to run.
Smart Control
All models feature an attractive remote 13 inch Full HD
Touch Screen with latest advancements in automatic
technology that can be mounted anywhere you need (5 m
data cable & wall-mount bracket included). The modern
user interface has been completely redesigned to provide
fully automatic start up and operation. Just set the temp,
press START, and that’s it!
The MiPods are in a class of their own being the most technically advanced and the most powerful
chilling systems of any comparable product available on the market. They give you the fastest chilling
performance available anywhere. Manufactured from the highest quality materials and components
for long service life, ice bath sessions are quick to set up and easy to use.
What’s new in Series 2
Wide Range
Our large range offers fully built-in pools in two sizes that
do not need plumbing connections and are ready to go
out of the box. You can choose from cold only models that
can cool water down to 5ºC (40ºF), hot only and dual temp
versions that can heat the water up to 40ºC (104ºF). There
is no external plumbing required. Just drop in place, set the
temp, and enjoy.
A REMOTE CHILLER version is also available for set ups
where space is limited and the cooling unit is installed in
a different area. This cooling unit can be chosen from our
wide range of Compact Cooling Units
24/7 Operation
The MiPod is built to be always on and always ready for
use in homes, gyms and other commercial applications.
All MiPods feature iCool’s award winning heat pump
technology designed to be ready to use 24/7 with an
exceptionally low running costs.

6
Identify your model
Your device’s model name is printed on your order/invoice and
on the Product Model Label located on the bottom right
hand side of the Machinery Panel.
Identify your serial number,
series and voltage
Your Device ID (or Serial Number) is noted on the label attached
inside the Electronic black box on the side of your pool 7.
The Series of your product corresponds to a certain ‘batch’ of
units made at a certain time. The Series is marked on the Serial
Number label & on the front page of your owner’s manual.
The Voltage of your MiPod is noted on the voltage sticker is
located inside the Electronic box, right below the Main Switch.
Included with your MiPod
This manual is intended to help you get started using the MiPod Range of all-in-one products. To know
your device’s features, specifications and operation instructions, you will first need to identify your
product. Below are some guidelines to help you determine your model, your series and your voltage.
Identify your MiPod
Remote 13inch Full HD Capacitive Touch Screen
Wall-mount bracket & screws kit
CAT6 Ethernet DATA cable 5 meters
Drain Valve with 12mm hose connection
Power Plug to suit country (EU, USA, AUS or UK)
Owner’s Manual
1Chrome Strip
7Electronic Panel + Serial Number
6Side Vent
5Drain Point
3Machinery Panel
2Product Model
4Condenser
2

7
Back View
1
3
4
1
5
2Model:
Rated Voltage:
Rated Frequency:
Rated Power Input:
(cooling)
Rated Power Input:
(heating)
Refrigerant:
Max. Running Power:
RCD Electrical Safety
Device trip current:
Power Plug:
Materials:
Control:
Weight:
MiPod Chill
220V AC Single phase
50/60Hz
5000W
2000W
350g - Hychill Minus 40
15 Amp
30mA
3 Pin heavy duty with Earth
Pool Grade GRP Marine Grade Alumnium
Remote 13inch Touch Screen
90Kg Empty
MiPod Series with Internal Heat Pump
Made in Australia
Front View
Left Side View
Right Side View
Components comply with
Compact
Series 4
Made in Australia
IC22000
On
Off
6
1
7
6
1

8
Specifications
* Data calculated with 500L of water and cooling from 25ºC down to 5ºC. Please note, the time taken each time depends on many
variables: the amount of water, the surrounding room temperature, the ventilation of your machine, the initial water temperature.
Leave the unit Always On so you can enjoy an ice bath anytime you want.

9
** MiPod Remote can be connected to any unit from our Portable chillers range. Must be ordered at the same time as custom
water connections are pre-fitted in the factory. Installation recommended to be completed by a certified plumber.

Quick
Set up
O2

Unboxing
We strongly recommend keeping the original packaging of your
unit for as long as your warranty lasts. It can be used if you ever
re-locate the pool and offers you peace of mind for transport.
To unpack, unscrew the bolts from the wooden crate starting
from the top panel, then the sides. First thing to note is to make
sure nothing is missing.
Requirements of the room
Prior to using your Mipod, you must ensure that the area of
the room where the Mipod is installed should not be less than
6 Square Meters (65 Square Feet) for best results. The door
frames should be at least 810mm wide (32 inches) to allow the
Mipod to be easily carried inside.
Extreme Weather Exposure
For best results, the ambient room temperature recommended
for all models should be between 10-25ºC (50º-77ºF).
If using your MiPod in extreme cold temperatures, never allow
the water to freeze or serious damage could occur that is not
covered under warranty. If freezing conditions are expected in
the room where the MiPod is installed, empty the water, add
anti-freeze to the water or turn on the heating mode if your
model has that function to keep water above freezing.
On very hot climates over 45ºC, it may not be possible to
run the system at full power due to the excessive heat. If the
temperature inside the unit exceeds 70ºC, the over heat safety
circuit will operate and shut the machine down.
Prepare for set up
Positioning
Your MiPod pool must be placed on a uniformly flat and level surface.
Be sure to place the pool on an area that can support the weight of
the bath when full (water is very heavy, 1KG per Litre). It is always
recommended that you seek the advice of a qualified engineer or
the local council if unsure. If eventual servicing is required for any
particular reasons, please also make sure that you have easy access
to all side vents and panels. We suggest that you closely consider the
required location for your ice bath prior to filling your bath. Please
account for the attachment point to drain the surplus water. We also
recommend to have a floor drain nearby for easy drainage of your
pool.
Airflow
For models with internal chillers, please ensure your MiPod is
placed at a minimum distance of 300mm on all sides away from any
obstacle, wall or structure to allow proper airflow. Please also make
sure it is kept away from heat sources of any description.
You must provide appropriate ventilation to keep the machine within
a safe operating temperature. A good ventilated area is required so
your chiller can disperse the heat effectively into the air and it should
not be placed in a confined space otherwise it will reach unsafe
temperatures that will cause the inbuilt safety system to operate and
shut down the unit.
Water Condensation
Please note that your unit is a very powerful chiller and
condensation will occur inside of your machine and you may notice
a small amount of water at the base. Condensation is water from
the air being condensed as ice or water on the very cold surfaces of
the iCool’s machinery. This is more evident in high humidity where
the air contains a lot of water.
Minimum 300mm
WALL or
OBSTRUCTION
WALL or OBSTRUCTION
Min.
300mm
Minimum 300mm
Min. 300mm
To make setup as smooth as possible, please follow
carefully the instructions outlined below. Do not start
your MiPod until you have read this entire owner’s
manual. Improper installation or operation may result
in equipment damage not covered by warranty.

12
For models with an internal built-in chiller, the first step is to connect the MiPod to the power and to
the screen. You must absolutely make sure that you do not connect your MiPod machine to the wrong
voltage or this will cause serious damage not covered under warranty.
MiPod Chill/Hot/Dual Temp
Components comply with
Compact
Series 4
Made in Australia
IC22000
On
Off
3
1
2
5
6
4
Electronic Panel Box
1Main Power Switch
7
6
Override Button
5
Ethernet Port for DATAcable
3Serial Number Label
2Main Power Socket
4Safety Test Button
220V
7
Voltage
5

13
2
5
1. Connect MAIN POWER
Plug the power cable to the Main Power socket and
to a 3-pin earthed wall socket rated at least 13 Amps at 220
volts (and 26 Amps at 110 volts if your machine is 110V). Please
avoid the use of long extension cords as they may result in
voltage drops that may trigger the inbuilt safety system.
MiPods must be connected to the voltage marked on the
machine, /!\ they are NOT multi-voltage and using a
different voltage may cause severe damage. The power
input socket on the side of your MiPod must be connected to
standard AC power capable of providing at least 13 Amps in
countries with a 220v supply, and 26 Amps in countries with a
110v supply. The system requires much less power than this for
normal operation, however they need more power for up to a
minute each time they start up and this must be allowed for. A
3 pin grounded power outlet is absolutely mandatory for user
safety. Never use a 2 pin plug it could be dangerous. Your MiPod
is fitted with an electrical safety device to protect users and All
AC power connections used must have an earth connection
that complies with your local electrical safety regulations.
2. Connect DATA CABLE
Plug the blue DATA cable to the
Ethernet Port on the machine and
to the RJ45 socket on the back of
your screen. Please note, a power
cable is not required for the screen.
The screen will receive its power
from the blue DATA cable (supplied).
Mount the screen on a wall or anywhere you want using the
wall mount bracket kit (included). Please note the DATA cable
supplied is 5m long.
3. Turn on SWITCH
Turn the Main Power Switch ON and check that the
screen turns on correctly. If that is the case, a WELCOME PAGE
will appear on the touch screen.
RJ45 OTG DC
Blue DATA cable Power cable
SCREEN NOT CONNECTING
If the screen does not light up when turning ON the
switch of the MiPod, please make sure that:
1The Main power cable is correctly connected to the
power socket on the unit and to the wall and that no
extension cables are being used.
2The Safety Switch is in the ON or UP position.
Please note that if your MiPod ever detects a potential
electrical safety risk, this switch will instantly turn off all
electric power to your MiPod. Always have an electrician
inspect your MiPod for safety should this ever happen
and before turning it back on.
3The Data cable is correctly connected to the
Ethernet socket on the unit and on the screen.
Please note: when contacting iCool Support, please
send pictures and a short video of the screen and pool
set up. This will help engineers to better determine the
problem and give you the best advice.
This is how you final set up should look:
Components comply with
Compact
Series 4
Made in Australia
IC22000
On
Off
1

14
For models with an external refrigeration unit, installation is recommended to be completed by a
certified plumber. PVC plumbing pipes (not supplied) will need to be connected between the MiPod
and the external chiller. The rest of the operation must be followed as per the chillers Owner’s Manual
purchased (different to this manual).
MiPod Remote
Compact chiller
With all MiPod Remotes, the davey water circulation pump is
installed inside your MiPod pool - an electrician will need to
wire the circulation pump to your chiller (this is not pre-fitted
as it must be custom made once on site). Your compact will
come with PVC barrel unions suited for 1 inch PVC pipes. PVC
pipes & MiPod water outlets are not included. Installation
is recommended to be completed by a certified plumber.
Insulation of the pipes is a must for the full length of the two
water pipes, otherwise a lot of cold energy will be lost.
Remote Screen (Optional)
With MiPod Remote versions, a Remote touch screen is
usually recommended (optional) so you can control your
MiPod temperature from the same area of your pool.
Please follow instructions from Page 15 of the Compact
Range Owner’s Manual (different to this manual).
Water flow direction
Compact COOL
MINIMUM WATER LEVEL
POOL
Water IN
Water OUT
PVC Pipes (not supplied)

15
Davey Cartridge Filters
(optional)
An external filter can be purchased however it
must be ordered at the same time and cannot
be retrofitted on existing MiPods. 2x Water
outlets are fitted to the shell of your MiPod and
installation must be done with PVC pipes. Make
sure to talk to an iCool representative to order
this at the same time you order your MiPod pool.
If using the optional iCool Davey Cartridge Filter, additional
water outlets are manufactured on the shell of your MiPod
when ordered at the same time. This must be ordered in
advance and cannot be retro-fitted.
The connecting PVC pipes between the filter and the
MiPod are not included. Installation is recommended to be
completed by a certified plumber. Insulation of the pipes is a
must for the full length of the two water pipes, otherwise a lot
of cold energy will be lost.
Water IN
Water OUT
MiPod Ice
For models with no chiller at all, there is no installation required.
Just fill your pool with water and add ice. That’s it!

16
Fill pool with water and allow enough space to handle water displacement and prevent overflow when
users enter the pool. This is particularly important if you intend to have 2 or 3 people at the same time.
Make sure the bath is filled with enough water as recommended on the right.
Fill with water
Fill with a hose
A permanent water connection is not
required. Simply fill with a hose over
the Mipod to at least cover the internal
top water outlet. If this is not followed,
the machine will draw air and cause the
safety system to shut the system down.
To empty water from MiPod, simply
connect a 12mm hose to the drain valve
and OPEN valve to let water go.
Drain Valve
Make sure the drain valve is in the
CLOSED position when filling the bath
so the water stays inside the MiPod.
CLOSED OPEN
12mm hose
(not supplied)

17
Recommended water level

Get
Started
O3


20
The all new modern user interface has been completely redesigned to provide completely automatic
start up and operation. It has an intelligent water flow correction and will attempt to correct issues
automatically.
User Interface
1. Software Load
Once you have switched on the MAIN POWER, the touch
screen will be blank for a few seconds. A few seconds later,
the iCoolsport logo will appear.
This will continue until your machine has loaded its operating
software and run a full system check. This can sometime take
up to a minute.
DO NOT TOUCH THE SCREEN DURING THIS SELF TEST
PROCEDURE.
2. Welcome Screen
A welcome screen movie of ice and snow indicates that the
machine has loaded the latest software and all safety checks
have been completed successfully.
TOUCH the screen anywhere and the Main Operating Screen
will appear.
3. Initial Connection
Your touch screen will usually connect to the MiPod main
operating page automatically, however in some circumstances
this page may appear because it has not yet recognized your
MiPod. If this happens, after a short time a small blue square
appears at the top left of the screen (as shown below). Simply
tap anywhere on this small blue square to connect manually.
Do not touch anything in the narrow blue band on the left
hand side, this is for service settings only.
4. Starting Up
To start the unit, simply set the temperature you require by
repeatedly clicking -or + and hit the “Set” button to lock in
your desired target temperature. Then press START and your unit
will begin its fully automatic START UP SEQUENCE PROCEDURE.
Please note: MiPod Chills will automatically cool water down
(max to 5ºC); MiPod Hots will heat water up to max. 40ºC,
MiPod Dual Temps will automatically select if it needs to chill
or heat to achieve selected temperature (range from 5ºC to
40ºC).
This manual suits for next models
7
Table of contents
Other iCoolsport Medical Equipment manuals
Popular Medical Equipment manuals by other brands

Iridex
Iridex PASCAL Synthesis Operator's manual

Shimmer
Shimmer ShimmerCapture user manual

Stryker
Stryker Power-PRO XT 6500 Operation and maintenance manual

marquette hellige
marquette hellige MicroSmart Servicing instructions

Ruck
Ruck STELLA 3s Instructions for use

Biolase
Biolase Waterlase Express user manual