8
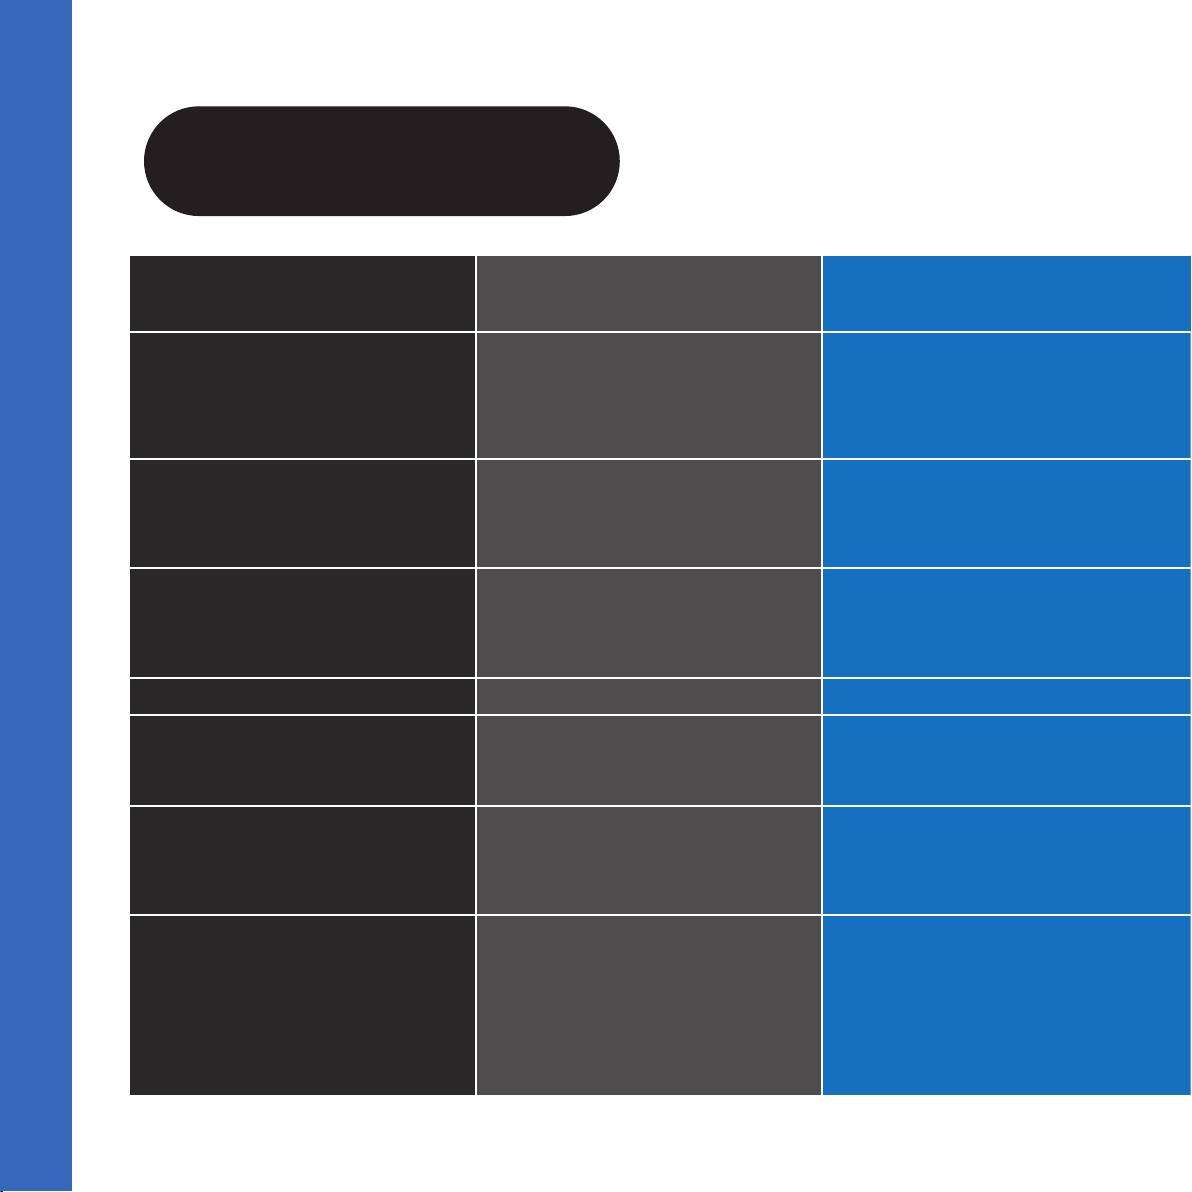
Specifications
MODEL COOL COOL Dual Temp XP XP Dual Temp ICEMAN
Power
Line Voltage
Cooling / Heating
Running Power 220V (& Max.)
Running Power 110V (& Max.)
Frequency 110V / 220V
Manufactured in 110V or 220V
5200 Watts / Chill Only
5 Amps (12 Amps)
10 Amps (20 Amps)
50/60Hz
Manufactured in 110V or 220V
5200 Watts / 5400 Watts
6.5 Amps (13 Amps)
13 Amps (26 Amps)
50/60Hz
Manufactured in either 110V or 220V
7200 Watts / Chill Only
7.5 Amps (14 Amps)
14 Amps (28 Amps)
50/60Hz
Manufactured in either 110V or 220V
7200 Watts / 7100 Watts
7.5 Amps (14 Amps)
15 Amps (28 Amps)
50/60Hz
Manufactured in either 110V or 220V
7800 Watts / Chill Only
7.5 Amps (14 Amps)
14 Amps (28 Amps)
50/60Hz
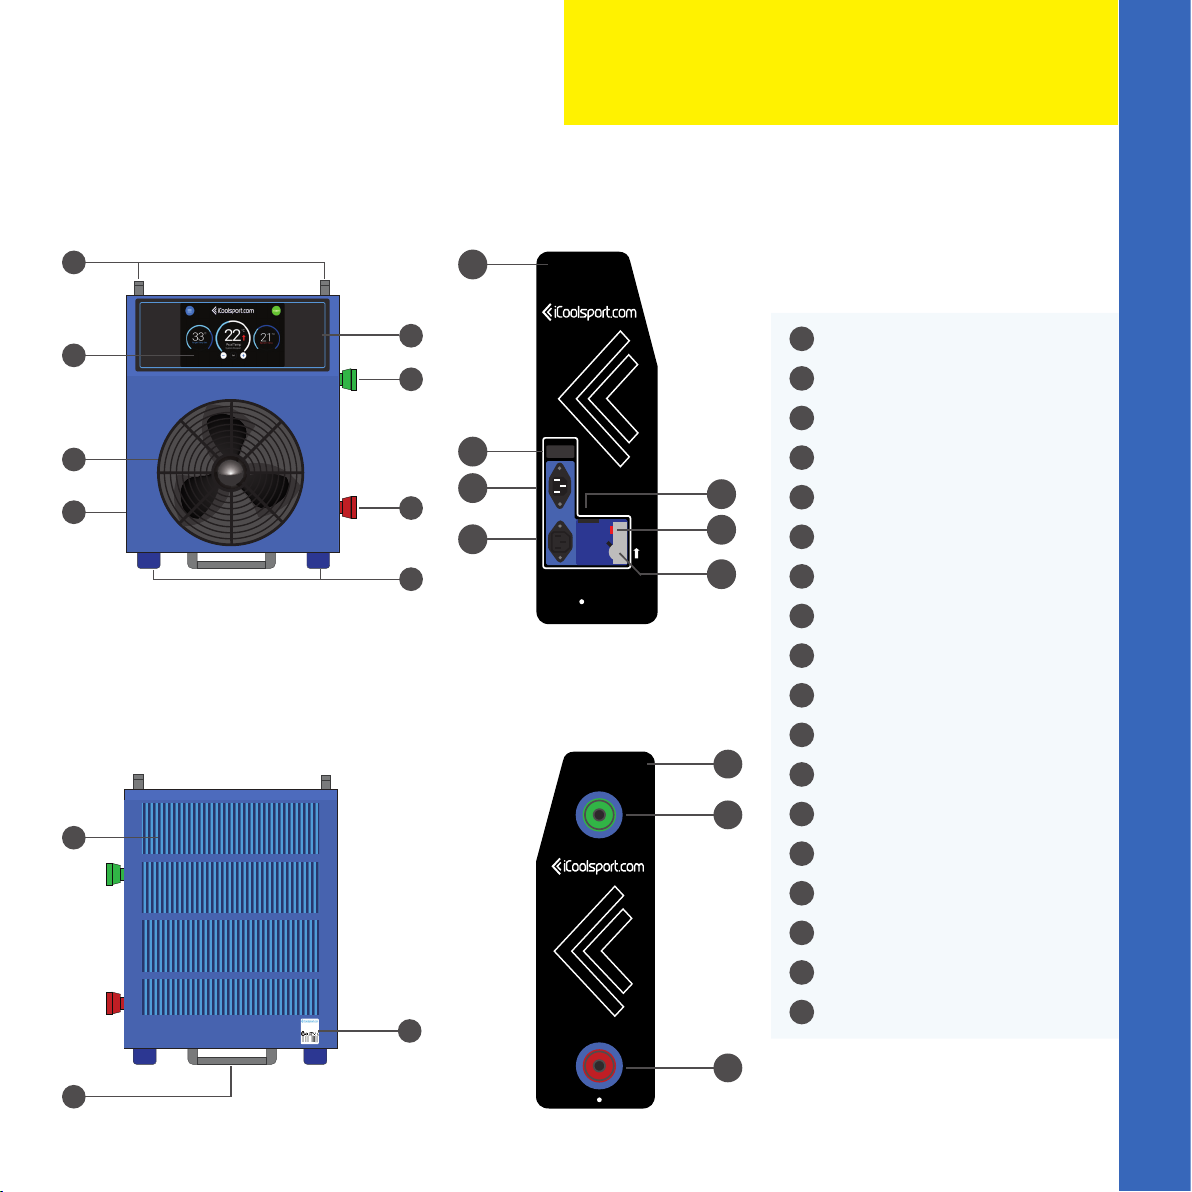
Finishes & Materials
Cabinet & Chassis & Coatings
Heat Exchanger
Heat Pump Pumbing
Handles / Wheels / Side Panels
Marine Grade Aluminium - Blaze Blue
Titanium
Commercial Grade Copper
St. Steel / Polyurethane / Co Extruded Acrylic
Marine Grade Aluminium - Blaze Blue
Titanium
Commercial Grade Copper
St. Steel / Polyurethane / Co Extruded Acrylic
Marine Grade Aluminium - Blaze Blue
Titanium
Commercial Grade Copper
St. Steel / Polyurethane / Co Extruded Acrylic
Marine Grade Aluminium - Blaze Blue
Titanium
Commercial Grade Copper
St. Steel / Polyurethane / Co Extruded Acrylic
Marine Grade Aluminium - High Gloss Black
Titanium
Commercial Grade Copper
St. Steel / Polyurethane / Co Extruded Acrylic
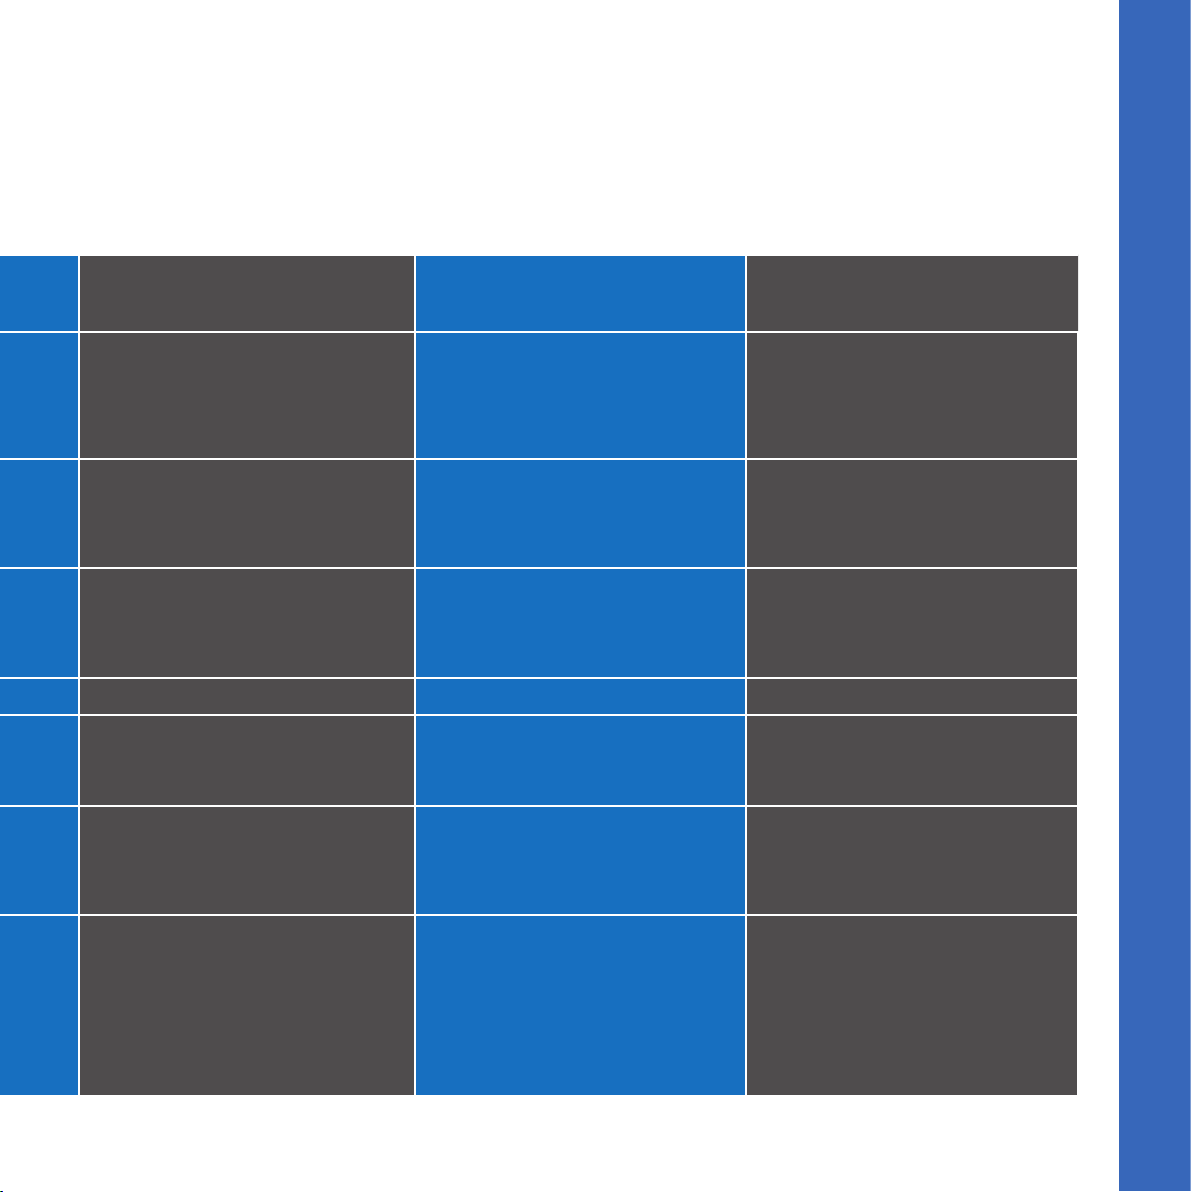
Size & Weight
Net Height x Width x Depth in mm
Net Weight Kg / Pounds
Size & Weight in STANDARD SHIPPING (LxWxH)
Size & Weight in TRAVEL CASE (LxWxH)
650 x 550 x 350 mm
32 Kg / 72 Lbs
650 x 460 x 840 mm 45 Kg
880 x 490 x 830 mm 52Kg
650 x 55 x 35 mm
36 Kg / 79 Lbs
650 x 460 x 840 mm 49 Kg
880 x 490 x 830 mm 57Kg
650 x 55 x 35 mm
39 Kg / 85 Lbs
650 x 460 x 840 mm 52 Kg
880 x 490 x 830 mm 60 Kg
650 x 55 x 35 mm
39 Kg / 85 Lbs
650 x 460 x 840 mm 52 Kg
880 x 490 x 830 mm 60 Kg
650 x 55 x 35 mm
39 Kg / 85 Lbs
650 x 460 x 840 mm 52 Kg
880 x 490 x 830 mm 60 Kg
Pool Compatibility & Recommended Pool Max. 500L pool / IceOne Pro Max. 500L pool / IceOne Pro Max. 2000L pool / IceMate Pro Max. 2000L pool / IceMate Pro Max. 2000L pool / IceMan Pro
Operation
Lowest Temp / Highest Temp
Automatic operation
24/7 operation allowed
4ºC (40ºF) / No heating
Yes
Yes
4ºC (40ºF) / 40ºC (104ºF)
Yes
Yes
4ºC (40ºF) / No heating
Yes
Yes
4ºC (40ºF) / 40ºC (104ºF)
Yes
Yes
2ºC (35ºF) / No heating
Yes
Yes
Display
Software-chip
Standard Display: 10 inch High Definition
Remote Screen
Remote Control over WiFi
Developed by iCool
Full HD Capacitive Touch Screen
Optional
Yes
Developed by iCool
Full HD Capacitive Touch Screen
Optional
Yes
Developed by iCool
Full HD Capacitive Touch Screen
Optional
Yes
Developed by iCool
Full HD Capacitive Touch Screen
Optional
Yes
Developed by iCool
Full HD Capacitive Touch Screen
Optional
Yes
Electrical
Earth Leak Device for maximum user safety
Power Plug 3 pin UK, US, AUS, EU
Airflow
Sound
Compressor Manufacturer
Water Pump electrical safety
Yes 30 Milliamps max allowed leakage
3 Pin Heavy Duty to suit country
Low Noise - 2000 Cubic ft per minute
59 dBa tested at 1.5m
Rotary type by Panasonic or Mitsubishi
Powered by built-in RCD electrical safety device
Yes 30 Milliamps max allowed leakage
3 Pin Heavy Duty to suit country
Low Noise - 2000 Cubic ft per minute
59 dBa tested at 1.5m
Rotary type by Panasonic or Mitsubishi
Electrically Isolated Pump supplied by built-in
Powered by built-in RCD electrical safety device
Yes 30 Milliamps max allowed leakage
3 Pin Heavy Duty to suit country
Low Noise - 3000 Cubic ft per minute
69 dBa tested at 1.5m
Rotary type by Panasonic or Mitsubishi
Electrically Isolated Pump supplied by built-in
Powered by built-in RCD electrical safety
device
Yes 30 Milliamps max allowed leakage
3 Pin Heavy Duty to suit country
Low Noise - 3000 Cubic ft per minute
69 dBa tested at 1.5m
Rotary type by Panasonic or Mitsubishi
Electrically Isolated Pump supplied by
Powered by built-in RCD electrical safety
device
Yes 30 Milliamps max allowed leakage
3 Pin Heavy Duty to suit country
Low Noise - 3000 Cubic ft per minute
69 dBa tested at 1.5m
Rotary type by Panasonic or Mitsubishi
Powered by built-in RCD electrical safety
device