Idexx Catalyst One Manual

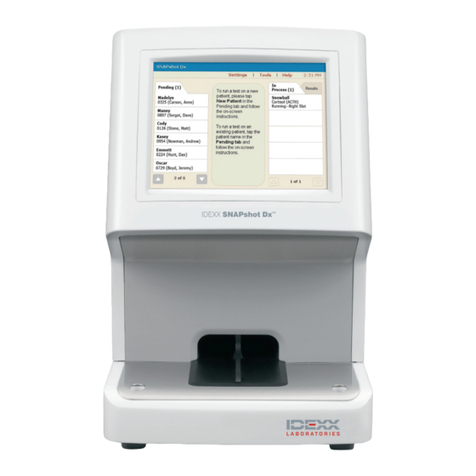
IDEXX Catalyst One* Chemistry Analyzer
Operator’s Guide

2
Proprietary Rights Notice
Information in this document is subject to change without notice. Companies, names and data used in
examples are fictitious unless otherwise noted. No part of this document may be reproduced or transmitted
in any form or by any means, electronic, mechanical or otherwise, for any purpose, without the express
written permission of IDEXX Laboratories. IDEXX Laboratories may have patents or pending patent
applications, trademarks, copyrights or other intellectual or industrial property rights covering this document
or subject matter in this document. The furnishing of this document does not give a license to these property
rights except as expressly provided in any written license agreement from IDEXX Laboratories.
© 2015 IDEXX Laboratories, Inc. All rights reserved. • 06-0001252-01
*IDEXX VetLab, Catalyst, Catalyst One, IDEXX VetTrol, SmartLink, IDEXX InterLink, IDEXX SmartService,
SNAP, and 4Dx are trademarks or registered trademarks of IDEXX Laboratories, Inc. in the United States
and/or other countries. All other product and company names and logos are trademarks of their respective
holders.

3
Contents
Preface ....................................................................................................................................................5
Safety Precautions.......................................................................................................................................5
Performance Precaution ..............................................................................................................................5
Care of the Analyzer ....................................................................................................................................5
International Symbol Descriptions...............................................................................................................6
Other Symbols.............................................................................................................................................7
Getting Started........................................................................................................................................8
Introduction..................................................................................................................................................8
Catalyst One Components ..........................................................................................................................9
Analyzer Status ..........................................................................................................................................10
Responding to an Alert..............................................................................................................................11
Installing the Catalyst One Analyzer..........................................................................................................11
Catalyst One Analyzer Consumables........................................................................................................12
Compatible Species ..................................................................................................................................13
Using the Catalyst One*Analyzer........................................................................................................14
Analyzing Samples ....................................................................................................................................14
Slide Handling ...........................................................................................................................................14
Diluting Samples........................................................................................................................................14
Viewing and Printing Test Results .............................................................................................................16
Outside of Reportable Range Samples ....................................................................................................17
Modifying the Settings on the Analyzer ..............................................................................................18
Modifying the Sound Settings‡..................................................................................................................18
Entering Standby Mode.............................................................................................................................18
Exiting Standby Mode................................................................................................................................18
Sample Preparation and Storage ........................................................................................................19
Supported Sample Types for Catalyst* CLIPs and Slides.........................................................................19
Preparing Samples for Use on the Catalyst One Analyzer........................................................................20
Proper Sample Cup Volume ......................................................................................................................22
Sample Inspection After Centrifugation.....................................................................................................22
Sample Storage.........................................................................................................................................23
Quality Control......................................................................................................................................24
Overview ....................................................................................................................................................24
Quality Control Materials ..........................................................................................................................24
Quality Control CLIPs and Slides ..............................................................................................................25
Preparing Control Fluid..............................................................................................................................26
Running Quality Control.............................................................................................................................27

4
Maintenance .........................................................................................................................................28
Overview ....................................................................................................................................................28
Upgrading the Software.............................................................................................................................28
Cleaning the Internal Components of the Analyzer...................................................................................28
Cleaning the Outside of the Analyzer
and the Sample Drawer.......................................................................................................................29
Emptying the Waste Drawer ......................................................................................................................29
Appendices ...........................................................................................................................................30
Chemistry Descriptions .............................................................................................................................30
Medical Protocol Descriptions...................................................................................................................51
Profile Selection .........................................................................................................................................56
Differences in Results................................................................................................................................57
Technical Specifications ............................................................................................................................57
IDEXX Technical Support Contact Information..........................................................................................58

5
Preface
Safety Precautions
Note: If the equipment is used in a manner other than specified, the protection provided by the
equipment may be impaired.
The analyzer does not contain any user-serviceable components. DO NOT disassemble.
Line voltage for the Catalyst One AC power adapter is 100–240 V AC, 50–60 Hz. Be sure to plug all
equipment into properly grounded electrical outlets.
Use only the AC power adapter and AC power cable supplied.
Disconnect the AC power cable from the wall outlet if the:
• AC power cable or the DC power cord becomes frayed or otherwise damaged.
• AC power adapter is exposed to water or other liquids.
Performance Precaution
Do not use certain liquids, aerosols (such as canned air), solvents, ammonia, and other substances
on or near the analyzer which could influence results.
Care of the Analyzer
It is recommended that you do not stack other equipment or containers on top of the analyzer.
Keep analyzer away from sources of heat or flames.
PROTECT your equipment from damp conditions, wet weather, or liquid spills.
Take care not to spill water or other liquids on the unit.
DO NOT use solvents, ink markers, sprays containing volatile liquids, or polish on the analyzer as it
may damage the outer case. Clean only with a mild soap and slightly moist cloth and only when the
analyzer is not in use.
Clean only with a mild soap and slightly moist cloth and only when the analyzer is not in use.

6
International Symbol Descriptions
International symbols are often used on packaging to provide a pictorial representation of particular
information related to the product (such as expiration date, temperature limitations, batch code,
etc.). IDEXX Laboratories has adopted the use of international symbols on our analyzers, product
boxes, labels, inserts, and manuals in an effort to provide our users with easy-to-read information.
Symbol Description Symbol Description
Use by
A utiliser avant
Verwendbar bis
Usare entro
Usar antes de
使用期限
Temperature limitation
Température limite
Zulässiger Temperaturbereich
Temperatura limite
Limitación de temperatura
保 存 温 度( 下 限 )
Batch code (Lot)
Code de lot (Lot)
Chargenbezeichnung (Partie)
Codice del lotto (partita)
Código de lote (Lote)
ロット 番 号
Upper limit of temperature
Limite supérieure de température
Temperaturobergrenze
Limite superiore di temperatura
Limite superior de temperatura
保 存 温 度( 上 限 )
Serial number
Numéro de série
Seriennummer
Numero di serie
Número de serie
シリアル番号
Consult instructions for use
Consulter la notice d’utilisation
Gebrauchsanweisung beachten
Consultare le istruzioni per l’uso
Consultar las instrucciones de uso
取扱説明書をご参照ください。
Catalog number
Numéro catalogue
Bestellnummer
Numero di catalogo
Número de catálogo
製品番号
Keep away from sunlight
Conserver à l’abri de la lumière
Vor direkter Sonneneinstrahlung
schützen
Mantener alejado de la luz solar
Tenere lontano dalla luce diretta del sole
遮光してください。
Authorized Representative in the
European Community
Représentant agréé pour la C.E.E.
Autorisierte EG-Vertretung
Rappresentante autorizzato nella
Comunitá Europea
Representante autorizado en la
Comunidad Europea
EC内の正規販売代 理店
WEEE Directive 2002/96/EC
Directive 2002/96/CE (DEEE)
WEEE-Richtlinie 2002/96/EG
Directiva 2002/96/CE RAEE
Direttiva RAEE 2002/96/CE
廃電気電子機器指令(WEEE Directive
2002/96/EC)
Manufacturer
Fabricant
Hersteller
Ditta produttrice
Fabricante
製造元
Biological risks
Risques biologiques
Biogefährlich
Rischi biologici
Riesgos biológicos
生 物 学 的リスク
Caution, consult accompanying
documents
Attention, consulter les documents
joints
Achtung, Begleitdokumente
beachten
Attenzione, consultare la
documentazione allegata
Precaución, consultar la
documentación adjunta
注意、添付文書をご参照ください。
2
Do not reuse
Usage unique
Nicht wiederverwenden
No reutilizarw
Non riutilizzare
再利用しないでください。
Preface

7
Symbol Description Symbol Description
Caution, hot surface
Attention, surface très chaude
Precaución, superficie caliente
Vorsicht, heiße Oberfläche
Attenzione, superficie rovente
高温注意
Electrostatic-sensitive device
Appareil sensible aux charges
éléctrostatiques
Dispositivo sensible a descargas
electrostáticas
Gerät ist sensibel auf elektrostatische
Ladung
Dispositivo sensibile alle scariche
elettrostatiche
静電気の影響を受ける装置
Keep dry
Conserver dans un endroit sec
Mantener seco
Vor Nässe schützen
Tenere al riparo dall’umidità
濡らさないこと。
Fragile
Fragile
Frágil
Zerbrechlich
Fragile
取扱注意
This side up
Haut
Este lado hacia arriba
Diese Seite nach oben
Alto
この面を上にする。
Date of manufacture
Date de production
Fecha de producción
Herstelldatum
Data di produzione
製造年月日:
Other Symbols
Symbol Description Symbol Description
USB symbol Ethernet/network symbol
Wireless symbol‡
Preface
‡Feature coming soon

8
Getting Started
Introduction
Welcome to IDEXX’s next-generation chemistry analyzer—the Catalyst One* Chemistry Analyzer.
The Catalyst One analyzer’s flexible test menu allows you to monitor the health status of specific
organs, recheck values over time, customize profiles by adding single tests to CLIPs. You can even
run up to 25 testson a single sample (for a complete list of the individual slides and CLIPs available,
see page 12).
The Catalyst One analyzer is for veterinary use only.
IDEXX VetLab*Station Connectivity
The Catalyst One analyzer is part of the IDEXX VetLab* suite of analyzers, all of which connect
to the IDEXX VetLab Station (IDEXX’s laboratory information management system). Connecting
multiple analyzers to the IDEXX VetLab Station helps you attain a comprehensive picture of your
patient’s health, with the ability to view test results from multiple analyzers on a single report,
determine disease progression with parameter-trending capabilities, and more.
By connecting the Catalyst One analyzer to the IDEXX VetLab Station, you can:
• Automatically review patients’ prior results on every printout for easy comparison.
• Improve client communications with illustrated diagnostic or treatment progress printouts.
• Link to expert descriptions and common causes of abnormal values.
• Print information to help explain the significance of results to your clients.
• Allow new staff to train independently.
• Learn proper protocols and tips for best techniques.
IDEXX Dry-Slide Technology
The Catalyst One analyzer uses dry-slide technology—the most accurate technology available for
in-house testing. Dry-slide technology uses layers to remove impurities for the most accurate results
from even compromised samples.
Patient sample is applied to
the top of the spreading layer
Spreading layer
Sample is distributed evenly
Reagent layer
Reagent reacts with sample
Support layer
Optical interface
Indicator layer
Reacted sample collects for spectral analysis
Filtering layer
Filters out substances that interfere with results

9
How it Works
There are several important steps that the analyzer performs in order to present the results of
a sample. Once the slides and sample have been inserted into the analyzer, the Catalyst One
analyzer incubates the slides. Then, if using a Catalyst* whole blood separator, the plasma is
separated from a whole blood sample. The sample is then accurately dispensed onto the slides,
the analyzer measures the color development of the slide, and then all used materials are removed
from the analyzer.
Catalyst One Components
Front of the Analyzer
Side door
Sample drawer
Waste drawer
Inside of the Sample Drawer
Note: This picture depicts where the sample cup and whole blood separator should be placed in
the sample drawer. Do not load a whole blood separator AND a sample cup for a single run.
Sample
cup
Slides/CLIPs Phenobarbital
(PHBR) reagent
consumable/automated
dilution cups
Whole blood
separator
Pipette tips
Other reagent
consumables
Getting Started
Status LED
Start button
Lock light

10
Side of the Analyzer
Side door Carousel cover
(shown closed)
Lever to raise
carousel cover
Back of the Analyzer
Ethernet port
Power port
Analyzer Status
The light-emitting diode (LED) indicator on the front panel of the Catalyst One analyzer indicates the
analyzer’s status.
Note: You can also view the analyzer status by viewing its icon on the IDEXX VetLab Station Home
screen.
LED Color Description
Green (steady) READY; analyzer is ready to process samples or perform
maintenance tasks
Green (pulse) STANDBY MODE
Yellow (steady) IN PROCESS; analyzer is processing a sample or performing
another activity
Yellow (pulse) Analyzer is waiting for the user to begin processing a sample after
receiving the patient information from the IDEXX VetLab Station
Red (flashing) ERROR; an error has occurred; review error or alert messages on
the IDEXX VetLab Station
Getting Started

11
Responding to an Alert
When the analyzer experiences a problem, an alert message appears on the upper right side of the
IDEXX VetLab Station title bar, the LED on the front panel of the Catalyst One analyzer flashes red,
and the Catalyst One icon on the IDEXX VetLab Station Home screen appears with an Alert status.
To View an Alert
Do one of the following:
• Tap the Catalyst One icon on the IDEXX VetLab Station Home screen.
• Tap the alert message in the title bar to display the alert message. Follow the instructions
displayed in the alert message.
Installing the Catalyst One Analyzer
The Catalyst One analyzer works in conjunction with the IDEXX VetLab Station.
To Install the Catalyst One Analyzer
1. Before you unpack the analyzer, choose an optimum location for the instrument. The analyzer
should be placed on a level surface in a well-ventilated area away from obvious sources of
heat, direct sunlight, cold, humidity, or vibrations. For optimum results, room temperature
should be at 15°C–30°C (59°F–86°F) and relative humidity at 15%–75%.
IMPORTANT: Ensure proper ventilation. The analyzer’s cooling vents are in the base and the
back.
2. Connect the analyzer to the router:
– If you are planning to connect the device wirelessly to an IDEXX VetLab* Station,
proceed to step 3 (wireless-capable router required).‡
OR
– If you are connecting the device to an IDEXX VetLab Station using a wired router,
connect the device to a numbered port on the router using an Ethernet cable
(provided).
Note: For more information about connecting your analyzer to the router, see the installation
instructions that accompanied your router.
3. Power on the Catalyst One analyzer. Once the Catalyst One icon displays on the IDEXX
VetLab Station Home screen, your connections are complete.
Note: If the Catalyst One icon does not appear on the IDEXX VetLab Station Home screen
within 3 minutes, contact IDEXX Technical Support for assistance.
Getting Started
‡Feature coming soon

12
Catalyst One Analyzer Consumables
The following consumables are available for use with the Catalyst One analyzer:
CLIPs, Panels, and Slides
Chemistry Abbreviation
Chem 17 CLIP
Chem 15 CLIP
Chem 10 CLIP
Equine 15 CLIP
NSAID 6 CLIP
UPC Panel
Lyte 4 CLIP
QC CLIP
Individual Slides
Albumin ALB
Alkaline Phosphatase ALKP
Alanine Aminotransferase ALT
Amylase AMYL
Aspartate Aminotransferase AST
Blood Urea Nitrogen BUN
Calcium Ca
Cholesterol CHOL
Creatine Kinase CK
Creatinine CREA
Chloride Cl
Fructosamine FRU
Gamma-glutamyltransferase GGT
Glucose GLU
Potassium K
Lactate LAC
Lactate Dehydrogenase LDH
Lipase LIPA
Magnesium Mg
Sodium Na
Ammonia NH3
Phenobarbital PHBR
Inorganic Phosphate PHOS
Total Bilirubin TBIL
Total Protein TP
Total T4TT4
Triglycerides TRIG
Urine Creatinine UCRE
Urine Protein UPRO
Uric Acid URIC
Getting Started

13
Compatible Species
Canine†Ferret Rabbit
Feline†Goat Rat
Equine†Lizard Sea Turtles
Bovine (beef cattle, dairy cow) Llama Sheep
Avian (budgerigar, cockatoos
[grey cheek, Moluccan, umbrella],
cockatiel, canary, conure, macaw
[blue and gold, hyacinth, scarlet],
parrots [Amazon blue, Amazon
yellow, eclectus, African grey])
Monkey Snake
Mouse Tortoise
Pig
†Species-specific intervals are available for these species. All other species are qualified as “other.”
Getting Started

14
Using the Catalyst One*Analyzer
Analyzing Samples
There are four different work flows that can be used to analyze a sample on the Catalyst One*
analyzer:
• Analyze Sample Button—Use this work flow if you do not have a practice management
system connected to your IDEXX VetLab* Station via IDEXX SmartLink* or IDEXX InterLink*
technology.
• Pending List or Census List—Use one of these work flows if you have a practice
management system connected to your IDEXX VetLab Station via IDEXX SmartLink or IDEXX
InterLink technology. Using this work flow will save you time because you do not need to
enter the client and patient information into the IDEXX VetLab Station (since it has already
been entered into your practice management system).
• Ready to Run Icon—Use this work flow if you initiated the sample run using one of the
other work flows, but the analyzer was busy at the time and the sample could not be run
immediately.
For more information on these work flows, see the IDEXX VetLab Station Operator’s Guide.
Slide Handling
The Catalyst One analyzer allows you to run up to 25 tests on a single sample. Before you begin,
please take note of the following:
• Frozen CLIPs/panels/slides can be run on the Catalyst One analyzer (no thawing required).
• Most CLIPs/slides should be loaded within 5 minutes of opening their foil packaging. The Lyte
4 CLIP should be loaded within 2 minutes of opening its foil packaging.
• If you are running a Lyte 4 CLIP, be sure to load it in the sample drawer before any other
CLIPs or slides.
Diluting Samples
Dilutions should only be performed when a test value is outside the reportable range or when the
sample contains interfering substances (e.g., medications) that cause a nonlinear or invalid result.
The Catalyst One analyzer supports automated dilutions (the analyzer mixes the sample and
diluent for you) and manual dilutions (you prepare the dilution outside of the analyzer). Select the
appropriate option on the Identify Sample screen.
Remember the following important notes when diluting samples for analysis on the Catalyst One
analyzer:
• Only dilute tests with results outside of the reportable range. Diluting tests with results in the
normal range may produce invalid results.
• All chemistries should be analyzed first on the undiluted sample. Some analytes, such as GGT
and total bilirubin, have low serum/plasma concentrations. These analytes may be diluted out
even with the lowest dilution. Dilute the remaining sample and analyze any chemistries that
were outside of the reportable range on the first analysis.
• Perform a dilution only when a test value is accompanied by a greater than symbol (>) or
dashes (---) on the patient report or when the analyzer informs you a dilution is necessary to
receive accurate results.

15
• Use the proper diluent material for your sample type.
– For plasma and serum samples, use normal saline.
– IDEXX does not recommend manually diluting whole blood in a Catalyst* whole blood
separator—only dilute the separated plasma.
– For urine, use
Catalyst* Urine P:C Diluent.
• Use an accurate measuring device, such as a calibrated pipette or syringe.
• For best results, start with a 1:2 dilution (1 part sample to 1 part diluent)—do not exceed 10
parts diluent.
• Do not dilute samples that are undergoing ammonia, phenobarbital, fructosamine, total T4, or
electrolyte testing.
• Do not dilute small samples to achieve a minimum sample volume. Such dilutions on normal
analyte concentration cannot be read accurately. When dilution is needed to determine some
analytes at very high concentration, the sample should be diluted manually.
• An automated dilution run will be canceled if:
– There is insufficient diluent/sample volume.
– There are too many slides in the run.
Minimum Sample Volume for Dilutions
The minimum sample volume varies based on the dilution factor and the number of slides that are
being diluted (see table below).
Parts Sample +
Parts Diluent =
Diluent Ratio
Maximum
Number of
Slides per
Dilution
Minimum Sample Volume Diluent
Volume
Serum, Plasma,
or Urine
Whole Blood
1 + 1 = 1:2 5 155 µL 700 µL 300 µL
1 + 3 = 1:4 10 130 µL 700 µL 300 µL
1 + 5 = 1:6 10 130 µL 700 µL 300 µL
1 + 9 = 1:10 10 100 µL 700 µL 300 µL
Preparing
Manual Dilutions
To Prepare a 1:2 Dilution
1. Accurately measure the desired amount of sample to be diluted and gently transfer it to a
sample cup.
2. Accurately measure an equal amount of diluent and transfer it to the sample collected in step 1.
3. Thoroughly mix the sample and diluent.
4. Analyze the sample.
Using the Catalyst One* Analyzer

16
To Prepare Dilutions Greater Than 1:2
If additional dilutions beyond 1:2 are necessary, always begin with the original, undiluted sample.
Then, incrementally increase the parts diluent as indicated in the dilution chart (below).
Volumes are for example only. Parts Sample + Parts Diluent = Total Parts (Dilution Factor)
Parts Sample Parts Diluent Total Parts
(Dilution Factor)
1 (100 µL) 0 1 (undiluted sample)
1 (100 µL) 1 (100 µL) 2
1 (100 µL) 2 (200 µL) 3
1 (100 µL) 3 (300 µL) 4
1 (100 µL) 4 (400 µL) 5
1 (100 µL) 5 (500 µL) 6
1 (100 µL) 6 (600 µL) 7
1 (100 µL) 7 (700 µL) 8
1 (100 µL) 8 (800 µL) 9
1 (100 µL) 9 (900 µL) 10
1 (100 µL) 10 (1,000 µL) 11
Viewing and Printing Test Results
Analyzer results are automatically returned to the IDEXX VetLab Station and recorded in the
appropriate patient’s record. The diagnostic results report is a comprehensive report of all the test
results specified in a laboratory request for that patient on a specific day.
Patient test results can be printed automatically each time a set of results are returned or you can
manually print the results when needed.
For more information about how to view and print test results, see the IDEXX VetLab Station
Operator’s Guide.
Using the Catalyst One* Analyzer

17
Outside of Reportable Range Samples
Occasionally a test value may be outside the analyzer’s reportable range capability. The test value
may be greater than (“>”) the reportable range, or interfering substances in the sample may be
causing a nonlinear or invalid result. See the following chart for reportable ranges on individual
chemistries. If a value is required, it will be necessary to dilute the sample and repeat the test.
Chemistry U.S. Units S.I. Units French Units
ALB 0.1– 6 .0 g/dL 1–60 g/L 1–60 g/L
ALKP 10–2,000 U/L 10–2,000 U/L 10–2,000 U/L
ALT 10–1,000 U/L 10–1,000 U/L 10–1,000 U/L
AMYL 5–2,500 U/L 5–2,500 U/L 5–2,500 U/L
AST 0 –1,083 U/L 0 –1,083 U/L 0 –1,083 U/L
BUN/UREA 2–130 mg/dL 0.6–46.4 mmol/L 0.034–2.730 g/L
Ca 1.0–16.0 mg/dL 0.25–4.00 mmol/L 10–160 mg/L
CHOL 6–520 mg/dL 0.16 –13 .4 4 mmol/L 0.06–5.20 g/L
CK 10–2,036 U/L 10–2,036 U/L 10–2,036 U/L
Cl 50 –160 mmol/L 50–160 mmol/L 50–160 mmol/L
CREA 0.1–13.6 mg/dL 9–1202 µmol/L 1.0–136.0 mg/L
FRU 100–1,000 µmol/L 100–1,000 µmol/L 100–1,000 µmol/L
GGT 0–952 U/L 0–952 U/L 0–952 U/L
GLU 10–686 mg/dL 0.56 – 3 8.11 mmol/L 0.10–6.86 g/L
K0.8–10 mmol/L 0.8–10 mmol/L 0.8–10.0 mmol/L
LAC 0.50–12.00 mmol/L 0.50–12.00 mmol/L 0.50 –12.00 mmol/L
LDH 50–2,800 U/L 50–2,800 U/L 50–2,800 U/L
LIPA 10–6,000 U/L 10–6,000 U/L 10–6,000 U/L
Mg 0.5–5.2 mg/dL 0. 21–2.17 mmol/L 5.0–52.0 mg/L
Na 85–180 mmol/L 85–180 mmol/L 85–180 mmol/L
NH30–950 µmol/L 0–950 µmol/L 0–950 µmol/L
PHBR†5–55 µg/mL 5–55 µg/mL 5–55 µg/mL
PHOS 0. 2 –16.1 mg/dL 0.0 6 – 5.19 mmol/L 2.00–161.00 mg/L
TBIL 0.1–27.9 mg/dL 2–477 µmol/L 1.0–279.0 mg/L
TP 0.5–12.0 g/dL 5–120 g/L 5–120 g/L
TRIG 10–375 mg/dL 0.11– 4. 23 mmol/L 0 .10 – 3 .75 g/L
TT4(canine) 0.5–10.0 µg/dL 6.43–128.70 nmol/L 6.43–128.70 nmol/L
TT4(feline) 0.5–20.0 µg/dL 6.4–257.4 nmol/L 6.4–257.4 nmol/L
UCRE 6–350 mg/dL 0.06–3.50 g/L 0.06–3.50 g/L
UPRO 5–400 mg/dL 0.05–4.00 g/L 0.05–4.00 g/L
URIC 0.1– 20 mg/dL 6 –1,190 µmol/L 1–200 mg/L
† 1 µg/mL = 4.31 µmol/L
Using the Catalyst One* Analyzer

18
Modifying the Settings on the Analyzer
Modifying the Sound Settings‡
The analyzer will beep when it encounters an alert. You can modify the Sound settings to turn the
sound off or adjust its volume.
1. Tap Instruments on the IDEXX VetLab Station Home screen.
2. Tap the Catalyst One side tab.
3. If you do not want the analyzer to make any sounds, tap Off in the Sound area.
OR
4. If you want the volume of the sound to be quiet, tap Low in the Sound area.
OR
5. If you want the volume of the sound to be loud, tap High in the Sound area.
Entering Standby Mode
You can modify the settings of the analyzer so that it enters Standby mode at a certain time each
day or put it in Standby mode immediately.
1. Tap Instruments on the IDEXX VetLab Station Home screen.
2. Tap the Catalyst One side tab.
3. If you do not want the analyzer to ever enter Standby mode, tap Never in the Standby area.
OR
4. If you want the analyzer to enter Standby mode at a certain time each day, tap Daily in the
Standby area and then select the desired start time from the available drop-down list.
OR
5. If you want the analyzer to enter Standby mode immediately, tap Now in the Standby area.
Exiting Standby Mode
You can set the analyzer to exit Standby mode at a certain time each day or immediately.
1. Tap Instruments on the IDEXX VetLab Station Home screen.
2. Tap the Catalyst One side tab.
3. If you want the analyzer to exit Standby mode at a certain time each day, tap Daily in the Exit
Standby area and then select the desired start time from the available drop-down list.
OR
4. If you want the analyzer to exit Standby mode immediately, tap Now in the Exit Standby area.
‡Feature coming soon

19
Sample Preparation and Storage
Supported Sample Types for Catalyst* CLIPs and Slides
The following sample types can be used with Catalyst* CLIPs and slides:
CLIPs/Slides Abbreviation
Serum
Lithium
Heparin-Treated
Plasma
Fluoride/
Oxalate-Treated
Plasma
Untreated Whole
Blood (using the
Catalyst* Lithium
Whole Blood
Separator)
Urine
Chem 17 CLIP N/A
Chem 15 CLIP N/A
Chem 10 CLIP N/A
Equine 15 CLIP N/A
NSAID 6 CLIP N/A
UPC Panel N/A
Lyte 4 CLIP N/A
Albumin ALB
Alkaline Phosphatase ALKP
Alanine Aminotransferase ALT
Amylase AMYL
Aspartate Aminotransferase AST
Blood Urea Nitrogen BUN/UREA
Calcium Ca
Cholesterol CHOL
Creatine Kinase CK
Creatinine CREA
Fructosamine (part number 99-0000131) FRU
Fructosamine (part number 99-0003341) FRU
Gamma-glutamyltransferase GGT
Glucose GLU
Lactate LAC
Lactate Dehydrogenase LDH
Lipase LIPA
Magnesium Mg
Ammonia NH3
Phenobarbital PHBR
Inorganic Phosphate PHOS
Total Bilirubin TBIL
Total Protein TP
Total T4TT4
Triglycerides TRIG
Uric Acid URIC

20
Preparing Samples for Use on the Catalyst One Analyzer
You can run untreated whole blood, lithium heparinized whole blood, plasma, serum, and urine
samples on the Catalyst One analyzer.
IMPORTANT: Do not use EDTA or sodium heparin for chemistry analysis.
To Prepare an Untreated Whole Blood Sample
(Using a Lithium Heparin Whole Blood Separator)
1. Remove the green cap from the lithium heparin whole blood separator to prepare it for
sample collection.
2. Immediately after sample collection (to avoid clotting), dispense 0.6–0.8 cc of untreated (no
additive) whole blood into the lithium heparin whole blood separator using an untreated syringe
with the needle removed.
Tip: Use the fill line on the separator to ensure proper fill volume.
Note: Heparinized samples can be used in the lithium heparin whole blood separator except
when running feline AST, LDH, or CK. Double dosing may elevate the results for these assays in
feline samples.
3. Gently swirl (do not invert or shake) the whole blood separator at least 5 times to mix the
sample with the anticoagulant.
Caution: Ensure that the cap is removed before loading the separator into the
analyzer.
132
Fill to lowest line on
separator (0.7 cc [700 µL])
To Prepare a Plasma Sample
1. Use the appropriate tube and collection device.
2. Draw the sample gently and transfer if necessary.
Note: Be sure to use the correct blood-to-lithium heparin ratio.
3. Gently invert (do not shake) the sample for 30 seconds to mix.
4. Centrifuge the sample.
5. Use a transfer pipette (or a 300 µL pipette) to transfer the appropriate volume of sample to a
Catalyst sample cup (ensure there are no bubbles in the sample cup). The volume needed
varies depending on the number of slides being used in the run—for more information, see
“Proper Sample Cup Volume” on page 22.
Sample Preparation and Storage
2 3 4 5
Table of contents
Other Idexx Measuring Instrument manuals
Popular Measuring Instrument manuals by other brands

Camlab
Camlab TRUEscience ION Iodide ISE instruction manual
Keysight Technologies
Keysight Technologies E5400-Pro Series user guide
Detecto
Detecto MedVue MVWIFI Installation, configuration, and operation manual

Feig Electronic
Feig Electronic ID ISC.ANT1710/690 Crystal Gate Excellence... Quick installation
Lutron Electronics
Lutron Electronics vt-8204 user manual
Siemens
Siemens SITRANS F operating instructions

