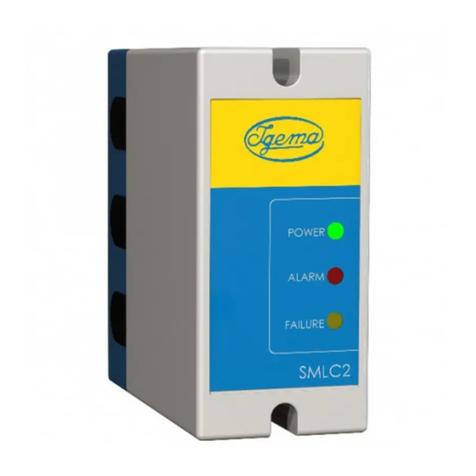
Igema SMLC 1 User manual

Low water level
limiter SMLC1
With level electrode
EL 030 / EL 19-2
D-08-B-166 -1
Edition 07/11
Installation and operating instructions

2
-Table of contents-
1. Risks and Safety precautions 3-4
1.1 General safety instructions ....................................................... 3
1.2 Exclusion of liability ..................................................................
2 Use in compliance with regulations
3. Function SMLC1 -6
3.1 Operating principle ................................................................... 6
4. Design 7
.1 Installation dimensions and descriptions...................................... 7
. Installation 8
6. Configuration 8
7. Fitting the electrode 9-11
7.1 Fixing elements for receiving electrodes ............................... 10-12
7.2 Mounting in mounting housing ............................................ 12-13
7.3 Adjusting the electrode plugs ................................................... 1
7. Shortening the electrode extension........................................... 1
8. Power connection 1 -16
8.1 Wiring diagram ...................................................................... 15
8.2 Procedure.............................................................................. 16
8.3 Testing.................................................................................. 16
9. Technical Data 16-17
9.1 Device data ...................................................................... 16-17
9.3 Maximum ratings of potential free contacts................................ 17
10 Appendix 18
10.1 Warranty............................................................................... 19
11 EC Declarations of conformity 20

3
General safety instructions
1. Avoidance of risks to persons and property
• Only use the device supplied in accordance with the intended planning.
• Extensions and modifications to the device must only be carried out with our approval.
• Observe accident prevention regulations and system-specific safety instructions.
• Read and observe assembly and operating instructions.
2. Limitations of use
The device must only be used in accordance with the details in these operating
instructions or for the parameters agreed in the supply contract (see name plate) and the
application.
3. Avoidance of risks and damage
• Disseminate the assembly and operating instructions to the departments responsible
for “goods in, transport, assembly, commissioning and maintenance”.
• If this device is passed on to third parties these assembly and operating instructions in
the relevant language of the country must accompany it.
• Work on the device should only be carried out by trained staff specially commissioned
and exclusively with the current disconnected.
• Read and observe the assembly and operating instructions carefully and keep them in a
safe place.
• Take note of and follow the safety instructions printed in bold and highlighted
in the individual sections!
• When transporting, avoid e.g. knocks and putting down heavily, this can lead to
damage.
• For intermediate storage ensure that the storage location is suitable for the device.
The storage location must be dry and the device secured against damage.
4. Symbols
In these assembly and operating instructions safety instructions are specially marked
with the following symbols:
means that if they are not observed there is risk to life and / or
significant damage to property may occur.
Danger
means that attention is particularly drawn to technical requirements.
Take note

Exclusion of liability
IGEMA GmbH Mess- und Regelsysteme will assume no liability if the above-mentioned
regulations, instructions and safety precautions are not noted and followed.

5
2. Use in compliance with regulations
The self-monitoring low water level limiter SMLC1 in combination with the level
electrodes EL 030 or EL 19-2 is a multi-dynamic limiter of a special type in
accordance with DIN VDE 0116 and Wasserstand 100. The self-monitoring
control system (SMC) enables first failure identification at the time of occurrence
and immediately switches off the downstream relays.
3. Function
The general function of the limiter SLMC1 is displayed by lighting of the green
LED “UB”. The input stage of the SMLC1 compares the values of the isolation
and limiter electrode in a Wheatstone bridge using a mains synchronised
reference voltage. The dimensioning of this stage allows the identification of
short circuits and interruptions in the electrode power line. The core element of
this limiter is a timer and control unit monitoring the output of the input stage in
the rhythm of 0 ms for its in-phase dynamic behaviour.
If the behaviour is correct the timer and control unit activates the driver of the
final stage with its own momentum. The final stage has its own specified time
which only activates the output relays when phasing and time of the activation
are carried out within a fixed framework. The power flowing via the contacts of
the safety chain is limited in the SMLC1 by amp fuse protection by which
sticking of the contacts is prevented. With static activation or failure of the
activation the final stage will switch off after a delay time.
Faults and lack of water are displayed by the lighting up of the red LED
“FAULT”. In the case of lack of water after a time delay of one second together
with the display “FAULT” the contacts of the additional fault reporting are
closed. After the delay time that can be set at , 8, 12, 16 seconds switch-off of
the relays of the safety chain takes place. Locking must be carried out on site.
The delay time is set at seconds.

6
3.1 Operating principle SMLC1
The SMC system is capable of identifying any possible first failure the moment it
occurs and switching off the downstream relays. Failure to detect a fault is
therefore impossible.
As further dynamic monitoring, the periodic overall test of the device takes place
every 2 minutes for one second as a fully automatic process. The yellow LED
“TEST” shows that the test is being carried out followed by confirmation by the
red LED “FAULT” lighting up briefly.
Because of this special first failure safe design manual tests are not necessary so
there are no test switches on the SMLC1.
Alarm Safety chain
Mains
Electrode

7
4. Design
The SMLC1 is supplied in a plastic plug-in housing for fitting into switch cabinets.
The housing is designed for quick fitting with a spring catch for the DIN EN
50022 standard 35 mm carrier rail and for screw fixing on a mounting plate.
4.1 Installation dimensions and descriptions SMLC1
Base Front view Side view
with connecting terminals
1 Screws for snap fastening
2 Holes, ø .3 mm
3 Fixing screws
Snap fastening
5 Holder
6 Cable feedthrough
7 Hood
SMLC1

8
. Installation
Secure with protection class in accordance with current regulations
!
With snap fastening for standard 3 mm carrier rail
according to DIN EN 0022
•Fix device on standard carrier rail by means of the snap fastening ( ).
•Release fixing screws (3) and pull hood (7) from holder (5).
Without snap fastening
•Release fixing screws (3) and pull hood (7) from holder (5).
•Release screws (1) and remove snap fastening ( ). Drill through the
marked point (2) in the holder (5) with ø .3 mm drill.
•Fit base (5) on base plate with two M screws.
6. Configuration
The preset switch-off time can be changed.
It is to be agreed with the local expert.
Setting the switch-off time:
•Open SMLC1. To do this release the fixing screws (3) and pull the hood
(7) off the holder (5) – with the device disconnected from the power
supply.
•After unlatching the back plate pull the circuit board sandwich out of the
hood (7). On the smaller circuit board at the front edge there is a two-
pole DIP switch (see diagram) via which the switch-off time can now be
changed as follows:
DIP switch Switch-off
1 2 time
off off s
on off 8 s
off on 12 s
on on 16 s
Circuit board
sandwich
DIP switch

9
7. Fitting the electrode
It is essential to remove the protective tube for transport before
installation!
If several electrodes are screwed into a flange the electrode plug (2)
and the associated electrodes should be labelled to prevent confusion!
Fixing the electrode extension (9)
Push the electrode extension (9)
approx. 30 mm over the electrode shank
(8) until the ø .3 mm hole
matches the threaded hole
in the electrode shank.
Screw up both parts by means
of the enclosed M set screw with
SW2 hexagon socket.
Screwing in the electrode
•Release screw (1) and pull off
electrode plug (2).
•Clean sealing surfaces and check
•Insert sealing ring (6)
•Lubricate thread (7) with heat-resistant
solid lubricant (e.g. graphite).
•Screw in electrode and tighten,
max. tightening torque Md=1 0 Nm.
On commissioning the boiler
check the electrode screw connection
in the flange for tightness and if necessary
retighten!
1 Screw
2 Electrode plug
3 Seal
4 Contact carrier
5 Threaded ring
6 Sealing ring
7 Thread
8 Electrode shank
9 Electrode extension

10
7.1 Fixing elements for receiving the electrodes
The flanges, seals, screws and nuts listed in the table below are laid out in
accordance with the Technical Rules for Steam Boilers (TRD) and tested by the
Technischen Überwachungsverein (TÜV) [Technical Inspection Agency].
Flange according to DIN
Drilling plans 1-8
“Bohrbild” means: drilling plan
Seals according to DIN
PN DN DIN Sealing
surface Form Threaded hole Material
0 2635 B
63 2636
100 / 160
50
2638
DIN 2526 E
according to drilling
plan
1,2
1.0 60
0 2635 B
63 2636
100 / 160
100
2638
DIN 2526 E
according to drilling
plan
1,2,3, ,5,6,7,8
1.0 60
PN DN DIN Material
0 EN 151 -1 IBC
asbestos-free
63
100 / 160
50 2697 RSt 37-2/ 0.5
graphite
0 EN 151 -1 IBC
asbestos-free
63
100/160
100 2697 RSt 37-2/ 0.5
graphite

11
DIN screws
PN DN DIN Numbe
r
Dimension Material
0 M16 x 75
63 M20 x 100
100/160
50 976
M2 x 110
1.7709
0 M20 x 90
63 976 M2 x 110 1.7709
100/160
100
2510
8
LM27 x 1 5 Ck 35
DIN nuts
PN DN DIN Numbe
r
Dimension Material
0 M16
63 M20
100/160
50 EN
2 032
8
M2
1.7258
0 M20
63
EN
2 032
M2 1.7258
100/160
100
2510
16
NFM27 C 35

12
7.2 Mounting in mounting housing
The approval is only valid if shut off valves are mounted between the
process connections of the mounting house and the boiler supports and
a relief valve is fitted on the mounting housing!
Illustration Mounting Housing

13
Construction dimensions
Materials
Flanges 1.0 60
Pipes St35.8 / 16 Mo 3 (according to pressure range)
Process connection M1
PN DN DIN Sealing form DIN
16
25
0
2635 2526 Form C
63
100 2637
160
50
100
2638
2526 Form E
Process connection M2
PN DN DIN Sealing form DIN
16
25
0
20 2635 2526 Form C
63
100 2637
160
25
2638
2526 Form E
On request ASME-compliant flanges, weld-on ends or
DIN or ASME-compliant socket welding on the process connection are also an
option.
Construction dimensions min. [
[[
[mm]]
PN DN ∅
∅∅
∅d C D A1 A2
16
25
0
115 85
63 100
100 105
160
50 60.3
135
15
115
100
16 100
25
0
1 0 150
63 1 0
100 155
160
100 11 .3
160
15
165
160

1
7.3 Adjusting the electrode plugs (see sketch page 9)
If insertion of the electrode plugs (2) is not possible because of the position of
the contact carrier ( ), take the following steps:
•Keep releasing the threaded ring (5) until the contact carrier ( ) can be lifted.
•Turn the contact carrier ( ) into the required position and snap in;
retighten the electrode plug (5).
7.4 Shortening the electrode extension (see sketch page 9)
Never dismantle the electrode when the boiler / mounting housing is
pressurised!
•Release screw (1) and pull off electrode plug (2).
•Screw out electrode.
•Dismount electrode extension (9) by screwing out the set screw.
•Clamp electrode extension (9) directly at the point to be shortened and
shorten. Do not distort the electrode extension!
Lengthening is not permissible!
Do not heat insulate electrode head - all parts above the thread (7)!!

15
8. Power connection
Carry out connection according to the SMLC1 wiring diagram on the
back plate of the hood (see page 7 item 7) or according to the wiring
diagram illustrated.
8.1 Wiring diagram (EL 030, EL 19-2)
See name plate of supply voltage
Safety chain
Alarm
Power connection:
Shielded connection line
e.g. LIHF/GLS 4 x min. 0.75 mm²
Cable connection at the
electrode socket EL03 or EL019-
1 Schraube
2 Electrode plug
3 Seal
4 Contact carrier
5 Threaded ring
6 Connecting cable

16
8.2 Procedure
•Pierce or pull out cable feedthrough (6) and feed connection cable through.
Check supply voltage. See name plate for allowable voltage. Use shielded
connection cable to the electrode 2 x 2 STP, e.g. LIHF/GLS,
x 0.75 mm².
•Length of connecting line max. 100 m at 5 – 10,000 µS/cm or max. 30 m at
0.5 – 2,000 µS/cm.
•Only connect shielding on the SMLC1 control unit (terminal 6). After electrical
connection - with device disconnected from the mains - put hood (7) on
holder (5) and tighten fastening screws (3).
(see sketch p. 7)
8.3 Testing
Switch on supply voltage, the green LED "U
B
” lights up.
•When the electrode is uncovered the red LED lights up “FAULT”.
•When the electrode is submerged the LED “FAULT” must not light up.
•The LED "TEST" must light up for one second every two minutes.
A successful test is confirmed by the red LED flashing briefly.
9. Technical data
9.1 Device data
Component
TÜV ID: 000006173
CE ID no.: 0035
Manufacture in accordance with EC Directive 97/23/EC,
Modules B+D, Category IV, EC type test W 17/02,
Applied standards:
Control device: DIN EN 50081-1, DIN EN 50082-1
Electrode TRD, AD2000, ASME boiler
230 V ± 15%
Mains connection
50/60 Hz
Power consumption approx. .5 VA
Device fuse 80 mA/T
Protection in accordance with DIN VDE 0 70 IP 0*
Allowable ambient temperature 0 - 60°C
* IP 5 protection class is to be ensured in the boiler area to comply with the German regulation
VdTÜV-Wasserstand 100, .90.

17
Electrode EL 030 EL 19-2
Nominal pressure PN 25 0 63 100 160 250 320
Max. allowable pressure PS [bar] 20 32 50 80 100 160 250
Max. allowable temperature TS [°C] 21 239 265 296 312 3 6 367
Construction dimensions Y
[mm]
> 125 > 130
Mechanical connection Thread G ½
Power connection Plug connection with screw terminals, strain relief
Screw cable connection M16X1.5
Protection class in accordance with DIN
VDE 0 70
IP 65
Allowable ambient temperature at the
plug [°C] 100°C
Construction
dimensions Y
[mm]
EL 030 / EL 19-2
1.700 with protective tube > DN 80, vertical installation position
800 with protective tube DN 50, vertical installation position
800 with protective tube DN 50 / 100, installation position inclined up to 5°
9.2 Maximum ratings of potential free contacts
Safety chain Switching voltage max. 250 V AC
switching current max. A resistive
max. 0.75 A inductive cos ϕ0.5
Additional fault reporting Switching voltage max. 250 V AC
switching current max. 8 A resistive
max. 1.5 A inductive cos ϕ0.5
Electrical conductivity 5 µS/cm ≤ æ ≤ 10,000 µS/cm
of the fluid 0.5 µS/cm ≤ æ ≤ 2,000 µS/cm
Length of the max. 100 m at 5 – 10,000 µS/cm
connecting cable max. 30m at 0.5 - 2,000 µS/cm
Electrode EL 030 EL 19-2
Insulator PTFE Ceramic
Plug Polyamide
(glass fibre reinforced)
Sealing ring Soft iron
Electrode housing Niro
Electrode rod Niro
Electrode extension Niro

18
10. Attachment
Warranty
We give a guarantee period on our product of 2 months. The condition for this
is proper handling in accordance with the assembly and operating instructions.
For worn and replacement parts the warranty is limited to defects of material
and manufacture.
Level electrodes are wearing parts and do not form part of the warranty.

19
11. Declaration of Conformity
EC conformity declaration in accordance with
EC Directive 2006/9 /EC,
EC Directive EMC 2004/108/EC and DIN EN 60730-1+2
We:
IGEMA GmbH
LECOS GmbH
J.G. Merckens Mess- und
Regelsysteme GmbH & Co. KG
Zieglerstraße 10-16
D-52078 Aachen
declare as the IGEMA Group that the
product “NW water level limiter” as pressure accessory
Product type:
Control device “SMLC1” with
Electrode “EL030” or “EL19-2”
comply with the directives and have been subjected to the following conformity-assessment
procedure:
Category IV, Modules B and D
Applied standards:
Control device: DIN EN 50081-1, DIN EN 50082-1
Electrode/float switch: TRD, AD2000
Notified body for the modules:
TÜV Rheinland Industrieservice GmbH
Am Grauen Stein
D-51105 Köln (Cologne)
Identification no. 0035
Aachen, 20.07.2011
E.H. Kilchert A.Scholl J.Riechelmann
(Managing director) (QM Officer) (Development)

20
This high-quality IGEMA product was designed, manufactured and
tested with the application of the QM System guidelines in accordance
with DIN EN ISO 9001:2000.
If the device supplied shows transport damage or gives cause for
complaint in spite of our final quality control please contact our
SERVICE department by return.
Telephone 0241- 5687-0.
Prepared by: V.Hugemann Approved: Date: 20.07.2011
Table of contents
Other Igema Control System manuals
Popular Control System manuals by other brands
Waterous
Waterous Aquis 2.5 SSP Installation & operation instructions
OSI Security Devices
OSI Security Devices OM100 installation instructions
Pego
Pego 200SCH202HYP user manual

Moniteq
Moniteq Crypto Lock CC-8521BN instruction manual

Lindsay
Lindsay FIRLDNET GSM CELLULAR RTU installation manual

SOMFY
SOMFY SOLIRIS Uno installation guide
