IKARI Clean Eco Line GX Mini User manual

IKARI SHODOKU CO., LTD.
High Performance Vacuum Insect Trap
Instruction Manual
February 2021, First edition
To use the product safely and correctly, be sure to read this manual before using the product.
Be sure to keep this manual in a safe place for future reference.
Document control number
B-GXM01-0111WM

2
Introduction
Thank you for purchasing Clean Eco Line GXmini (hereafter referred to as “the product”).
Before using the product, thoroughly read this Instruction Manual (hereafter referred to as “this manual”)
and operate the product in a correct manner. In addition, keep this manual in an easily accessible place
and be careful not to lose it.
Trademarks
This product is a registered trademark of IKARI SHODOKU CO., LTD. (hereafter referred to as “IKARI
SHODOKU”).
Copyrights
The copyrights for this manual belong to IKARI SHODOKU or its licensor. The customer may not
disclose these details to any third party without IKARI SHODOKU’s consent.
The customer may not use or make copies of this manual, in whole or in part, without receiving prior
consent from IKARI SHODOKU. The customer is also prohibited from translating or modifying the
content of this manual, in whole or in part.
Target readers
This manual has been prepared to help all intended users of the product. However, this manual does not
describe the detailed procedures that require expertise, including communication testing and electrical
work. Such procedures must be performed by qualified personnel after obtaining appropriate technical
information from IKARI SHODOKU.
Attention
Please note that the contents of this manual are subject to change without advance notice.
The product is intended for exclusive use outside of Japan.
Although we take all possible measures to ensure that the descriptions in this manual are accurate,
contact your local IKARI SHODOKU authorized dealer (hereafter referred to as local dealer), if you find
any errors.
Comply with the administrative laws and regulations stipulated by the national or local government for
disposal of the main unit and components of the product as well as consumables.
In case of lease or transfer of this product, attach this Instruction Manual to the product.

3
Notations in This Manual
Meaning of signal words
Failure to observe the descriptions in this manual may cause a physical risk to the human body
or material damage. This manual describes such matters using signal words including
“WARNING” and “CAUTION” as follows. Thoroughly read and understand the descriptions with
these signal words in advance and comply with their details.
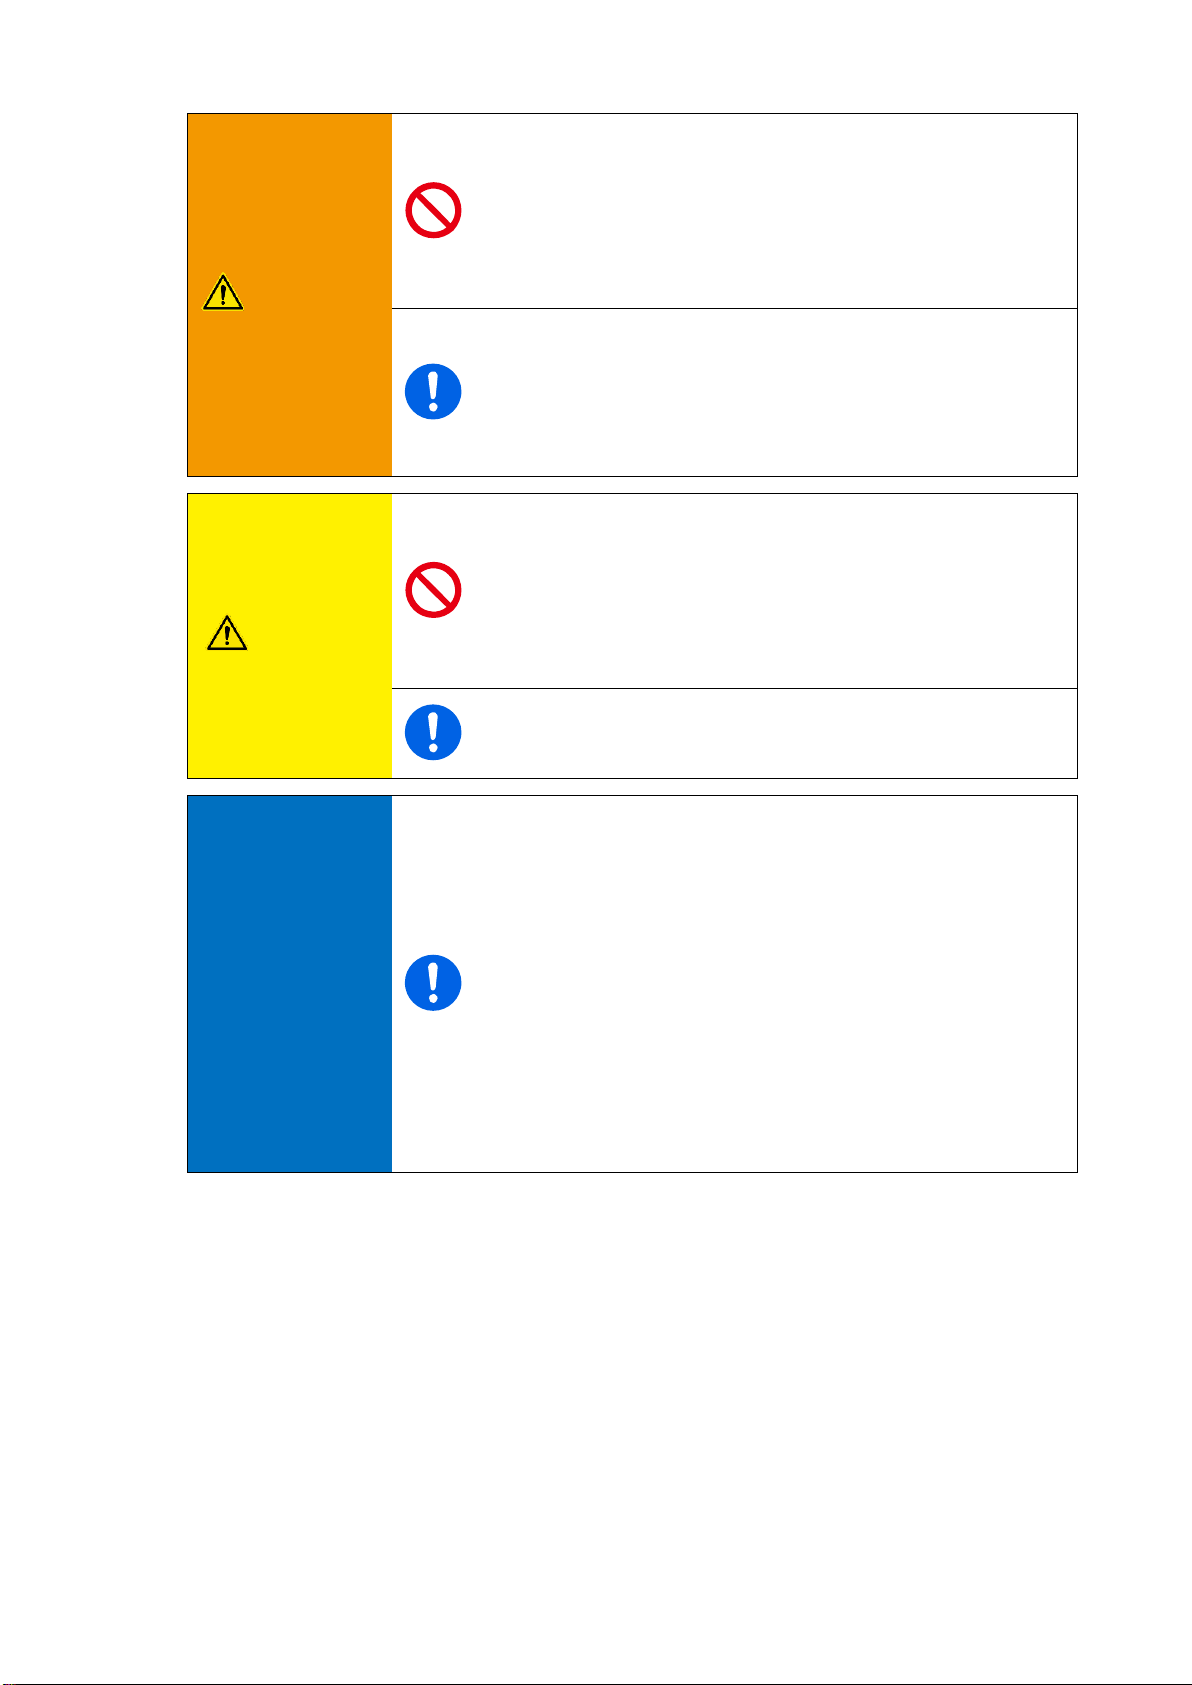
WARNING
A “WARNING” item indicates a potentially hazardous situation
that may result in serious injury or death to the operator.
CAUTION
A “CAUTION” item indicates a potentially hazardous situation that
may result in minor or moderate injury to the operator.
NOTICE
A “NOTICE” item indicates a situation that will not result in injury
to the operator, but may result in damage to or cause malfunction
of the product, facility, other devices, and so on.
Definition of “Serious injury”, “Moderate injury”, and “Minor injury”
“Serious injury”
Loss of eyesight, wounds, burns, electric shock, bone fracture,
poisoning, and other injuries that cause lasting effects and require
hospitalization or long-term outpatient treatment
“Moderate injury”
Injuries that require hospitalization of less than one month for recovery
and inflict after-effects.
“Minor injury”
Injuries that do not require hospitalization or long-term outpatient
treatment
Meaning of pictograms
This symbol indicates a risk that may affect the human body. A specific description
of the warning is provided with this symbol.
This symbol indicates prohibited activities. A specific description of the prohibition
is provided with this symbol.
This symbol indicates activities that must be implemented. Specific instructions
are provided with this symbol.
A “Note” item indicates information related to the operation of the product with
which the operators must be fully familiar.
A “Reference” item indicates the location of any sections containing related
information.
Note
Reference

4
Period of Service and Time Limit on Supply
Standard period of service by design
WARNING
The product has a standard period of service by design
of 6 years after the shipment. Continuing the use beyond
the standard period of service by design may cause an
accident, such as a fire or electric leakage, due to aging.
The standard period of service by design is not a guaranteed value. This value is the standard
period that is expected if appropriate maintenance, management, and care is exercised by the
customer. In addition, the indicated value may not be achieved depending on the operating
conditions (e.g., environment).
When the standard period of service by design is reached, contact your local dealer.
The contents of this manual shall be valid until the usage time of the product reaches the
standard period of service by design.
Time limit on supply of maintenance parts
In principle, the time limit on the supply of the maintenance parts is approximately 6 years after
the discontinuation of production of the product.
Note that, for some components, such as generic electronic parts, the production may be
discontinued or the specifications may be changed in a short cycle due to the circumstances of
the manufacturer.
When the production of a generic electronic part is discontinued, IKARI SHODOKU will predict
requirements and make an effort to secure an appropriate quantity. However, in some cases,
we may discontinue the supply of some of the maintenance parts before 6 years after the
discontinuation of production of the product.
In addition, note that the time limit on the supply of commercially available devices and parts is
specified by each manufacturer.
If you need any further information, for example, related to repairs after the warranty has
expired, contact your local dealer.

5
Contents
Introduction................................................................................................................... 2
Trademarks.................................................................................................................................. 2
Copyrights....................................................................................................................................2
Target readers..............................................................................................................................2
Attention....................................................................................................................................... 2
Notations in This Manual .............................................................................................. 3
Meaning of signal words.............................................................................................................. 3
Meaning of pictograms ................................................................................................................3
Period of Service and Time Limit on Supply ................................................................. 4
Standard period of service by design..........................................................................................4
Time limit on supply of maintenance parts ..................................................................................4
1For Safe Use .......................................................................................................... 7
1.1 Cautions on operation..........................................................................................................7
1.2 Cautions on maintenance and inspection ...........................................................................9
1.3 Precautions for power outage..............................................................................................9
1.3.1 When the time frame of a power outage is known ..................................................9
1.3.2 In the case of a sudden power outage .................................................................... 9
1.4 Product nameplate............................................................................................................. 10
2Product Overview ..................................................................................................11
2.1 Product functions ................................................................................................................11
2.2 Features............................................................................................................................. 12
2.3 Specifications..................................................................................................................... 13
2.3.1 Product specifications............................................................................................ 13
2.3.2 Accessories............................................................................................................13
2.3.3 Optional parts......................................................................................................... 14
2.4 Name and operation of each part......................................................................................15
2.4.1 Front of the main unit .............................................................................................15
2.4.2 Back of the main unit ............................................................................................. 16
2.4.3 Sides of the main unit ............................................................................................ 16
2.4.4 Inside of the center cover ......................................................................................17
2.4.5 Behind the control cover ........................................................................................ 18
3Installation ............................................................................................................ 19
3.1 Before installation ..............................................................................................................19
3.1.1 Precautions for installation.....................................................................................19
3.1.2 Installation space ...................................................................................................20
3.1.3 Unpacking and check of items in the package ......................................................21
3.2 Installation method............................................................................................................. 22
3.2.1 For wall mounting................................................................................................... 22
3.2.2 For direct placement ..............................................................................................24

6
3.2.3 Pole stand (optional part)....................................................................................... 24
3.2.4 Blindfold cover (optional part) ................................................................................ 24
4Usage....................................................................................................................25
4.1 Preparation before use ...................................................................................................... 25
4.1.1 Checking the installation of the insect trap lamp. .................................................. 25
4.1.2 Set the insect trap bag........................................................................................... 26
4.1.3 Setting the attractant.............................................................................................. 28
4.1.4 Inserting the power plug into the socket................................................................ 30
4.2 Startup method .................................................................................................................. 31
4.3 Stop method....................................................................................................................... 31
5Maintenance and Inspection .................................................................................32
5.1 Cleaning of the main unit................................................................................................... 32
5.2 Replacement of the insect trap bag................................................................................... 33
5.3 Washing and replacing the filter ........................................................................................ 35
5.4 Replacement of the insect trap lamp................................................................................. 37
5.5 Replacement of the attractant ........................................................................................... 40
5.6 Replacement of the fuse.................................................................................................... 42
6Troubleshooting.....................................................................................................43
7Storage and Disposal of Product...........................................................................45
7.1 Storage when the product is not operated for a long period............................................. 45
7.2 Disposal of the product...................................................................................................... 45
8List of Consumables and Optional Parts ...............................................................46
8.1 Consumables..................................................................................................................... 46
8.2 Optional parts .................................................................................................................... 46

1 For Safe Use
7
1 For Safe Use
This chapter describes the matters that should be observed in order to use the product safely
and prevent injury to the customer or other people and damage to property.
Be sure to read and thoroughly understand this manual to properly use the product.
1.1 Cautions on operation
WARNING
•Do not use the product for any application other than as
described in this manual. Doing so may cause not only
damage or malfunction of the product, but also injury or
a serious accident.
•Do not place the power cord near an open flame. Do not
damage the power cord. Doing so may result in a short
circuit or heat generation, causing a fire or an electric
shock.
•Do not use the product with a voltage other than the
specified power supply voltage. Doing so may cause
damage to the product or an ignition accident.
•Do not touch the main unit, power plug, or socket with
wet hands. Doing so may cause an accident including
an electric shock.
•Do not pull the power cord to unplug the power plug.
Doing so may cause an electric shock or short circuit,
resulting in ignition.
•Do not use the power plug with dust attached.
•Do not use the main unit where a flammable gas is
formed. Doing so may cause an ignition accident or the
like.
•Do not disassemble or modify the product. Doing so
may cause damage to the product, a fire, or an electric
shock. Furthermore, a product that is disassembled or
modified by the customer is no longer covered by the
warranty.
•The customer should not repair the product. Doing so
may cause damage to the product, a fire, or an electric
shock. Furthermore, a product that is repaired by the
customer is no longer covered by the warranty.
•If any liquid or foreign object has entered the product,
immediately unplug the power plug and stop using the
product. Continuing to use the product may cause a fire
or an electric shock.
•Do not splash water on the product. Doing so may
cause a fire or malfunction.
•Do not use the product in a wet or humid location. Doing
so may cause a fire or malfunction.
1 For Safe Use
8
WARNING
•Do not drop or apply a strong shock to the product. If
you have dropped or applied a strong shock to the
product, immediately unplug the power plug and stop
using the product. Continuing to use the product may
cause a fire or an electric shock.
•Do not use the product within reach of children. Doing
so may cause an electric shock, injury, or burn.
•If smoke, foreign odor, or abnormal sound occurs,
immediately unplug the power plug and stop using the
product. Continuing to use the product may cause a fire
or an electric shock.
•For the installation location and method, always follow
the details described in “3 Installation”.
CAUTION
•Do not use the product in an environment that is subject
to chemicals or a hazardous gas. Doing so may result in
the corrosion of the product.
•Do not cover the product with paper or cloth. Do not
place the product near a flammable object. Doing so
may cause heat generation from the product, resulting
in a fire.
•Store the attractant in a safe location out of reach of
children and pets.
NOTICE
•If the product becomes dirty, lightly wipe the product
with a clean cloth moistened with a neutral detergent.
The product does not have a waterproof construction.
•If the product is moved between two environments with
a drastic difference in temperature, dew condensation
may occur. The product should be used at an ambient
temperature from 5°C to 35°C and a humidity of 80% RH
or less (with no dew condensation).
•If any abnormality in the lighting state is found, such as
damage to the glass of the insect trap lamp, immediately
unplug the power plug and stop using the product.
•Under the direction of a responsible person, designate
the storage location of the center cover key and store
the key with care so as not to lose it.

1 For Safe Use
9
1.2 Cautions on maintenance and inspection
WARNING
•Always turn OFF () the power switch and unplug the
power plug from the socket before cleaning the product
or replacing the consumables.
•When cleaning the product or replacing the
consumables, follow the cautions and procedures
described in the relevant sections of “5 Maintenance
and Inspection”.
CAUTION
•When handling the insect trap lamp, be careful not to
drop it. Dropping the insect trap lamp may cause injury
due to damage to the lamp or scattering of broken
pieces.
1.3 Precautions for power outage
Although the product is designed to prevent insects from escaping, take the following measures
if there is any concern, based on the type of insects, that the insects may escape during a
power outage.
1.3.1 When the time frame of a power outage is known
Take either of the following measures:
•Seal the suction opening of the main unit with tape before the power outage. Be sure to
remove the tape after the power is restored. Returning to operation with the tape attached
may cause a malfunction.
•Collect the insect trap bag before the power outage, and reinstall it after the power is
restored.
1.3.2 In the case of a sudden power outage
Open the center cover of the main unit and remove the insect trap bag. Perform insecticidal
treatment by directly spraying an aerosol insecticide.
1 For Safe Use
10
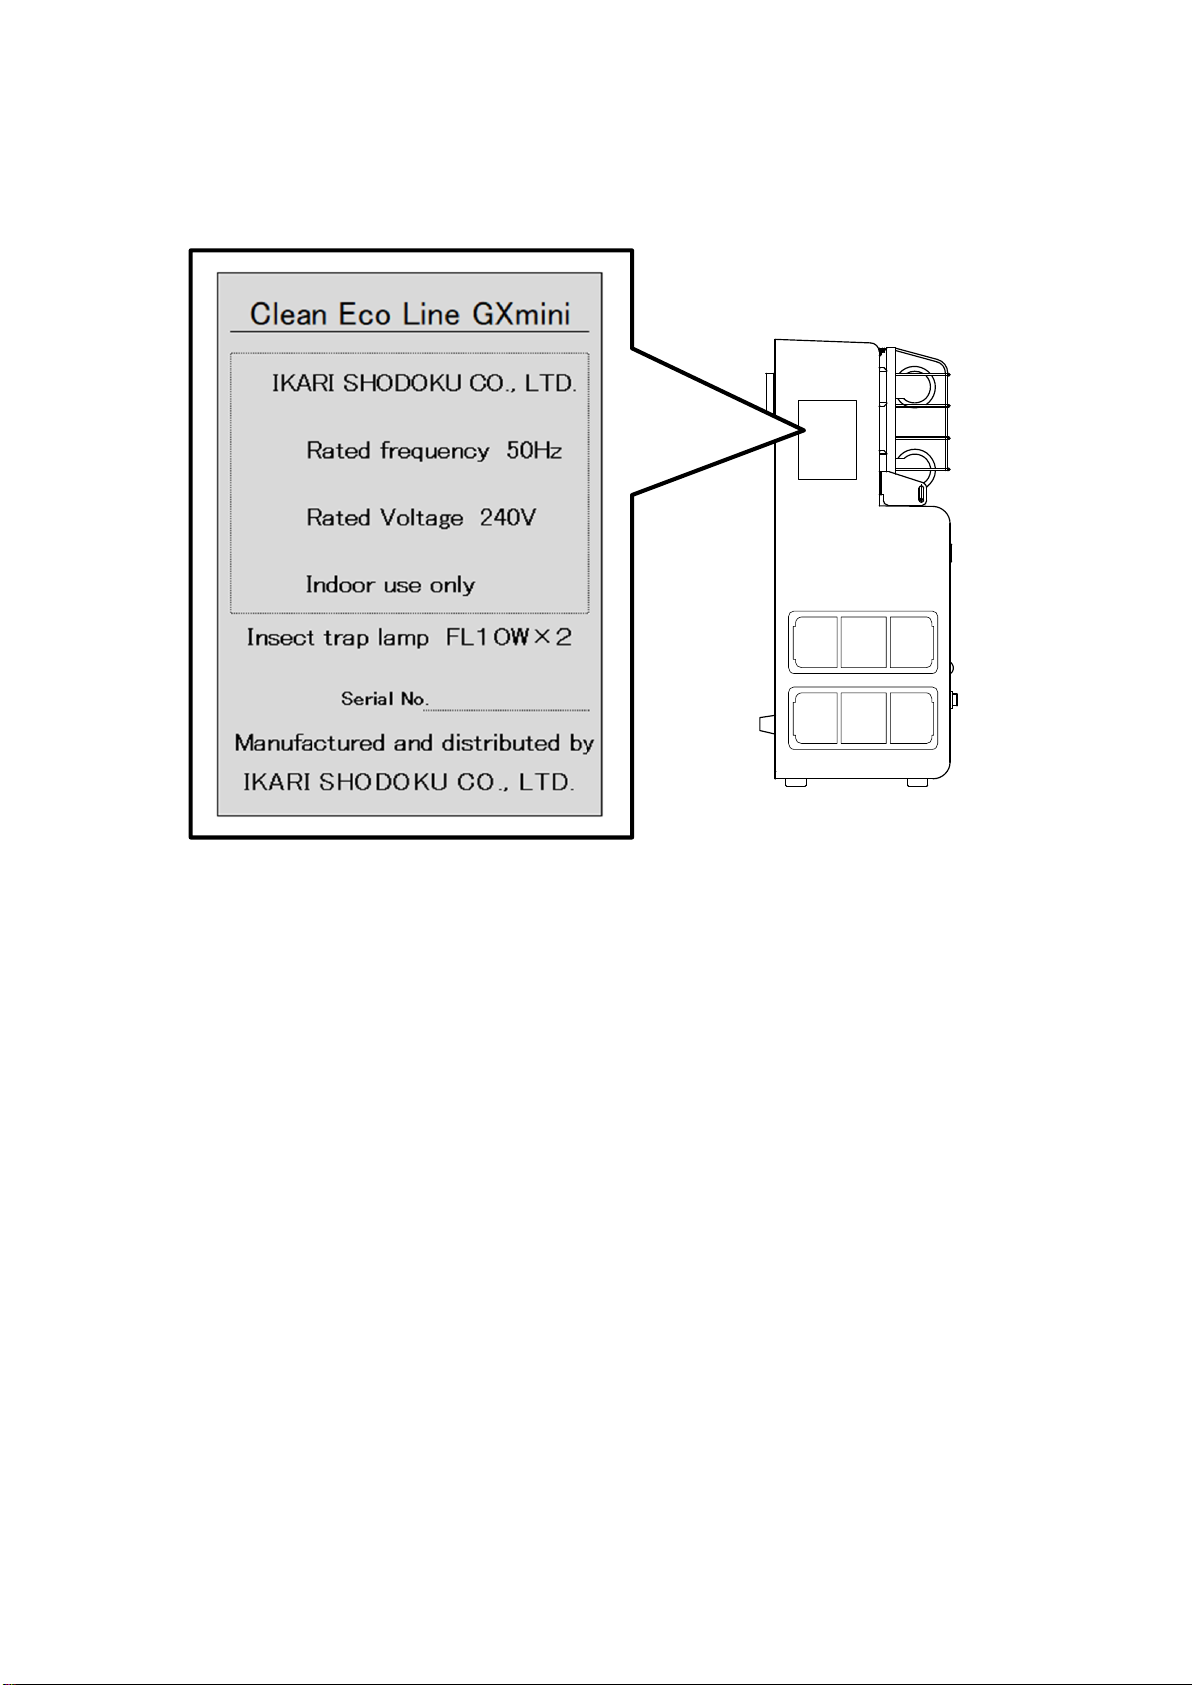
1.4 Product nameplate
The nameplate describing the serial No., rating, and so on, of the product is attached as shown
in the figure below.
If the product nameplate is peeling off or deteriorating and becoming illegible, contact your local
dealer and obtain a new product nameplate. Attach the new product nameplate obtained to the
same location as before.

2 Product Overview
11
2 Product Overview
2.1 Product functions
The product captures insects (flying insects), including house flies, humpbacked flies, fruit flies,
etc. that cause problems in food plants, restaurants, supermarkets, and so on.
In addition to the insect trap lamps (ultraviolet rays) and the suction using the fan, the product is
also equipped with an attractant that is especially effective against large flies as a standard
feature, enabling it to capture insects that could not be trapped with adhesive type.
Insect trap lamp
Suction opening
Attractant
Insect trap bag
2 Product Overview
12
2.2 Features
The trapped insects are contained in the special insect trap bag designed to prevent them from
escaping.
Unique and powerful attraction structure
The insect trap lamps (10 W × 2) are installed in parallel on the front of the product. The
reflector behind an insect trap lamp increases the insect attraction effect.
IKARI SHODOKU original attractant
The IKARI SHODOKU original attractant (accessories) can increase the insect trapping effect.
Suction method
The suction structure enables you to efficiently capture a variety of flying insects. Suctioning is
particularly effective against smaller insects.
Prevention of insect escape using the insect trap bag
Since the product uses suction to capture insects, the trapped insects survive in the insect trap
bag. Therefore, the double structure of the insect trap bag prevents the trapped insects from
escaping, for example, during a power outage. In addition, the large capacity of the bag allows
you to capture a large amount of insects.
Usability
The product is operated simply by turning ON/OFF the switch.
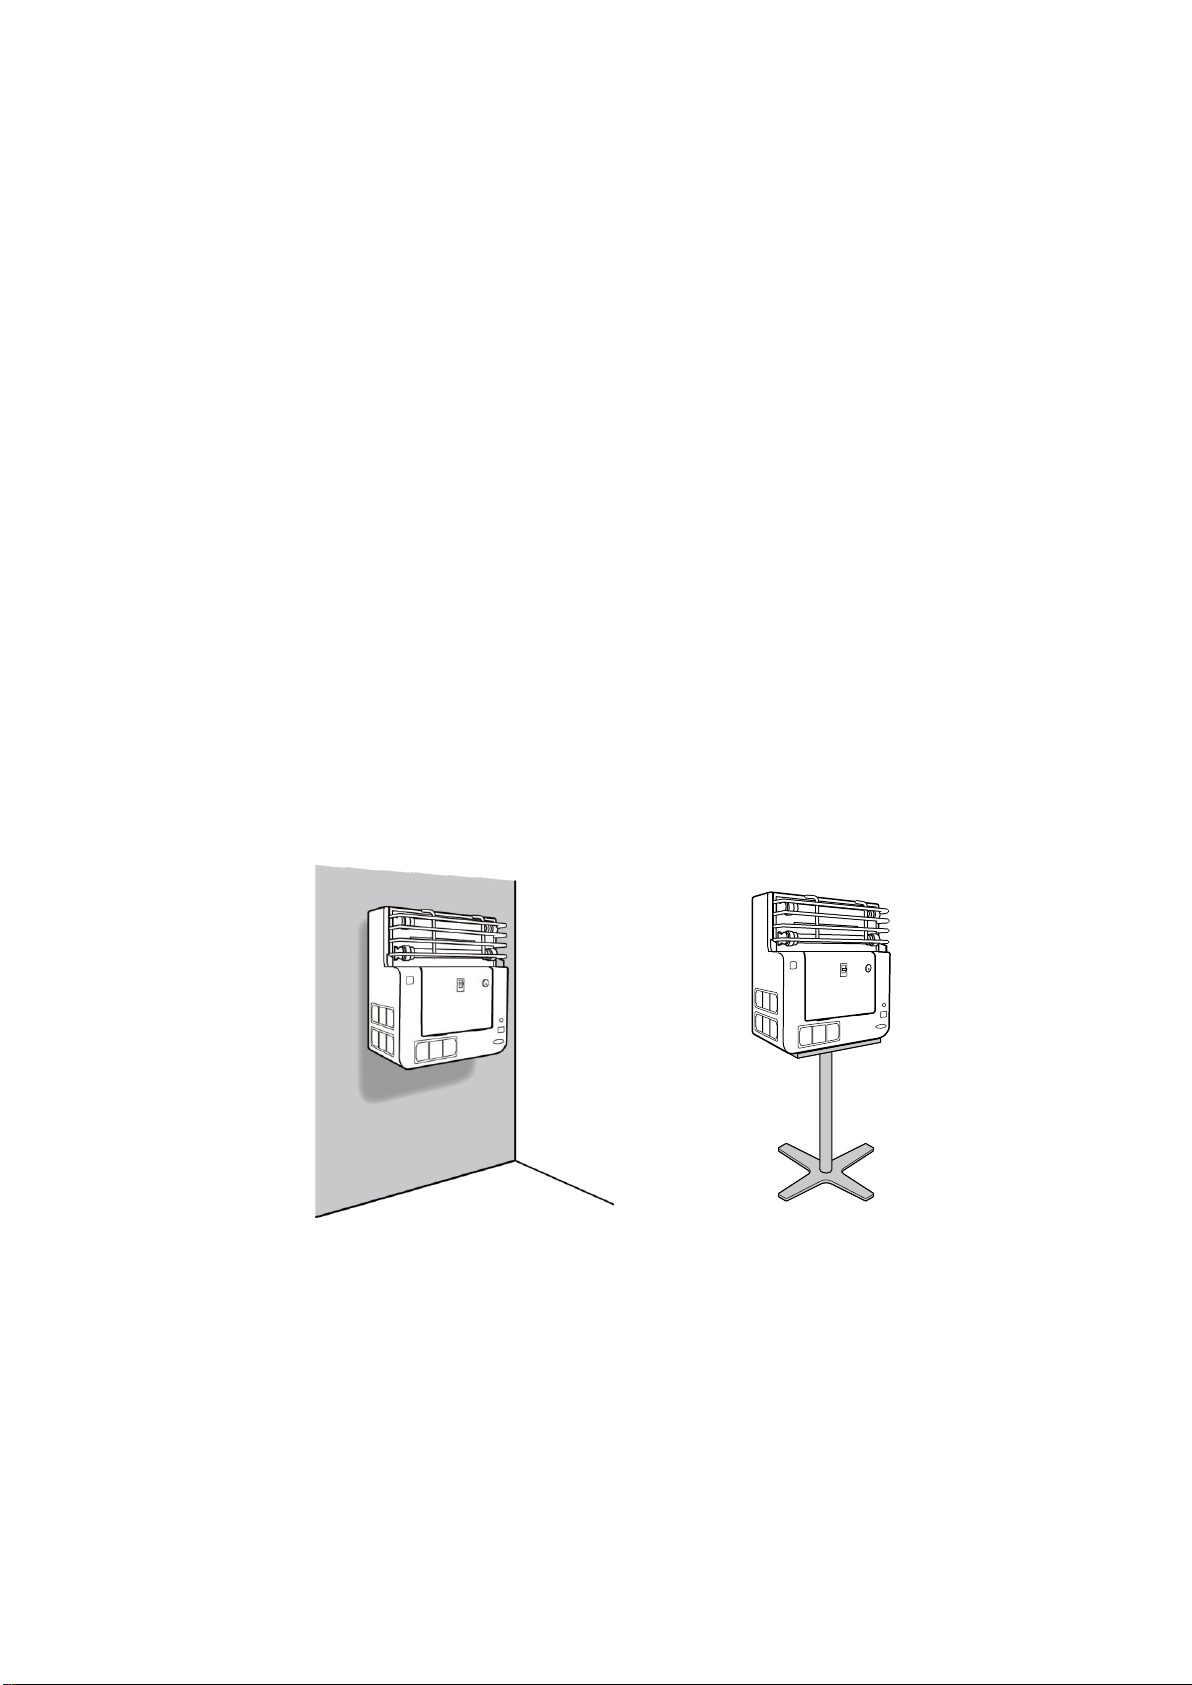
Installation method
The product can be installed via direct placement or wall mounting. A dedicated pole stand is
also available as an optional part.
Wall mounting
Dedicated pole stand
(optional part)
2 Product Overview
13
2.3 Specifications
2.3.1 Product specifications
Item
Description
Name
Clean Eco Line GXmini
Dimensions
Width 430 mm × height 470 mm × depth 190 mm
Weight
Approx. 6 kg (excluding wall mounting fixture)
Insect trap lamp
10 W × 2 (FL10SBL)
Power supply
240 V AC 50 Hz
Power consumption
114 W
Insect trapping method
Suction fan, insect trap bag
Installation method
Wall mounting, direct placement, mounting on the dedicated pole
stand (optional part)
Operating
temperature/humidity
5°C to 35°C, 80% RH or less (with no dew condensation)
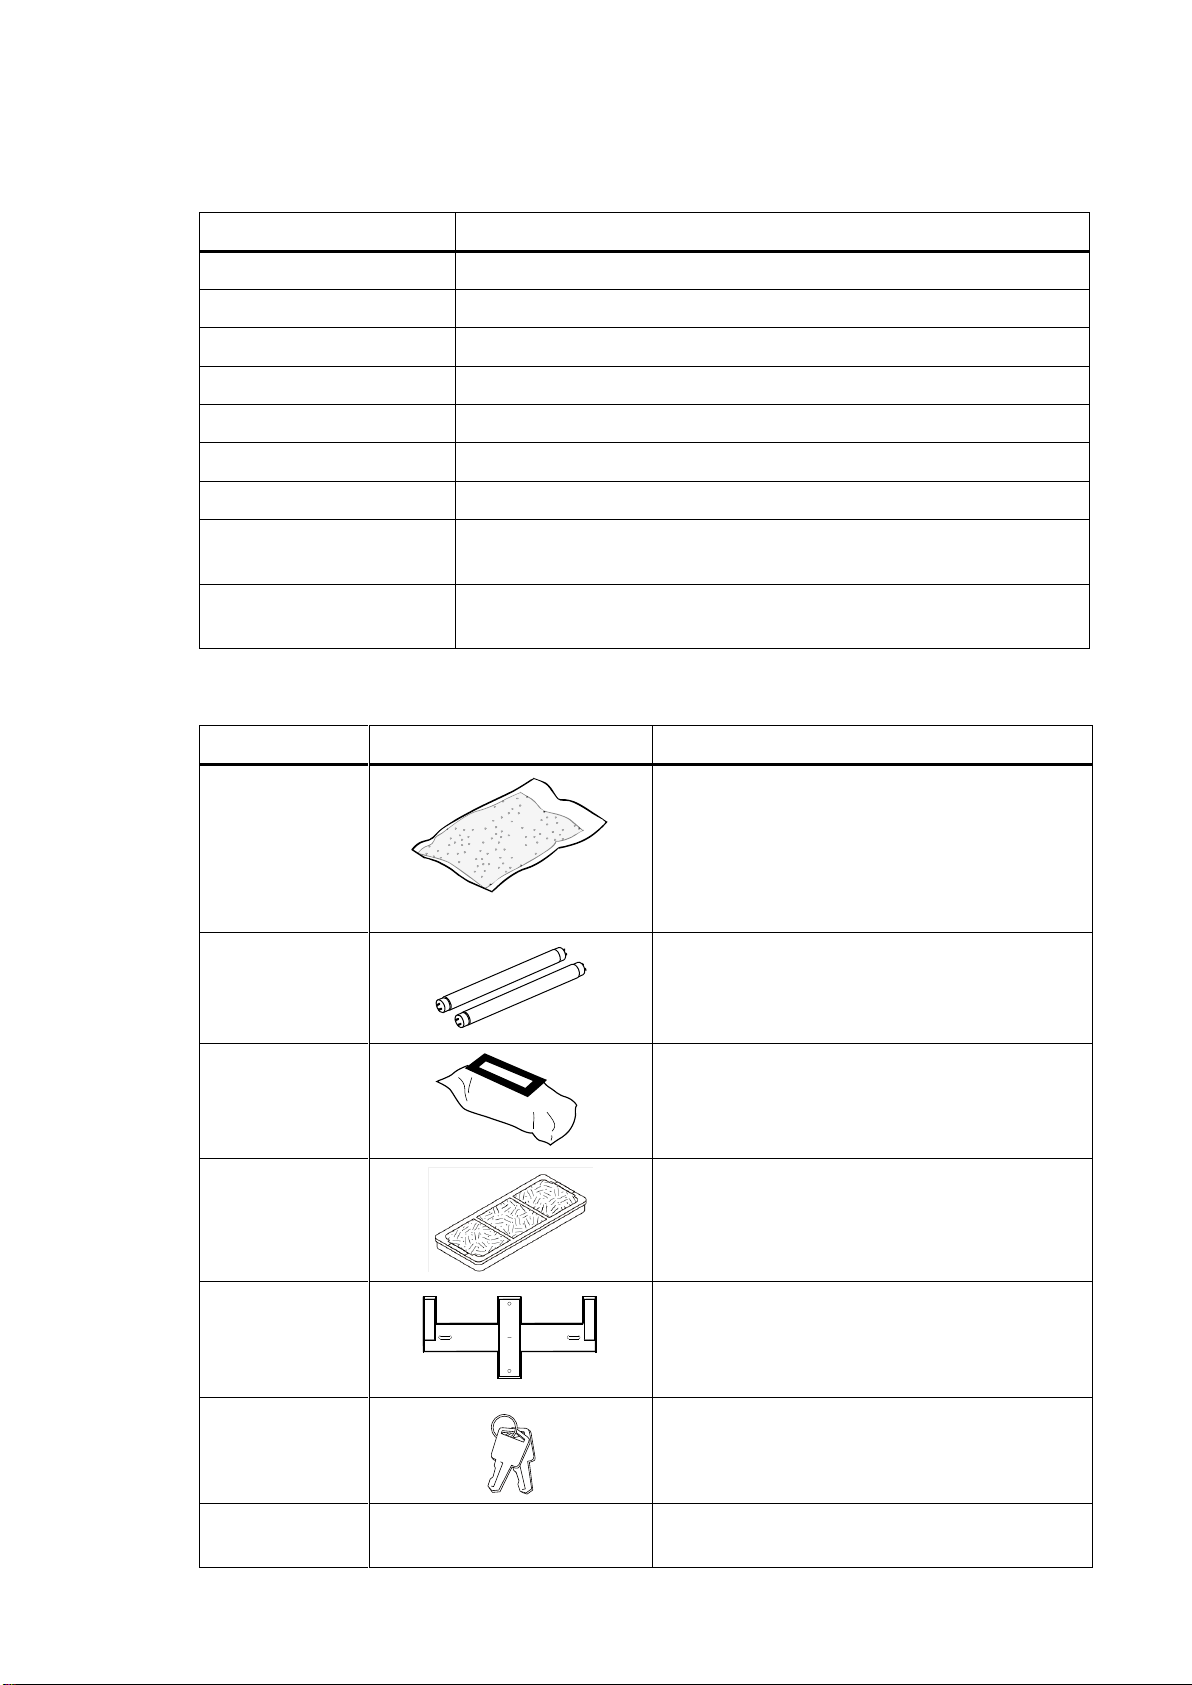
2.3.2 Accessories
Name
Exterior
Description
Attractant
(consumables)
Natechno-Lure BS Bag (attractant derived
from natural ingredients) × 10
Main ingredient: Bamboo shoot extract
Target insects:
Large flies (house flies, flesh flies)
Small flies (fruit flies, etc.)
Insect trap lamp
(consumables)
10 W × 2 (FL10SBL)
Note: The shatter-proof type is provided with
a lamp coated with a shatter-proof film.
Insect trap bag
(consumables)
Non-woven fabric (disposable) × 5
sheets/bag
Filter
(consumables)
Filter for cleaning the exhaust air × 3
Wall mounting
fixture
1 piece
Note: No screws are attached. Separately
prepare screws appropriate for the wall
material.
Key
Key for the center cover lock × 2
Instruction
Manual
This manual
1 copy

2 Product Overview
14
For the product codes, product names, and specifications of the consumables,
refer to “8 List of Consumables and Optional Parts”.
2.3.3 Optional parts
Name
Exterior
Description
Pole stand for Clean Eco Line
GXmini
Dimensions:
W 420 mm × H 620 mm × D 420 mm
Weight: Approx. 7 kg
Base: Aluminum (with adjuster)
Stand and pole: Steel
Coating: Silver powder coating
Blindfold cover for Clean Eco
Line GXmini
Dimensions:
W 412 mm × H 160 mm × D 61 mm
Weight: Approx. 200 g
Material: Acrylic resin
For the product code, product name, and specifications of the optional parts,
refer to “8 List of Consumables and Optional Parts”.
Reference
Reference

2 Product Overview
15
2.4 Name and operation of each part
2.4.1 Front of the main unit
No.
Name
Description
1
Fluorescent lamp socket
The insect trap lamp is inserted.
2
Insect trap lamp
Fluorescent lamp for the insect trap (10 W × 2).
A specification of the lamp with shatter-proof film is also
available.
3
Protective grille
Protects the insect trap lamp.
4
Reflector
Reflects the light from the insect trap lamp and increases the
insect trapping effect.
5
Suction opening
Insects are suctioned through this opening by the internal
vacuum fan.
6
Center cover lock
Lower this tab to open the center cover.
7
Keyhole
Hole for inserting the center cover key.
8
Filter
For cleaning the exhaust air.
9
Power indicator
Lit while the product is in operation.
10
Power switch
Switch to start/stop the operation.
11
Center cover
Opened when replacing the insect trap bag or the attractant.
1
3
4
5
7
6
9
10
2
1
8
11
2 Product Overview
16
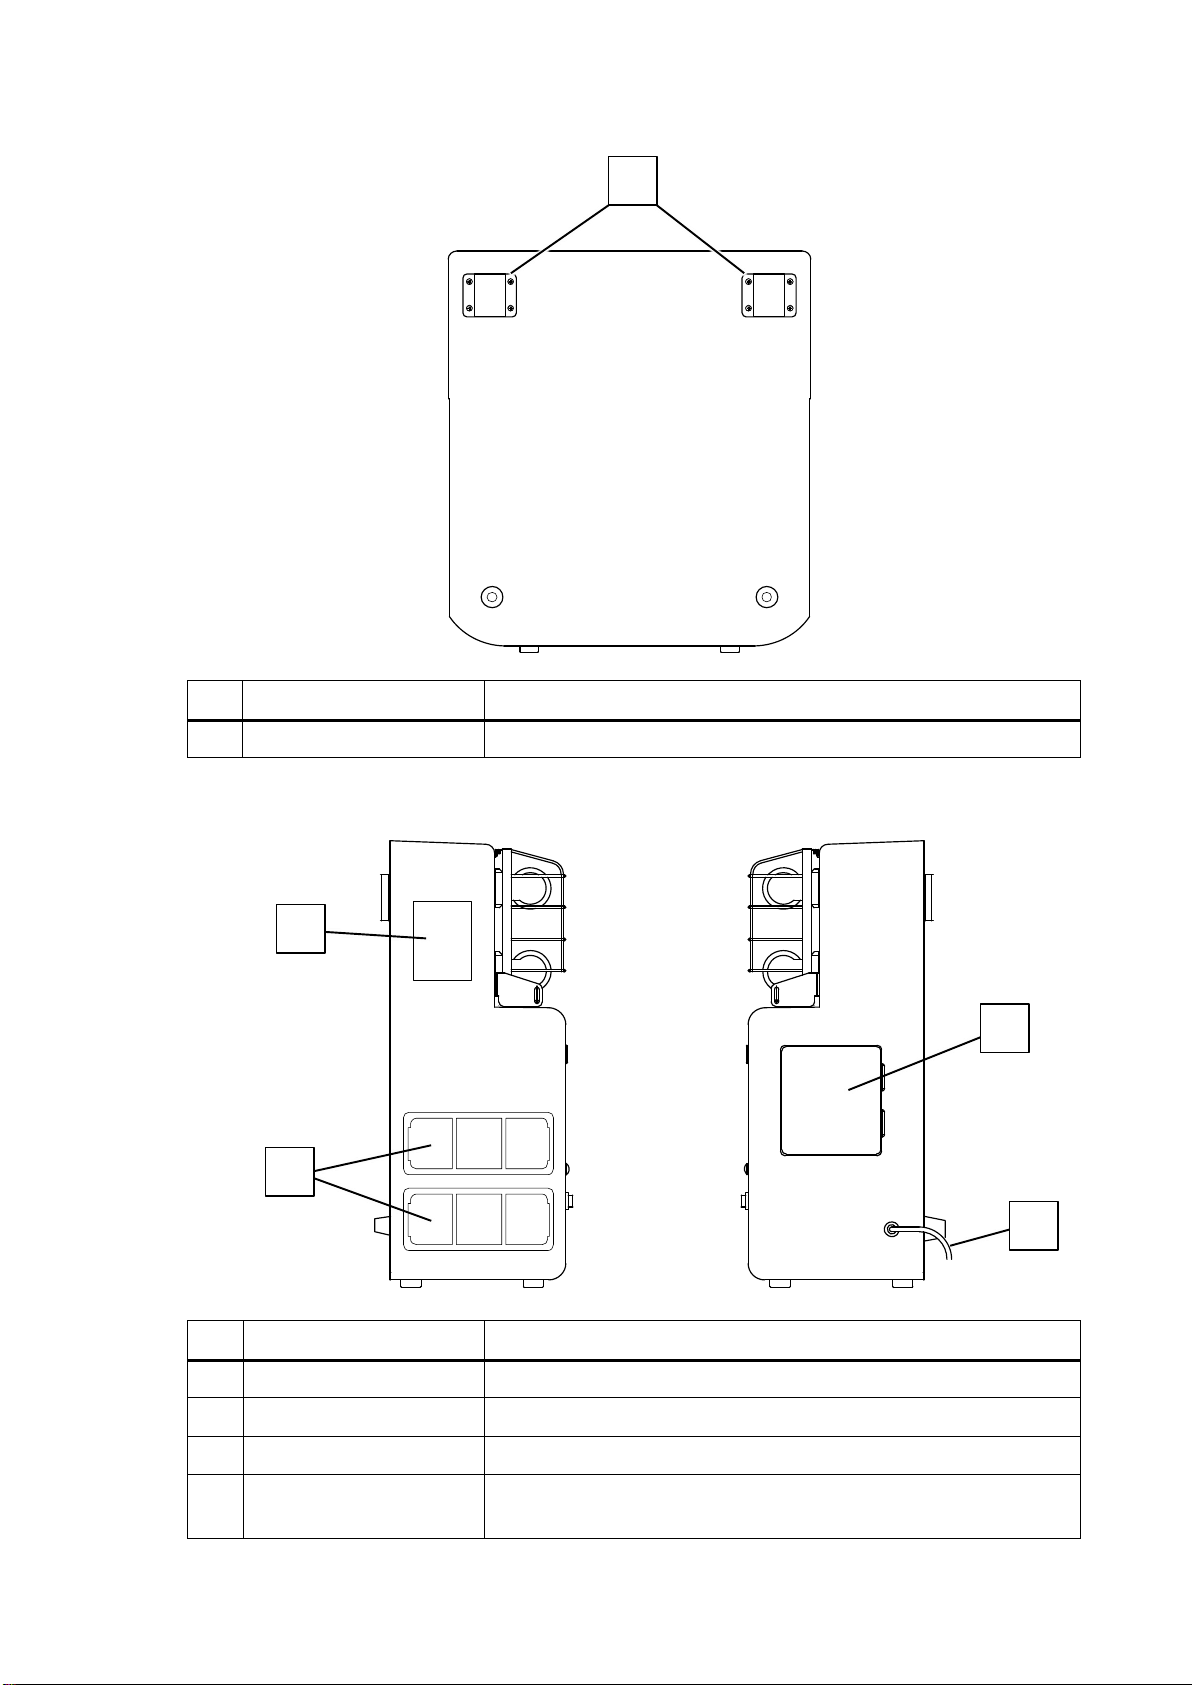
2.4.2 Back of the main unit
No.
Name
Description
1
Wall mounting hook
The wall mounting fixture is inserted.
2.4.3 Sides of the main unit
No.
Name
Description
1
Filter
For cleaning the exhaust air.
2
Control cover
The fuse is housed behind the cover.
3
Power cord
Wiring for supplying the power.
4
Product nameplate
Describes the name, rating, serial No., compatible standards,
and so on, of the product.
1
1
2
3
4

2 Product Overview
17
2.4.4 Inside of the center cover
No.
Name
Description
1
Insect trap bag fixing clip
Metal fixture for fixing the insect trap bag.
2
Insect trap bag
Collects the captured insects. The double structure of the
insect trap bag prevents the trapped insects from escaping.
No.
Name
Description
1
Attractant pocket
Pocket for storing the attractant.
2
Attractant
Packet containing the ingredient that attracts insects
(bamboo shoot extract).
1
2

2 Product Overview
18
2.4.5 Behind the control cover
Name
Description
Fuse
To replace the fuse, rotate this cap counterclockwise and
remove the fuse (250 V, 4 A).

3 Installation
19
3 Installation
3.1 Before installation
3.1.1 Precautions for installation
Observe the following for the installation:
WARNING
•The rated voltage of the product is 240 V. Do not supply
power other than the rated value.
•When mounting the product on the wall, select a place
with sufficient strength and securely install the product.
Select and attach the anchors and screws appropriate
for the wall material.
CAUTION
•Do not use the product in an environment that is subject
to chemicals or a hazardous gas. Doing so may result in
the corrosion of the product. In addition, hazardous
chemicals may attach and cause harm to the human
body.
•Do not use the product in a horizontal position. The
product is designed to be used in a vertical position.
•When carrying the product, do not hold the protective
grille. Also, do not put your hands on the filter sections.
•Install the product in a place and at a height where a
person or object will not hit it.
•Install the product indoors.
Do not use the product in the following locations, even if they are indoors:
Where the operating temperature or humidity is beyond the specified range
Operating temperature range: 5°C to 35°C.
Operating humidity range: 80% RH or less (with no dew condensation)
Where there is a risk of deterioration in the insulation performance due to water
(conductive liquid)
When the product is installed in a location where mist water, water vapor, and the like, may
splash over the product, an electric shock or a fire may occur due to deterioration in the
insulation performance, corrosion, and so on.
Location with strong vibration
A malfunction may occur and the main unit may fall.
Dusty location
When the product is installed in a dusty location, the insect trapping performance may
deteriorate due to reduced performance of the vacuum fan or a clogged filter.
Location with direct sunlight
A malfunction or deformation may occur.

3 Installation
20
Location with an adhesive objects
The fan may fail if it suctions vapor emitted from a highly adhesive materials for a long period.
Example: Manufacturing or treatment process that handles highly glutinous foods (such as in
food manufacturing factories).
Operation on an unsteady stand, or a tilted or unstable location
Injury, malfunction, damage, or contact failure may occur.
Where there is a risk of explosion due to a combustible gas and so on
The specifications of the product are not explosion-proof. Do not use the product in a
combustible gas atmosphere.
Where there is a risk of deterioration in the insulation performance due to a corrosive
gas and so on
When the product is installed in a location where a corrosive gas or solution is discharged*, the
insulation or conduction performance may deteriorate, causing an electric shock or a fire.
* Protection facilities of acids and alkalis, chloric acids, bleaching powder, paint, or artificial
fertilizers, smelters of copper, zinc, and so on, electroplating factories, and the like
3.1.2 Installation space
Secure a space in the front, sides, and top of the product as follows:
15 cm or greater
(recommended)
30 cm or greater
(recommended)
1 m or greater
(recommended)
30 cm or greater
(recommended)
Table of contents
Popular Cleaning Equipment manuals by other brands

Streamline
Streamline STREAMFLO SF-TR25L-000 manual

Philips
Philips GCA1000 user manual

Eden Park
Eden Park MobileShield222 Getting started

Meech
Meech IonWash operating manual

HCT
HCT HelioJET C-100 Installation operation & maintenance

Nilfisk-Advance
Nilfisk-Advance MultiFoamer Pegasus 120 Directions for use


Becca
Becca ENVIRO 300 PowerClean instruction manual

Bestway
Bestway 60313 owner's manual

cedis
cedis e 125.DUS operating instructions

TEGRAS Concept
TEGRAS Concept iFoam Mini user manual

Clayton
Clayton Warthog 603-202GN Safety, Operation & Maintenance

Dolphin
Dolphin DS800 Installation, operation and maintenance guide