imacon Flextight Damaged Original Kit User manual

Instructions
Flextight Damaged Original Kit

Flextight Damaged Original Kit Instructions
2
©1999 Imacon ApS. All rights reserved.
Flextight Damaged Original Kit Instructions
The information in this manual is furnished for informational use only, is subject to change
without notice, and should not be construed as a commitment by Imacon ApS. Imacon ApS.
assumes no responsibility or liability for any errors or inaccuracies that may appear in this
manual.
Imacon ApS. assumes no responsibility or liability for loss or damage incurred during or as
a result of using Imacon software or products.
Imacon, ColorFlex and Flextight are trademarks of Imacon ApS. Adobe and Adobe Photo-
shop are trademarks of Adobe Systems, Inc. Macintosh, Mac OS and ColorSync are regis-
tered trademarks of Apple Computer, Inc.
Printed in Denmark.

Flextight Damaged Original Kit Instructions
Table of Contents
4

Flextight Damaged Original Kit Instructions
Introduction
5
Introduction
The Flextight Damaged Original Kit will help you get better results
when scanning scratched or otherwise damaged transparencies with
your Imacon Flextight scanner.
Normally, a primary advantage of Flextight is that it does not require
any tape or gel when scanning transparencies. This saves you the time
otherwise required to prepare and clean your originals and is also a
result of the fact that no glass exists to interfere between your original
and the scannerÕs CCD sensor. However, when working with damaged
or scratched originals, the extreme sharpness of the Flextight scanner
means that all of the damage to your original is accurately reproduced
in your scan, thereby requiring you to retouch the original later.
When scanning a damaged original, scanning gel can actually work to
beneÞt your scan. The gel Þlls the scratches of your original and acts to
blur each scratch so that it takes on the color of the surrounding Þlm,
thereby making the scratches much less visible.
The Flextight Damaged Original Kit makes it possible for you to use
mounting gel when scanning with Flextight. Because scans are most
typically made from new or well-preserved originals, most people will
only need to use the kit occasionally.

Flextight Damaged Original Kit Instructions
Kit Contents
Included Materials
6
Kit Contents
Included Materials
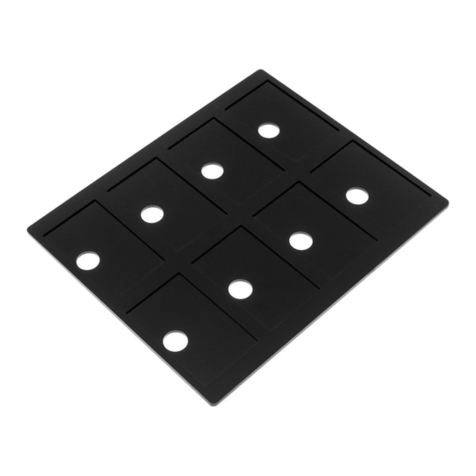
A Mounting Plate:
Includes a clasp for holding the mounting foils
and marks for applying gel and positioning the original (shown
with an original mounted).
B Mounting Foils:
Two-layer holders in which you will apply gel
and insert an original.
C Roller:
Helps you to spread the gel evenly over the originals after
applying gel and closing the foil.
D Tube of Gel:
Apply this gel to hide scratches and abrasions in a
damaged original (shown with the applicator tip attached).
Figure 1: The contents of the Flextight Damaged Original Kit.
A
B C
D

Flextight Damaged Original Kit Instructions
Kit Contents
Additional Materials Required
7
Additional Materials Required
The gel included with the kit is exactly like the gel used with traditional
drum scanners. Because of the laws governing the shipping of volatile
liquids, this kit does not include equipment for cleaning your originals
after scanning. Therefore, you must obtain the following items from
your local pre-press supplier before using the Damaged Originals Kit:
¥
Cleaning Fluid
: This should simply be the standard cleaning ßuid
used for cleaning originals after drum scanning with gel. The manu-
facturer of the gel included with the cleaning kit, Policrom Screens,
markets such ßuid as Policrom LMS 52E and L52E.
¥
Cleaning Tray with Air-Tight Lid
: Your cleaning tray must be large
enough to hold your original plus a reasonable amount of cleaning
ßuid. It must be approved for use with toxic, petroleum-based sol-
vents. It must also include an air-tight lid so that you agitate the
original during cleaning and store the tray and liquid without allow-
ing the liquid evaporate.
For more information about cleaning your originals, contact your local
pre-press supplier.

Flextight Damaged Original Kit Instructions
Using the Kit
Preparing a Damaged Original for Scanning
8
Using the Kit
Preparing a Damaged Original for Scanning
To prepare a damaged original for scanning, use the procedure below
and refer to Figure 1.
1. Position the mounting plate on your desk with the clasp at the top.
2. Place a foil with the sealed side under the clasp so that you can
open the foil from the bottom. The top of the foil must lie straight
along the top of the clasp.
3. Open the foil.
4. If you have not already done so, break the seal on the gel tube and/
or attach the applicator.
5. As shown in Figure 2, the mounting plate is marked to indicate
where the various formats of originals should be placed. Apply gel
in a ÒTÓ shape within the marks of the format you are going to use.
Apply light pressure on the tube and lay a single sweep in each
direction.
Figure 2: Format markings on the mounting plate
4" x 5"
60 x 60 mm
24 x 36 mm
36 x 24 mm

Flextight Damaged Original Kit Instructions
Using the Kit
Cleaning the Original
9
6. Position the original on the marks on the mounting plate.
7. Apply another ÒTÓ of gel on top of the original.
8. Close the foil.
9. Get the roller and place it at the top of the foil. Gently apply pres-
sure and roll from top to bottom to get an even distribution of gel
on the original.
10. Remove the foil from the mounting plate without opening the foil
and mount it as usual in a Flextight original holder.
11. Be sure to keep the gel tube sealed by replacing the applicator cap.
To store the gel for a longer period of time, remove the applicator
and replace the tube cap.
Cleaning the Original
1. Remove the foil from the Flextight original holder.
2. Remove the original from the foil and discard the foil. (ReÞll kits
that include more foils and gel are available from Imacon.)
3. If necessary, pour some cleaner into your cleaning tray (see ÒAddi-
tional Materials RequiredÓ on page 7 for more information about
these items).
4. Place the original in the tray.
5. Place the lid tightly on the tray.
6. Gently rock the tray back and forth for one or two minutes.
7. Open the tray, remove the original and seal the tray again.
8. Put the original on a lint-free cloth and gently wipe it clean of
excess solvent.

Flextight Damaged Original Kit Instructions
Using the Kit
Cleaning the Original
10
Table of contents