INNO TR Series User manual


2 3
1
2
1
3
1
4
2
3
TR102 Installation Procedure for the individual Vehicle Model
Manufacturer Model yearVehicle typeVehicle model Loading conditions
Maximum Load
Capacity Bike
SUBARU FORESTER Feb. 1997
- Feb. 2002
w/ Roof rail 40㎏2 bikes
Vehicle preparations
Parts preparations
Clean the roof rail of the vehicle.
Insert the T-nut projection into the
hole of the rear hook.
Lay the cross bars vertically against
the roof bars.
Insert the bar into the assembled
stay. Open the front hook and rear
hook manually, and place them on
the roof rail.
Slide the front hook so that it is
pressed onto the roof rail.
●Verify the directions of the T-nut projection and the rear hook
for proper installation.
Caution
Reference
Tip of the bolt should not protrude from T-nut.
Reference
●Be sure that the center of the cross bar is positioned at the
center of the vehicle.
Caution
●Check the spacer projection mode (see page 2).
Caution
loaded items
+
attachment Rear hook
Stay
Spacer
T-nut
Projection
Bolts
Rubber spacer
Cover plate
Verify the direction.
T-nut
Rear hook
Front hook
Cover
Rear hook
Cross bar
Front hook
Front hook
Roof rail
Roof rail
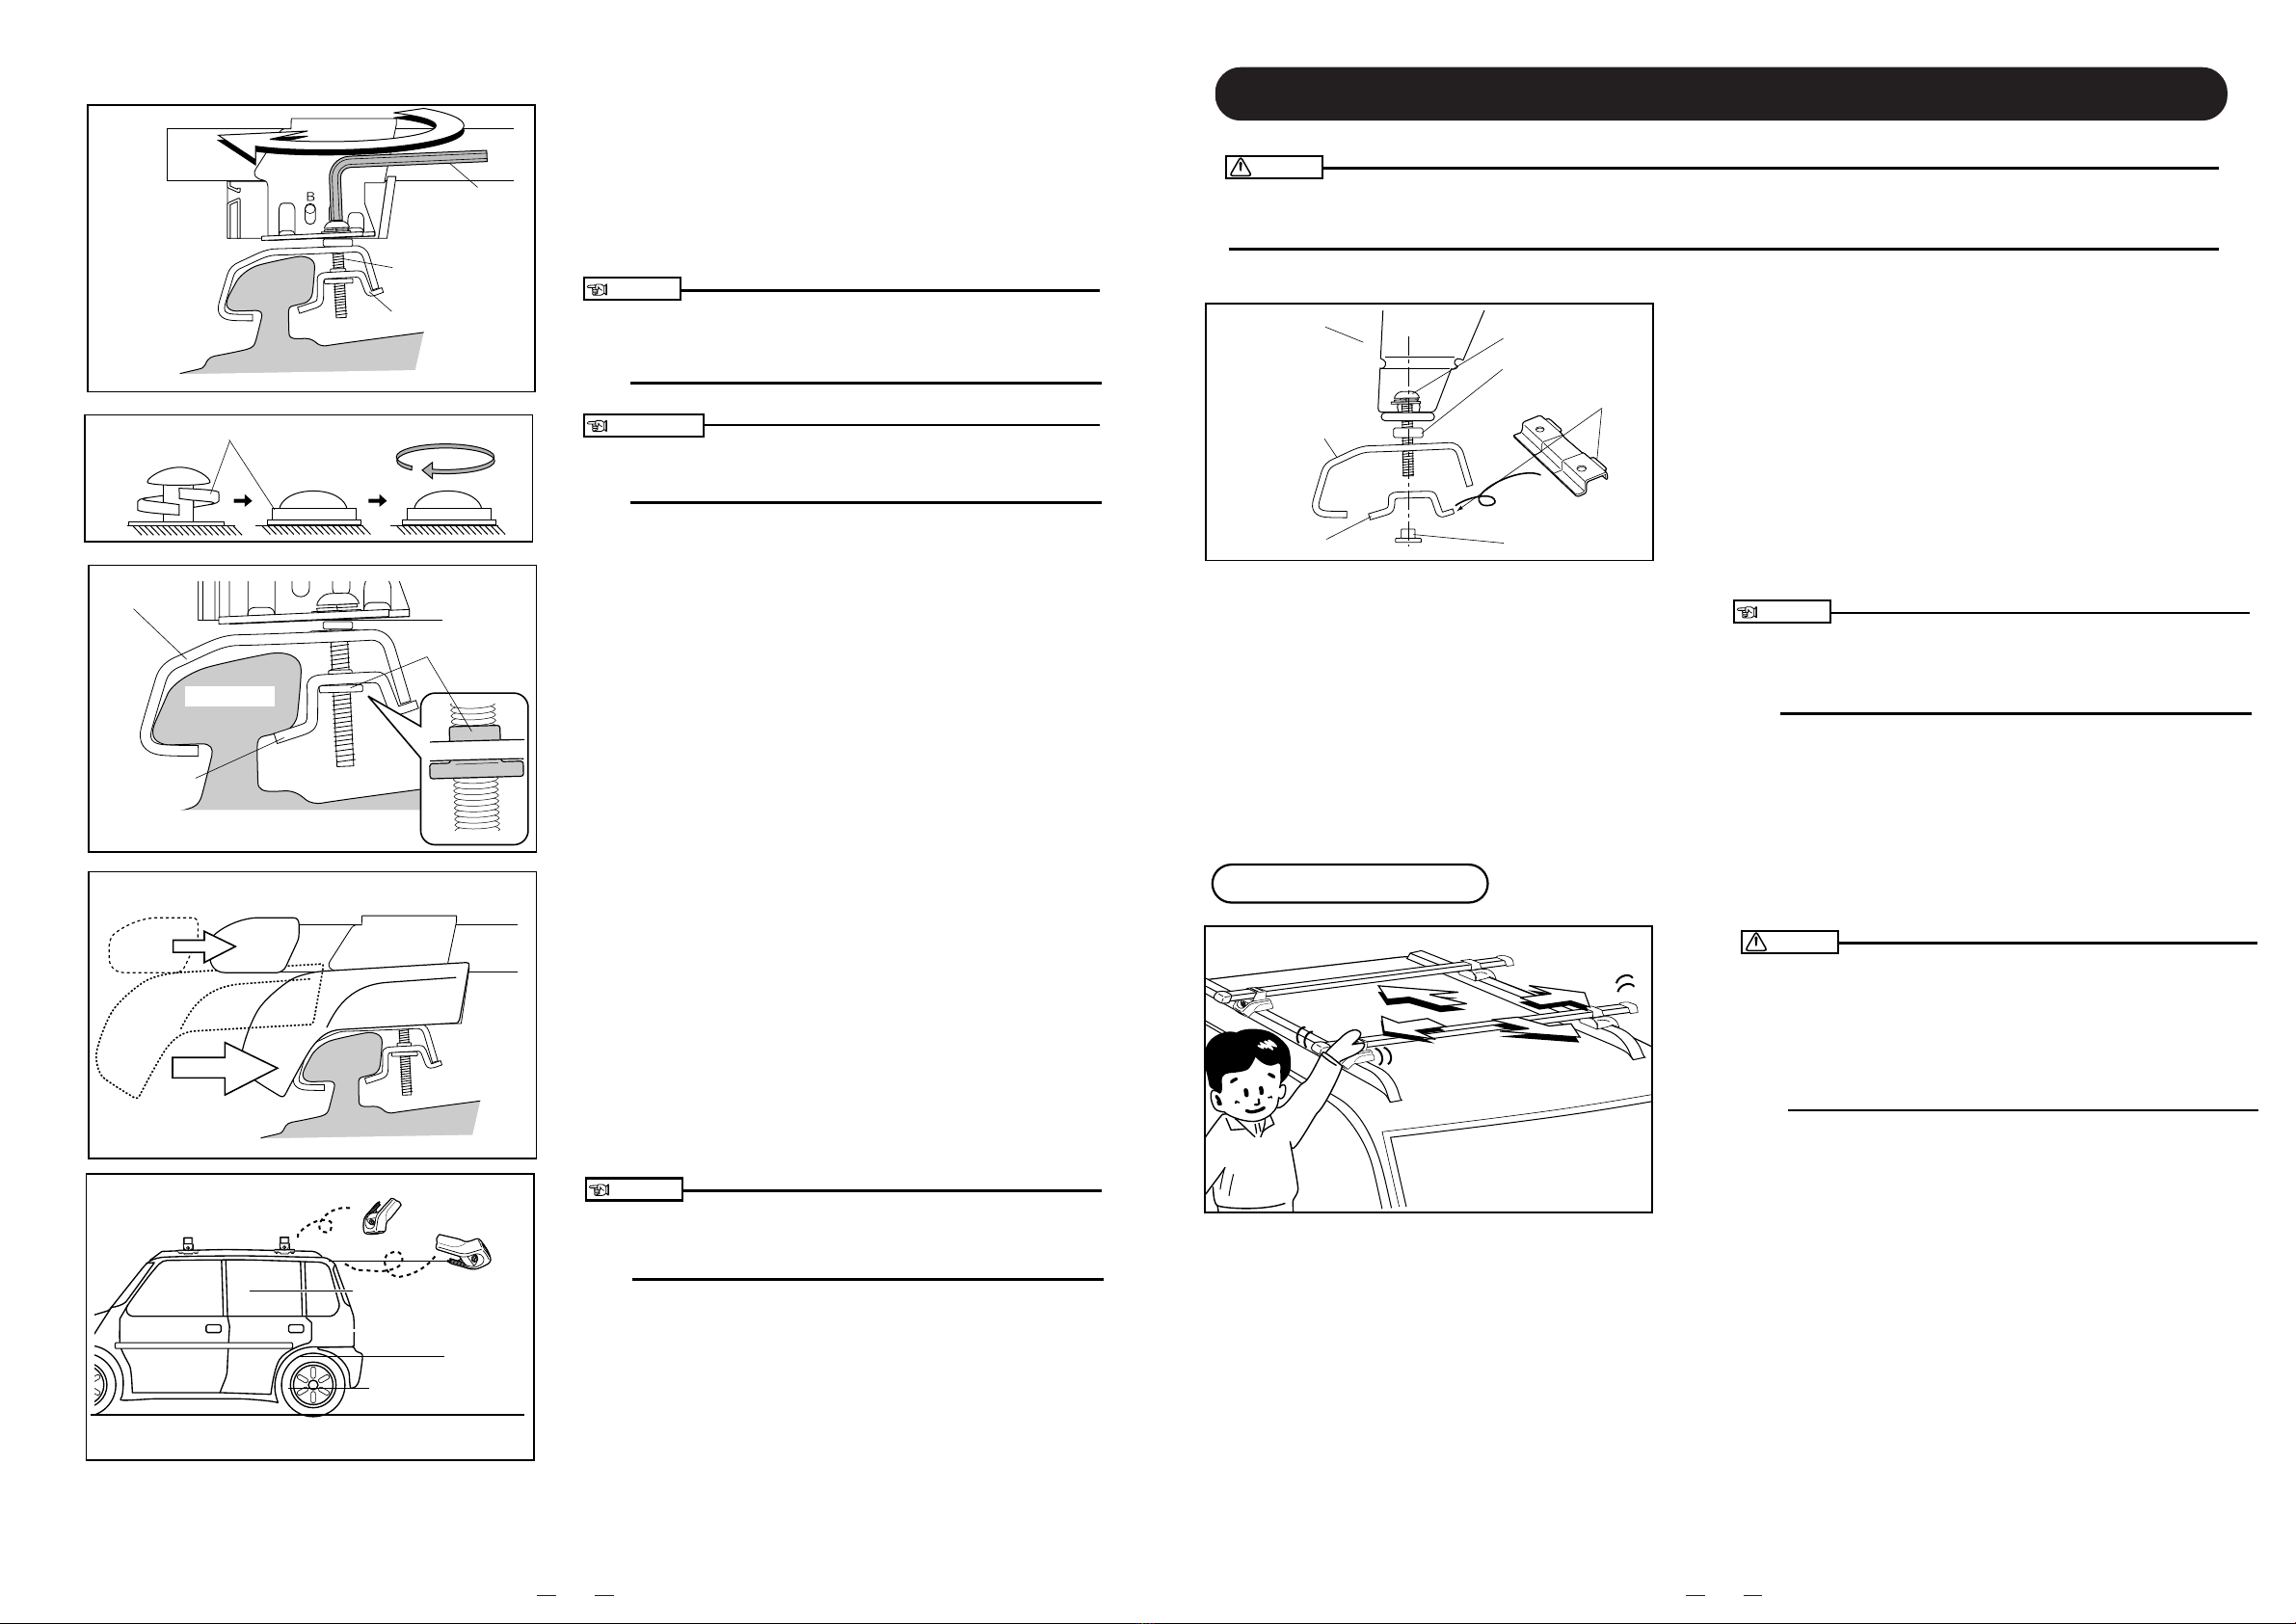
Installing System Carrier (IN-TR)
Unlock the key of your Basic Stay TR
and remove the covers from the
stays.
Slide the spacer so that the projection
is positioned at the B hole.
*Use TR104 for the low type roof rail (already attached to STi-II. Feb.2000 - Feb.2002).
Place the bolts through the carrier,
rubber spacer, front hook and rear
hook in this order and loosely screw
the bolts. Verify the direction of the T-
nut in doing this.
Repeat this procedure for the
opposite end.
Standard
700mm
Same distance
Inside of
vehicle
Mounting on vehicle
Repeat the procedure to install all 4
stays.
In installing front and rear cross bars, select an appropriate
distance between 500mm and 800mm between the bars
depending on the length of the load. Standard distance is
700mm. Short loads such as child skis will be stabilized at short
distances between the bars.
When loading longer loads such as boats and roof boxes will
require longer distances between bars for better stability.
Reference
The surface of the cross bar with 8 grooves must face up.
Tip of the bolt should not protrude from T-nut. Loosen the bolt
before installing.
Repeat the procedure on all 4
locations ( right, left, front and rear).
4 5
5
6
4
2
1
Reference
Caution
T-nut
Allen key
Bolt
Bar end cap
Rear hook
Rear hook
Tighten further.
Spring washer
Front hook
Roof rail
Close the cover and the bar end cap.
Insert key and turn right to lock.
Verify that the rear hook is securely
fastened and that the T-nut is firmly
inserted into the hole of the rear
hook.
Repeat the procedure on all 4
locations ( right, left, front and rear).
●Always use the key lock to secure the carrier. The locks are
an extra safety measure preventing racks from coming loose
which may result in serious injuries and/or accidents.
Warning
Tighten bolts loosely with hands first, and tighten further using
the Allen key.
Tighten bolts alternately using the
attached allen key and fixate the stay
onto the roof rail.
●Tighten the bolt until the spring washer lies flat.
●Be sure that cross bars are placed vertically across the
direction of the vehicle.
After installation
●Before driving, shake the installed stays and bars in order to
check that all 8 bolts are securely tightened. If loosely screwed
bolts are found, tighten them immediately.
Loose bolts may lead to separation of stays, attachments and
the load due to wind pressure and vibration while driving,
resulting in serious injuries and/or accidents.
Warning
Warning
Installing Other Winter Carriers (TX###)
Place the bolts through the carrier,
rubber spacer, front hook and rear
hook in this order and loosely screw
the bolts. Verify the direction of the T-
nut in doing this.
When mounting on the vehicle, see
page 3 and follow the same
procedure for mounting the system
carrier.
Caution
The rest of the procedure should be
followed in accordance with the
instruction manual of the winter
carrier.
Carrier
T-nut
Rear hook
Front hook
Rubber spacer
Verify the direction.
Bolt
●Verify the orientation of base plate and hook plate.
These carriers require the appropriate fit hooks for your vehicle type which are sold separately. Each fit hook style has a unique
installation method. For the correct fit hook set for your vehicle, consult the fit guide which is available at our service center, your
dealer, or online.
●The short bolts (M6x15mm) that are included in the winter
carrier are not used.
This manual suits for next models
1
Other INNO Automobile Accessories manuals


Popular Automobile Accessories manuals by other brands

Magneti Marelli
Magneti Marelli 350203062560 installation instructions

WIX
WIX WP9028 Installation instruction

Leer
Leer PACE EDWARDS ULTRAGROOVE ELECTRIC installation instructions

Car Keys Express
Car Keys Express Simple KEY user guide

Prorack
Prorack K491 Fitting instructions

Metra Electronics
Metra Electronics 95-7617B installation instructions


STO N SHO
STO N SHO SNS 289b Installation procedures

Phonocar
Phonocar 05143 instruction manual

Cartft
Cartft FLEETPC-8-I7BPOE user manual

Lippert Components
Lippert Components Solera OEM INSTALLATION MANUAL

ALAN Electronics
ALAN Electronics Albrecht BT 1000 operating manual

Nokia
Nokia CK-20W - Multimedia Car Kit Installation guidelines