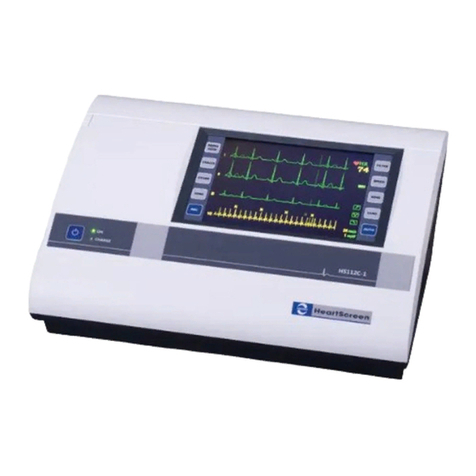
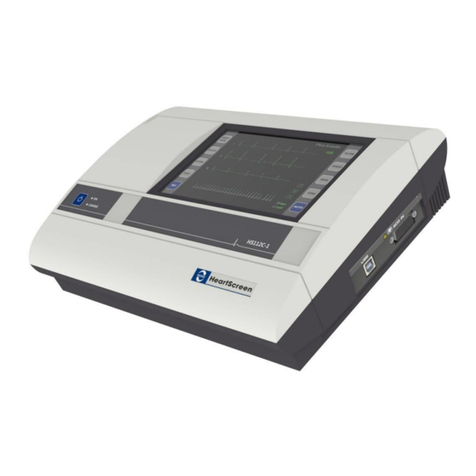
Innomed Medical HeartScreen 80G-L1 User manual

INNOMED MEDICAL
HeartScreen 80G-L1
Simultaneous 12-channel ECG device
with 80 mm, 3-channel built in printer
and color LCD display
R-7317-2-B
Users’ manual


HS80G-L1 Users’ Manual
R-7317-2-B 3/61
Table of Content
1. Introduction, Warnings............................................................................................ 7
2. Recommended field of application, handling.......................................................... 8
2.1. Brief description...................................................................................................... 8
2.2. Who is allowed to operate the device...................................................................... 8
2.3. Areas of use............................................................................................................. 9
2.4. Device identification ............................................................................................... 9
2.5. Shipping and storage requirements ......................................................................... 9
2.6. Packaging ................................................................................................................ 9
3. Maintenance of HeartScreen 80G-L1 device........................................................ 10
3.1. Regular and periodical maintenance ..................................................................... 10
3.2. Cleaning, disinfection............................................................................................ 10
3.3. Battery related tasks .............................................................................................. 10
3.4. Environmental protection...................................................................................... 11
3.5. Classifications ....................................................................................................... 11
4. Installation instructions ......................................................................................... 12
4.1. Battery related tasks .............................................................................................. 12
4.2. Printer installation, paper loading ......................................................................... 13
5. Symbols, controls and their functions................................................................... 14
5.1. Symbols applied on the device.............................................................................. 14
5.2. Device controls and their functions....................................................................... 15
6. Operation of the device ......................................................................................... 16
6.1. How to use the touch-screen ................................................................................. 16
6.1.1. Touch-screen calibration....................................................................................... 16
6.1.2. Role of the touch-screen during monitoring, freeze.............................................. 17
6.1.3. Operation of the touch-screen in menu mode ....................................................... 17
7. Useful pieces of advice on how to make a good quality ECG record................... 17
7.1. How to make a good ECG record ......................................................................... 17
7.1.1. Limb electrode placement ..................................................................................... 18
7.1.2. Chest electrode placement..................................................................................... 18
8. Monitoring mode................................................................................................... 19
8.1. Automatic blocking............................................................................................... 20
8.2. Setting of filters..................................................................................................... 20
8.3. Heart rate indication.............................................................................................. 21
8.4. QRS sound............................................................................................................. 21
8.5. Automatic shutdown.............................................................................................. 21
8.6. Setting options in monitoring mode...................................................................... 21
8.6.1. Changing lead group ............................................................................................. 21
8.6.2. Changing sensitivity.............................................................................................. 22
8.6.3. Changing speed ..................................................................................................... 22
8.6.4. Switching filters .................................................................................................... 22
8.6.5. Manual blocking of the amplifier channel ............................................................ 22
8.6.6. Starting manual printing........................................................................................ 23
8.6.7. Starting automatic printing.................................................................................... 25
8.6.8. Program selection.................................................................................................. 26
8.6.9. Setting of device and patient data, access to stored records.................................. 27
9. Programs of the device.......................................................................................... 27

HS80G-L1 Users’ Manual
4/61 R-7317-2-B
9.1. Record storage –the STORE program.................................................................. 27
9.1.1. Starting the program.............................................................................................. 27
9.1.2. Running the program............................................................................................. 28
9.1.3. Aborting the program............................................................................................ 29
9.2. Making analysis-diagnosis –the DIAG program.................................................. 29
9.2.1. Starting the program.............................................................................................. 30
9.2.2. Running the program............................................................................................. 31
9.2.3. Aborting the program............................................................................................ 31
9.3. Making rhythm analysis –the ARTM program.................................................... 32
9.3.1. Starting the program.............................................................................................. 33
9.3.2. Running the program............................................................................................. 34
9.3.3. Calculated parameters during arrhythmia analysis ............................................... 35
9.3.4. Aborting the program............................................................................................ 36
10. Using the menu system of the device.................................................................... 37
10.1. Entering the menu system ..................................................................................... 37
10.2. Submenu management .......................................................................................... 38
10.3. Modification of parameters ................................................................................... 38
10.4. Returning to monitoring mode .............................................................................. 38
11. Stored record management (Catalog).................................................................... 38
11.1. Changing patient name and identification............................................................. 39
11.2. Deleting record...................................................................................................... 39
11.3. Printing all data belonging to the record ............................................................... 40
11.4. Managing record data............................................................................................ 40
11.4.1. Managing ECG record........................................................................................... 41
11.4.2. Managing Spec. group........................................................................................... 42
11.4.3. Managing rhythm record....................................................................................... 42
11.4.4. Managing analysis –diagnosis results .................................................................. 44
12. Entering identifier (patient code and name).......................................................... 46
13. Configuring the device (Settings).......................................................................... 47
13.1. Spec. lead............................................................................................................... 48
13.2. Printing.................................................................................................................. 48
13.3. Diagnosis............................................................................................................... 48
13.4. Storage................................................................................................................... 49
13.5. Date, time .............................................................................................................. 49
13.6. Language ............................................................................................................... 49
13.7. Filters..................................................................................................................... 50
13.8. HR Warning .......................................................................................................... 50
13.9. Other50
14. Computer connection ............................................................................................ 51
15. The HeartScreen 80G-L1 accessories ................................................................... 52
16. Device construction............................................................................................... 53
17. Technical data of the device.................................................................................. 54
17.1. General features..................................................................................................... 54
17.2. Mains and power supply........................................................................................ 54
17.3. Safety..................................................................................................................... 54
17.4. Operating modes.................................................................................................... 55
17.5. Lead groups........................................................................................................... 55
17.6. Heart frequency measurement............................................................................... 55
17.7. EKG amplifier....................................................................................................... 56
17.8. Digitalizing features .............................................................................................. 56

HS80G-L1 Users’ Manual
R-7317-2-B 5/61
17.9. Printing and display features................................................................................. 57
17.10. PC connection........................................................................................................ 57
17.11. Mechanical (informative) data .............................................................................. 57
17.12. Pacemaker pulse detection .................................................................................... 57
17.13. Checking the operation of electrode and amplifier ............................................... 57

HS80G-L1 Users’ Manual
6/61 R-7317-2-B
This Users’ Manual can be applied for devices with software version number 1.00 and
above. Innomed Medical Inc. reserves the right for unannounced modifications regarding
product improvement.
Partial or complete copying of this Manual can only be made with Innomed’s written
authorization.
All brand names and logos are registered trademarks of their respective owners. All rights
reserved!
Please read the manual of the electrocardiograph and get familiar
with the locations and functions of the controls.
The device is manufactured and distributed by:
Innomed Medical
Medical Developing and Manufacturing Inc.
1146 Budapest, Szabó József utca 12.
(1) 460-9200 Fax: (1) 460-9222
www.innomed.hu
innomed@innomed.hu

HS80G-L1 Users’ Manual
R-7317-2-B 7/61
1. Introduction, Warnings
For safe operation, keep the warnings below, by all means:
HeartScreen80G-L1 is a safety class no. I. ECG device (with CF class patient
protection). The power supply of the device can only be connected to grounded
mains outlet.
It is FORBIDDEN to cover the adapter of the charger!
Device cover can only be removed or fuse can only be changed after
unplugging the device from the mains. Repairs can only be performed by
qualified personnel.
If the mains connector base is damaged or the grounding is not appropriate,
the device can only be used from the built-in batteries!
Only the fuse specified in the documentation can be used in the device.
Device can only be used with the charger supplied by Innomed Medical Inc.!
In case of completely discharged battery, the device must be charged for at
least 10 minutes, safe record making is only possible afterwards.
Device should be used with the recording paper recommended by
manufacturer, the lifetime specified in the technical data for the printer head is
only ensured this way.
Only the 10 pcs electrodes can be connected to the patient, application of
separate grounding is FORBIDDEN!
When inserting the device into a measurement system, make sure that only
properly isolated and IEC601 tested devices are connected together and that
patient should not touch any device connected to the mains.
If the device is used connected to a computer, make sure that patient cannot
get closer than 1.5m to the computer or it should be operated from an isolating
transformer.
The device’s defibrillator protection is only ensured with one of the following
manufacturer specified defibrillator-protected cables.
Cable types: KPACDR and
KPACDL
It is strictly FORBIDDEN to use high-frequency (HF) surgical devices with
this device!
The ECG evaluation program offers a recommended diagnosis, final decision
is physician’s responsibility!
For environmental protection please keep the followings:
When replacing the batteries the device’s damaged or used batteries must be stored in a place designated for hazardous waste
(NiMh batteries)
!
!
!
!
!
!
!
!
!
!
!
!
!

HS80G-L1 Users’ Manual
8/61 R-7317-2-B
2. Recommended field of application, handling
2.1. Brief description
HeartScreen 80G-L1 is a battery operated, modern 12-channel electrocardiograph, used for
the measurement and graphic printing of the heart’s bioelectric potential during the
examination of the human heart and vascular system. The device contains a 12-channel
amplifier and ECG signal-processing unit. The built-in quick printer is 3-channel. The high-
speed 12-channel on-line data transfer on the USB line or via radio connection (Bluetooth),
ensures 12-channel on-line display on the PC.
Device operation is simple; by a few button-presses only, the selection of basic
functions and pre-edited record modes, record making and storage can be executed. Even in
its basic configuration the device can be connected to a PC. This makes 12-channel on-line
display and record storage possible on the large PC screen. Besides the date and exact time,
the automatically generated identification code or the user entered patient code and patient
name serve as identifiers for the records stored in the HeartScreen 80G-L1 .
Archiving tasks are performed by the PC-based cardiological database management program
(Innobase for Windows), which runs under Windows. It can be used for on-line ECG
monitoring, ECG and diagnosis storage, search and retrieval. The program system can be used
to receive signals from other INNOMED manufactured devices and to store their records.
The following HeartScreen 80G-L1 versions and services are available:
A: storage, 3-channel recording in manual or automatic mode,
12-channel record storage, built-in clock and battery pack.
B: the services of the “A” version with analysis and diagnosis program
C: the services of the “A” version with analysis and diagnosis program, and rhythm
analysis program
2.2. Who is allowed to operate the device
HeartScreen 80G-L1 ECG device can be operated by skilled hospital personnel. Device
operation is simple, easy-to-learn, button symbols assist handling. The touch-screen operation
possibility made the operation of the device to be even simpler.
Innomed does not organize any training for learning the operation of the device. Training of
operators is made on the scope of healthcare trainings.
Warning!
The B and C versions of the device give indication of diagnosis as well, but it must always be
kept in mind that this is only an indication, final decision is always physician’s
responsibility.
.

HS80G-L1 Users’ Manual
R-7317-2-B 9/61
2.3. Areas of use
HeartScreen 80G-L1 ECG device is dedicated to indoor applications, it can be used in GP
practices, in hospitals, clinics and in all the fields, where monitoring of patients’ ECG signal
is needed. Application of HeartScreen 80G-L1 ECG device has no any contraindications.
The device was made for continuous operation, but in case of noisy ECG signal, printer-head
overheating might limit continuous printing. HeartScreen 80G-L1 device cannot be used for
any purposes contradicting its intended use.
2.4. Device identification
The product label serves for the identification of HeartScreen 80G-L1 ECG device. The
product label contains all the data specified by Section no.7 of EN60601-1:2007 standard and
the 13.3 point of the 93/42/EEC COUNCIL DIRECTIVE supplement no. II. Manufacturer
applies the standard specified symbols on the product label.
2.5. Shipping and storage requirements
For short-term storage the electrocardiograph must be stored in a closed place, at temperatures
0C –45C and max. 80% relative humidity (at 25C). Air of the place should not contain
any contamination that can cause corrosion.
If the above conditions cannot be met, the device must be stored in its shipping packaging or
in a similar method. Individual devices are shipped in a carrying case, inside a closed
cardboard box with protective packaging.
If the electrocardiograph was not under operating conditions for a longer period –for example
it was stored at lower temperatures –, keep it in a normal operating environment for at least 4
hours.
To preserve battery capacity it is recommended to format the battery semi-annually. for this,
completely discharge the battery by disabling the automatic shutdown feature in the ‘Settings
/ Other / Shutdown’ menu point, then charge the battery full with its own charging adapter for
at least 2.5 hours.
During shipping the device must be placed into its original factory packaging –carrying case,
cardboard box.
2.6. Packaging
The device is shipped in a carrying case, also containing the accessories. The carrying case
can be used to transport the device. During the usage make sure that the accessories are
always placed into their own place and the cables are not tangled.

HS80G-L1 Users’ Manual
10/61 R-7317-2-B
3. Maintenance of HeartScreen 80G-L1 device
3.1. Regular and periodical maintenance
HeartScreen80G-L1 device requires little maintenance, number of moving parts, thus the
chance for any breakdown is minimal.
You should continuously make sure that the device and its accessories are clean and
undamaged. After use, gel and other stuck materials should be removed from the electrodes.
The undamaged status of electrode cables should be checked regularly (cable isolation,
breaking).
Battery status should be monitored, if the device indicates that the battery is discharged, it has
to be connected to the mains for charging.
After several years of use, battery capacity might become so low, that it is no longer able to
ensure the operation conditions specified in the technical details.
In such case the device gives a warning, battery replacement must be done. Battery
replacement should only be performed by a professional.
Periodically (in 1-2 years) the essential parameters of the electrocardiograph should be
checked, and if necessary, calibration should be done. Calibration should only be performed
by a professional service person with the adequate qualifications.
Battery pack of the device must be replaced in about every 3 years.
The accidental or meaningless pushing of controls cannot cause any failure.
Do not apply any instrument, too hard, sharp or pointed for handling of the touch-screen
LCD, in order to avoid failure of the touch-screen display.
Expected lifetime of the device is 8 years.
3.2. Cleaning, disinfection
Formaldehyde solution can be used to clean, disinfect the device. Use wet cloth with
detergent to clean the device, then disinfect it with formaldehyde solution by making an even,
continuous liquid layer on the device surface and let it get dried. During cleaning make sure
that no liquid should get inside the device and into the paper bin. Use alcohol or
formaldehyde solution to clean the electrodes. Formaldehyde is a skin and mucous membrane
irritating, bad smelling liquid, so cleaning should be performed by rubber gloves and the room
should be well ventilated afterwards.
To make the formaldehyde solution: for 1000cm3 dilute 50cm3 35-40% formaldehyde
solution in distilled water.
3.3. Battery related tasks
Before the first use, the battery of the device should be charged. For this, connect the charging
adapter to the device and the mains. Regarding the connection, please mind the warnings
described in Section no. 1.
Charging status of the battery is indicated by a green LED on the front panel of the device.
Battery of the device can be charged continuously, this cannot cause any fault. However it is
recommended to interrupt charging for the night, or if the device is left unattended, disconnect
the adapter from the mains.
For further information regarding the battery consult Section no. 4.1.

HS80G-L1 Users’ Manual
R-7317-2-B 11/61
3.4. Environmental protection
3.5. Classifications
The classification of the HeartScreen 80G-L1 electrocardiograph, according to rule no. 10
described in point III./3.2 of Supplement no. IX. of the council directive no. 93/42/EEC,
modified by the directive no. 2007/47/EC is as follows: II.a.
Regarding the aspect of electromagnetic compatibility, the HeartScreen 80G-L1
electrocardiograph’s classification according to Section no. 4 of the standard MSz EN
55011:2000, is as follows: group 1, class B.
Dispose of unneeded electric and electronic
devices as waste (To be used in the selective
waste collecting systems of the European Union
and other countries.)
This symbol on the device or on its packaging
indicates that the device is not to be handled as
domestic waste. Please dispose of these at the
dedicated electric and electronic waste collecting
points.

HS80G-L1 Users’ Manual
12/61 R-7317-2-B
4. Installation instructions
The device is delivered in a carrying case, which contains the accessories and the manuals.
Please after unpacking the device, act according to the followings.
Before turning the device on please:
Read the users’ manual of the electrocardiograph and get familiar with the control
locations and functions.
Make sure that the device and the related cables and connections are undamaged.
Connect the patient cable to the HeartScreen 80G-L1 device.
For battery charging, connect the charging adapter to the mains and to the (14)
battery charging connector, located on the back side of the device (see figure on
page 15.).
Load printing paper into the ECG device according to the description of Section
no. 4.2.
4.1. Battery related tasks
The device measures the battery charge state during operation and in case of low
charge it displays a battery symbol in the top-left corner of the display.
If there is no indication, battery charge state is appropriate.
If the device cannot be turned on, battery must be charged for at least 10-20 minutes.
The device battery can be continuously charged with the charging adapter, it cannot
cause any damage; however it is recommended to abort charging by unplugging the
adapter from the mains overnight or when the device is left unattended.
If the device is not used and automatic shutdown is set to 5 minutes in the
‘Settings/Other’ menu, the device will automatically turn off after 5 minutes.
However, battery charging still continues!
The “charge” indicator is located in the top left corner of HeartScreen 80G-L1
keyboard.
To preserve battery capacity it is recommended to format the battery semi-annually.
To format the battery, completely discharge the battery by disabling the automatic
shutdown feature in the ‘Settings / Other / Shutdown’ menu item, then fully charge the
battery with its own charging adapter for at least 2.5 hours.

HS80G-L1 Users’ Manual
R-7317-2-B 13/61
4.2. Printer installation, paper loading
Before first use, or if the printer has run out of paper, a new roll of recording paper should be
placed into the printer. Its steps are as follows:
1. After pushing the button indicated by the arrow, open the paper bin cover.
2. Place a new roll into the paper bin. The roll should be placed with the paper’s rasterred
side facing the printer head and the display.
3. Close the paper bin cover in a way that at least a few centimeters of the paper hangs
out:
4. Press and hold the “REC” button to make sure the paper runs smoothly without
creases.
With the above, the device is ready for operation.

HS80G-L1 Users’ Manual
14/61 R-7317-2-B
5. Symbols, controls and their functions
5.1. Symbols applied on the device
Name of manufacturer
WiFi connection is
working
User manual must be
read
Warning! Check in the
user’s manual
Expiry time
Do not treat the product as
domestic waste
Low and high
temperature limit
Keep it dry
Batch code
Protect from direct sun
Recyclable waste
IP 20
Environment resistance
Power on/off
Internal battery supplied
device
Device intended for
indoor applications
S/N
Device serial number
CF type defibrillator
protected device
Discharged battery
ECG mains filter
Functional ground
ECG muscle filter
Protecting ground
ECG base line filter

HS80G-L1 Users’ Manual
R-7317-2-B 15/61
5.2. Device controls and their functions
1. Key for turning the device on and off
2. Menu and monitoring selection key
3. Arrhythmia program selection key
4. Storage program selection key
5. Diagnosis program selection key
6. Start and stop manual printing key
7. Filters on and off key
8. Setting of the speed of curves to be displayed and printed key
9. Setting of the sensitivity of curves to be displayed and printed key
10. Key for the selection of the lead group to be displayed and printed
11. Key for blocking the ECG amplifiers
12. Start and stop Auto printing key
13. Paper bin cover opening key
14. Charger connector
15. USB connector
16. Patient cable connector
17. Paper bin cover
Hereinafter, the controls and connectors will be referred to with their names. Reference to the
keys of the keyboard will be made by the picture of the key (e.g. ), reference to the keys
appearing on the display for the touch-screen operation will be made by the name of the
element (e.g. Enter ).
13
1
16 15 14
17
USB

HS80G-L1 Users’ Manual
16/61 R-7317-2-B
6. Operation of the device
HeartScreen 80G-L1 device can be operated by device keys or by touching the respective
area of the screen.
6.1. How to use the touch-screen
By touching the screen, we can give instructions to the device. The information referring to
the instruction appears on the display (e.g. a key or a definitely marked area of the screen).
The touch-screen can be handled by the finger tips or by the nails, or by a pencil shaped
plastic instrument, made for this purpose.
Warning!
Do not use sharp or pointed instruments, made of too hard material, because they can cause
scratching, damage on the screen. You are also recommended not to use biro, as the
painting, flowing out of it might get stuck to the screen.
The device is delivered from the factory with calibrated touch-screen, meaning that the
surface to be touched and the picture underneath are overlapping each other. In case, due to
some errors calibration is terminated, touch-screen operation will not work properly, saying
that by touching the marked surface (key displayed on the screen) the instruction is not
executed. In such case, the touch-screen requires a re-calibration, which is a simple process.
6.1.1. Touch-screen calibration
Look for any instrument which made of a not too hard material, e.g. a pencil or a thin plastic
stick. Switch on the device with the (1) power on key. Innomed logo will appear on the
display for a few seconds.
Touch the screen, until the logo is still visible. This makes the logo disappear, the display will
turn into monochrome, and a cross symbol appears on it. Touch the intersection of the cross
by the plastic stick. Then another cross symbol appears, touch the intersection of this cross as
well. Then a third cross symbol appears, touch it as well with the plastic stick. After this, the
display color changes, a zone of different color appears on the lower side of the display, and
again another cross symbol appears, which should be touched. As a result of this touch a fifth
cross symbol appears. When its intersection point is touched, the device turns off followed by
a sound signal, the calibration was successful.

HS80G-L1 Users’ Manual
R-7317-2-B 17/61
Touching the last two crosses is already for the checking of the calibration. If the calibration
is faulty, namely the device detects as if it was not the cross that was touched on the display,
it will not step forward. In such case, calibration can be re-started by touching the zone of
different color.
6.1.2. Role of the touch-screen during monitoring, freeze
If device is turned on, after the self-test it enters monitoring mode, three ECG channels will
be displayed on the screen at a speed of 25 mm/s and with 10 mm/mV sensitivity. At the
bottom of the screen, a rhythm curve appears, at 5 mm/s speed. If the surface of the display is
touched, on that part where the 3 ECG curves are running, the image will be freezed. (freeze
function). For another touch, displaying of the monitored curves will continue. The same way
rhythm curve can be freezed as well, if the screen is touched around the zone of the curve.
Freezing can be terminated by touching the screen again.
6.1.3. Operation of the touch-screen in menu mode
Operation of the touch-screen in menu modes will be detailed under the description of menu
modes, as operation can only be understood together with the operation mode description.
General remark about the handling: in case, in the description, we are talking about a key
displayed on the screen, its using (touching) is to be understood as follows: the named key is
touched on the screen, or the key on the keyboard, next to the displayed key is pressed.
7. Useful pieces of advice on how to make a good quality
ECG record
7.1. How to make a good ECG record
INNOMED ships its devices with silver-silver chloride electrodes.
These electrodes have low contact potentials, allowing the creation of much better quality
ECG than with non-silver-silver chloride electrodes.
Please use our devices with these electrodes.
Connect the patient cable (4 or 10-lead) to the (16) connector, located at the back side of
the device (figure no. 15). Connect the connectors on the other side of the cable to the
electrodes, according to the figure below.
Oil and body lotion should be removed from patient’s skin by alcohol, if necessary,
patient should be shaved (for example, in case of hairy chest).
Electrodes should also be cleaned before each use. Always make sure that no dried gel
should remain on the electrodes!
INNOMED supplied gel must be applied on the electrodes (or similar quality gel
recommended for ECG).
The use of wet gauze instead of gel is NOT recommended.

HS80G-L1 Users’ Manual
18/61 R-7317-2-B
Electrodes should not be placed over muscles, because muscle trembling causes too much
noise on the record.
Patient must remain still during record creation, he should not move or talk.
In case you are using disposable electrodes, you should check the expiry date of the
electrodes.
7.1.1. Limb electrode placement
7.1.2. Chest electrode placement
R L
F
N
R: right hand
L: left hand
N: right leg
F: left leg
V1 : on the IVth rib space on the right side of the
sternum
V2: on the IVth rib space on the left side of the
sternum
V3: on the midpoint between the line, connecting
the leads V2 to V4
V4: on the Vth rib space on the mediclavicular
line
V5: on the Vth rib space on the frontal armpit
line
V6: on the Vth rib space on the central armpit
line

HS80G-L1 Users’ Manual
R-7317-2-B 19/61
8. Monitoring mode
After being switched on by the (1) ON/OFF key, in case of existing stored records, the device
performs a memory test, which is indicated by the
Checking stored records...
message, the displayed Innomed logo and the version number. In case of several stored
records, it might even take10-15 seconds.
After this, the device automatically, or in cases mentioned later by pressing the button,
enters monitoring mode.
This is the device starting, standard operating mode. Three selected ECG curves appear on the
display, together with the current pulse rate, lead, speed, sensitivity and filter state.
The device calls attention on possibly discharged batteries and the presence of pacemaker
impulse.
After power on, monitoring always starts with the same settings. These are the following:
leads: I, II, III; sensitivity: x1; speed: 25 mm/s; filters: off.
The display during monitoring
Live Bluetooth connection indicates, that the device is in active connection with a PC
with the purpose of monitoring or data transfer.
The “P” pacemaker indication appears, if the examined patient has implanted
pacemaker, and the device detects this. In this case, location of the pacemaker impulse
on the ECG curve is indicated by a marker.
The “Battery low” indication appears if the device battery is lower than the 10 % of its
capacity. In such case, you should start battery charging.
Beat type is defined according to the rhythmicity and the QRS width. There are
rhythmical, early and late beats and according to the width: wide, normal and extra
wide beats. Exact definition is described in the Section of Rhythm analysis.
Meaning of the rest of the information displayed on the screen is obvious.
Ritmus csatorna
elvezetés
Elvezetések
jelzése
Akkumulátor
lemerült jelzés
Pacemaker
Jelzés
Élő Bluetooth
kapcsolat
Érzékenység
QRS indicating
pulsing heart
jelző pulzáló
szív
Heart Rate
HR
Rhythm channel
lead
Lead
indicator
Low battery
indicator
Pacemaker
indicator
Bluetooth
connection
Sensitivity
Channels
Beat type
Rhythm
channel
Speed
Filters

HS80G-L1 Users’ Manual
20/61 R-7317-2-B
8.1. Automatic blocking
The fault (inadequate contact) of any lead (even if not indicated on the display) is resulted in
automatic blocking, which causes the termination of monitoring, and the BLOCK message
appears in the middle of the display. In such case it is advisable to check the ECG electrodes.
If there is too much noise, the amplifier input stage over-controls due to high input electrode
potential or defibrillator use, in this case as well, automatic blocking happens, indicated by
the “BLOCK” message, followed by filter initialization. This is indicated by a “Wait…”
message.
After blocking the device examines if the error still exists. If so, it repeats blocking and
performs filter initialization.
Warning!
Due to automatic blocking and filter settling, 6 seconds must be waited if pre-start is turned
on, and 4 seconds if turned off, before the curve appears again.
For this reason, in case of possible defibrillator use, it is recommended to turn the pre-start
function on in the Settings / Printing / Pre-start menu item. Detailed description on pre-start
can be found in the chapter dealing with manual and automatic printing.
If any of the curves has shifted, went out of the picture permanently in horizontal direction or
it is covering another curve, the problem can be solved by manual blocking, by pressing the
key. (Section no. 8.6.5)
8.2. Setting of filters
There are three types of filter in the device, which are the baseline filter, the mains filter and
the muscle filter. The mains and the muscle filters can be switched on and off from the
keyboard, their state is indicated by the symbols visible on the upper line of the display.
The baseline filter can be switched on and off in the Settings/Filters menu point (see Menu
Handling). The mains filter frequency can be set in the same menu point, which is 50Hz in
Europe and in Asia, Africa and America it can be 60 Hz as well. When installing the device,
the mains frequency valid in the place of application should be set.
The baseline filter makes it possible to create better quality records than previously, by the
suppression of baseline shift. During printing and monitoring, the baseline filter ensures the
followings:
slow change of polarization and contact potential generated by all means on the
electrodes
most of the noises caused by patient respiration and by patient movement do not
influence the ECG signal to be examined
The baseline filter causes an approximately 2.5 seconds signal delay, so you should wait 2.5
seconds after blocking, electrode placement and movement, in order to receive a good quality
signal.
During blocking, the baseline filter is reset, the “Wait…” message appears on the display until
the filter sets in and the delay period passes. During this time period printing, storing and
analysis program cannot be started
Table of contents
Other Innomed Medical Medical Equipment manuals

Innomed Medical
Innomed Medical Heart Screen 60 G User manual

Innomed Medical
Innomed Medical Heart Screen 60 G User manual

Innomed Medical
Innomed Medical Hear Screen 112C-1 User manual

Innomed Medical
Innomed Medical HS112 C-1 User manual

Innomed Medical
Innomed Medical TOP-X 100LC User manual

Innomed Medical
Innomed Medical Cardio-Aid 360-B User manual