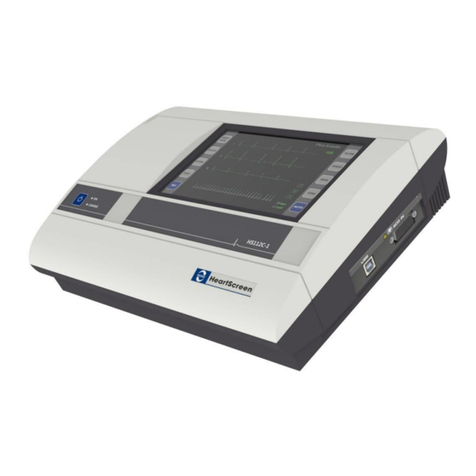
Innomed Medical HS112 C-1 User manual

(HeartScreen112 Clinic)
12-
channel ECG device with 112 mm wide built
colour touch screen LCD display
R-6730-EN02-E
INNOMED
HS112 C-1
(HeartScreen112 Clinic)
channel ECG device with 112 mm wide built
colour touch screen LCD display
INNOMED
MEDICAL
(HeartScreen112 Clinic)
channel ECG device with 112 mm wide built
-in printer,

HS112 C
-
1 User Manual
2
/73
R
-
6730
-
EN02
-
E

HS112 C
-
1 User Manual
R
-
6730
-
EN02
-
E
3
/73
Table of Contents
1.
Introduction warnings ......................................................................................................... 7
2.
Intended use concept of operation ....................................................................................... 8
2.1.
Short description .............................................................................................................. 8
2.2.
Who can operate the device? ........................................................................................... 8
2.3.
Where can the device be used? ........................................................................................ 9
2.4.
Device identification ....................................................................................................... 9
2.5.
Shipping and storage requirements ................................................................................. 9
2.6.
Device packaging ............................................................................................................ 9
3.
Maintenance of the HS112 C-1 .......................................................................................... 10
3.1.
Regular and periodic maintenance ................................................................................ 10
3.2.
Cleaning disinfection .................................................................................................... 10
3.3.
Battery related tasks ...................................................................................................... 11
3.4.
Environmental protection .............................................................................................. 11
3.5.
Classification ................................................................................................................. 11
4.
Symbols on the device label ............................................................................................... 12
5.
Installing the HS112 C-1 device ........................................................................................ 13
5.1.
Battery-related tasks ...................................................................................................... 13
5.2.
Printer setup loading the paper ..................................................................................... 14
5.2.1.
General remarks about printing ................................................................................ 15
6.
Device controls and their function ..................................................................................... 16
7.
Useful advice for creating good quality ECG records........................................................ 18
7.1.
Requirements for good quality ECG record creation .................................................... 18
7.1.1.
Limb lead placement ................................................................................................ 18
7.1.2.
Precordial lead placement ......................................................................................... 19
7.2.
Defibrillation ................................................................................................................. 19
7.3.
Using a high-frequency surgical knife........................................................................... 19
8.
Monitoring mode ................................................................................................................ 20
8.1.
Using the touch screen ................................................................................................... 21
8.2.
Heart rate warning ......................................................................................................... 22
8.3.
The QRS sound ............................................................................................................. 22
8.4.
Automatic shutdown ...................................................................................................... 22
8.5.
Selecting the number of displayed leads ....................................................................... 23
8.6.
Lead group selection ..................................................................................................... 23
8.7.
Sensitivity selection ....................................................................................................... 24
8.8.
Sweep speed selection ................................................................................................... 24
8.9.
Display freezing function .............................................................................................. 25
8.10.
Filter activation ............................................................................................................ 25
8.11.
Controlling direct online printing ................................................................................ 26
8.12.
Paper-saving printing (ECO printing) ......................................................................... 27
8.12.1.
Stopping ECO printing ........................................................................................... 28
8.13.
Starting automatic printing .......................................................................................... 28
8.13.1.
In the case of a 3 or 6 channel setting ..................................................................... 28
8.13.2.
In the case of a 12 channel setting .......................................................................... 28
8.13.3.
Stopping automatic printing ................................................................................... 29
9.
Device programs................................................................................................................. 30
9.1.
Storing records — the STORE program ....................................................................... 30
9.1.1.
Starting the program ................................................................................................. 30

HS112 C
-
1 User Manual
4
/73
R
-
6730
-
EN02
-
E
9.1.2.
Running the program ................................................................................................ 31
9.1.3.
Automatic printing after running the program ......................................................... 31
9.1.4.
Aborting the program ............................................................................................... 31
9.2.
Obtaining an analysis/diagnosis — the DIAG program ................................................ 32
9.2.
Obtaining an analysis/diagnosis — the DIAG program ................................................ 32
9.2.1.
Starting the program ................................................................................................. 33
9.2.2.
Running the program ................................................................................................ 33
9.2.3.
Automatic printing after running the program ......................................................... 34
9.2.4.
Aborting the program ............................................................................................... 34
9.3.
Performing a rhythm analysis in the STORE program ................................................. 34
9.3.1.
Starting the program ................................................................................................. 36
9.3.2.
Running the program ................................................................................................ 36
9.3.3.
Parameters calculated during arrhythmia analysis ................................................... 37
9.3.4.
Statistics calculated form the results ........................................................................ 38
9.3.5.
Automatic printing after running the program ......................................................... 38
9.3.6.
Aborting the program ............................................................................................... 38
9.4.
Printing rhythm events .................................................................................................. 39
9.4.1.
Aborting the program ............................................................................................... 39
10.
Using the device menu system ......................................................................................... 40
10.1.
Entering the menu system ........................................................................................... 40
10.2.
Entering the sub-menus ............................................................................................... 41
10.3.
Parameter modification ............................................................................................... 41
10.4.
Returning to monitoring mode .................................................................................... 41
11.
Managing stored records (Catalogue) .............................................................................. 42
11.1.
Displaying the catalogue ............................................................................................. 42
11.2.
Deleting a record ......................................................................................................... 43
11.3.
Printing all record data ................................................................................................ 43
11.4.
Managing record data .................................................................................................. 44
11.4.1.
Managing the ECG record ...................................................................................... 44
11.4.2.
Managing the rhythm record .................................................................................. 45
11.4.3.
Managing the analysis/diagnosis results................................................................. 47
12.
Entering patient data ......................................................................................................... 50
12.1.
Patient data of the last 20 patients ............................................................................... 50
12.2.
Importing patients from the hospital network (optional) .............................................. 51
12.3.
Editing the name .......................................................................................................... 51
12.4.
Entering the patient identifier ...................................................................................... 52
12.5.
Guided parameter entry ............................................................................................... 52
12.6.
Entering the date of birth ............................................................................................. 52
12.7.
Editing the patient’s gender (Sex) ............................................................................... 52
12.8.
Weight height blood pressure HR limits time/date ................................................. 52
12.9.
Exiting the patient menu .............................................................................................. 53
13.
Device setup ..................................................................................................................... 54
13.1.
Printing ........................................................................................................................ 55
13.2.
Diagnosis ..................................................................................................................... 55
13.3.
Storage ......................................................................................................................... 55
13.4.
Language ..................................................................................................................... 56
13.5.
Filters ........................................................................................................................... 56
13.6.
Others .......................................................................................................................... 56
14.
Device warnings ............................................................................................................... 57
15.
Computer connection ....................................................................................................... 57

HS112 C
-
1 User Manual
R
-
6730
-
EN02
-
E
5
/73
16.
Starting the demo mode .................................................................................................... 57
17.
Accesories of the HS112 C-1 device ................................................................................ 58
18.
HS112 C-1 device technical specifications ...................................................................... 59
18.1.
Standard references ..................................................................................................... 59
18.2.
General features ........................................................................................................... 59
18.3.
Mains and power supply .............................................................................................. 59
18.4.
Safety ........................................................................................................................... 59
18.5.
Operating modes .......................................................................................................... 60
18.6.
Lead groups ................................................................................................................. 60
18.7.
Heart frequency measuremen ...................................................................................... 60
18.8.
Pacemaker pulse detection .......................................................................................... 60
18.9.
ECG amplifier ............................................................................................................. 60
18.10.
Digitalizing features .................................................................................................. 61
18.11.
Printing features......................................................................................................... 61
18.12.
Display ....................................................................................................................... 61
18.13.
Communication parameters ....................................................................................... 62
18.14.
Mechanical (informative) data .................................................................................. 62
19.
Guidelines and manufacturer’s statement – electromagnetic compatibility ...................... 63
20.
Appendix I –– Decision categories .................................................................................. 66
20.1.
Rhythm analysis decision categories and rules ........................................................... 66
20.2.
Depolarization analysis decision categories and rules ................................................ 68
20.3.
Repolarization analysis decision categories and rules ................................................ 70
21.
Appendix II –– Troubleshooting ...................................................................................... 72

HS112 C
-
1 User Manual
6
/73
R
-
6730
-
EN02
-
E
This manual is intended for devices running software version 1.27 and above.
Innomed Medical Inc. reserves the right to make modifications without notice in the course of product
development.
The copying of this manual as a whole or in part requires written authorization from our company. All
brand names and logos are registered trademarks of their respective owners. All rights reserved!
Please read the ECG’s user manual and familiarize yourself with the control layout and the functionality
of the control buttons.
Device manufactured and distributed b :
Innomed Medical
Medical Development and Manufacturing Inc.
H-1146 Budapest Szabó József utca 12.
(+36-1) 460-9200 Fax: (+36-1) 460-9222
www.innomed.hu
innomed@innomed.hu

HS112 C
-
1 User Manual
R
-
6730
-
EN02
-
E
7
/73
1.
Introduction, warnings
For safe operation, please comply with the following warnings:
HS 112 C-1 is a safety class I ECG device with type CF patient isolation and defibrillator protection.
The ains cable of the device can be connected to a grounded power outlet only.
If the ains power outlet is da aged or not working, or the grounding is inadequate, the device ay only
be operated using the built-in battery!
Only the type of fuse specified in the docu entation is allowed to be used in the device.
The use of paper reco ended by the anufacturer is advised, as only this ensures the printer head
lifeti e indicated in the technical specifications.
At ost 10 electrodes ay be connected to the patient. The use of separate grounding is FORBIDD N!
Make sure that the unused electrodes (including the N electrode) do not co e in contact with any current-
carrying objects.
When connecting the device to a easuring syste , ake sure that only appropriately isolated and IEC
60601 co pliant devices are connected, and that the patient does not co e into contact with any devices
connected to the ains power supply.
If the device is used connected to a co puter, ake sure that the patient is kept at an at least 1.5
distance fro the co puter, or that the co puter is operated fro an isolation transfor er.
The defibrillator protection of the device is guaranteed only with one of the following defibrillator
protected cables approved by the anufacturer.
Cable type: KPACDR and
KPACDL
The ECG evaluation progra suggests a suitable diagnosis. The final decision is the physician’s
responsibility!
Do not use the device in the presence of co bustible, potentially explosive gases.
Disasse bly or repair of the device is allowed only to experts trained by the anufacturer.
In case of hot environ ental te peratures, the electrodes should be 41°C ax when they are placed on the
patient.
The device cannot be used for direct, invasive cardiological easure ent!
In the interest of protecting the environment, please adhere to the following:
When replacing the battery the used or damaged battery should be disposed of only at a designated place for the collection of
hazardous waste (NiMH batteries).
!
!
!
!
!
!
!
!
!
!
!
!
!

HS112 C
-
1 User Manual
8
/73
R
-
6730
-
EN02
-
E
2.
Intended use, concept of operation
2.1. Short description
The HS112C-1 is a battery and mains operated microprocessor controlled modern 12-
channel electrocardiograph used to measure and graphically record the heart’s bioelectric
potential during cardiovascular system examinations in humans. The device is equipped
with a 12-channel amplifier and an ECG signal-processing unit. All 12 channels can be
displayed simultaneously on the large colour display. The fast built-in recorder is suitable for
6 or 12 channel recording. The 12-channel landscape printing mode makes this device
competitive with those equipped with an A4 printer.
High-speed online data transfer through a USB cable or an optional radio connection (WiFi)
makes it possible to display the 12 channels online on a PC or to print them out.
The device is easy to use. Access to the main functions preset recording mode selection and
record creation and storing can be achieved by pressing only a few buttons.
Based on the recording the HS112 C-1 can perform an ECG analysis suggest a diagnosis
and carry out heart rhythm analysis.
Even in its default configuration the device can be connected to a computer. This makes it
possible to display the 12 channels online and store records on a big-screen PC.
Record identification in the HS112 C-1 is done using not only a time and date stamp but also
through the assignment of an automatically generated identification code or through a patient
identification code and patient name entered by the user.
The archiving task is performed by a PC-based cardiological database management system
(Innobase) running under Windows. This system can be used for ECG monitoring as well as
ECG and diagnosis storage search and display. It can also receive signals and archive
records from other ECG devices manufactured by Innomed Medical.
2.2. Who can operate the device?
The HS112 C-1 ECG device can be operated by qualified hospital or clinic personnel. The
operation of the device is simple and easy to learn. The labels and symbols on the buttons are
designed to help with device operation which is also simplified by the possibility of
touchscreen interaction.
Innomed Medical does not organize any courses concerning device operation. Device training
is performed within the scope of medical training.
Caution!
The device will suggest a suitable diagnosis. However, the fact that this is erely a
suggestion ust be taken into consideration at all ti es. The final decision is always the
responsibility of the physician. Inno ed Medical will not assu e liability for any da age
incurring fro potential isdiagnosis by the device!

HS112 C
-
1 User Manual
R
-
6730
-
EN02
-
E
9
/73
2.3. Where can the device be used?
The HS112 C-1 ECG device is intended for indoor use at general practitioners’ offices
clinics hospitals or at any place where there is a need to observe a patient’s ECG signal. The
device is suitable for ECG recording of adult child and infant patients. The use of the
diagnosis function is recommended only for adults.
The device is designed for continuous use but the overheating of the printer head in case of a
noisy signal may limit the possibility of continuous printing. The HS112 C-1 may not be used
for any purpose contrary to the device’s intended use.
2.4. Device identification
The HS112 C-1 ECG device is identified with a product label. The product label contains all
information required under section 7 of the EN 60601-1:2007 standard and in accordance
with point 13.3 of Annex II to Council Directive 93/42/EEC. The symbols specified by the
standard are used on the product label.
2.5. Shipping and storage requirements
For short-term storage keep the electrocardiograph in an enclosed space with temperatures
between 0C and 45C and a relative humidity below 95% (at 25C). The air must not
contain any corrosion causing pollution.
If the above conditions cannot be met the device must be stored in its original or comparable
packaging. Individual devices are shipped in a carrying case inside of a sealed protective
cardboard box packaging.
If the electrocardiograph has been under conditions not suitable for operation for a longer
period — for example it was stored at low temperatures — it must be kept at normal
operating conditions for at least 4 hours prior to use.
To preserve battery capacity it is recommended to format the battery at least every 6 months.
In order to do this discharge the battery completely by disabling the automatic shutdown
feature of the device (Setup/Others/Turn off) then recharge it fully by connecting it to the
mains power supply for at least 3 hours.
During transport the device must be placed in its original packaging — the carrying case or
cardboard box.
2.6. Device pac aging
The device is shipped in a carrying case which contains the device and its accessories. After
use make sure that the accessories are all placed back into their own slots and that the cable
is not tangled.

HS112 C
-
1 User Manual
10
/73
R
-
6730
-
EN02
-
E
3.
Maintenance of the HS112 C-1
3.1. Regular and periodic maintenance
The HS112 C-1 is a low-maintenance device.
Always make sure that the device and its accessories are clean and free from damage. After
use the electrodes have to be cleaned from gel and other materials that might have stuck to
them. The condition of the electrode cables has to be checked regularly making sure there is
no damage (cable insulation breakage).
Battery status has to be monitored. If the device indicates that the battery is close to being
discharged it has to be connected to the mains power supply.
After several years of use the capacity of the battery may decrease to the extent that it is not
able to perform a 4-hour monitoring when fully charged. In this case battery replacement is
recommended. The replacement should only be done by qualified experts.
Occasionally (every 1-2 years) the main parameters of the electrocardiograph should be
checked and if need be the settings should be adjusted. This should only be done by a
qualified service technician.
Accidental or random pressing of the buttons cannot cause failure.
Interact with the screen only using your fingers! Do not use any tools or instruments.
The expected lifetime of the device is 8 years. The expected lifetime of the battery depends
strongly on use but it averages at approximately 3 years.
In the service documentation the manufacturer provides the circuit diagram accessory list
descriptions calibration instructions and other information about reparable parts relevant to
the service technician.
3.2. Cleaning, disinfection
A formaldehyde solution can be used to clean and disinfect the device. The device can be
cleaned using a cloth with a mild solution of detergent and water and then disinfected with
the formaldehyde solution. The formaldehyde should form an even continuous liquid film on
the surface of the device and then be allowed to dry. While cleaning make sure that no liquid
gets into the device or the paper tray. The electrodes can be cleaned and disinfected with
alcohol or even with a formaldehyde solution. As formaldehyde has an unpleasant smell and
can cause skin and mucous membrane irritation wearing rubber gloves while cleaning is
advised. After finishing air the room thoroughly.
To make the disinfectant formaldehyde solution — for 1000 cm
3
of liquid dilute 50 cm
3
of
35–40% formaldehyde solution with distilled water.

HS112 C
-
1 User Manual
R
-
6730
-
EN02
-
E
11
/73
3.3. Battery related tas s
Before first use the battery has to be charged. In order to do this connect the device to a
mains power outlet. Make sure to take into consideration the warnings listed in section 1.
The LED light labelled “Charge” located on the front panel of the device indicates that the
battery is charging.
The device battery can be charged continuously without damage; however it is advised not to
leave the device charging overnight or unattended. In these cases the charging process can be
interrupted by disconnecting the device from the mains power outlet.
In case there is an interruption in the power supply during charge and there is a charged and
working battery in the device the charging process will stop but the device will continue to
work uninterrupted until the battery is discharged. Stored data will not be lost.
In case of a defective or insufficiently charged battery the device will shut down if there is an
interruption of power supply. When turning the device back on the screen will be black.
3.4. Environmental protection
Disposal of old electrical and electronic
equipment (applicable in the European Union
and other European countries with separate
collection s stems)
This symbol on the product or on its packaging
indicates that this product shall not be treated as
household waste. Please hand it over to the
applicable collection point for the recycling of
electrical and electronic equipment.
3.5. Classification
The HS112 C-1 electrocardiograph is classified as a Class IIa device according to Rule 10 of
point 3.2 of Part III of Annex IX to Council Directive 93/42/EEC as modified by Directive
2007/47/EC.
With respect to electromagnetic compatibility the HS112 C-1 electrocardiograph is classified
as Group 1, Class B according to section 4 of the MSZ EN 55011:2000 standard.

12
/73
4.
S mbols on the device
Manufacturer
Obligatorily read the manual
Use by date
Upper and lower temperature
limits
Batch code
Recyclable
Power on/off button
Intended for indoor use
Type CF defibrillator protected
applied parts
ECG mains noise filter
ECG muscle noise filter
ECG baseline filter
HS112 C
-
1 User Manual
S mbols on the device
label
Obligatorily read the manual
Upper and lower temperature
Power on/off button
Intended for indoor use
Type CF defibrillator protected
ECG mains noise filter
ECG muscle noise filter
ECG baseline filter
Caution consult documents
Product shall not be treated as
household waste
Keep dry
Keep away from sunlight
IP 20
Ingress Protection Marking
Internally powered device
S/N
Serial number
Battery empty
Functional earth
Protective earth
R
-
6730
-
EN02
-
E
Caution consult documents
Product shall not be treated as
household waste
Keep dry
Keep away from sunlight
Ingress Protection Marking
Internally powered device
Serial number
Battery empty
Functional earth
Protective earth

HS112 C
-
1 User Manual
R
-
6730
-
EN02
-
E
13
/73
5.
Installing the HS112 C-1 device
The device is shipped in a carrying case which contains the device accessories and the user
manual. Perform the following steps after unpacking the device.
Before turning on the device:
Read the electrocardiograph’s manual and familiarize yourself with the layout and
functionality of the controls.
Make sure that the device and the cables are not damaged.
Connect the patient cable to the HS112 C-1 device.
Load the paper into the ECG device as specified in section 5.2.
Connect the device to the mains power supply to charge the battery.
Caution!
The device is only allowed to be connected to a power supply in accordance with the
specifications. The only way to co pletely disconnect the device fro the ains power source
is to pull the power plug out of the ains outlet. Install and position the device in a way that
akes this possible.
5.1. Battery-related tas s
The device continuously keeps track of the charge status of the battery and in case the
device is operating on battery a battery indicator symbol appears in the top right
corner of the display under the HR symbols. When the device operates on the mains
power supply there is no battery indicator. If the charge level of the battery is very
low the indicator turns red and starts to blink (in the rhythm of the QRS). The colour
of the battery indicator reflects the charge level; however it does not directly
correspond to the remaining operational time.
If the device does not turn on it has to be connected to the mains power supply in
order to charge.
The device battery can be charged continuously without damage; however it is
advised not to leave the device charging overnight or unattended. In these cases the
charging process can be interrupted by disconnecting the device from the mains power
outlet.
If the device is not being used (it is not connected to a patient and/or no button is
pressed for 5 minutes) and if “Turn off” is set to 5 minutes in the Setup/Others
menu the device will shut down automatically after approximately 5 minutes.
However the battery will continue to charge.
The LED light labelled “Charge” which indicates that the battery is charging is
located at the bottom of the front panel next to the power button.
To preserve battery capacity it is recommended to format the battery at least every 6
months.

HS112 C
-
1 User Manual
14
/73
R
-
6730
-
EN02
-
E
In order to do this, discharge the battery co pletely by disabling the auto atic shutdown feature of the device
(Setup/Others/Turn off), then recharge it fully by connecting it to the ains power supply for at least 3 hours.
If battery capacity has decreased considerably (the battery discharges rapidly) it has to
be replaced. Battery replacement should be done by a qualified expert with a battery
pack acquired from Innomed Medical. If it is maintained in accordance with the
instructions given in the user manual the minimal lifespan of the battery is 2 years.
Refer to the maintenance manual for details on battery and power failure.
Factor reset
In case of malfunction of the device you can reset the factory setting by switch on the device
with more than 10sec pressing of the ON button. Press it while you hear a sound. If during
pressing the GREEN LED become off release the button and immediately press it again for
more than 10 sec (until appearing the sound).
Caution!
The factory reset clear all e ory, all records, and set the factory default setting.
5.2. Printer setup, loading the paper
Before first use or if the device has run out of paper a new stack of recording paper has to be
placed into the paper tray. Loading the paper tray consists of the following steps:
1.
Press the button indicated by the arrow and pull out the paper tray.
2.
Place a stack of paper into the tray and fold the top sheet over as indicated in the
figure below. The black page boundary markers and the raster grid should be facing
upwards.

HS112 C
-
1 User Manual
R
-
6730
-
EN02
-
E
15
/73
3.
With the first sheet hanging out push the tray back into its place (you should hear a
click) and turn on the device. When turned on the device will roll the paper out until
the first page boundary marker.
4.
Make sure that the device does not indicate a paper or print error. Press the
button to start printing.
After completing these steps both the device and the printer are ready for use.
Attention!
Please read the instructions provided with the recording paper. The records printed on the
paper supplied by Inno ed Medical retain their legibility for 8 years, provided that the
storing conditions described in the instructions are et.
5.2.1. General remarks about printing
The device starts each printing session at the beginning of a page and rolls the paper out until
a page boundary at the end of each session. This makes tearing the paper off at the perforated
edge convenient.
When printing starts the printer pulls the paper back slightly in order to begin printing at its
very edge.
Do not pull the paper out forcibly before tearing it off because it could damage the printer
and interfere with the paper positioning mechanism.

HS112 C
-
1 User Manual
16
/73
R
-
6730
-
EN02
-
E
6.
Device controls and their function
The device has one mechanical button — the power on/off button — which can be found on
the left side of the device. Settings can be adjusted using the touch screen and the touch
buttons located on the left and right edges of the screen. The touch screen can be manipulated
by touching or swiping over the buttons and fields displayed on it.
Directly accessible buttons on the device are the following:
1.
Power on/off button (mechanical)
The dedicated buttons below are touch buttons:
2.
Menu and monitoring selection button
3.
Channel number selection button in monitoring mode
4.
Storage program selection button
5.
Diagnosis program selection button
6.
Manual printing start and stop button
7.
Filter on/off button
8.
Curve speed setting for the display and printout
9.
Curve sensitivity setting for the display and printout
10.
Lead group selection button for the display and printout
11.
Automatic printing start and stop button

HS112 C
-
1 User Manual
R
-
6730
-
EN02
-
E
17
/73
12.
Paper tray release button
13.
Display and touch buttons
14.
Paper tray
15.
Mains cable connector
16.
USB connector
17.
Patient cable connector
The right side of the device with the connectors The back side of the device
Hereinafter the controls and connectors will be referred to with their respective names as
defined in this section.
Touch buttons will be referred to using their picture representation (e.g. ) while touch
screen controls will be referred to by specifying their name (e.g. OK).
16
17
15
12
13
14

HS112 C
-
1 User Manual
18
/73
R
-
6730
-
EN02
-
E
7.
Useful advice for creating good qualit ECG records
7.1. Requirements for good quality ECG record creation
Innomed Medical ships its devices with silver-silverchloride electrodes.
These electrodes have a low contact potential and therefore produce better ECG records than
non-silver-silverchloride electrodes.
Please use our devices with the electrodes provided.
Connect the patient cable to the ECG IN connector on the right side of the device. The
connectors on the opposite end of the cable should be connected to the electrodes as shown in
subsections 7.1.1. and 7.1.2.
The patient’s skin should be cleaned from body oil and moisturizers and shaved if necessary
(e.g. in case of a hairy chest).
Before each use the electrodes have to be cleaned. It is extremely important that no dried gel
remains on the electrodes!
The clamp and suction type electrodes should be applied with gel provided by Innomed
Medical (or other comparable quality gel recommended for ECG use).
Using a wet gauze instead of gel can lead to undesirable results.
If possible avoid placing the electrodes over muscle masses as muscle tremors cause a lot of
noise on the record.
During recording the patient should lie calmly without moving or speaking.
If disposable electrodes are used check their expiry date.
7.1.1. Limb lead placement
R: right hand
L: left hand
N: right leg
F: left leg
R
L
N
F

HS112 C
-
1 User Manual
R
-
6730
-
EN02
-
E
19
/73
7.1.2. Precordial lead placement
V1: 4th intercostal place at the right margin of the
sternum
V2: 4th intercostal place at the left margin of the
sternum
V3: midwa between V2 and V4
V4: 5th intercostal place at the left midclavicular line
V5: 5th intercostal place at the anterior axillar line
V6: 5th intercostal place at the midaxillar line
The device is equipped with a mechanism which checks electrode contact and warns the user
in case any of the electrodes are not properly attached.
A sequence of characters representing the 12 channels appears on the right side of the display
above the filter icons:
RLFN1
23456
These correspond to the right hand – left hand – left leg – N point (right leg) and the 6 chest
leads represented by the numbers 1–6. The character representing the lead which is not
connected properly turns red and indicates an error by blinking and beep in the rhythm of the
heartbeat. For technical reasons the device does not indicate the status of the N electrode
so the “N” character is always coloured yellow.
If the ECG is noisy — make sure that the ECG cable does not cross any mains cables. If need
be disconnect the mains power supply cable and operate the device on battery or turn the
mains noise filter on.
7.2. Defibrillation
The device is defibrillator protected when using an approved ECG cable but it is
recommended to remove the precordial electrodes before defibrillation (as they also interfere
adequately placing the defibrillator electrodes). Make sure that the unused electrodes do not
come into contact with current-carrying surfaces or persons. Please do not place the
defibrillator directly onto the electrodes! During and after defibrillation the ECG signal may
disappear from the display for several seconds but it will appear again afterwards.
7.3. Using a high-frequency surgical nife
The device can be used while working with a high-frequency knife if using an approved
patient cable. Observe the following: The electrodes should be as far as possible from the area
under surgery. The ECG cable should be as far as possible from cable of the knife. Turn on all
three filters! Under these circumstances the ECG signal display and the heart rate measures
may contain errors.

HS112 C
-
1 User Manual
20
/73
R
-
6730
-
EN02
-
E
8.
Monitoring mode
After switching the device on by pushing the on/off power button the device will perform a
self-test.
If there is an error during the test the device will display the error otherwise it will enter into
monitoring mode. During the test the device will also perform a memory check and while
“Memory x% OK” is displayed the touch buttons cannot be used.
Monitoring mode is the default state of the device: the chosen number of ECG channels is
displayed as well as the patient’s name their heart rate curve sweep speed and sensitivity
filter settings and other status notifications (battery wireless connection status pacemaker
pulse presence etc.).
After turning the device on monitoring will always start with the latest settings (retained after
shutdown) with the exception of the baseline filter which is turned on for the printer and
turned off for the display at each start-up.
The following figure shows the information displayed during monitoring.
If a wireless connection is available an indicator icon appears on the right side of the
display. Wireless communication can be disabled by touching the icon which then
becomes crossed out. If the connection is turned on again (by touching the icon) the
icon is no longer crossed out. If the icon is in inverse colour the connection is active
and if it is not in inverse colour there is no connection (the receiver is turned off or
there is no network available).
The pacemaker s mbol “Pace” appears when the patient examined has an active
pacemaker and the device detects it. In these cases a marker line coloured differently
from the ECG curve indicates the pacemaker spikes.
This manual suits for next models
1
Table of contents
Other Innomed Medical Medical Equipment manuals

Innomed Medical
Innomed Medical Cardio-Aid 360-B User manual

Innomed Medical
Innomed Medical Heart Screen 60 G User manual

Innomed Medical
Innomed Medical HeartScreen 80G-L1 User manual

Innomed Medical
Innomed Medical TOP-X 100LC User manual

Innomed Medical
Innomed Medical Heart Screen 60 G User manual

Innomed Medical
Innomed Medical Hear Screen 112C-1 User manual