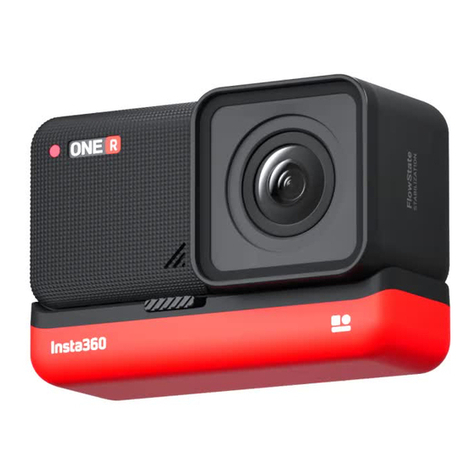
Insta360 ONE R User manual

Installation
Insert the lens and the four positioning posts on the camera body into the
positioning holes, and tighten the two parts of the use case.
Once the lens and body are installed, align them with the metal slots of
the battery and press firmly to ensure that the battery clips completely
catch the lens and body.
MicroSD card slot cover installation
Place the SD card with a gold-red side and place it in the SD card slot
toward the side where the camera has no screen. Then align the cover to

the side of the camera that has no screen, first aligning into the slot.
Press firmly on the cover, and make sure that the yellow color at the
button is no longer displayed, it is considered to be completely covered
with a waterproof board.
Please note that the button on the cover and the microphone hole on the
bottom are in a vertical line for the correct orientation. If installed in the
opposite direction, there may be a risk during exercise. The camera

hardware currently used for making samples is not waterproof enough.
Camera boot and SD card instructions
Press and hold the camera's power button for 2 seconds, and the camera
will perform power on/off. The boot animation will display the current
firmware version number for confirmation.
After the power is turned on, the lens screen appears, but if the blue light
flashes, the available MicroSD card is not recognized. When the indicator is
green, it means that the memory card has been read and shooting is possible.

* The camera needs to use a MicroSD card that supports the v30 standard. The
file format of the card is exFat. The supplied sandisk v30 MicroSD is available.
Switch shooting mode and resolution gear to
shoot
1. In the upper left corner of the camera shooting preview interface, the
displayed information is the number of photos that can be taken or the length
of the video that can be taken under the current settings. The right side shows
the current battery level. At the bottom left of the screen interface, click to
switch the current shooting mode: photo, video. Then click on the bottom
right of the screen to switch the resolution and frame rate of the content, or
press the power button to switch to normal photo or normal recording mode.
Draw a setting menu at the top of the camera screen. Currently only the
screen brightness and switch indicators on the left side of the first page are
available. Other icon clicks are invalid.

2、Among them 1/ 2.3" lens support recording the following:
mode
Resolution
Frame rate
Take a photo (support
shooting dng photos
4000x3000
Video
3840x2160
60
4000x3000
30
1920x1080
120
1920x1080
200
HDR Video
3840x1920
30
1. Use APP to connect, control shooting, read back
albums, play content
2. 2. Please download the iOS app from the following address (currently only
supports iOS)https://www.pgyer.com/vL3b
3. 3. After the camera is turned on, please operate the phone only in the
system WiFi list and manually connect to the camera's WiFi. The camera
WiFi name is the last six digits of the serial number of the camera body.
The default connection password is 8 8 (88888888).

4. After the connection is successful, open the OneR APP, click the capture
button, enter the shooting interface, set the parameters and shoot (the
current version of the APP control camera shooting stability is not enough,
it is recommended to use the camera screen to control the shooting).
Once you have the content, you can click on the album entry to view the
files on the camera's MicroSD card. Click to play or download any file.
On the video play page, you need to manually click on the center of the
interface to start the video. The thumbnail of the current version of the
video and the first frame of the video may show a problem, please pay
attention to use.
Camera gyroscope calibration method
If the camera's anti-shake effect is not good enough, or the picture is
drifting. You can now position the camera as shown in the picture with
the lens facing down on a full horizontal desktop. Then use your finger to
draw the setup menu from the top of the camera screen, and in the lower
right corner of the second page menu, click the “50Hz” icon to enter
the gyroscope calibration interface.
You have a 5s countdown time to return to the previous screen to cancel
the gyroscope correction. After the 5s countdown is over, the camera will

perform the gyroscope calibration. During the calibration process, the
camera indicator will flash alternately between blue and green. After the
calibration is completed, the camera will automatically restart.
Shooting precautions
1. After upgrading the firmware for the first time (for the firmware upgrade
method, see the fourth section of the operation guide), be sure to do a
gyroscope calibration (see the eighth section for the gyroscope calibration
method), otherwise the anti-shake effect may be affected. Gyro calibration can
be done only once after upgrading the firmware version after 0.0.17.
2. After the firmware is successfully upgraded for the first time, the camera will
automatically turn on. But please don't shoot directly, you need to restart the
camera to be normal, otherwise the anti-shake effect may be abnormal if you
shoot directly.
3. At present, regardless of the 1080P high frame rate of 1/2.3" or 1" lens, the
picture quality is not very good. It is recommended to use only the stationary
position to shoot moving objects in a scene with good light.

4. Use 1" lens to shoot night scenes. It is recommended to use 5.4K@30fps
and raw photos. The picture quality of 4K@60 and 1080P@120 frames is not
good enough.
5. If you used a 1/2.3" lens to take a photo with the manual exposure
parameter, first switch the exposure mode to auto exposure, then switch to
the recording mode to shoot. Avoid some bugs.
6, 1 / 2.3" lens 1080P@120fps gear position, the current settings exposure,
white balance and other parameters will not take effect. 1080P@200 switching
white balance does not take effect. Other resolution gears are normal.
7. The current APP version will play a few errors when connecting to view the
camera album, but it will not affect the use, and the album will disappear when
the error pop-up window disappears. This bug will be fixed tomorrow.
FCC Statement
This device complies with Part 15 of the FCC Rules. Operation is subject
to the following two conditions: (1) This device may not cause harmful
interference, and (2) this device must accept any interference received,
including interference that may cause undesired operation.
NOTE: This equipment has been tested and found to comply with the
limits for a Class B digital device, pursuant to Part 15 of the FCC Rules.

These limits are designed to provide reasonable protection against
harmful interference in a residential installation. This equipment
generates uses and can radiate radio frequency energy and, if not
installed and used in accordance with the instructions, may cause harmful
interference to radio communications. However, there is no guarantee
that interference will not occur in a particular installation. If this
equipment does cause harmful interference to radio or television
reception, which can be determined by turning the equipment off and
on, the user is encouraged to try to correct the interference by one of the
following measures:
-Reorient or relocate the receiving antenna.
-Increase the separation between the equipment and receiver.
-Connect the equipment into an outlet on a circuit different from that
to which the receiver is connected.
-Consult the dealer or an experienced radio/TV technician for help.
WARNING: Any changes or modifications not expressly approved by the
party responsible for compliance could void the user's authority to
operate this equipment.
The device must not be co-located or operating in conjunction with any
other antenna or transmitter.

This device complies with FCC’s radiation exposure limits
set forth for an uncontrolled environment
This device complies with Part 15 of the FCC Rules. Operation is subject to the
following two conditions : (1) this device may not cause harmful interference, and
(2) this device must accept any interference received, including interference that
may cause undesired operation.
5.15-5.25GHz Band ÿOperations in the 5.15-5.25GH band are restricted to indoor use only.
Other manuals for ONE R
1
This manual suits for next models
1
Table of contents
Other Insta360 Action Camera manuals
Insta360
Insta360 ONE X User manual
Insta360
Insta360 One User manual
Insta360
Insta360 GO User manual
Insta360
Insta360 ONE RS User manual
Insta360
Insta360 DJI Mavic AIR 2 Instruction Manual

Insta360
Insta360 ONE RS User manual
Insta360
Insta360 Ace Pro User manual

Insta360
Insta360 GO 3 User manual

Insta360
Insta360 ONE RS User manual

Insta360
Insta360 GO 3 User manual


