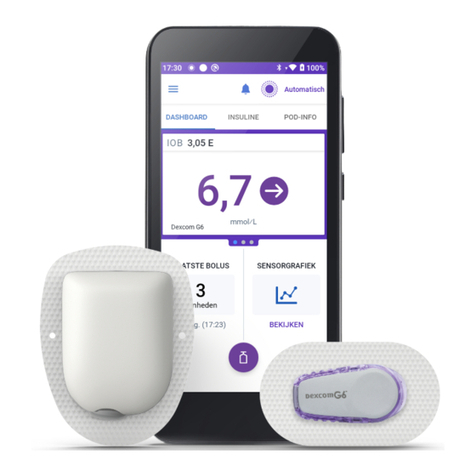
Insulet Omnipod 5 Firmware update

Resource Guide
Omnipod®5 Automated Insulin Delivery System

3
Omnipod®5 App screens are for educational purposes only. Consult your healthcare professional before using these features and for personalized recommendations.
Introduction |TABLE OF CONTENTS
Introduction
Choosing Your Omnipod® 5 Controller........................................................................................................... 4
Preparing to Start Omnipod 5 Automated Insulin Delivery System ............................................................. 5
Understanding Automated Insulin Delivery Systems.................................................................................... 6
Omnipod 5 System
Omnipod 5 Components ................................................................................................................................ 8
Communication............................................................................................................................................... 9
Starting Omnipod 5 System |System Instruction
Omnipod 5 Application Settings .................................................................................................................. 12
Change a Pod
Activate a New Pod................................................................................................................................... 14
Pod Site Preparation and Placement Options ......................................................................................... 20
Deactivate a Pod....................................................................................................................................... 22
Connect Dexcom G6® CGM........................................................................................................................... 23
System Modes .............................................................................................................................................. 24
Switching Modes........................................................................................................................................... 26
Everyday Use |Omnipod 5 System Instructions
Omnipod 5 App Home Screen...................................................................................................................... 28
Glucose Trends and CGM Graph .................................................................................................................. 29
Eating: Deliver a Bolus.................................................................................................................................. 30
Activity: Start the Activity Feature ............................................................................................................... 32
Troubleshooting
History....................................................................................................................................................... 34
Notications,AlertsandAlarms .............................................................................................................. 35
System States........................................................................................................................................... 36
Additional Use |Omnipod 5 System Instructions
Settings: Edit Target Glucose & Bolus Settings ........................................................................................... 39
Extended Bolus............................................................................................................................................. 41
Manual Mode
Pause Insulin Delivery.............................................................................................................................. 42
Start Insulin Delivery................................................................................................................................ 43
Start a Temporary Basal Rate................................................................................................................... 44
Edit Manual Basal Program ...................................................................................................................... 45
Create Additional Basal Programs ........................................................................................................... 46
Create Temp Basal Presets ...................................................................................................................... 48
Understanding Diabetes Therapy
Carbohydrate Counting................................................................................................................................. 52
Hypoglycemia ............................................................................................................................................... 54
Hyperglycemia .............................................................................................................................................. 56
Sick Day Management .................................................................................................................................. 58
INDICATIONS FOR USE
The Omnipod 5 ACE Pump (Pod) is intended for the
subcutaneous delivery of insulin, at set and variable rates, for
the management of diabetes mellitus in persons requiring
insulin. The Omnipod 5 ACE Pump is able to reliably and
securely communicate with compatible, digitally connected
devices, including automated insulin dosing software, to
receive, execute, and conrm commands from these devices.
The Omnipod 5 ACE Pump is intended for single patient,
home use and requires a prescription.
SmartAdjust™ technology is intended for use with
compatible integrated continuous glucose monitors
(iCGM) and alternate controller enabled (ACE) pumps to
automatically increase, decrease, and suspend delivery
of insulin based on current and predicted glucose values.
SmartAdjust technology is intended for the management of
type 1 diabetes mellitus in persons 6 years of age and older.
SmartAdjust technology is intended for single patient use
and requires a prescription.
The Omnipod 5 SmartBolus Calculator is software intended
for the management of diabetes in persons aged 6 and
older requiring rapid-acting U-100 insulin. The Omnipod 5
SmartBolus Calculator calculates a suggested bolus dose
based on user-entered carbohydrates, most recent sensor
glucose reading (or blood glucose reading if using ngerstick),
rate of change of the sensor glucose (if applicable), insulin on
board (IOB), and programmable correction factor, insulin to
carbohydrate ratio, and target glucose value. The Omnipod 5
SmartBolus Calculator is intended for single patient, home
use and requires a prescription.
CONTRAINDICATIONS
The Omnipod 5 System is NOT recommended
for people who:
•Are unable to monitor glucose as
recommended by their healthcare provider
•Are unable to maintain contact with their
healthcare provider
•Are unable to use the Omnipod 5 System
according to instructions
• Are taking hydroxyurea as it could lead to
falsely elevated CGM readings and result in
the over-delivery of insulin that can lead to
severe hypoglycemia
•Do NOT have adequate hearing and/or vision
to allow recognition of all functions of the
Omnipod 5 System, including alerts, alarms,
and reminders
Device components including the Pod,
CGM transmitter, and CGM sensor must be
removed before Magnetic Resonance Imaging
(MRI), Computed Tomography (CT) scan, or
diathermy treatment. In addition, the Controller
and smartphone should be placed outside
of the procedure room. Exposure to MRI,
CT, or diathermy treatment can damage
the components.
For full indications and instructions for use
please consult the Omnipod 5 System User
Guide available online at www.omnipod.com.

5
Omnipod®5 App screens are for educational purposes only. Consult your healthcare professional before using these features and for personalized recommendations.
Introduction |PREPARING TO START OMNIPOD 5 AUTOMATED INSULIN DELIVERY SYSTEM
4Omnipod®5 App screens are for educational purposes only. Consult your healthcare professional before using these features and for personalized recommendations.
Introduction |CHOOSING YOUR OMNIPOD 5 CONTROLLER
Welcome to your Omnipod®5 System
Before you begin using your Omnipod 5 Automated Insulin Delivery
System you will need to choose to use the provided Controller or a
compatible personal smartphone* for the Omnipod 5 App.
Settings and history are stored on the device (Omnipod 5 Controller
or smartphone) that you choose.
Caution: If you decide later to switch between the Controller and your
smartphone, you will need to start setup again on the new device. New
setup requires entry of all your personalized settings. Consult with your
healthcare provider if you are unsure about how to set up the new
device. If you are wearing a Pod and need to switch devices, you will
need to deactivate your Pod and activate a new one with the new
device since the Pod cannot communicate with two devices at one time.
During rst time setup of the Omnipod 5 App you will be directed to
a website to create your Insulet prole. At this time you will create an
Omnipod account, link your accounts, select training preferences and
engage in eLearning courses.
• If you already have an Omnipod account, use the same username
and password to sign into your controller.
Training
Learning how to use your Omnipod 5 System the correct way is important for safe and eective use.
Dierent training methods to learn how to use your system are based on your and your healthcare
provider’s preferences.
This resource guide includes instructions for some of the key functions you may perform with the
Omnipod 5 System.
Have questions at any time? We are here to help with our 24/7 Customer Care.
Customer Care: 1-800-591-3455
From Outside the US: 1-978-600-7850
omnipod.com
For more information about indications, contraindications, warnings, and full instructions please consult
your Omnipod 5 System User Guide available online at www.omnipod.com.
In an emergency, you should call your healthcare provider.
You should also keep the following supplies on hand at all times to quickly respond to any diabetes emergency:
If using a compatible
personal smartphone:
• Download the
Omnipod 5 App
on Google Play.
• Ensure Bluetooth®
is turned ON on your
compatible smartphone
so that the Omnipod 5
App and your Pod
can communicate.
• In order to use the
Omnipod 5 App on a
compatible smartphone,
you must rst log into
the Omnipod 5 App on
the provided Controller.
*For a list of compatible smartphones please visit omnipod.com/compatibility.
Connecting to cellular data or Wi-Fi is important when
using the Omnipod 5 System. Being connected will allow
you to be notied of important updates as well as allow
seamless auto uploading of your data to Insulet’s secure
cloud. With either device, be sure to only connect to a
trusted Wi-Fi network.
Supplies
• Several new, sealed Omnipod 5 Pods
• A vial of rapid-acting U-100 insulin
• Glucose tablets or another fast-acting source
of carbohydrates
• Continuous glucose monitor (CGM) and supplies
• Blood glucose meter and test strips
• Lancing device and lancets
• Alcohol prep swabs
• Syringes or pens for injecting insulin
• Instructions from your healthcare provider
about how much insulin to inject if delivery
from the Pod is interrupted
• Phone numbers for your healthcare provider
in case of emergency
• Ketone testing supplies
• Glucagon kit and written instructions for
administration if you are unconscious
Preparing to Start your Omnipod®5 System
Warning: DO NOT start to use your system or change your settings without adequate training and guidance from
your healthcare provider. Initiating and adjusting settings incorrectly can result in over-delivery or under-delivery,
which could lead to hypoglycemia or hyperglycemia.
Dexcom CGM sold separately. You can
set up and start your Dexcom G6 before
or after setting up your Omnipod 5 App.
You must use the Dexcom G6 App,
not the Dexcom G6 receiver with the
Omnipod 5 System
Please consult the Dexcom G6 User
Guide for more information.

6Omnipod®5 App screens are for educational purposes only. Consult your healthcare professional before using these features and for personalized recommendations.
Introduction |UNDERSTANDING AUTOMATED INSULIN DELIVERY SYSTEMS
Understanding Basal, Bolus, and Automated
Insulin Delivery (AID) Systems
Insulin Pump Therapy
With or Without Automation
• Basal insulin covers background needsto
keep glucose levels in target between meals
and overnight
• Bolus insulin is an additional dose of insulin
needed for food (meal bolus) and/or high
glucose (correction bolus)
Automated Insulin Delivery Systems
• An insulin pump/Pod that communicates
with CGM and algorithm to automatically
adjust insulin delivery
• Must still bolus for meals and snacks
• Benets of AID systems1,2:
– Increase the amount of hours each day
spent in time in range (70-180 mg/dL)
– Less hypoglycemia (low glucose)
– Less hyperglycemia (high glucose)
– Improved quality of life
Omnipod®5
System
Insulin Delivered From Pod
1. Cinar A. Automated insulin delivery algorithms. Diabetes Spectrum. 2019;32(3);209-214.
2. American Diabetes Association. 7. Diabetes technology: Standards of Medical Care in Diabetes - 2021. Diabetes Care 2021; 44(Suppl. 1):S85-S99.
Bolus Insulin
Basal Insulin

9
Omnipod®5 App screens are for educational purposes only. Consult your healthcare professional before using these features and for personalized recommendations.
Omnipod 5 System |COMMUNICATION
8Omnipod®5 App screens are for educational purposes only. Consult your healthcare professional before using these features and for personalized recommendations.
Omnipod 5 System |OMNIPOD 5 COMPONENTS
* Please go to omnipod.com/compatibility for a list of compatible smartphones
** IP28 Rating, up to 25 ft. for 60 minutes
Dexcom G6 Transmitter
Controller or smartphone
Omnipod 5 Pod
Omnipod®5 System
The Omnipod 5 App
• Can be used on a compatible smartphone* or
the provided Controller
• Used to control and monitor the Pod’s operations
• Although your Omnipod 5 System does
not require the Controller to be nearby to
continue your insulin delivery in Manual Mode
or Automated Mode, the Controller and/or
smartphone provide(s) you with important
information about recent insulin delivery,
alerts, and alarms that come from your Pod,
and allows you to use the SmartBolus
Calculator to deliver a bolus
The Omnipod 5 Pod
• Small lightweight, waterproof**,
Bluetooth-enabled Pod
• Enhanced with SmartAdjust™ technology
which continuously adjusts glucose
levels using a customized glucose target
• Provides up to 72 hours of continuous
insulin delivery
Dexcom G6® CGM
• Provides real-time glucose readings
every 5 minutes (up to 288 times per day)
• Consists of auto applicator, sensor,
transmitter, and Dexcom app
System Communication
Bluetooth®wireless technology allows communication between the components of the Omnipod®5 System.
Omnipod 5 App
• Activates/deactivates
Pod
• Sends and receives
insulin delivery info
• Receives CGM info
from Pod
• Displays alerts
and alarms
Dexcom App
• Starts/stops
sensor session
• Displays CGM
value and trends
• Display alerts
and alarms
• Troubleshooting
guidance
Omnipod 5 Pod
• Delivers insulin to your body
• Sends CGM values to
Omnipod 5 App
• SmartAdjust™ technology
in Pod automatically adjusts
insulin delivery based on CGM
Dexcom G6 CGM
• Transmitter sends
sensor values to
the Pod and
Dexcom G6 app
Pod receives CGM Values
• The Omnipod 5 App does not have to be near the Pod for basal insulin delivery in both Manual or
Automated Mode. It is recommended to keep the Omnipod 5 App nearby as it displays important
information such as alerts and alarms.
• The Omnipod 5 App does not communicate directly with the Dexcom app or the Dexcom transmitter.
Dexcom CGM sold separately.
Caution: You cannot use the
Dexcom G6 receiver with the
Omnipod 5 System because
the Omnipod 5 System is
compatible only with the G6
app on a smartphone.

Starting Omnipod®5
System Instructions

12 Omnipod®5 App screens are for educational purposes only. Consult your healthcare professional before using these features and for personalized recommendations.
Starting Omnipod 5 System |OMNIPOD 5 APPLICATION SETTINGS
Omnipod®5 App Setup
Depending on the device you have chosen, you may see dierent screens and settings as you begin to set up
the Omnipod 5 App. If you have chosen to use your smartphone the Omnipod 5 System relies on some of your
smartphone’s settings to function. If these settings are not correctly set, you will not be able to use the App until
the setting is correctly enabled or disabled. The Omnipod 5 App relies on some of your smartphone’s settings
to function. For recommended smartphone settings please consult your Omnipod 5 System user guide.
Your initial pump therapy settings are needed to set up your Omnipod 5 App. These settings are provided to
you by your healthcare provider.
Keep a copy of your current settings in case you have to set up the Omnipod 5 App again. If you use a smartphone,
you may wish to take screenshots or photos of your Omnipod 5 App settings to keep for future reference.
Warning: Always identify the Omnipod 5 System as yours before using it. Using someone else’s
Omnipod 5 System can result in incorrect insulin delivery for both of you.
Warning: Always keep your Omnipod 5 App secure and within your control to ensure others cannot
make changes to your insulin therapy which could lead to hypoglycemia or hyperglycemia. Do not
share your Controller PIN or smartphone screen lock security with anyone. Do not share
your Controller screen lock security with anyone.
Caution: AVOID setting your Controller or smartphone to Silent, Vibrate, or any other
setting that prevents you from hearing alarms and notications. If you do not hear
alarms and notications from your Controller or smartphone, you might not make
the changes you need to make to your insulin therapy in a timely manner. Your
Pod will still sound, and you will be able to see the Alarm or Notication
displayed on the Omnipod 5 App. Refer to Section 13 in the Omnipod 5
User Guide to learn how to manage sounds and vibrations.
13

14 15
Omnipod®5 App screens are for educational purposes only. Consult your healthcare professional before using these features and for personalized recommendations. Omnipod®5 App screens are for educational purposes only. Consult your healthcare professional before using these features and for personalized recommendations.
Starting Omnipod 5 System |ACTIVATE A NEW POD Starting Omnipod 5 System |ACTIVATE A NEW POD
Activate an Omnipod 5 Pod
Before activating a Pod wash your hands with soap and water and gather the necessary supplies:
• An unopened Omnipod 5 Pod
– Conrm that you are using an Omnipod 5 Pod by looking for the Omnipod 5 logo on the label or on the Pod itself
• Vial of U-100, rapid acting insulin cleared for use in Omnipod 5 System, at room temperature
• Alcohol prep swabs
• Controller or smartphone with Omnipod 5 App
Omnipod®5 Pod
Needle Tab
Fill Port
Adhesive
Backing
BOTTOMTOP
Viewing
Window
Pink Slide
Insert
• After rst time setup,
tap SET UP NEW POD
• From the POD INFO
tab on the Home
screen, tap SET UP
NEW POD
OR
Tip
Follow the screen
instructions by tapping
the area highlighted
by the “red circle”
If you are using the
Omnipod 5 App on
your smartphone,
location permission
and Location setting
must be on in order
to activate a Pod
Caution: DO NOT use a Pod if the sterile packaging
is open or damaged, the Pod has been dropped
after removal from the package, or the Pod is
expired as the Pod may not work properly and
increase your risk of infection.
Warning: NEVER use insulin that is expired
or cloudy in the Pod as it may be damaged.
Using damaged or expired insulin could cause
hyperglycemia and put your health at risk.
TOP
Omnipod®5
product name
on Pod

17
Starting Omnipod 5 System |ACTIVATE A NEW POD
16
Starting Omnipod 5 System |ACTIVATE A NEW POD
• Remove the ll syringe
and needle. Keep the Pod
in its tray during set up.
• Use the alcohol prep swab
to clean the top of the
insulin vial
• Securely twist the ll needle
onto the ll syringe
• Pull outward to remove
the protective cap from
the needle
• Determine how much insulin
you will use over the next
72 hours
• Draw air into the ll syringe
equal to the amount of
insulin you want
• Insert needle into the vial
of insulin and inject air.
Injecting air makes it easier
to withdraw insulin from
the vial.
• With the syringe still in the
vial, turn the vial and syringe
upside down
• Pull down on the plunger to
withdraw insulin from the
vial and ll the syringe with
the amount of insulin you
want; ll at least to the
MIN ll line
• With the needle still in the
vial, tap or ick the syringe to
dislodge any air bubbles to
the top of the syringe. Then
push in the plunger to expel
any air bubbles out of the
syringe and into the vial.
• Remove the needle from
the vial
1. Fill the Pod
• Leave Pod in its
plastic tray
• Insert the needle
straight down into the
ll port as indicated
by the arrow, on the
underside of the Pod.
To ensure proper ll,
do not insert ll syringe
at an angle into the
ll port.
• Completely empty the
syringe into the Pod
• The Pod will beep
twice, indicating that
the Omnipod®5 Pod
is ready to proceed
• Return to the Omnipod
5 App. If the screen
times out, press the
Power button to wake
the controller. Place
the controller next
to the Pod so they
are touching.
• Tap NEXT
• The Omnipod 5 App
establishes a one-to-one
relationship with the Pod,
which will prevent it from
communicating with any
other Pod while this Pod
is active
• Listen for the tone from
the Omnipod 5 App
that indicates the Pod
is activated and ready
to be applied
Omnipod®5 App screens are for educational purposes only. Consult your healthcare professional before using these features and for personalized recommendations. Omnipod®5 App screens are for educational purposes only. Consult your healthcare professional before using these features and for personalized recommendations.
Reminder
During activation and
priming, the Controller or
smartphone running the
Omnipod 5 App and Pod
should be next to each
other and touching
Note
Minimum ll is 85 units,
Maximum ll is 200 units
Warning: NEVER use a Pod if, while you are lling the Pod, you feel signicant resistance while pressing the plunger
down on the ll syringe. Do not try to force the insulin in to the Pod. Signicant resistance may indicate that the Pod
has a mechanical defect. Using this Pod can result in the under-delivery of insulin that could lead to hyperglycemia.
Warning: NEVER inject large bubbles or pockets of air when lling the Pod with
insulin. Air in the system takes up space where insulin should be and can aect
insulin delivery. Doing so could result in over-delivery or under-delivery of insulin,
which can lead to hypoglycemia or hyperglycemia.

19
Omnipod®5 App screens are for educational purposes only. Consult your healthcare professional before using these features and for personalized recommendations.
Starting Omnipod 5 System |ACTIVATE A NEW POD
18 Omnipod®5 App screens are for educational purposes only. Consult your healthcare professional before using these features and for personalized recommendations.
Starting Omnipod 5 System |ACTIVATE A NEW POD
• Place your thumb on the
bottom of the Pod and pull
the tab upward. The tab will
snap o.
• Using the pull tabs, carefully
remove white paper backing
from the adhesive. Be
careful not to remove the
adhesive pad itself. Do not
allow the adhesive to fold
back on itself.
• Apply the Pod to the
selected site
• Run your nger around
the adhesive to secure it
2. Apply the Pod 3. Start Insulin Delivery
• Clean the site where the Pod will be applied
• Be careful to avoid areas where the Pod will be
aected by folds of skin and clothing
• Refer to Omnipod 5 Site Preparation and Placement
section for sites your healthcare provider may
recommend and placement tips
• Tap START • Verify that the Pod is
securely attached to your
body, then tap YES. For best
technique refer to pinching
up in the Pod Preparation
and Placement section of
this Resource Guide.
• The Pod automatically
inserts the cannula
• After insertion the
cannula is lled with
insulin and ready to
begin insulin delivery
• Once the cannula has
inserted, verify proper
insertion by checking
that the pink window
slide insert is visible in
the faint window on
the top of the Pod
• Tap YES
• Your Pod is now active!
The Omnipod®5 System
will generate an automatic
reminder to check your
blood glucose 90 minutes
after each Pod change. If
there is a valid CGM value
at that time, the alert will
be dismissed.
Tip
When choosing sites:
Consider where your CGM is placed.
Allow 3 inches between CGM and Pod.
Place Pod and CGM within direct line of
sight for best communication. See images
for placement examples on page 21.
Warning: Check the infusion site
after insertion to ensure that the
cannula was properly inserted. An
improperly inserted cannula can
result in under-delivery of insulin
which could lead to hyperglycemia.

21
Omnipod®5 App screens are for educational purposes only. Consult your healthcare professional before using these features and for personalized recommendations.
Starting Omnipod 5 System |POD SITE PREPARATION AND PLACEMENT OPTIONS
20 Omnipod®5 App screens are for educational purposes only. Consult your healthcare professional before using these features and for personalized recommendations.
Starting Omnipod 5 System |POD SITE PREPARATION AND PLACEMENT OPTIONS
Caution: ALWAYS apply the Pod as directed. If you are applying a Pod in a place that does
not have a lot of fatty tissue, squeeze the skin around the Pod until after the cannula has
inserted. Blockages may result if you do not use this technique for lean areas.
Arm & Leg:
Position the Pod vertically or at a slight angle.
Back, Abdomen & Buttocks:
Position the Pod horizontally or at a slight angle.
Site Preparation
• Be cool and dry (not perspiring) for Pod change.
• Clean your skin well. Body oils, lotions and sunscreen can loosen the Pod’s adhesive. To improve adhesion, use
an alcohol swab to clean the area around your site—about the size of a tennis ball. Then let it air dry completely
before applying the Pod. Do not blow dry the skin.
Best Placement for CGM and Pod
Pod Positioning
Trouble With... Problem Solution
Oily skin Residue from soap, lotion, shampoo or
conditioner can prevent your Pod from
sticking securely.
Clean your site thoroughly with alcohol
before applying your Pod—and be sure to
let your skin air dry.
Damp skin Dampness gets in the way of adhesion. Towel o and allow your site to air dry
thoroughly; do not blow on it.
Body hair Body hair gets in-between your skin and
your Pod—and if there is a lot of it, can
keep the Pod from sticking securely.
Clip/shave the site with a razor to create
a smooth surface for Pod adhesion. To
prevent irritation, we recommend doing
this 24 hrs before putting on the Pod.
Omnipod®5 Site Preparation and Placement
Site Selection
• Because there is NO TUBING, you can wear the Pod comfortably most places you would give yourself a shot.
Please note the recommended Pod positioning for each body area.
• Be careful not to put it where it will be uncomfortable or dislodge when you sit or move around. For instance,
don’t place it near folds of skin or directly under your waistband.
• Change the site location each time you apply a new Pod. Improper site rotation may reduce insulin absorption.
• The new Pod site should be at least: 1 inch away from the previous site; 2 inches away from the navel; and
3 inches away from a CGM site. Also, never insert Pod over a mole or a scar.
• Remember to place the Pod and CGM within direct line of sight, meaning the two devices can “see” one another,
for best communication.
CHILD
FRONT BACK
abdomen
arm
thigh
buttocks
leg
BACKFRONT
arm
back
buttocks
leg
YOUTH/ADULT
abdomen
thigh
YOUTH/ADULT
CHILD
Pod
CGM
CGM
Pod
CGM
Pod
Pod
CGM

22 23
Omnipod®5 App screens are for educational purposes only. Consult your healthcare professional before using these features and for personalized recommendations. Omnipod®5 App screens are for educational purposes only. Consult your healthcare professional before using these features and for personalized recommendations.
Starting Omnipod 5 System |DEACTIVATE A POD Starting Omnipod 5 System |CONNECT DEXCOM G6 CGM
• Tap VIEW POD DETAILS
• The Pod will take a
moment to deactivate
• Tap POD INFO • Tap CHANGE POD
• Tap DEACTIVATE POD
How to Change the Pod
You may need to change the Pod:
• When the Pod is low on insulin or empty,
or the Pod is nearing expiration or expired
• In response to an alarm
• If the Pod/cannula has become dislodged
• If you have glucose of 250 mg/dL or more
and ketones are present
• If you experience unexpected elevated glucose
• As directed by your healthcare provider
• If, during activation, the Pod fails to beep
Connect Your Dexcom G6 CGM
Locate your Dexcom G6 Transmitter Serial Number (SN) from the back of the transmitter OR from the transmitter
box. If you already have a sensor session started, you can also locate your SN in the Dexcom G6 app.
1. Locate CGM Transmitter Entry Screen
2. Enter & Save New CGM Transmitter SN
From rst time setup
after Pod activation:
• Tap CONNECT CGM
in First Time Setup
• Tap entry eld within rst
box to begin entering
transmitter SN
• Tap SAVE • Tap CONFIRM
From Home screen:
• Tap the Menu button
• Tap Settings and Tap
CGM Transmitter
OR
After the Pod is deactivated, gently lift the
edges of the adhesive tab from the skin
and remove the entire Pod.
Tip: Remove Pod slowly to help avoid
possible skin irritation.
After you have deactivated and removed
the old Pod, follow the instructions on
how to Activate a Pod in this guide.
DO NOT apply a new Pod until you
have deactivated and removed the
old Pod.

24 25
Omnipod®5 App screens are for educational purposes only. Consult your healthcare professional before using these features and for personalized recommendations. Omnipod®5 App screens are for educational purposes only. Consult your healthcare professional before using these features and for personalized recommendations.
Starting Omnipod 5 System |SYSTEM MODES Starting Omnipod 5 System |SYSTEM MODES
Omnipod 5 System Modes
The Omnipod 5 System has two operating modes: Automated Mode and Manual Mode
Automated Mode Manual Mode
Manual Mode Automated Mode
How it works
Basal Insulin Delivery Insulin is delivered according to the Active
Basal Program.
Insulin is delivered and adjusted
automatically based on CGM values
and prediction.
Bolus Insulin Delivery Insulin is delivered using the SmartBolus
Calculator or entered manually.
Insulin is delivered using the SmartBolus
Calculator or entered manually.
Connected CGM
Not required. If connected, CGM values
displayed, stored in history, and available
for use in SmartBolus Calculator.
Required. CGM values used for automated
insulin delivery, displayed, stored in
history, and available for use in
SmartBolus Calculator.
What you can do
Basal Programs Edit, create new, activate Basal Programs.
Does not impact Automated Mode.
Edit Target Glucose to impact automated
insulin delivery. Cannot modify Basal
Programs in Automated Mode.
Basal Insulin Delivery Start and cancel Temp Basal rate, create
Temp Basal Presets. Start and cancel the Activity feature.
Bolus Calculator
Settings Edit Bolus Settings. Edit Bolus Settings.
Bolus Insulin Delivery Deliver and cancel Immediate and
Extended Boluses. Deliver and cancel Immediate Boluses.
Pod Changes Activate and Deactivate Pods.
Deactivate Pods.
Once deactivated, the system switches
to Manual Mode.
Pod Activation occurs in Manual Mode
(after activation, prompt to switch to
Automated Mode displayed).
CGM Transmitter View, and modify CGM transmitter
serial number. View CGM transmitter serial number.
Pause and Start Insulin
Manually pause insulin for a specied
duration of up to 2 hours. Manually
Start insulin.
System automatically pauses automated
insulin delivery based on CGM
value/prediction. Switch to Manual
Mode to manually pause insulin delivery.
History Details Review History Details. Review History Details.
BG Entry Enter blood glucose readings to save in
History Details.
Enter blood glucose readings to save in
History Details.
How you will
be notied Refer to Sections 2 & 5 for a detailed list of alarms and notications.

26 Omnipod®5 App screens are for educational purposes only. Consult your healthcare professional before using these features and for personalized recommendations.
Starting Omnipod 5 System |SWITCHING MODES
Everyday Use
Omnipod®5 System
Switch to Automated Mode
• Tap the Menu button • Tap Switch Mode • Tap SWITCH • Tap CONFIRM
Switch to Manual Mode
• Tap Switch Mode• Tap the Menu button • Tap SWITCH
Warning: ALWAYS be aware of your current CGM value, trust how your body feels, and do not ignore symptoms
of high and low glucose. Even though insulin delivery adjusts automatically in Automated Mode with the goal of
bringing your glucose level to your dened Target Glucose, severe hypoglycemia or hyperglycemia may still occur.
If your CGM values do not match your symptoms, ALWAYS check your blood glucose using a BG meter, consider
treatment and/or CGM sensor calibration if necessary. ALWAYS switch to Manual Mode if you feel you are receiving
inaccurate CGM values.

Trending steady
Trending steady
Rapidly falling
Slowly rising
28 29
Omnipod®5 App screens are for educational purposes only. Consult your healthcare professional before using these features and for personalized recommendations. Omnipod®5 App screens are for educational purposes only. Consult your healthcare professional before using these features and for personalized recommendations.
Everyday Use |OMNIPOD 5 APP HOME SCREEN Everyday Use |GLUCOSE TRENDS AND CGM GRAPH
CGM Glucose
Value and
Trend Arrow
Current
System Mode
Tab Views:
• DASHBOARD
• INSULIN
• POD INFO
Alarms and
Notications
Menu Button
Insulin on
Board (IOB)
Last Bolus
Bolus Button
CGM Graph
Omnipod®5 App Home Screen Glucose Trends and Indicators
CGM Value Color Key:
The CGM value and trend arrow will change color depending on your Glucose Goal Range.*
CGM value within Glucose Goal Range (Manual Mode)
CGM value within Glucose Goal Range (Automated Mode)
CGM value below Glucose Goal Range (Automated & Manual Modes)
CGM value above Glucose Goal Range (Automated & Manual Modes)
Note: CGM Graph diers
slightly in appearance
depending on Mode
• Tap the symbol to see a Legend of symbols used in the CGM graph
View CGM Graph
• Tap VIEW under
CGM Graph
* Refer to Section 19 for CGM trend arrows

31
Omnipod®5 App screens are for educational purposes only. Consult your healthcare professional before using these features and for personalized recommendations.
Everyday Use |DELIVER A BOLUS
30 Omnipod®5 App screens are for educational purposes only. Consult your healthcare professional before using these features and for personalized recommendations.
Everyday Use |DELIVER A BOLUS
• Tap the Bolus button • Tap on the Carbs eld
to manually enter
grams of carbs
• Tap USE CGM to use
CGM value and trend*
• Tap CONFIRM • Tap START to begin
bolus insulin delivery
• Always look for the progress bar on
the Home screen to conrm bolus
delivery has started before navigating
away from the Omnipod 5 App
*Note: Tap Glucose eld to manually enter your blood glucose reading
Deliver a Bolus
The Omnipod 5 SmartBolus calculator suggests a bolus (an additional dose of insulin) to correct glucose that is
high (correction bolus) and/or to cover the carbohydrates in the meal or snack you may be eating (meal bolus).
Tip
When you tap USE CGM the SmartBolus calculator will
use BOTH CGM Value and Trend in the bolus calculation
The SmartBolus calculator tries to keep
glucose at target and adds more insulin
to the correction bolus
The SmartBolus calculator tries to keep
glucose at target and subtracts insulin
from the correction bolus
Tip
Follow the screen
instructions by tapping
the area highlighted
by the “red circle”
Note: Always bolus for meals
as directed by your healthcare
provider. In Automated Mode,
bolus doses still require your
programming and delivery. Failure
to deliver a bolus for meals could
lead to hyperglycemia.

32 33
Omnipod®5 App screens are for educational purposes only. Consult your healthcare professional before using these features and for personalized recommendations. Omnipod®5 App screens are for educational purposes only. Consult your healthcare professional before using these features and for personalized recommendations.
Everyday Use |ACTIVITY Everyday Use |ACTIVITY
Start the Activity Feature
While in Automated Mode there may be times, like during or after exercise, activities like housework, or illness
when you would like less insulin automatically delivered. When the Activity feature is enabled, the SmartAdjust™
technology reduces insulin delivery and sets the Target Glucose to 150 mg/dL for the time you choose.
Cancel the Activity Feature
• Tap the Menu button
• Tap START • The Home screen will show
that the Activity feature
is enabled by displaying
ACTIVITY in green
• Tap Activity • Tap Duration eld
• Set Duration (1-24 hrs)
• Tap CONFIRM
• Tap CANCEL on the
ACTIVITY Tab
• Tap YES
Tip
Follow the screen
instructions by tapping
the area highlighted
by the “red circle”
Note
The Activity feature is available
only in Automated Mode
Warning: ALWAYS monitor for symptoms of hypoglycemia while the Activity feature is in progress. Hypoglycemia
can still occur when using the Activity feature. Follow your healthcare provider’s advice on hypoglycemia avoidance
and treatment. If untreated, hypoglycemia can lead to seizure, loss of consciousness, or death.

34 35
Omnipod®5 App screens are for educational purposes only. Consult your healthcare professional before using these features and for personalized recommendations. Omnipod®5 App screens are for educational purposes only. Consult your healthcare professional before using these features and for personalized recommendations.
Troubleshooting |HISTORY Troubleshooting |NOTIFICATIONS, ALERTS AND ALARMS
• Tap the Menu button
• Summary section includes:
– Average CGM, CGM % in
range, above range and
below range
– Total Insulin (basal + bolus),
Basal Insulin, Bolus Insulin
and Total Carbs
• Swipe up on the
history screens to
see the details section
• Details section shows
individual records
listed by time of day
• Tap AUTO EVENTS
• Insulin amounts
delivered are shown
every 5 minutes while
in Automated Mode
• Tap History Detail
View History Details Notications, Alerts & Alarms
• If your device is asleep when you hear or feel a notication,
wake up your device to check if the notication is coming from the
Omnipod 5 App. The lock screen will show the reminder notication
icon and the message.
• Waking your device up and using the Omnipod 5 App does not
automatically acknowledge or silence notications. To acknowledge
notications, tap on the notications icon at the top of the screen.
• Read any messages with a blue notication icon ( ). Scroll down the
screen, if necessary, to see any additional notications with blue icons.
• Tap the back arrow ( ) in the top left corner to mark the notications
as acknowledged.
Hazard Alarms
High priority alarms that indicate a serious problem has occurred and you may need to remove your Pod.
Examples: Pod Expired, Pod Out of Insulin, Pod Shut-O, Blockage, Pod Error, System Error,
Omnipod®5 App Error, and Omnipod 5 Memory Corruption
Advisory Alarms
Lower priority alarms that indicate a situation exists that needs your attention.
Examples: Pod Expiration, Low Pod Insulin, Pod Shut-O, Start Insulin, Low Battery, Urgent Low
Glucose, Missing CGM Values, and Automated Delivery Restriction
Notications
Remind you of an action that you may want to perform. Some are generated automatically and others
have settings that you can control.
WARNING: ALWAYS respond to hazard alarms as soon as they occur. Pod hazard alarms
indicate that insulin delivery has stopped. Failure to respond to a hazard alarm could result
in the under-delivery of insulin which can lead to hyperglycemia.
CAUTION: AVOID setting your Controller or smartphone to Silent, Vibrate, or any other setting that
prevents you from hearing alarms and notications. If you do not hear alarms and notications
from your Controller or smartphone, you might not make the changes you need to make to your
insulin therapy in a timely manner. Your Pod will still sound, and you will be able to see the Alarm
or Notication displayed on the Omnipod 5 App. See Section “13.3 Sounds and Vibrations” in the
Omnipod 5 User Guide to learn how to manage sounds and vibrations.
Tip
Tapping on a specic row with a
bolus entry brings up additional
details about the bolus

36 Omnipod®5 App screens are for educational purposes only. Consult your healthcare professional before using these features and for personalized recommendations.
Troubleshooting |SYSTEM STATES
Missing CGM Values in Omnipod 5
• If the Pod is not receiving updated CGM values, the system can no longer
fully adjust your automated insulin delivery. After 20 minutes not receiving
CGM values, ‘Limited’ will be displayed on the Home screen.
• When the System enters Limited state, SmartAdjust™ technology never gives
more than the Basal Program that would be active during Manual Mode.
• When CGM values are updated, full automated delivery resumes.
There are times when your Pod and CGM may lose connection.
Some common reasons for loss of communication are:
• Pod and CGM not being in direct line of sight
• Temporary loss of communication due to environmental interference
(for example, while swimming)
• Sensor warm up or required calibration
What should you do?
• Make sure that the Pod and CGM are in direct line of sight.
• Sometimes you can see ‘Limited” if the loss of communication is between the Pod and CGM. It is possible
that your Dexcom G6 app is still receiving CGM values. Open your Dexcom G6 app to check. Also look to
see if there are any CGM actions that you need to take to re-establish communication.
No Pod Communication
• If the Omnipod 5 App cannot communicate with an active Pod ‘No Pod
Communication” will be displayed
• Follow the on-screen instructions to resolve the issue.
At times there may be communication issues between the Omnipod 5 App
and your Pod. What should you do?
• Bring the device running the Omnipod 5 App and active Pod closer – within
5 feet of each other may restore communication
• Omnipod 5 App will oer you options to resolve the communication issue.
Leave any options to DISCARD or DEACTIVATE POD as last choice after trying
the other options.
Additional Use
Omnipod®5 System

39
Omnipod®5 App screens are for educational purposes only. Consult your healthcare professional before using these features and for personalized recommendations.
Additional Use |EDIT TARGET GLUCOSE
Change Your Target Glucose
There may be a time where you want to change your Target Glucose. Check with your healthcare provider before
changing your settings.
Target Glucose and Correct Above values are used in both Automated and Manual Modes. In Automated Mode,
your insulin delivery will be adjusted automatically to bring your glucose towards your Target Glucose. In both
Automated and Manual Mode, when delivering a bolus the SmartBolus calculator will try to bring your glucose
to the Target Glucose.
• Tap Settings
• Tap Bolus
• Tap SAVE
• Tap the Menu button • Tap Target Glucose
& Correct Above
• Tap NEXT
• Tap on the segment
you wish to change
• Edit time and/or
Target Glucose or
Correct Above
• Tap NEXT
Other manuals for Omnipod 5
4
Table of contents
Other Insulet Medical Equipment manuals
