Intelix DIGI-88FS Operating instructions

8001 Terrace Ave
Suite 201
Middleton, WI 53562
Rev 141006 Phone: 608-831-0880
Toll-Free: 866-462-8649
Fax: 608-831-1833
DIGI-88FS Installaon and
Operaon Guide


DIGI-88FS Installaon Guide
3
Important Safety Instrucons
Read all of these instrucons. Save them for future reference.
»Follow all warnings and instrucons marked on the device.
»This product is for indoor use only.
»Do not place the device on any unstable surface (cart, stand, table, etc.). If the device falls, serious damage will result.
»Do not use the device near water.
»Do not place the device near, or over, radiators or heat registers.
»The device cabinet is provided with slots and openings to allow for adequate venlaon. To ensure reliable operaon, and to protect
against overheang, these openings must never be blocked or covered.
»The device should never be placed on a so surface (bed, sofa, rug, etc.) as this will block its venlaon openings. Likewise, the device
should not be placed in a built in enclosure unless adequate venlaon has been provided.
»Never spill liquid of any kind on the device.
»Unplug the device from the wall outlet before cleaning. Do not use liquid or aerosol cleaners. Use a damp cloth for cleaning.
»The device should be operated from the type of power source indicated on the marking label. If you are not sure of the type of power
available, consult your dealer or local power company.
»To prevent damage to your installaon it is important that all devices are properly grounded.
»Clean only with a dry cloth.
»Do not install near any heat sources such as radiators, heat registers, stoves, or other apparatus (including ampliers) that
produce heat.
»Use only accessories specied or recommended by Intelix.
»Explanaon of graphical symbols:
◊ Lightning bolt/ash symbol: the lightning bolt/ash and arrowhead within an equilateral triangle symbol is intended
to alert the user to the presence of uninsulated “dangerous voltage” within the product enclosure which may be of
sucient magnitude to constute a risk of shock to a person or persons.
◊ Exclamaon point symbol: the exclamaon point within an equilateral triangle symbol is intended to alert the user
to the presence of important operang and maintenance (servicing) instrucons in the literature accompanying
the product.
»Do not allow anything to rest on the power cord or cables. Route the power cord and cables so that they cannot be stepped on or
tripped over. If an extension cord is used with this device make sure that the total of the ampere rangs of all products used on this
cord does not exceed the extension cord ampere rang. Make sure that the total of all products plugged into the wall outlet does not
exceed 15 amperes.
»To help protect your system from sudden, transient increases and decreases in electrical power, use a surge suppressor, line
condioner, or uninterrupble power supply (UPS).
»Posion system cables and power cables carefully; be sure that nothing rests on any cables.
»Never push objects of any kind into or through cabinet slots. They may touch dangerous voltage points or short out parts resulng in a
risk of re or electrical shock.
»Do not aempt to service the device yourself. Refer all servicing to qualied service personnel.
»If the following condions occur, unplug the device from the wall outlet and bring it to qualied service personnel for repair.
◊ The power cord or plug has become damaged or frayed.
◊ Liquid has been spilled into the device.
◊ The device has been exposed to rain or water.
◊ The device has been dropped, or the cabinet has been damaged.
◊ The device exhibits a disnct change in performance, indicang a need for service.
◊ The device does not operate normally when the operang instrucons are followed.
»Only adjust those controls that are covered in the operang instrucons. Improper adjustment of other controls may result in
damage that will require extensive work by a qualied technician to repair.
»Use only with the cart, stand, table, or rack specied by Intelix or sold with the equipment. When/if a cart is used, use
cauon when moving the cart/equipment combinaon to avoid injury from p-over.
»Unplug this apparatus during lightning storms or when unused for long periods of me.

DIGI-88FS Installaon Guide
4
Table of Contents
Product Overview��������������������������������������������������������������������������������������������������������������������������������������������� 6
Package Contents ��������������������������������������������������������������������������������������������������������������������������������������������� 7
Front and Rear Panels��������������������������������������������������������������������������������������������������������������������������������������� 8
Front Panel���������������������������������������������������������������������������������������������������������������������������������������������������������� 8
Rear Panel����������������������������������������������������������������������������������������������������������������������������������������������������������� 8
IR Remote��������������������������������������������������������������������������������������������������������������������������������������������������������� 9
Installaon Instrucons ���������������������������������������������������������������������������������������������������������������������������������� 10
Quick Start ��������������������������������������������������������������������������������������������������������������������������������������������������������10
Rack mount the Matrix �������������������������������������������������������������������������������������������������������������������������������������10
Connect Ground ������������������������������������������������������������������������������������������������������������������������������������������������10
Connect Sources������������������������������������������������������������������������������������������������������������������������������������������������11
Connect Displays�����������������������������������������������������������������������������������������������������������������������������������������������11
Connect Control ������������������������������������������������������������������������������������������������������������������������������������������������11
IR Control ....................................................................................................................................................11
RS232 Control .............................................................................................................................................12
TCP/IP (Telnet) Control ...............................................................................................................................12
Router Connecon .....................................................................................................................................13
Crossover Cable Connecon .......................................................................................................................13
Web Browser Control .................................................................................................................................13
Apply Power ������������������������������������������������������������������������������������������������������������������������������������������������������14
Front Panel Operaon ������������������������������������������������������������������������������������������������������������������������������������ 15
Unlock the Front Panel��������������������������������������������������������������������������������������������������������������������������������������15
Basic Roung ����������������������������������������������������������������������������������������������������������������������������������������������������15
Advanced Roung ���������������������������������������������������������������������������������������������������������������������������������������������15
Front Panel Menu����������������������������������������������������������������������������������������������������������������������������������������������16
IP Seng.....................................................................................................................................................16
Serial Port Seng .......................................................................................................................................16
Operaon Mode .........................................................................................................................................16
EDID Mode ����������������������������������������������������������������������������������������������������������������������������������������������� 16
CEC ����������������������������������������������������������������������������������������������������������������������������������������������������������� 16
OSD����������������������������������������������������������������������������������������������������������������������������������������������������������� 17
Output Status������������������������������������������������������������������������������������������������������������������������������������������� 17
Security Mode ............................................................................................................................................17
Save to a Prole ..........................................................................................................................................17
IR Remote Operaon �������������������������������������������������������������������������������������������������������������������������������������� 18
Web GUI��������������������������������������������������������������������������������������������������������������������������������������������������������� 19
GUI Menu����������������������������������������������������������������������������������������������������������������������������������������������������������19
Connecon Sub-Menu���������������������������������������������������������������������������������������������������������������������������������������19
Status ..........................................................................................................................................................19
Output Audio Adjust ...................................................................................................................................19

DIGI-88FS Installaon Guide
5
Setup Sub-Menu������������������������������������������������������������������������������������������������������������������������������������������������20
Web ............................................................................................................................................................ 20
System ........................................................................................................................................................ 20
Port Name ..................................................................................................................................................20
EDID Mode Seng .....................................................................................................................................20
Customized Video Data���������������������������������������������������������������������������������������������������������������������������� 21
Customized Audio Data���������������������������������������������������������������������������������������������������������������������������� 21
Video Processing Mode ..............................................................................................................................21
System Sub-Menu ���������������������������������������������������������������������������������������������������������������������������������������������21
Prole Sub-Menu ����������������������������������������������������������������������������������������������������������������������������������������������22
Selecon ..................................................................................................................................................... 22
Name ..........................................................................................................................................................22
User Mgmt Sub-Menu���������������������������������������������������������������������������������������������������������������������������������������22
Add User .....................................................................................................................................................22
Edit User .....................................................................................................................................................22
RS232 Commands������������������������������������������������������������������������������������������������������������������������������������������� 23
Roung Commands�������������������������������������������������������������������������������������������������������������������������������������������23
AV Mung Commands ��������������������������������������������������������������������������������������������������������������������������������������23
Get AV Status ����������������������������������������������������������������������������������������������������������������������������������������������������24
EDID Sengs�����������������������������������������������������������������������������������������������������������������������������������������������������24
Proles ��������������������������������������������������������������������������������������������������������������������������������������������������������������24
Power On Detecon ������������������������������������������������������������������������������������������������������������������������������������������ 25
On-Screen Display ���������������������������������������������������������������������������������������������������������������������������������������������25
CEC �������������������������������������������������������������������������������������������������������������������������������������������������������������������� 25
Baud Rate Sengs��������������������������������������������������������������������������������������������������������������������������������������������26
Reset to Factory Defaults ����������������������������������������������������������������������������������������������������������������������������������26
Telnet Commands������������������������������������������������������������������������������������������������������������������������������������������� 27
Connecng to the DIGI-88FS �����������������������������������������������������������������������������������������������������������������������������27
Help, Command List ������������������������������������������������������������������������������������������������������������������������������������������28
Troubleshoong ��������������������������������������������������������������������������������������������������������������������������������������������� 29
Matrix does not power on���������������������������������������������������������������������������������������������������������������������������������29
Image looks “fuzzy” ������������������������������������������������������������������������������������������������������������������������������������������29
Image looks “squashed” or “stretched” ������������������������������������������������������������������������������������������������������������29
Cannot control via RS232����������������������������������������������������������������������������������������������������������������������������������29
Technical Specicaons ���������������������������������������������������������������������������������������������������������������������������������� 30

DIGI-88FS Installaon Guide
6
The Intelix DIGI-88FS eight input by eight output HDMI matrix is designed to add fast switching and scaling to
enhance the user experience in professional installaons.
The new DIGI-88FS features eight HDMI inputs and eight scaling HDMI outputs with support for resoluons up to
1920x1200. Regardless of the source video resoluon, the display will always receive the ideal video resoluon.
Gone are the days of not being able to view 1080p content on a WXGA or 720p display.
In addion to the fast switching and scaling capabilies of the matrix, the DIGI-88FS can also be congured to
automacally advance to the next HDMI input if the current video source is powered o.
The DIGI-88FS can be controlled via the front panel, infrared (IR), RS232, or via a web GUI when connected to an
internal network. The extensive variety of control opons makes the DIGI-88FS an easily accessible matrix for any
control system.
The DIGI-88FS takes up only one rack unit, saving valuable real estate in an equipment rack. The 62-wa internal
power supply with an industry standard IEC power input in the DIGI-88FS eliminates the need for tradional “wall
wart” or inline power supplies.
Product Overview

DIGI-88FS Installaon Guide
7
Package Contents
Shelf Feet with Screws
(installed on matrix)
4 ea
DIGI-88FS Installaon
and Operaon Guide
1 ea
DIGI-88FS Matrix Switcher
1 ea
Rack Ears with Screws
2 ea
IR receiver (eye)
1 ea
US Power Cable
1 ea
Infrared Remote Control
1 ea
Please verify the following items are in the shipping box prior to installaon of the DIGI-88FS.

DIGI-88FS Installaon Guide
8
Front and Rear Panels
Front Panel
Rear Panel
1 2 3 4
5 6 7
A CB D FE
HG
1. LCD screen
2. Input select buons
3. MENU buon
4. CANCEL buon
5. Output select buons
6. PROFILE buon
7. ENTER buon
A. AC power input
B. Power switch
C. Ground screw
D. HDMI outputs
E. IR input for matrix
F. TCP/IP (Telnet) control input; also allows control via web browser
G. HDMI inputs
H. RS232 control input

DIGI-88FS Installaon Guide
9
IR Remote
The included IR remote performs AV roung and power on/o funcons. Please see page 18 (IR Remote
Operaon) for informaon on controlling the matrix from the IR remote.
The remote control requires one CR2025, which is included and installed for convenience. A clear plasc tab
prevents the baery from being drained during shipment and must be removed prior to operaon.

DIGI-88FS Installaon Guide
10
Installaon Instrucons
Quick Start
Rack mount the Matrix
1. Rack mount the matrix (oponal)
2. Connect ground (oponal)
3. Connect sources
4. Connect displays
5. Connect control (oponal)
6. Apply power
At least 2 inches of free air space is required on both sides of the DIGI-88FS for proper side venlaon. Avoid
mounng the DIGI-88FS near a power amplier or any other source of signicant heat.
Remove the supplied shelf feet from the boom of the matrix.
Then, remove the screw that secures the front panel to the side of
the matrix chassis.
Aach the supplied rack ears to the sides of the DIGI-88FS matrix.
The matrix requires one rack units (1 RU) of space. It is recommended
that you leave an empty rack space above and below the DIGI-88FS
for addional cooling.
Connect Ground
A ground screw is located on the le rear of the matrix to help eliminate stac shock during installaon and
operaon of the matrix. Connect a wire from the matrix to an earth ground, such as a grounded bus bar in an
equipment rack.

DIGI-88FS Installaon Guide
11
Connect Sources
Connect Displays
Connect the source devices to HDMI inputs using HDMI cables that
are less than or equal to 5 meters in length. For source devices that
are further away, an HDMI extension device will be required to
complete the connecon.
Connect the display devices to HDMI outputs using HDMI cables
that are less than or equal to 5 meters in length. For display devices
that are further away, an HDMI extension device will be required to
complete the connecon.
Connect Control
Insert the TRS 3.5 mm plug of the IR receiver to the matrix IR input
port (IR EYE) of the matrix.
When IR control of the DIGI-88FS is necessary, the IR EYE input allows the IR remote to control the matrix via the
supplied IR receiver.
IR Control

DIGI-88FS Installaon Guide
12
RS232 Control
The RS232 control port requires a standard straight-through serial cable for operaon. The default sengs for the
RS232 port are:
• 9600 baud
• 8 Data Bits
• 1 Stop Bit
• Parity = none
Connect a standard straight-through serial cable with DE9 connector
between the RS232 port on the DIGI-88FS and the controller.
TCP/IP (Telnet) Control
Connect the Ethernet cable between to the matrix and a router with
a straight-through cable or between the matrix and a computer
with a crossover cable.
The TCP/IP port requires a standard straight-through Category 5e
or greater cable with the TIA/EIA-568B crimp paern for operaon.
The default sengs for the TCP/IP port are:
IP address: 192.168.0.178
Port: 23
TIA/EIA-568B
Orange/White
Orange
Green/White
Blue
Blue/White
Green
Brown/White
Brown
Pin 1
Pin 2
Pin 3
Pin 4
Pin 5
Pin 6
Pin 7
Pin 8
1 8
12345
9 8 7 6
2 = TX
3 = RX
5 = GND

DIGI-88FS Installaon Guide
13
Router Connecon
1. Congure the router to use the same IP range as the matrix, such as 192.168.0.1.
2. Connect the computer to the router.
3. Connect the DIGI-88FS to the router
Crossover Cable Connecon
1. Congure the computer to use the same network prex as the IP address assigned to the matrix. For example,
the IP address of the matrix is 192.168.0.178. Set the computer to use a stac IP address within the same
network range, such as 192.168.0.42.
2. Connect the network crossover cable to the computer and to the TCP/IP port on the DIGI-88FS.
Web Browser Control
The DIGI-88FS includes a web portal to allow control and conguraon of the matrix via a standard web browser.
The IP address is the same address that is used for TCP/IP control. See page 19 (Web GUI) for detailed informaon
regarding the web browser interface, including customizaon.
TIA/EIA-568A
Green/White
Green
Orange/White
Blue
Blue/White
Orange
Brown/White
Brown
Pin 1
Pin 2
Pin 3
Pin 4
Pin 5
Pin 6
Pin 7
Pin 8
1 8 TIA/EIA-568B
Orange/White
Orange
Green/White
Blue
Blue/White
Green
Brown/White
Brown
Pin 1
Pin 2
Pin 3
Pin 4
Pin 5
Pin 6
Pin 7
Pin 8
1 8
Crossover Cable Pinout

DIGI-88FS Installaon Guide
14
Apply Power
Plug the power cable into the AC power input on the rear of the
matrix. The DIGI-88FS supports 100-240V AC at 50 or 60 Hz.
Press the power switch up to turn on the matrix.

DIGI-88FS Installaon Guide
15
Front Panel Operaon
Basic Roung
Unlock the Front Panel
To set a route using the front panel of the DIGI-88FS:
1. Press the desired input buon (source).
2. Press the desired output buon (display).
The DIGI-88FS ships with the front panel in a password protected state. The default password is 1234 and must be
entered with the INPUT selecon keys.
To route video and audio from input 2 to output 4:
Press input 2.
Press output 3.
Advanced Roung
To route video and audio from input 3 to all outputs:
1. Press input 3.
2. Press outputs 1, 2, 3, and 4.

DIGI-88FS Installaon Guide
16
Front Panel Menu
Aer the front panel is unlocked, pressing the MENU buon will enter the menu system. The opons available on
screen will be matched to corresponding lit INPUT LEDs.
Press the MENU buon to exit out of the selected opon or to return to the roung screen.
The current IP sengs of the matrix are viewable in this screen. The web GUI must be accessed in order to change
the IP sengs of the DIGI-88FS. Please see page XX for more informaon.
EDID sengs, CEC on or o, on-screen display (OSD) sengs, and video output on or o opons are available from
this menu.
Below are the input EDID opons.
1. Default - The default EDID (720p/60 with 2 channel PCM audio) is passed to all video sources.
2. Port 1 - The EDID from output port 1 is passed to all video sources.
3. Remix - Uses the EDID of each connected display according to its connecon when the DIGI-88FS is rst
powered on, or immediately aer pressing 3 to select the remix opon.
4. Customized - Automacally retrieves and saves the EDID sengs of a connected display to an input source.
This can be customized in the web GUI. See page XX for more informaon.
The current baud rate of the matrix is viewable on this screen. Press INPUT 1 to access and set the other baud
rates. Available opons are:
1. 9600
2. 19200 (default)
3. 38400
4. 115200
IP Seng
Operaon Mode
EDID Mode
Serial Port Seng
The DIGI-88FS will pass CEC commands from the display to the source when this feature is enabled. This feature
is disabled by default.
CEC

DIGI-88FS Installaon Guide
17
When an input is routed to an output, the matrix will overlay the output to input route in the top le corner of
the display. For example, switching to input 7 on output 2 will show 2-7 on the display. The on-screen display
opon is enabled by default.
By default, all outputs are passing audio and video. Changing the output status from ON to NA (not available) will
disable video for the selected output.
OSD
Output Status
This opon turns on and turns o the front panel lock out opon of the DIGI-88FS. It also provides an opon to
change the default password from 1234 to another four digit password.
The current route can be saved for future use in a system prole (preset). Through the front panel, up to 16 proles
may be stored. The matrix can store up to 32 proles. The other proles are accessible through the web GUI (see
page 19; Connecon > Status) or via RS232 (see page 24; Proles).
Security Mode
Save to a Prole

DIGI-88FS Installaon Guide
18
The ON and OFF buons will enable and disable all input sources respecvely.
To change the route for an output, select the output port, then select the input port. If no input selecons are
made within four seconds, the output selecon will me out.
For example, to route input 4 to output 2, press the output 2 buon followed by the input 4 buon.
IR Remote Operaon

DIGI-88FS Installaon Guide
19
Web GUI
To access the web browser GUI, type the DIGI-88FS’s IP address into the address bar of any browser. If a Security Alert dialog
box appears, accept the cercate. The welcome screen will appear.
The DIGI-88FS’s default IP address is:
hp://192.168.0.178
The default GUI username and password are:
Username: administrator
Password: password
Note: The DIGI-88FS username supports lower case leers only.
The web GUI menu is at the top of every screen for easy navigaon of the
interface.
Connecon: Set AV routes and enable/disable video, audio, CEC and OSD
funcons per output.
Setup: Dene IP and RS232 sengs, rename inputs and outputs,
congure input EDID modes, and set scaled output resoluons.
System: Upload rmware updates.
Prole: Select and rename proles (presets).
User Mgmt: Create new users and change passwords.
Logout: Logs out of the web browser GUI.
Video: Turns o and on audio and video for the corresponding output.
Audio: Turns o and on audio for the corresponding output.
CEC: The DIGI-88FS will pass CEC commands from the display to the
source when this feature is enabled. This feature is disabled by default.
OSD: When an input is routed to an output, the matrix will overlay the
output to input route in the top le corner of the display. The on-
screen display opon is enabled by default.
To set routes for inputs to outputs, click the radio buon for the route.
Press Submit for the changes to be applied to the matrix.
Proles may also be saved or loaded from this screen. To load a prole,
select it from the dropdown on the top le of the page and press Load.
To save a prole, set the route, select the prole to save from the
dropdown, then press Save.
See page 20 (Port Name) to change input and output names and page
22 (Prole > Name) to change prole names.
GUI Menu
Connecon Sub-Menu
Status
Output Audio Adjust

DIGI-88FS Installaon Guide
20
Below are the input EDID opons.
1. Default - The default EDID (720p/60 with 2 channel PCM audio) is
passed to all video sources.
2. Port 1 - The EDID from output port 1 is passed to all video sources.
3. Remix - Uses the EDID of each connected display according to its
connecon when the DIGI-88FS is rst powered on, or immediately
aer pressing 3 to select the remix opon.
4. Customized - Automacally retrieves and saves the EDID sengs of
a connected display to an input source.
Input and Output names will appear on the Connecon Status screen.
Each entry has a Save buon associated with it.
Each name can have a maximum of 16 characters. Supported characters
are: numbers (0-9), lower case leers (a-z), upper case leers (A-Z),
underscore (_), and hyphen (-).
The DIGI-88FS features Power On Detecon mode, which will toggle the
matrix to automacally switch to the next powered-on device should an
HDMI source switch o. This feature is turned o by default.
While the default baud rate of the DIGI-88FS is 19200, other baud rates
are available to control the matrix via RS232: 9600, 38400, and 115200.
Change the IP address, subnet mask, and default gateway to match the
network sengs. Click the Save buon.
Website Timeout changes the length of me before the user has to login
to the web GUI again. 5min is the default.
Telnet Conguraon allows the DIGI-88FS to be controlled via telnet. This
is enabled by default.
Setup Sub-Menu
Web
System
Port Name
EDID Mode Seng
Table of contents
Other Intelix Amplifier manuals
Intelix
Intelix HDDA-8-F User manual
Intelix
Intelix INT-1X4B-1H User manual
Intelix
Intelix DIGI-1X4B-1H Operating instructions
Intelix
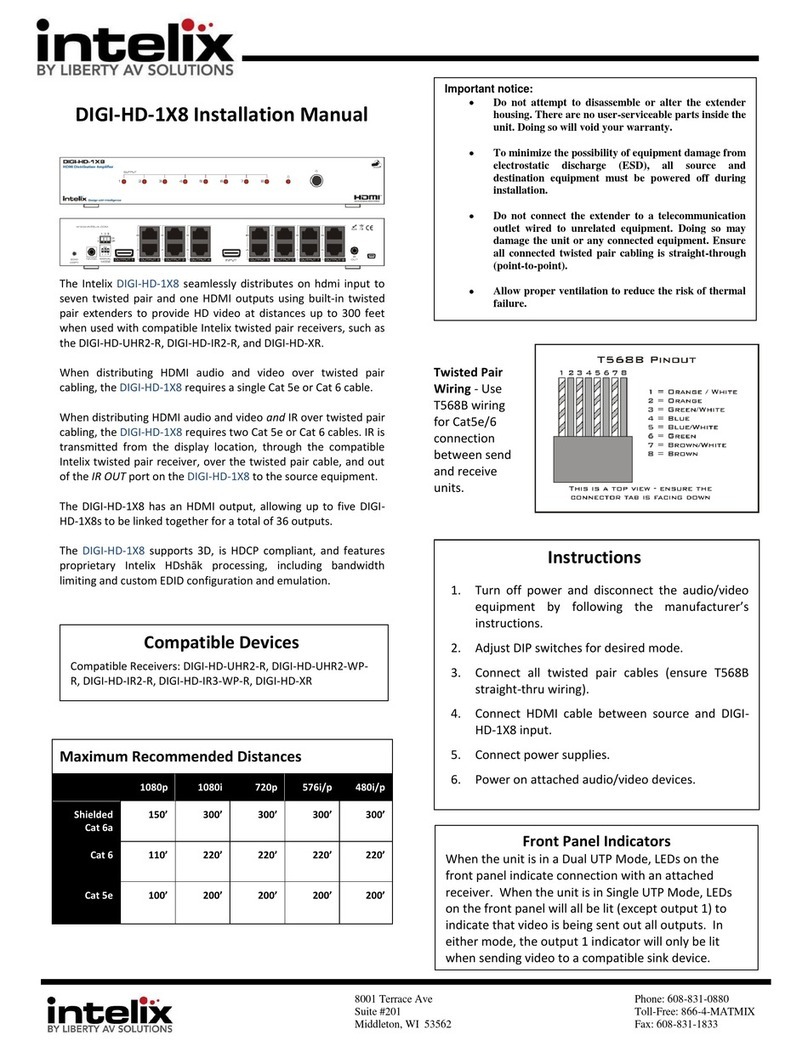
Intelix DIGI-HD-1X8 User manual
Intelix
Intelix VGADA-2 User manual
Intelix
Intelix HDMI-2X8 User manual
Intelix
Intelix AUD-220 User manual
Intelix
Intelix HDMI-2X2 User manual
Intelix
Intelix AUDISEY Athena User manual
Intelix
Intelix VGA2-DA4 User manual
