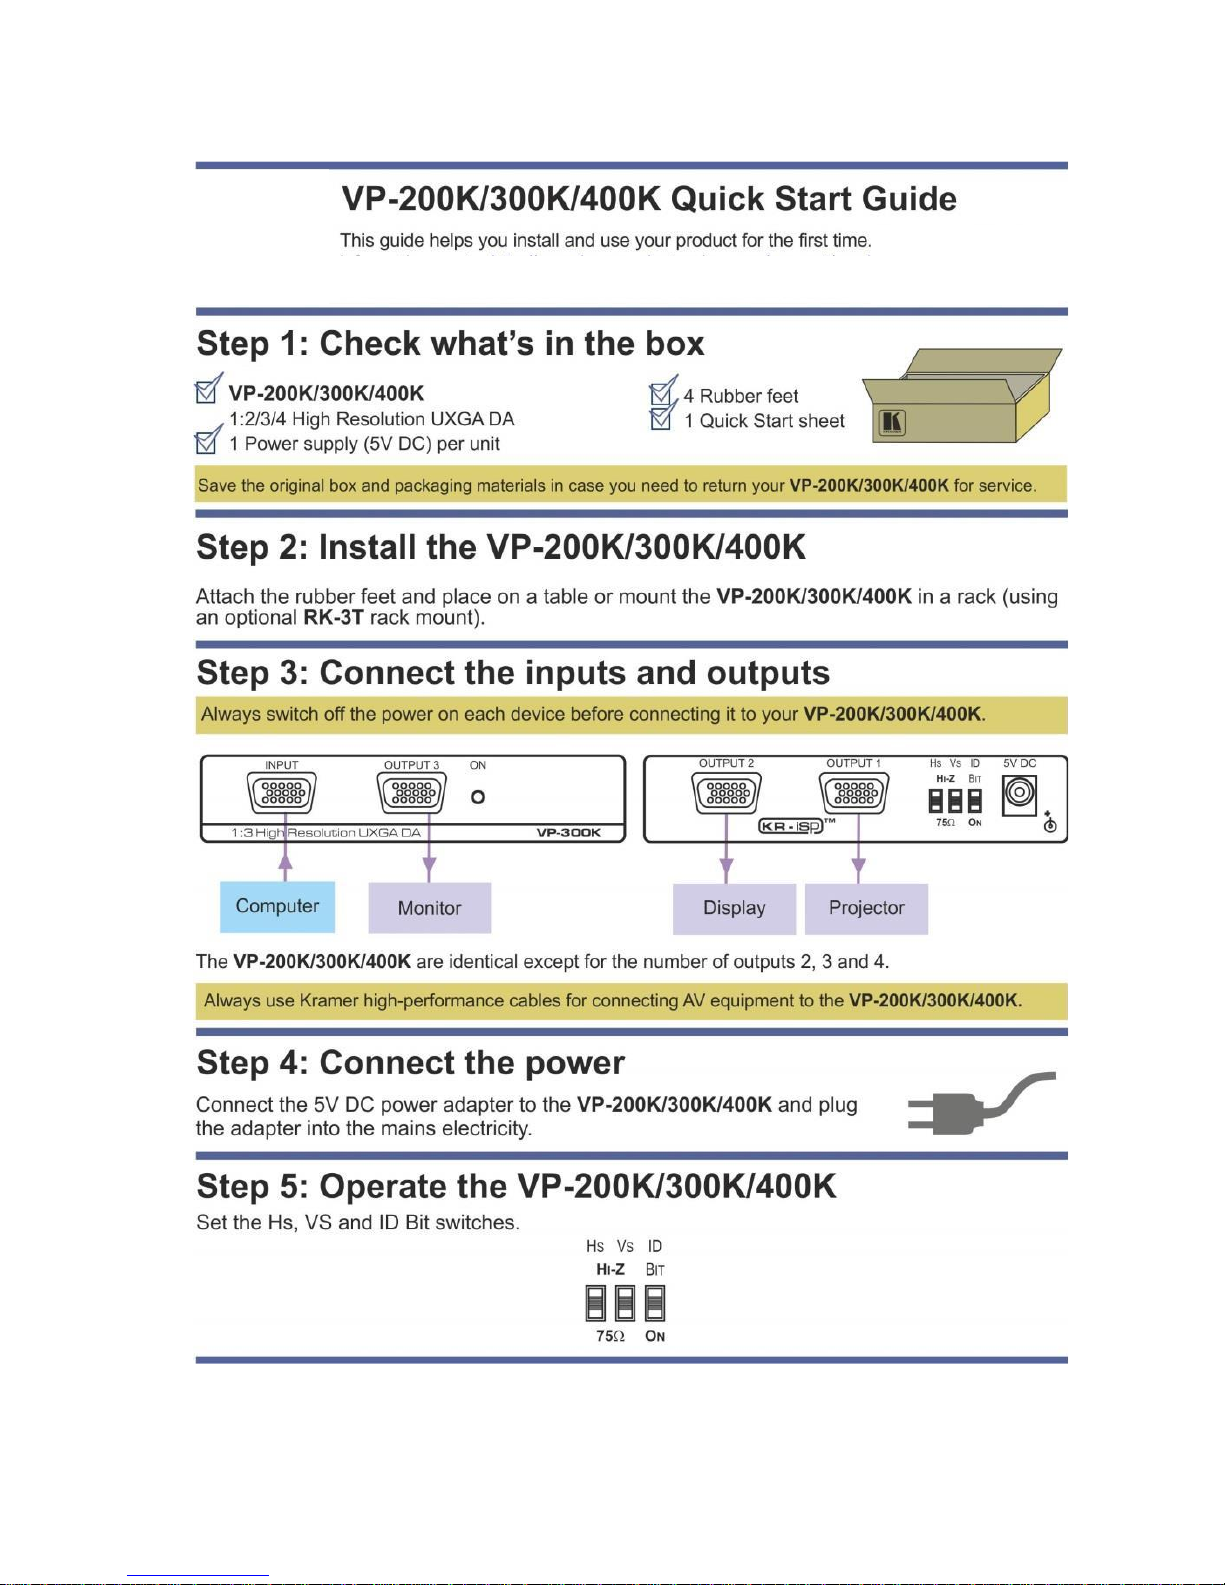
Kramer VP-200K User manual
Other Kramer Amplifier manuals

Kramer
Kramer VP-2XLK User manual

Kramer
Kramer VM-30AV User manual

Kramer
Kramer VM-92 User manual

Kramer
Kramer VP-72 User manual

Kramer
Kramer 6601 User manual

Kramer
Kramer VM-4HDMI User manual

Kramer
Kramer VP-103 User manual

Kramer
Kramer DigiTOOLS VM-4HN User manual

Kramer
Kramer VP-2L User manual

Kramer
Kramer VM-10HD I Series User manual

Kramer
Kramer VP-108 User manual

Kramer
Kramer VP-200K User manual

Kramer
Kramer PA-120Z User manual

Kramer
Kramer VM-3UHD User manual

Kramer
Kramer VM-2HDCPxl User manual

Kramer
Kramer VM-4HD User manual

Kramer
Kramer VM-9T User manual

Kramer
Kramer TOOLS VP-200NK User manual

Kramer
Kramer VM-214DT User manual

Kramer
Kramer VM-4UX User manual