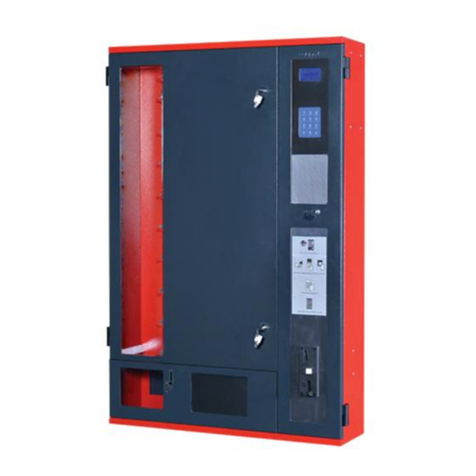
Intelligent Vending MULTI-6 User manual

INSTALLATION INSTRUCTIONS FOR YOUR MULTI-6
Your Multi-6 vending machine has been set up at the factory and should give many years or
trouble free operation.
Health & Safety.
The Multi-6 vending machine weighs in excess of 30 kilo (depending on the options
requested) therefore ensure there is sufficient equipment / staff available when installing this
machine.
To install the machine proceed as follows:
Remove the front door.
After carefully removing the machine from its carton, remove the keys from the back of the
machine and lay it down on the floor. Using the keys, release the 2 locks on the door and
open. Whilst in the open position, lift the door off its hinges.
Installation
Ensure the wall is flat and sufficiently strong to take the weight of the Multi-6. Using the
screws provided, or other suitable fastenings, screw the chassis to the wall ensuring it is level.
Remember to allow sufficient room for the door to open. Re hang the door. The battery pack
should now be connected.
Product Label Identification
A standard label has been fitted in the display area if one was requested (optional extra). If
you are fitting your own label, proceed as follows:
Remove the 2 screws securing the top of the black display panel and swing down. Remove
the nuts securing the label back plate in position and take the back plate off. Using the paper
template, fit part of the product pack by the appropriate button remembering to include the
price. The top button (number 1) operates column number 1 (furthest left)
Filling the Multi-6 with product
The Multi-6 has been set up at the factory and a label has been fitted to the column to indicate
the product being vended (If known). Remove the weight from the channel and fill
remembering to place the weight on top of the final pack. (This weight can be discarded if the
products fall correctly and they are of sufficient weight to activate the switch on the tractor
unit. When changing to a new product or filling for the first time, operate the Multi-6 with
the door open to ensure smooth operation. If a problem occurs, see the trouble shooting guide
below.

Changing the vend value
To change the value of any column proceed as follows:
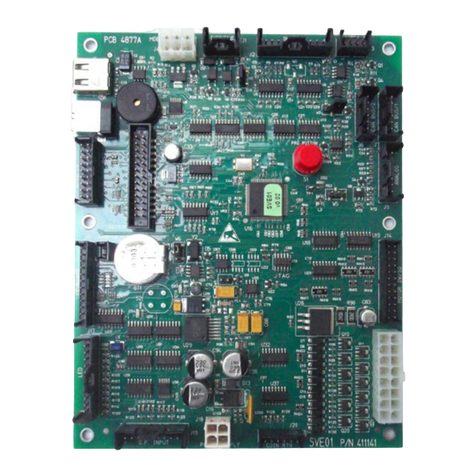
1/ Lift the battery pack out of its location (leave connected), and beneath it you will find
a slot. Beneath the slot there is a switch on the printed circuit board (see above). Move
this switch to the ‘on’ position (towards the back of the machine). The display shows
‘Prog’
2/ Insert the value of the coins required for the new vend price. The value is shown in the
display.
3/ Push the button that will operate that product.
4/ Return the switch in 1 above to the ‘off’ position and test.
To change the value of all the columns proceed as follows:
1/ Lift the battery pack out of its location (leave connected), and beneath it you will find
a slot. Beneath the slot there is a switch on the printed circuit board (see above). Move
this switch to the ‘on’ position (towards the back of the machine). The display shows
‘Prog’
2/ Insert the lowest value of the coins required for least expensive vend price. The value
is shown in the display.
3/ Push all the buttons that will operate the products at this price.
4/ Insert more coins to give the next higher price. (Include the coins already inserted for
the first price) and push the buttons that will operate the products at this price.
5/ Continue to do this until all the columns have been reset or until the columns that
require re setting have been updated.
6/ Return the switch in 1 above to the ‘off’ position and test.
To check the quantity of products that have been vended.
1/ Lift the battery pack out of its location (leave connected), and beneath it you will find
a slot. Beneath the slot there is a switch on the printed circuit board (see above). Move
this switch to the on’ position (towards the back of the machine). The display shows
‘Prog’
2/ Do not insert any coins.
3/ Push button 1 (the top button) and P1 will be shown on the display.
4/ Push button 1 again and the number of items sold in column 1 will be indicated on the
display. (Column 1 is the furthest left hand column).
5/ Push button 1 again and P2 will be shown on the display and pushing button 1 again
will indicate the quantity sold in column 2. Repeat until all the columns have been
viewed.
6/ Return the switch in 1 above to the ‘off’ position..

To reset all the column quantities.
When the display shows any ‘P’ number (i.e. ‘P3’), Push button 2 and this will then
reset ALL the column counters.
To check the total value of coins inserted.
1/ Lift the battery pack out of its location (leave connected), and beneath it you will find
a slot. Beneath the slot there is a switch on the printed circuit board (see above). Move
this switch to the on’ position (towards the back of the machine). The display shows
‘Prog’
2/ Keep pushing button 1 (the top button) until ‘P7’ is shown on the display.
3/ Push button 1 again and the display will indicate the high digits (before the decimal
point) of the cash counter.
4/ Push button 1 again to indicate ‘P8’ on the display. Pushing button 1 again will
indicate the low value of the cash counter (after the decimal point)
5/ Return the switch in 1 above to the ‘off’ position.
To run in ‘TEST’ mode
Running in test mode will allow for free vends to be made without adding to the vend counts.
To select this mode, proceed as follows:
1/ Lift the battery pack out of its location (leave connected), and beneath it you will find
a slot. Beneath the slot there is a switch on the printed circuit board (see above). Move
this switch to the on’ position (towards the back of the machine). The display shows
‘Prog’
2/ Keep pushing button 1 (the top button) until ‘P9’ is shown on the display.
3/ Pushing button 2 repeatedly toggles between ‘run’ and ‘test’ mode. ‘Run mode is for
normal operation.
4/ Return the switch in 1 above to the ‘off’ position.
Battery or mains operation
The vending machine can be operated by either battery or mains transformer. (Optional extra).
It is pre set at the factory for battery operation. To change to mains operation, proceed as
follows:
1/ Lift the battery pack out of its location (leave connected), and beneath it you will find
a slot. Beneath the slot there is a switch on the printed circuit board (see above). Move
this switch to the on’ position (towards the back of the machine). The display shows
‘Prog’
2/ Keep pushing button 1 (the top button) until ‘PA’ is shown on the display.
3/ Pushing button 2 repeatedly toggles between ‘bat’ (for battery mode) and ‘---’ (for
mains mode.).
4/ Return the switch in 1 above to the ‘off’ position.

To change the coin set
The Multi-6 can be programmed to accept either Pounds sterling (British) or Euro coins
(EEC) The Multi-6 will accept the following coins:
£2, £1, 50p, 20p, 10p,
€2, €1, 50c, 20c, 10c.
To change the coin set proceed as follows:
1/ Lift the battery pack out of its location (leave connected), and beneath it you will find
a slot. Beneath the slot there is a switch on the printed circuit board (see above). Move
this switch to the on’ position (towards the back of the machine). The display shows
‘Prog’
2/ Keep pushing button 1 (the top button) until ‘Pd’ is shown on the display. Push the
button once more.
3/ Pushing button 2 repeatedly toggles between ‘CO 1’ for Sterling, ‘CO 2’ for Euro
4/ Return the switch in 1 above to the ‘off’ position.
To add another column.
Other columns are available. Please follow the instructions that come with the column.
Cleaning
To clean the vending machine front, wipe down with a damp cloth. Do not use
solvents, polishes, abrasives etc.
Troubleshooting
Question: When ejecting, the product strains to go round the deflector.
Answer:: Adjust the deflector up or down using the wing nuts on the front until it runs
smoothly. This problem normally occurs when the product is very deep. Ensure
the wing nuts are tight to prevent the deflector from dropping during use.
Question: The machine will not accept any coins
Answer: There must be product in at least one of the columns. If all the columns are
empty, the coin will be rejected.
or
Check that you have got the correct coin set. i.e. you are not trying to put euros
in a sterling machine. See ‘To change the coin set’ above

INSTRUCTIONS.
To open the machine ready for installation.
Health & Safety.
The Multi-6 vending machine weighs in excess of 30
kilo (depending on the options requested) therefore
ensure there is sufficient equipment / staff available
when installing this machine.
1/ Remove the keys that have been taped to the back
of the machine.
2/ Lay the machine on its back and using the keys
supplied release the top and bottom locks. If they
do not pop out completely, turn the key slightly and
pull the lock until a stop is felt.
3/ Open the front door and when open, lift off from
the back plate.
4/ Inside the font door you will find the instructions
for continuing the installation of your Multi-6

£1.00
£3.00
£3.00
£1.00
£1.00
Femcare
Product available
when buttons flash.
Anadin
Trojan
condoms
Jelly beans
Wrigleys
chewing gum
Product available when
buttons flash.

Multi-6. Set up as follows: Date…….………
COINAGE
£
€
Button
Price
Product Tested
Machine
Number(s)
= Blank off.
= PCB no.
Token
Office use.
Customer ………………….…
Return to office. Inv. No. ……………………
4
68 = SVEMCO
94 = SVEMFE
120 = SVEMTO
136 =
S
VEMTA
Column code
Notes.
……………………………………………………………………………………………
……………………………………………………………………………………………
……………………………………………………………………………………………
……………………………………………………………………………………………
Table of contents
Popular Vending Machine manuals by other brands

HOTWORX
HOTWORX HWINF5C manual
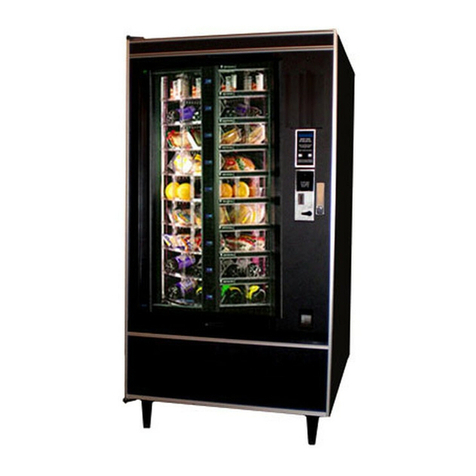
National Vendors
National Vendors shoppertron 431 Operator's guide
Voce
Voce Freshbrew Operator's manual

EVOCA
EVOCA Opera Touch Installation operation & maintenance
Necta Vending Solutions SpA
Necta Vending Solutions SpA Zeta CB Series Installation - use - maintenance

Laurel Metal Products Incorporated
Laurel Metal Products Incorporated 2599 Operation and service manual
SCRUB TRAK
SCRUB TRAK VendNet 3599 Programming manual
RSL
RSL Bag & Overstrom B4 Cleaning guide
Bianchi
Bianchi REPARTO CORSE SADDLE Use and maintenance manual
Azkoyen
Azkoyen TEMPUS III Technical manual
Seaga
Seaga Intelligent Inventory Control IQ640 Service and parts manual

Royal Vendors
Royal Vendors GII Service bulletin
