Intercomp CW250 User manual

CW250
User Manual
Manual #: 700014-M

CW250, Users
Rev M, April 2018
Page 2 of 31
Table of Contents
DECLARATION OF CONFORMITY .............................................................................................................3
INTRODUCTION........................................................................................................................................... 4
CW250 SCALE FEATURES .........................................................................................................................4
OPTIONS.................................................................................................................................................... 4
SPECIFICATIONS ........................................................................................................................................5
CONTROLS................................................................................................................................................. 5
ELECTRICAL...............................................................................................................................................5
PERFORMANCE ..........................................................................................................................................5
ENVIRONMENTAL........................................................................................................................................5
PHYSICAL ..................................................................................................................................................5
RADIO .......................................................................................................................................................6
OPERATIONS...............................................................................................................................................7
CW250 SCALE ..........................................................................................................................................7
CONTROL FUNCTIONS ................................................................................................................................ 8
TOTALIZING SETUP..................................................................................................................................10
SERIAL OUTPUT SETUP........................................................................................................................... 12
SERIAL OUTPUT MODE SETUP..................................................................................................................12
ON-DEMAND............................................................................................................................................12
CONTINUOUS ...........................................................................................................................................13
ACCUMULATING PRINT.............................................................................................................................. 13
ACCUMULATED TOTAL ............................................................................................................................ 14
ACCUMULATING PRINT AXLE.....................................................................................................................14
ACCUMULATING PRINT STANDARD ............................................................................................................ 15
ACCUMULATING PROCEDURE....................................................................................................................16
MODE MENU.............................................................................................................................................. 18
MODE MENU............................................................................................................................................ 18
SETTING MODE MENU PARAMETERS.........................................................................................................19
CALIBRATION ............................................................................................................................................22
CALIBRATION PREPARATION ....................................................................ERROR! BOOKMARK NOT DEFINED.
CALIBRATION ENABLE JUMPER .................................................................................................................22
CALIBRATION MENU .................................................................................................................................23
SETTING CALIBRATION PARAMETERS........................................................................................................ 24
WEIGHT CALIBRATION.............................................................................................................................. 26
CALIBRATION COMPLETION.......................................................................................................................27
TROUBLESHOOTING ................................................................................................................................ 28
ERROR MESSAGES ..................................................................................................................................28
DIAGNOSTIC CODES.................................................................................................................................29
PT CONNECTOR PINOUT ......................................................................................................................... 30
HOW TO CONTACT INTERCOMP............................................................................................................31
This document is the property of Intercomp Co. and contains information
that is confidential and protected under federal and/or state trade secret,
unfair competition and copyright law. Any reproduction, use or disclosure
without written permission from Intercomp Co. is prohibited.

CW250, Users
Rev M, April 2018
Page 3 of 31
Declaration of Conformity
We, Intercomp Company
3839 County Road 116
Medina, Minnesota 55340 USA
Declare under sole responsibility that the CW250 to which this declaration relates meets the essential
health and safety requirements and is in conformity with the relevant EC Directives listed below using the
relevant section of the following standards and other normative documents.
2001/95/EC - on general product safety
2009/125/EC - ecodesign requirements for energy-related products (2005/32/EC recast)
(EC) No 278/2009 - no-load condition electric power consumption and average active efficiency of
external power supplies
Directive 2014/30/EU of the European Parliament and of the Council of 26 February 2014 on the
harmonization of the laws of the Member States relating to electromagnetic compatibility (recast) Text with
EEA relevance AKA Electromagnetic Compatibility (EMC) Directive
EN 55011:2016 -Industrial, scientific and medical equipment. Radio-frequency disturbance characteristics.
Limits and methods of measurement
EN 61000-6-1:2007 - Generic standards, Residential, commercial and light industry environment
EN 61000-6-2:2005 - Immunity for industrial environments
EN 61000-6-3:2007 - Emission standard for residential, commercial and light-industrial environments
EN 45501:2015 - Metrological aspects of non-automatic weighing instruments
2012/19/EU - on waste electrical and electronic equipment (WEEE) (Directive 20/96/EC Recast)
2013/56/EU amending Directive 2006/66/EC on batteries and accumulators
This product complies with all safety-relevant provision referring to protection against electrical hazards
and other hazards, such as mechanical hazards, fire hazards, noise and vibration. The safety issues of
this measurement equipment have been evaluated under the self-certification provisions of the relevant
directives.
The related technical construction files are held for inspection in the U.K. at Intercomp Europe Limited.
The CE mark, Red M and WEEE marks must be affixed as required in the directives.
Mark Browne / Quality Manager
June 24, 2014

CW250, Users
Rev M, April 2018
Page 4 of 31
Introduction
This manual contains specifications, operating instructions and calibration procedures
for the Intercomp Model CW250 Scale.
CW250 Scale Features
lb or kg programmable readout
Ability to display total weight
Accumulating total function
Auto zero tracking automatically corrects zero-weight display shifts
RFI/EMI protection
Low battery detection with automatic shutoff to protect batteries
Built-in self-diagnostics to check Load Cells, Memory, Display, AD Converter and
Power Supply
Weigh pads manufactured from high strength aluminum alloys
Options
220V / 50Hz charging transformer
24” x 24” Ramp (100181)
Cast Aluminum
15” x 15” Ramp (100330)
Cast Aluminum
Battery Operated Tape Printer (100090)
Transport Wheels (100183)
2 wheels per platform
Remote Indicator (100184)
Indicator with pedestal
Remote Indicator (100184)
Indicator for use on floor or wall

CW250, Users
Rev M, April 2018
Page 5 of 31
Specifications
Controls
General
On/Off, Print/Accumulate, Local/Total, Zero
Display
5½ digit, LCD (1.0 inch) with automatic LED back lighting
Indicators
lb, kg, TOTAL, ERROR, (- minus) sign, 4-segment battery indicator
Electrical
Voltage
5 - 15 VDC, 120 VAC, optional 240 VAC
Charging Voltage
10 - 15 VDC
Batteries
4-AA size NiMH or alkaline cells
Charging Current
50 mA
Charging Time
Up to 48 hours for a full charge.
Battery Life
Radio Off: 300 hours with alkaline or NiMH cells.
Radio On: 250 hours with alkaline or NiMH cells.
NOTE: The battery life for setups requiring a scale
wireless "host", is 40 hours
A/D Converter
24 bit conversions
Auto-Zero
Satisfies all HB-44 requirements
Performance
Speed
1 second to typical reading (static)
Accuracy
0.1% of reading or display graduation, whichever is greater
Calibration Interval
Twelve months recommended
Environmental
Humidity
10 to 95% Non-Condensing
Temperature
Operating: -30 C to +60 C / -22 F to +140 F
Storage: -40 C to +70 C / -40 F to +158 F
EMI/RFI
Meets Mil Spec 461
Physical
Dimensions
Overall: 15 x 22 x 4 in. / 380 x 557 x 100 mm
Platform: 15 x 15 x 4 in. / 380 x 380 x 100 mm
Weight
40.5 lb / 18.4 kg
Dimensions
Platform: 24 x 24 x 4 in. / 610 x 610 x 100 mm
Weight
85 lb / 39 kg
Overload Capacity
150%

CW250, Users
Rev M, April 2018
Page 6 of 31
Radio
Radio Frequency
ISM 2.4GHz, 802.15.4
License Requirements
None. Pre-approved US/FCC, CAN/IC, EUR/CE
Range
200ft. / 60m indoor, 300ft. / 90m line of sight
Batteries (AC-PDA-RF only)
4-AA size alkaline or NiMH rechargeable
Battery life (AC-PDA-RF only)
36 hours using NiMH 2500 or alkaline
Radio Notes: Frequency: ISM 2.4GHz (2.400GHz - 2.483GHz), with 12 channels
(CH 1-12) within that range with each center frequency = 2405MHz + (CH * 5) MHz
Power output 63mW (18dBm), 10mW (10dBm) for international variant. Antenna is
internal surface mount with -1.5dbi gain, omni-directional.
WARNING: To satisfy FCC RF exposure requirements for mobile
transmitting devices, a separation of 20 cm or more should be
maintained between the antenna of this device and persons during
device operation. To ensure compliance, operations at closer than this
distance is not recommended. The antenna for this transmitter must not
be located in conjunction with any other antenna or transmitter.

CW250, Users
Rev M, April 2018
Page 7 of 31
Operations
CW250 Scale
Display Description
The display is a Liquid Crystal Display unit (shown below) providing one line of 5 1/2
digits. The screen displays the weights read from the pad. Information displayed
includes indicators for "lb" and "kg" unit of measure, a segment bar to show battery
charge level, error conditions, and set-point indicators that show when set-point
thresholds are reached. The display contains an automatic backlight for use in low-light
conditions.

CW250, Users
Rev M, April 2018
Page 8 of 31
The "TOTA"L icon displays the scale measurement mode as referenced in the table
below. CW250 Measurement Modes
Control Functions
ON / OFF
Press the On/Off key to apply power to the weighing system electronics. When
power is first applied, the weighing system rapidly performs self-tests of the pad and the
internal electronics. When the tests have been successfully completed, the scale
begins weighing. If a problem is detected during self-test, the screen will display an
error message. To turn the scale off, press the On/Off key. The CW250 retains the
setup information and calibration in a special memory device (non-volatile memory) that
is not affected by power loss or battery condition.
PRINT / ACCUMULATE
Press the Print/Accumulate button to print and/or accumulate weights. The function is
dependent on the current print mode setting. When using the accumulated total
function, press the PRINT /ACCUMULATE button to add the total to the accumulated
total. (New accumulated total = total weight (all scales in system) + old accumulated total)
LOCAL/TOTAL
Press the LOCAL/TOTAL button to toggle the scale between local weight and total
weight. The local weight is the weight on that scale only. The total weight shown is the
weight on all of the scales in the system. The display will be in local mode unless the
"TOTAL" icon is displayed.
If the serial output is set to mode 2 or 3 and a successful accumulation has occurred,
press the LOCAL/TOTAL button to toggle the display through the current local weight,
current total weight, accumulated total, and the number of accumulations that make up
the total.
NOTE:
If the system is not setup correctly, an "error" icon and the message ""
will be displayed when attempting to view the total weight.
Mode Status
Setting
TOTAL not lit
Local
TOTAL lit
Total
TOTAL flashing
Accumulated Total
Current local
weight on this
scale
Current total
weight of all
scales
Total number of
accumulations
this session
Total weight of
accumulations
this session
.

CW250, Users
Rev M, April 2018
Page 9 of 31
ZERO
The ZERO key will reset the weight on a scale to read zero (either lb or kg unit of
measure). If the ZERO key is pressed when a pad holds weight, the current weight
becomes the zero condition for the pad. The ZERO feature can be useful to cancel the
weight of weighing fixtures such as tail cones or wheel chocks. When the weight is
removed, a negative weight is displayed until the system is re-zeroed. The ZERO
function is also used when the scale shows a non-zero value with no weight on the
pads. NOTE: The system includes a feature called Auto Zero Tracking (AZT). AZT
corrects for slight zero changes during normal operation. An example of a zero change
could be a buildup of dirt on the pads.
The ZERO key can also be used to clear the accumulated total. Press and hold the
ZERO key until the display screen shows ".", then release the ZERO key. The
accumulated total and the accumulation number will be reset. All scales connected in
the system through interconnect cables will also be zeroed. The entire system can be
zeroed with one press of the ZERO key.

CW250, Users
Rev M, April 2018
Page 10 of 31
Totalizing Setup
The CW250 scale must be setup correctly in order to communicate with other scales in
the system. If the system is not setup correctly, an "error icon" and message “ “will
be displayed when attempting to view the total weight.
1. To begin Totalizing Setup, press the LOCAL/TOTAL and ZERO buttons
simultaneously.
2. The message "" will be displayed. Press the PRINT/ACCUMULATE button.
A number will be displayed followed by 3 dashes. The number displayed is the
scale number. Use the LOCAL/TOTAL button to increment and the ZERO button
decrement the number. When the desired number is displayed, press the
PRINT/ACCUMULATE button.
3. The message "" will be displayed. Press the PRINT/ACCUMULATE button.
The display will show three dashes followed by a number. The number
represents the total number of scales in the system. Use the LOCAL/TOTAL
button to increment and the ZERO button to decrement the number. When the
desired number is displayed, press the PRINT/ACCUMULATE button. NOTE:
The maximum number of scales in a system is 32.
4. If the scale number is "1", the display will issue a prompt confirming the scale
designation is "". Press the PRINT/ACCUMULATE button. Use the
LOCAL/TOTAL or the ZERO button to toggle either "" or "". A scale with a
HOST designation controls the entire scale network. The setting should be set to
"yes" if the scale network consists of scales only. If the system uses an external
device such as a PDA or PC to view the weights, the display setting should be
set to "no" because the external host device controls the scale network. Press
the PRINT/ACCUMULATE button to save the setting.
SETUP EXAMPLE: Setup for two scales. First Scale: Enter "01" for the first scale
number. Enter "02" for the total number of scales. Enter "yes" for the "Host"
setting. Second Scale: Enter "02" to identify the second scale and "02" for the
total number of scales.
Total # of Scales
(Displayed on scale #1 only)
Scale #

CW250, Users
Rev M, April 2018
Page 11 of 31
ACCUMULATE NOTE: The scale will not accumulate when the weight is
negative, zero, or if the weight is in motion. The protections are added to ensure
only valid readings are accumulated into the total. An error message "." will
be displayed when any of the three conditions are present. At the completion of
a successful accumulation, the scale must be returned to zero before the next
accumulation can be attempted. If an attempt is made to accumulate the next
weight before allowing the scale to return to zero, the error message ".” will
be displayed.

CW250, Users
Rev M, April 2018
Page 12 of 31
Serial Output Setup
The CW250 scale can be set to one of four different serial output modes.
1. On-Demand
2. Continuous
3. "Accumulating Print" Wheel Axle
4. "Accumulating Print" Standard
Serial Output Mode Setup
To access Serial Output Mode Setup, press the PRINT/ACCUMULATE and ZERO
buttons simultaneously until the message "." is displayed. Press the PRINT/
ACCUMULATE button to scroll through the Menu until the display shows "". Press
the PRINT/ACCUMULATE button one time to display the setting number. Set the print
mode to the number of the Communication Mode setting (shown below) required by
using the LOCAL/TOTAL button to increment and the ZERO button decrement the
number.
Communication Mode
Setting
On-Demand
0
Continuous
1
Accumulating Print Axle
2
Accumulating Print Standard
3
NOTE:
For the best result, select only one scale to be designated for Communication
Mode 1, 2 or 3. The scale being used to print should be the scale selected as
the Communication Mode designation. The default setting is"0".
Press the PRINT/ACCUMULATE button. The display screen will show "". Press
the PRINT/ACCUMULATE button to change the baud rate setting. Press the LOCAL/
TOTAL or the ZERO button to cycle through the available baud rates (1200, 2400,
4800, 9600, 19200, 38400, 57600 and 115200). When the desired baud rate is
entered, press the PRINT/ACCUMULATE button. The baud rate should only be set on
the scale connected to the printer. Press the PRINT/ACCUMLATE button to save the
baud rate setting and advance the menu. The scale can now be turned off to exit the
Mode Menu.
On-Demand
When the scale is set in the On-Demand mode, the weight is transmitted each time the
PRINT/ACCUMULATE button is pressed. Press PRINT/ACCUMULATE button to print
either the local or total weight (depending on the local/total setting of the scale). The
On-Demand setting is the default print mode.

CW250, Users
Rev M, April 2018
Page 13 of 31
Continuous
When the Continuous mode has been selected, the scale automatically and
continuously outputs the weight approximately one time per second.
Data Format
When the serial output is set to either on-demand or continuous mode, the transmitted
data is in the format shown as: AAAAAAA BB<cr><lf>
Item
Definition
ASCII Hex
ASCII Decimal
AAAAAAA
weight
BB
units “lb” or “kg”
<cr>
carriage return
0D
13
<lf>
linefeed
0A
10
The AAAAAAA field will vary in length depending on the length of the number and may
contain a decimal point and/or a minus sign. The weight will either be local weight or
total weight, depending on which mode is selected.
Accumulating Print
Refer to the "Using Accumulated Total" section for specific information about the
"Accumulating Print Axle" and "Accumulating Print Standard" communication modes.

CW250, Users
Rev M, April 2018
Page 14 of 31
Accumulated Total
The CW250 scale platform can be used separately, in pairs, or in groups to measure a
support load or a total weight across the scales connected to the system in one
weighing procedure. The Accumulated Total feature "accumulates" the weights as each
individual load is weighed.
To use the Accumulated Total feature, each scale in the system must be numbered
correctly. The scale selected to print from or to display the accumulated total must have
the print mode set to either the "Accumulating Print Axle" or "Accumulating Print
Standard" mode.
Accumulating Print Axle
If the "Accumulating Print Axle" mode has been selected for the designated scale,
press the PRINT/ACCUMULATE button to add the current total weight to the
accumulated total weight. If the scale designated as the "Accumulating Print Axle"
mode scale is connected to a printer, a print ticket will be printed. The print ticket format
is in reference to the individual wheels and axles of the vehicle being weighed or is
formatted in a standard weight accumulation mode.
The following example shows a 4-scale system with two separate weighings having
been conducted and accumulated.
Subgroup #1: "WHL 1" is scale number 1 and "WHL 2" is the second scale. "AXL 1"
shows the total weight of scale number one and two. "AXL2" shows the weights from
scale number three and four. Both the subtotal and accum total weights reflect the
Subgroup #1 totals
Subgroup #2": WHL 1" is scale number 1 and "WHL 2" is the second scale. "AXL 1"
shows the total weight of scale number one and two. "AXL2" shows the weights from
scale number three and four. The subtotal grp 2 weight reflects the total weight for the
subgroup #2. The accum total weight reflects the Subgroup #1 total and Subgroup #2
total.
PRINT / ACCUMULATE
button has been pressed
PRINT / ACCUMULATE
button has been pressed
WHL 1: 7460 WHL 2: 7400
AXL 1: 14860
WHL 3: 10110 WHL 4: 10070
AXL 2: 20180
SUBTOTAL GRP 1: 35040
ACCUM TOTAL: 35040
WHL 1: 10110 WHL 2: 10070
AXL 1: 20180
WHL 3: 9800 WHL 4: 9500
AXL 2: 19300
SUBTOTAL GRP 2: 39480
ACCUM TOTAL: 74520

CW250, Users
Rev M, April 2018
Page 15 of 31
When a successful accumulation has occurred, press the LOCAL/TOTAL button to
toggle the display through the current local weight, current total weight, accumulated
total, and the number of accumulations that comprise the total weight.
ACCUMULATE NOTE: The scale will not accumulate when the weight is negative, zero,
or if the weight is in motion. The protections are added to ensure only valid readings are
accumulated into the total. An error message "." will be displayed when any of the
three conditions are present. At the completion of a successful accumulation, the scale
must be returned to zero before the next weight accumulation can be initiated. If an
attempt is made to accumulate the next weight before allowing the scale to return to
zero, the error message "." will be displayed.
The accumulated total weight can be viewed only on the designated scale. When the
PRINT/ACCUMULATE button is pushed, the display will show the message ". X" as
the system accumulates the next reading and sends it to print. ("X" denotes the number
of accumulations for the session) When a successful accumulation has occurred, press
the LOCAL/TOTAL button to cycle the display to show the number of accumulations,
current local weight, current total weight on all scales, and the accumulated total.
When the local weight, current total weight, or accumulated total is displayed, the
TOTAL icon will be lit, flashing or turned off.
Accumulating Print Standard
The "Accumulating Print Standard" mode will display the total weight of multiple items
weighed on one or more scales. The following example depicts a 1-scale system with
three separate loads (950 lb., 1000 lb. and 1500 lb.) being weighed and accumulated.
950 lb
ACCUM TOTAL: 950 lb
1000 lb
ACCUM TOTAL: 1950 lb
1500 lb
ACCUM TOTAL: 3450 lb
PRINT/ACCUMULATE
button has been pressed
Current local
weight on this
scale
Current total
weight on all
scales
Total number of
accumulations
this session
Total weight of
accumulations
this session
.

CW250, Users
Rev M, April 2018
Page 16 of 31
When a successful accumulation has occurred, press the LOCAL/TOTAL button to
toggle the display through the current local weight, current total weight, accumulated
total, and the number of accumulations that comprise the total weight.
ACCUMULATE NOTE: The scale will not accumulate when the weight is negative, zero,
or if the weight is in motion. The protections are added to ensure only valid readings are
accumulated into the total. An error message "." will be displayed when any of the
three conditions are present. At the completion of a successful accumulation, the scale
must be returned to zero before the next weight accumulation can be initiated. If an
attempt is made to accumulate the next weight before allowing the scale to return to
zero, the error message "." will be displayed.
The accumulated total weight can be viewed only on the designated scale. Press the
PRINT/ACCUMULATE button and the display will show the message ". X" as the
system accumulates the next reading and sends it to print ("X" denotes the number of
accumulations for the session). When a successful accumulation has occurred, press
the LOCAL/TOTAL button to cycle the display to show the number of accumulations,
current local weight, current total weight on all scales, and the accumulated total.
When the local weight, current total weight, or accumulated total is displayed, the
TOTAL icon will be lit up, flashing or turned off.
When the scale is set to the "Accumulating Print Standard" mode, the scale can in
accumulate in either local or total weight, but not when viewing the accumulated total.
To clear the accumulated total weight, press and hold the ZERO button until the display
shows the message ".".
Accumulating Procedure
1. When the system is setup and operating correctly, select the scale to be used to
accumulate the weights. Any scale can be designated, but once selected, the scale
must be used to accumulate all weights until the weighing is complete. The scale
should be set to the desired accumulate mode of 2 or 3 (Refer to the "Serial Output
Setup" section for additional information). If using a printer, the scale directly
connected to the printer should be designated as the scale to be used for
accumulation.
Current local
weight on this
scale
Current total
weight on all
scales
Total number of
accumulations
this session
Total weight of
accumulations
this session
.

CW250, Users
Rev M, April 2018
Page 17 of 31
2. When the first group of items to be weighed is stable on the scales, press the
PRINT/ACCUMULATE button. If using a printer, a print ticket with all weights will be
printed. The display will return to the setting the accumulation was obtained from.
The weight from the first group will become the accumulated total. The
accumulated total can be displayed by pressing the LOCAL/TOTAL button when
the TOTAL icon is flashing. An accumulation cannot be made in standard mode if
the scale is in the Accumulation Print mode with the TOTAL icon flashing. When
the accumulation is complete, remove the first group of items from the scale(s).
3. When the next group of items to be weighed is stable on the scale(s), press the
PRINT/ACCUMULATE button. The total weight will be added to the accumulated
total. If using a printer, a print ticket with all weights will be printed.
4. Repeat step 3 as required for additional weigh groups. If the accumulated total
becomes too large to display, the message "" and an error icon will be
displayed.
5. When finished, the accumulated total weight can be cleared by pressing and
holding the ZERO button until the display shows ".".The display will clear the
accumulated total and the number of accumulations.
ACCUMULATE NOTE: The scale will not accumulate when the weight is negative,
zero, or if the weight is in motion. The protections are added to ensure only valid
readings are accumulated into the total. An error message "." will be
displayed when any of the three conditions are present. At the completion of a
successful accumulation, the scale must be returned to zero before the next weight
accumulation can be initiated. If an attempt is made to accumulate the next weight
before allowing the scale to return to zero, the error message ".” will be
displayed.

CW250, Users
Rev M, April 2018
Page 18 of 31
Mode Menu
Mode Menu
To access the Mode Menu, press the PRINT/ACCUMULATE and ZERO buttons
simultaneously. The display will show the message ".". If the message is not
displayed, verify the Calibration Enable Jumper is in the "RUN" position (refer to the
"Calibration Enable Jumper" section).
When accessing the Mode Menu, it may be necessary to enter a number (up to a five
digit). This will be required when the current number is displayed with the far right digit
flashing. The flashing digit may be incremented by pressing the LOCAL/TOTAL button.
To move one digit to the left, press the ZERO key. When the number has been entered,
press the PRINT/ ACCUMULATE button. The settings are saved each time the
PRINT/ACCUMLATE button is pressed to advance the menu. The scale can then be
turned off.
Step
Function
Note
Default
.
Backlight
,,
Set Point 1
0 to 199999
Set Point 2
0 to 199999
.
Firmware Version
View only
XXXXX
.
Average Rate
1 to 120
.
Average Threshold
1 to 10000
Auto Off
000 = off, 1 to 240
Print Mode
0 = On-demand,
1 = Continuous
2 = Accumulating Total Axle,
3 = Accumulating Total Standard
Printer Baud Rate
1200, 2400, 4800, 9600, 19200, 38400,
57600, 115200
Measurement Units
lb or kg
lb
Protocol
,,. or
.
Interface Baud Rate
9600 or 115200
Radio Enable
Yes or no
Radio Channel
01 to 12
.
Radio Network ID
0 to 65534
.
Radio Encryption Key
0 to 65534
.
Restore Radio Defaults
0 or 3

CW250, Users
Rev M, April 2018
Page 19 of 31
Setting Mode Menu Parameters
1. Press the PRINT/ACCUMULATE and ZERO buttons simultaneously. The display
will show the message ".". Press the PRINT/ACCUMULATE button. The
flashing display shows the current setting. Press the ZERO or the LOCAL/TOTAL
buttons to toggle between Auto, On and Off. When "Auto" is selected (default
setting), the backlight will automatically light up when low level light conditions are
detected. When the desired setting is displayed, press the PRINT/ ACCUMULATE
button to save.
2. The display will show "". Press the PRINT/ACCUMULATE button. The flashing
digit shows the current setting. When the weight displayed is equal to or greater
than the set point, the corresponding icon is displayed on the LCD screen. During
normal weighing mode, the S1 icon on the display will light up when the weight is
greater than or equal to Set Point 1. Use the LOCAL/TOTAL button to advance the
number and the ZERO button to move the flashing number to the left. When the
desired set point number is displayed, press the PRINT/ACCUMULATE button.
3. The display will show "". Press the PRINT/ACCUMULATE button. The flashing
digit shows the current setting. During normal weighing mode, the S2 icon on the
display will light up when the weight is greater than or equal to set point 2. Use the
LOCAL/TOTAL button to advance the number and the ZERO button to move the
flashing number the left. When the desired set point number is displayed, press the
PRINT/ACCUMULATE button.
4. The display will show "". Press the PRINT/ACCUMULATE button. The display
will show the current version of firmware loaded on the scale. Press the
PRINT/ACCUMULATE button.
5. The display will show the message ".". Press the PRINT/ACCUMULATE button.
The flashing digit shows the current setting. The number reflects the number of
readings that be averaged together before the reading is sent to the display. Higher
values will result in a more stable reading, but will take longer to process the final
value. The scale updates at 4Hz, so an Average Rate of "8" equates to 2 seconds of
averaging. Enter a "1" to disable averaging. Use the Lb/Kg button to the advance
the number and the ZERO button to move the flashing number to the left. When the
desired average rate setting is displayed, press the Mode button.
6. The display will show ".". Press the Mode button. The flashing digit reflects the
current Average Threshold setting. The setting enables dynamic averaging, which
can improve the settling time of a large Average Rate. If the scale detects a large
weight change, it will temporarily suspend averaging, jump to the new weight, and
resume averaging. Enter a value between 1 and 10000 to set the threshold (in
display divisions) at which the dynamic averaging activates. Enter "0" to disable
dynamic averaging. When the display shows the desired setting, press the
PRINT/ACCUMULATE button.

CW250, Users
Rev M, April 2018
Page 20 of 31
7. The display will show ".". Press the PRINT/ACCUMULATE button. The
flashing digit shows the current setting. The number displayed is the number of
minutes the scale can remain idle before it automatically shuts down. Setting the
number to "" will disable the function and the scale will never automatically shut
down. Use the LOCAL/TOTAL button the advance the number and the ZERO button
to move the flashing number to the left. When the display shows the desired
number, press the PRINT/ACCUMULATE button.
8. The display will show "". Press the PRINT/ACCUMULATE button. The flashing
digit shows the current setting. The Print Mode setting enables one of three scale
print modes (0 for on-demand, 1 for continuous, 2 for accumulating total axle format
and 3 for accumulating total standard format). Use the LOCAL/TOTAL button to
increment and the ZERO button to decrement the number. When the display shows
the desired number, press the PRINT/ACCUMULATE button.
9. The display will show "". Press the PRINT/ACCUMULATE button. The flashing
display shows the current printer baud rate setting. The available baud rates are:
1200, 2400, 4800, 9600, 19200, 38400, 57600 and 115200. Use the LOCAL/TOTAL
button or the ZERO button to toggle through the available rates. When the desired
printer baud rate setting is shown, press the PRINT/ACCUMULATE button.
10.The display will show "". Press the PRINT/ACCUMULATE button. The current
unit of measure (lb or kg) icon will flash in the upper left corner of the display. The
Measurement Units function will set the scale to measure in pounds (lb) or kilograms
(kg). Use the LOCAL/TOTAL button or the ZERO button to toggle between the two
settings. When the desired setting is flashing, press the PRINT/ACCUMULATE
button.
11.The display will show the message "". Press the PRINT/ACCUMULATE
button. The flashing display shows the current Protocol setting. There are four
protocol settings available to choose from; Standard (""), Low Power
(""), Current Loop (".") and "".The Standard setting is the legacy
setting for use in wireless and wired scale networks. The maximum number of
scales that may be connected in a network is 32. The Low Power setting will
significantly improve the wireless battery life for all "non-host" scales. The Current
Loop setting is not used in the CW250. When scales are not part of a totalizing
network, battery life will be improved if "" is selected. Use the LOCAL/TOTAL
button or the ZERO button to cycle through the settings. When the desired protocol
setting is flashing, press the PRINT/ ACCUMULATE button.
12.The display will show ".". Press the PRINT/ACCUMULATE button. The display
will show the current Interface Baud Rate setting in flashing mode. Two baud rate
settings available; 9600 and 115200. Use the LOCAL/TOTAL button or the ZERO
button to toggle between the settings. When the desired baud rate setting is
flashing, press the PRINT/ ACCUMULATE button.
Other manuals for CW250
1
Table of contents
Other Intercomp Scale manuals
Intercomp
Intercomp CS3000 User manual
Intercomp
Intercomp CS750 User manual
Intercomp
Intercomp PT300 User manual
Intercomp
Intercomp CS1500 User manual
Intercomp
Intercomp PROFESSIONAL SW777 User manual
Intercomp
Intercomp CS750 User manual
Intercomp
Intercomp LP600 User manual

Intercomp
Intercomp CS200 User manual
Intercomp
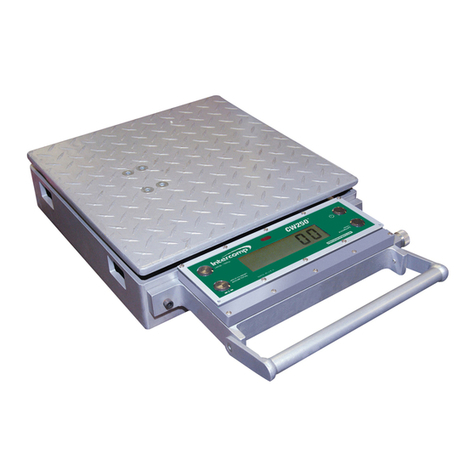
Intercomp CW250 User manual
Intercomp
Intercomp Microflex User manual
