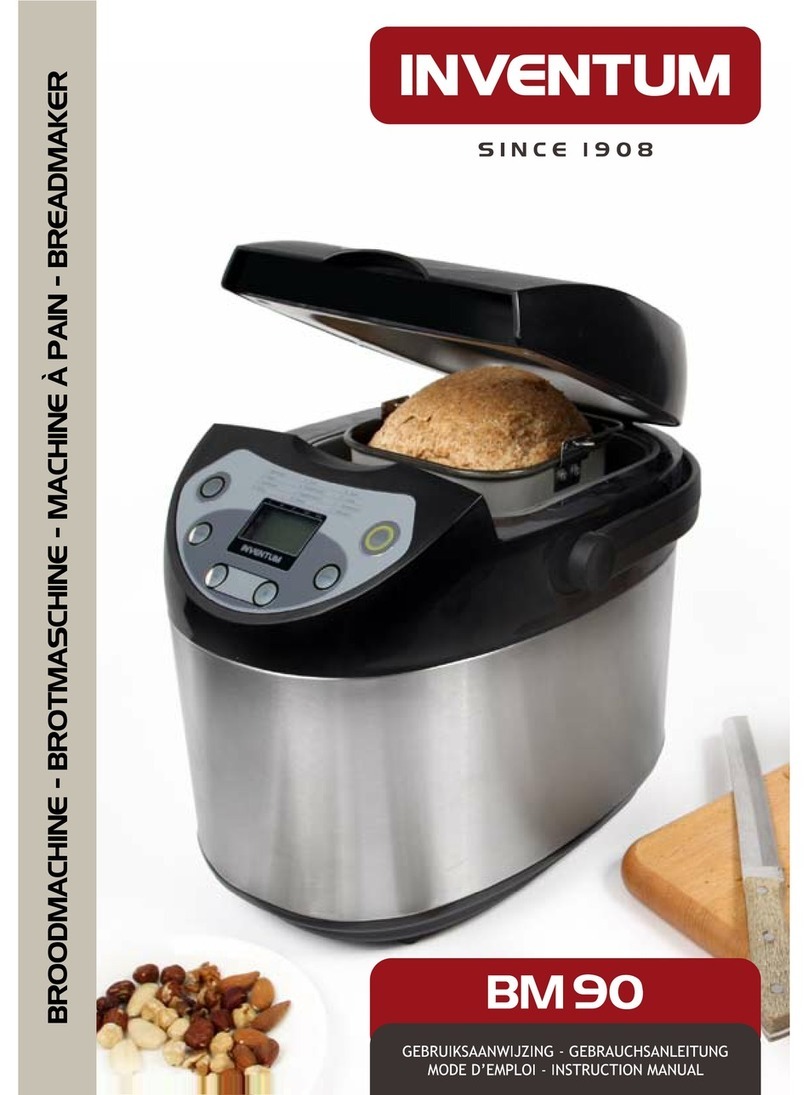
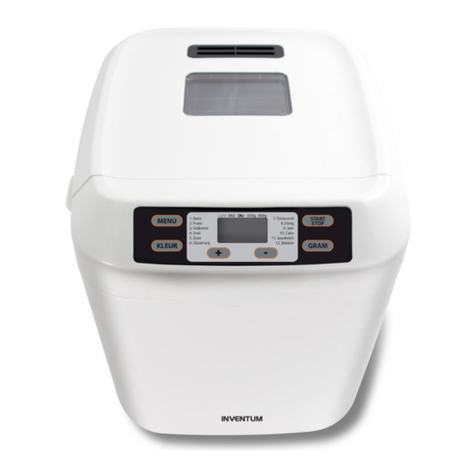
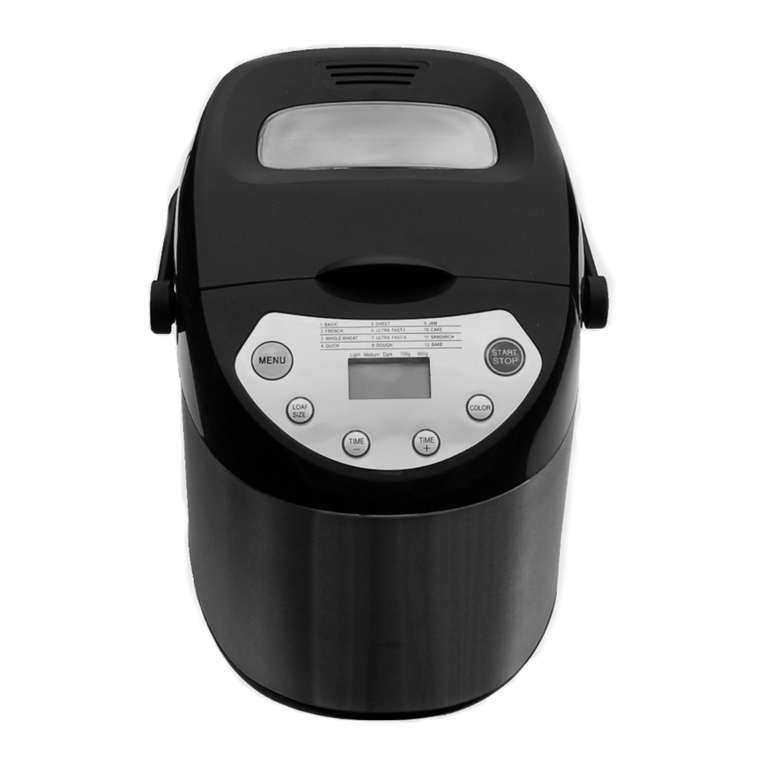
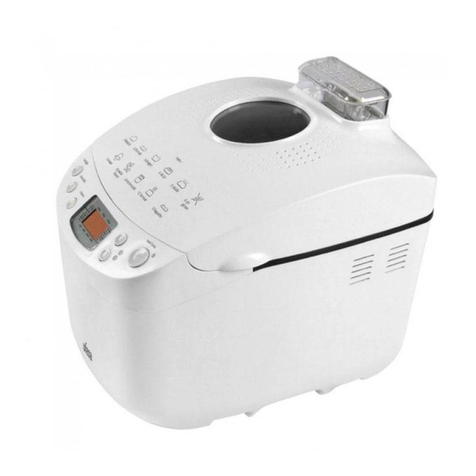
inventum BM55 User manual

B M 5 5
BROODMACHINE
BREAD MAKER
BROTMASCHINE
MACHINE À PAIN
GEBRUIKSAANWIJZING
INSTRUCTION MANUAL
GEBRAUCHSANLEITUNG
MODE D’EMPLOI

ENGLISH
DEUTSCH
Klein huishoudelijke apparaten horen niet in
de vuilnisbak. Breng ze naar de betreende
afvalverwerkingsafdeling van uw gemeente.
Legislation requires that all electrical and
electronic equipment must be collected for
reuse and recycling. Electrical and electronic
equipment marked with the symbol indicating
separate collection of such equipment must be
returned to a municipal waste collection point.
Elektro Haushaltsgeräte gehören nicht in
den Hausmüll. Entsorgen Sie diese über
Ihren Elektrofachhändler oder Ihrer örtlichen
Wertstosammelstelle.
Les petits appareils domestiques doivent être
mis au rebut dans des conteneurs spéciaux ou
aux points de collecte réservés à cet usage.
6. Foutmeldingen in display pagina 5
7. Programma’s pagina 5
8. Brood bakken pagina 6
9. De tijdvertraging instellen pagina 7
10. Enkele tips pagina 7
11. Problemen & oplossingen pagina 8
12. Veelgestelde vragen pagina 8
13. Reiniging & onderhoud pagina 10
14. Recepten pagina 10
Garantie & Service pagina 42
6. Errors in the display page 15
7. Programs page 15
8. Baking bread page 16
9. How to use the timer page 16
10. Tips for baking bread page 17
11. Problems that may occur page 17
12. Frequently asked questions page 17
13. Cleaning & maintenance page 19
14. Recipes page 19
Guarantee & after sales Service page 42
6. Störungsmeldung auf dem Display Seite 24
7. Programme Seite 24
8. Brot backen Seite 25
9. Zeitverzögerung einstellen Seite 26
10. Einige Tipps Seite 26
11. Problemen & Lösungen Seite 27
12. Fragen die oft gestellt werden Seite 27
13. Reinigung & pflege Seite 29
14. Rezepten Seite 29
Garantie & Service Seite 43
6. Messages d’erreur page 34
7. Choix du mode de cuisson page 34
8. Cuisson de pain page 35
9. Utilisation de la minuterie page 36
10. Quelques petits de conseils page 36
11. Problèmes & solutions page 37
12. Questions qui sont souvent posées page 37
13. Nettoyage & entretien page 39
14. Recettes page 39
Garantie & Service page 43
FRANÇAIS
NEDERLANDS
2
Omschrijving van het apparaat pagina 3
1. Veiligheidsvoorschriften pagina 3
2. Voor het eerste gebruik pagina 4
3. De kunst van het bakken pagina 4
4. De ingrediënten pagina 4
5. Het display pagina 5
Définition de l’appareil page 32
1. Consignes de sécurité page 32
2. Pour la première utilisation page 33
3. L’art du boulanger page 33
4. Les ingrédients page 33
5. Le panneau de commande page 34
Beschreibung des Geräts Seite 22
1. Sicherheitshinweise Seite 22
2. Vor der Inbetriebnahme Seite 23
3. Die Kunst des Backens Seite 23
4. Die Zutaten Seite 23
5. Das Display Seite 24
Description of the appliance page 13
1. Safety instructions page 13
2. Before first use page 14
3. The art of baking page 14
4. The ingredients page 14
5. The display page 15

NEDERLANDS
• Lees eerst de gebruiksaanwijzing aandachtig en
geheel door voordat u het apparaat gaat gebruiken en
bewaar deze zorgvuldig voor latere raadpleging.
• Gebruik dit apparaat uitsluitend voor de in de
gebruiksaanwijzing beschreven doeleinden.
• Let op! Vermijdt het aanraken van de warme
oppervlakken wanneer het apparaat ingeschakeld is.
• Sluit het apparaat alleen aan op wisselstroom, op een
randgeaarde wandcontactdoos, met een netspanning
overeenkomstig met de informatie aangegeven op het
typeplaatje van het apparaat.
• Het netsnoer nooit scherp buigen of over hete delen
laten lopen.
• Wikkel het snoer geheel af om oververhitting van het
snoer te voorkomen.
• Plaats het apparaat nooit in de buurt van apparaten die
warmte afgeven zoals ovens, gasfornuizen, kookplaten,
etc. Het apparaat op afstand houden van muren of
andere objecten die vlam kunnen vatten zoals gordijnen,
handdoeken (katoen of papier etc.).
• Zorg er altijd voor dat het apparaat op een stevige, vlakke
ondergrond staat en gebruik het uitsluitend binnenshuis.
• Laat het apparaat niet onbeheerd achter indien het
apparaat in werking is.
• Indien u het apparaat wilt verplaatsen, dient u ervoor te
zorgen dat het apparaat uitgeschakeld is. U dient bij het
verplaatsen van het apparaat beide handen te gebruiken.
• Gebruik het apparaat niet wanneer de stekker, het snoer
of het apparaat beschadigd is, of wanneer het apparaat
niet meer naar behoren functioneert of wanneer
het gevallen of op een andere manier beschadigd is.
Raadpleeg dan de winkelier of onze technische dienst. In
geen geval de stekker of het snoer zelf vervangen.
• Reparaties aan elektrische apparaten dienen uitsluitend
door vakmensen uitge voerd te worden. Verkeerd
uitgevoerde reparaties kunnen aanzien lijke gevaren voor
de gebruiker tot gevolg hebben.
• Het apparaat nooit gebruiken met onderdelen die niet
door de fabrikant zijn aanbevolen of geleverd.
• Niet aan het snoer c.q. het apparaat trekken om de
stekker uit de wandcontactdoos te halen. Het apparaat
nooit met natte of vochtige handen aanraken.
• Het apparaat buiten bereik van kinderen houden.
Kinderen beseen de gevaren niet, die kunnen ontstaan
bij het omgaan met elektrische apparaten. Laat kinde ren
daarom nooit zonder toezicht met elektrische apparaten
werken. Zorg ervoor dat het apparaat altijd zodanig
opgeborgen wordt dat kinde ren er niet bij kunnen.
• Het apparaat is niet bedoeld voor gebruik door
hulpbehoevenden, kleine kinderen en/of personen
met gebrek aan ervaring en kennis, tenzij zij goede
begeleiding krijgen of geïnstrueerd zijn in het veilig
gebruiken van het apparaat door een persoon die
verantwoordelijk is voor hun veiligheid.
• Indien het apparaat niet gebruikt of gereinigd wordt, zet
het apparaat geheel uit en verwijder de stekker uit het
stopcontact.
• Verlengsnoeren mogen alleen gebruikt worden indien de
netspanning (zie typeplaatje) en het vermogen hetzelfde
of hoger is dan van het apparaat. Gebruik altijd een
goedgekeurd, geaard verlengsnoer.
• Als u besluit het apparaat, vanwege een defect, niet
langer te gebruiken, adviseren wij u, nadat u de stekker
uit de wandcontactdoos heeft verwijderd, het snoer
af te knippen. Breng het apparaat naar de betreende
afvalverwerkingsafdeling van uw gemeente.
• Indien het apparaat na het inschakelen niet functioneert,
dan kan de zekering of de aardlekschakelaar in de elektra
verdeelkast zijn aangesproken. De groep kan te zwaar
zijn belast of een aardlekstroom kan zijn opgetreden.
• Ga bij storing nooit zelf repareren; het doorslaan van
de beveiliging in het apparaat kan duiden op een
defect, dat niet wordt verholpen door verwijdering of
1. Display
2. Deksel met kijkvenster
3. Behuizing
4. MENU knop
5. Programma’s
6. START- /STOP knop
7. GRAM knop
8. Tijdvertragingsknoppen +/-
9. KLEUR knop
10. Bakblik
11. Kneedhaak
3
1 | VEILIGHEIDSVOORSCHRIFTEN
1. Basis
2. Frans
3. Volkoren
4. Snel
5. Zoet
6. Glutenvrij
7. Extra-snel
8. Deeg
9. Jam
10. Cake
11. Sandwich
12. Bakken
MENU
KLEUR GRAM
START
STOP
Licht Mid Dkr 650g 800g
+ -
4
10 11
1
2
3
5 5
16
79 8

vervanging van deze beveiliging. Het is noodzakelijk dat
er uitsluitend originele onderdelen gebruikt worden.
• Dompel het apparaat, het snoer of de stekker nooit
onder in water.
• Dit apparaat is uitsluitend geschikt voor huishoudelijk
gebruik. Wanneer het apparaat oneigenlijk gebruikt
wordt, kan er bij eventuele defecten geen aanspraak op
schadevergoeding worden gemaakt en vervalt het recht
op garantie.
4
De belangrijkste factoren voor het bakken van een
geslaagd brood zijn de kwaliteit, de versheid en het correct
afwegen van uw ingrediënten.
Bloem/ Meel
Bloem of meel is het basisbestanddeel van brood.
Het gewicht van de bloem of meel verschilt van soort
tot soort. Daarom is het absoluut noodzakelijk de
juiste hoeveelheid af te meten met een weegschaal.
Advies: let met het kopen van meel op de tekst van
de verpakking. Er moet op staan dat het meel geschikt
is voor het maken van onder andere brood (geen
patentbloem gebruiken).
Gluten
Gluten zitten van nature in bloem/ meel en bevorderen
de rijzing van het brood.
Gist
Gist is een micro-organisme dat groeit op diverse
plantaardige voedingsmiddelen. Gist heeft het
vermogen om suikers om te zetten in alcohol en
koolzuurgas, waardoor het zich bijzonder snel
vermeerdert. Ideaal dus om het deeg te laten rijzen en
het lichter en beter verteerbaar te maken. Wij adviseren
in de Inventum broodmachine droge gist te gebruiken.
Deze (korrel)gist is gemakkelijker te verwerken, langer
houdbaar dan verse gist en het geeft een constanter
bakresultaat dan verse gist.
Zout
Zout zorgt niet alleen voor een bepaalde smaak aan het
brood, maar regelt ook de activiteit van de gist, maakt
het deeg stevig en vast en voorkomt dat het brood te
hard rijst.
Boter/olie
Boter of olie geeft een betere smaak aan het brood
en maakt het brood zachter. De boter of olie moet
op kamertemperatuur zijn voor u deze bij de andere
ingrediënten voegt.
Suiker
Suiker is de voedingsbron voor de gist en een belangrijk
bestanddeel voor het rijzingsproces. U kunt gewone
witte suiker, bruine suiker, stroop of honing gebruiken.
Het geeft een zekere zachtheid aan de smaak van het
brood, verhoogt de voedingswaarde en helpt het brood
langer te bewaren. Let op: Gebruik geen grove suiker of
suikerklontjes, voor bijvoorbeeld suikerbrood, omdat dit
de anti-aanbaklaag van de bakvorm beschadigd.
De kwaliteit van het brood dat u in de broodmachine
bakt, hangt van veel factoren af. Hoe vaker u met uw
broodmachine werkt, hoe sneller u deze factoren leert
kennen wat uiteindelijk het bakresultaat ten goede
komt. De broodmachine, relatief eenvoudig in gebruik,
vereist echter een correcte dosering van de ingrediënten.
Wij adviseren u dan ook om voor het afwegen een
keukenweegschaal te gebruiken die bij voorkeur per gram
weegt.
De machine laat u de keuze tussen verschillende
programma’s. Kies het programma voor het type brood dat
u wenst, of indien anders aangegeven in het recept.
Plaats de gist als laatste in de vorm en bovenop de bloem,
zodat deze niet in aanraking komt met het zout, suiker
en water en/of melk. Zorg ervoor dat uw ingrediënten
vers zijn. U kunt de versheid van de gist vaststellen door
1 theelepel suiker in een halve beker water op te lossen
en aan dit mengsel 1 theelepel gist toe te voegen. Na een
paar minuten moet het geheel gaan borrelen en bruisen,
pas dan weet u dat de gist vers is.
Controleer het deeg tijdens het kneedproces.
Voordat u het apparaat voor de eerste maal in gebruik
neemt, dient u als volgt te werk te gaan: pak de
broodmachine voorzichtig uit en verwijder al het
verpakkingsmateriaal. De verpakking (plastic zakken
en karton) buiten het bereik van kinderen houden.
Controleer na het uitpakken het apparaat zorgvuldig op
uiterlijke schade, mogelijk ontstaan tijdens transport.
In de verpakking vindt u de broodmachine, het bakblik,
de kneedhaak en de gebruiksaanwijzing. Plaats het
apparaat op een stevige, vlakke ondergrond. Maak de
broodmachine, het bakblik en de kneedhaak schoon
met een vochtige doek. De binnenkant van het bakblik
en de kneedhaak zijn bedekt met een anti-aanbaklaag,
daarom dient u deze artikelen nooit schoon te maken
met schoonmaakmiddelen, een afwasborstel of een
spons. Gebruik hiervoor altijd een vochtige doek. Dit is
voldoende om het goed schoon te houden.
Op het moment dat u de machine voor de eerste keer
aansluit, zal de machine een harde pieptoon geven en
er verschijnt “3:00” in het display. De machine is nu klaar
voor gebruik. Uw broodmachine kan bij het eerste gebruik
ietwat roken, dit is volkomen normaal, kan geen kwaad en
zal vanzelf verdwijnen.
2 | VOOR HET EERSTE GEBRUIK
3 | DE KUNST VAN HET BAKKEN
Na plusminus 5 á 10 minuten moet het eruitzien als een
gladde, elastische ronde bol. Voeg telkens 1 eetlepel water
toe als het deeg te klonterig is of voeg 1 eetlepel bloem toe
als het deeg te vloeibaar is.
Zorg ervoor dat u de ingrediënten, inclusief water,
toevoegt in de aangegeven volgorde en dat ze op
kamertemperatuur zijn. Haal daarom boter en gist tijdig
uit de koelkast. Soms kan het brood te hard rijzen. Dit kan
veroorzaakt worden door een te hoge kamertemperatuur
of een te hoge temperatuur van de ingrediënten.
Wanneer u een brood gebakken heeft, dient u de
broodmachine 15-20 minuten te laten afkoelen alvorens
opnieuw te bakken.
4 | DE INGREDIËNTEN

5
1: Basis Dit is het meest gebruikte programma
voor het maken van wit, tarwe of licht
volkoren brood.
2: Frans De baktijd is bij dit programma langer
dan bij het normale programma waardoor
het brood een iets hardere korst krijgt.
3: Volkoren Dit programma wordt gebruikt voor het
bereiden van broden waarbij zwaardere
bloemsoorten gebruikt worden, zoals
volkoren-, tarwe- en meergranenbrood.
Deze bloemsoorten hebben een langere
kneed- en gisttijd nodig. Het brood zal
over het algemeen wat kleiner zijn
als een wit brood, omdat het meel
zwaarder is.
4: Snel Dit is een programma voor als u een keer
binnen een korte tijd een wit brood wilt
hebben. Door de kortere tijd dient u er
wel rekening mee te houden dat deze
kleiner zal zijn als bij het normale
programma.
5: Zoet Voor het bereiden van “zoete“ broden
zoals rozijnen- en notenbrood.
6: Glutenvrij Met dit programma kunt u uw eigen
glutenvrije brood maken. De machine
kneedt het, laat het deeg rijsen en bakt het
af.
7: Extra snel Met dit programma maakt u in 90 min.
een lekker vers wit brood van 650 gram
en in 100 min. een wit brood van 800
gram.
Indien er, na het inschakelen van de broodmachine,
op het display “H:HH” verschijnt, wil dit zeggen dat de
temperatuur van het apparaat nog te hoog is. Doe de
deksel van het apparaat omhoog en laat het apparaat
afkoelen voordat u een nieuw brood gaat bakken.
Wanneer er op het display EE0 of EE1 verschijnt, is de
temperatuursensor defect. Zet het apparaat uit en haal de
stekker uit de wandcontactdoos. Neem in dit geval contact
op met onze technische dienst (zie laatste pagina voor het
adres).
MENU-knop
Deze knop gebruikt u om het juiste bakprogramma te
selecteren. Elke keer als u op deze knop drukt, hoort
u een piep en het programmanummer verandert.
Het programma staat in het display vermeld. Deze
broodmachine heeft 12 programmamogelijkheden (zie
ook: Programma’s).
START- en STOP-knop
Met deze knop START of STOPT u het programma.
TIP: Indien u het verkeerde programma heeft gekozen,
kunt u dit wijzigen door de stopknop een aantal
seconden ingedrukt te houden. U kunt daarna de
machine opnieuw instellen met het juiste programma.
START: om een programma te starten, drukt u de knop
in en u zult een korte piep horen. De dubbele punt
tussen de tijd in het display zal gaan knipperen en de
machine gaat de tijd nu aftellen en werkt het gekozen
programma af.
STOP: om een programma te beëindigen, drukt u de
knop een aantal seconden in totdat u een piep hoort.
De piep bevestigt dat u het programma uitgezet heeft.
KLEUR-knop
Deze knop gebruikt u om aan te geven of u de
korstkleur licht, middel of donker wilt hebben.
TIP: Indien u een recept voor de eerste maal probeert,
adviseren wij u de korstkleur middel te kiezen.
GRAM-knop
Deze knop gebruikt u om aan te geven welk gewicht
brood u op dat moment wenst te maken. U kunt kiezen
uit een brood van 650 of 800 gram.
TIP: De totale hoeveelheid van de ingrediënten vermeld
in het recept is het gewicht van het brood dat u gaat
maken.
Water
Wanneer de bloem/ meel vermengd wordt met het
water, vormen de gluten zich en wordt de lucht
afgesloten, zodat het brood kan rijzen. Bij een normale
omgevingstempera tuur gebruikt u lauw water om het
brood te maken: koud water activeert de gist niet en
warm water activeert de gist te sterk.
Melk
Melk doet de broodkorst bruinen, verbetert de smaak
van het brood, verhoogt de voedingswaarde en geeft
een mooie romige kleur binnenin. Indien u verse melk
gebruikt, dan dient u de hoeveelheid water uiteraard
te verminderen om het vochtigheidspeil in evenwicht
te houden. Let op: Gebruik geen verse melk als u het
bakproces programmeert met de tijdvertragingsfunctie.
De melk zou zuur kunnen worden.
Andere ingrediënten
In kookboeken kunt u recepten tegenkomen die
kruiden, noten, krenten, fruit of groente e.d. vereisen.
Gebruik steeds verse ingrediënten. Indien u noten,
zonnebloempitten, gedroogd fruit of dergelijke gebruikt,
raden wij u aan deze vooraf in water te laten weken,
goed droog te deppen en dan pas aan het deeg toe
te voegen. Let er wel op dat deze ingrediënten niet
te groot en te scherp zijn in verband met mogelijke
beschadigingen aan de anti-aanbaklaag.
5 | HET DISPLAY
Tijdvertragingsknoppen (TIMER + / TIMER - )
Met deze knoppen kunt u zelf bepalen wanneer uw
brood klaar is. Door op de knop «+» te drukken, zal de
tijd met 10 minuten per keer toenemen. Indien u de
knop «-» in drukt, zal de tijd met 10 minuten afnemen.
Zie ook: Het gebruik van de tijdvertraging.
AAN/UIT?
Hoe kunt u zien of de
machine werkt of het
programma loopt?
Als de dubbele punt
knippert, draait het
programma.
Als de dubbele punt
constant brand, is het
programma gestopt.
6 | FOUTMELDINGEN IN DISPLAY
7 | PROGRAMMA’S

6
Stap 1: Haal het bakblik uit de machine door
deze een kwartslag naar links te draaien
en aan de handgreep recht omhoog uit de
machine te trekken.
8: Deeg Met dit programma kunt u deeg maken
voor broodjes, pizza of ieder ander
recept waar u (brood)deeg voor nodig
heeft. Het deeg wordt niet in de machine
gebakken. Een signaal geeft aan wanneer
het deeg klaar is en uit het bakblik
gehaald kan worden.
9: Jam Voor het bereiden van heerlijke verse
jam. Let op: Zorg ervoor dat de pitten
van de ingrediënten verwijderd zijn
voordat u deze in het bakblik doet.
Scherpe pitjes kunnen namelijk de anti-
aanbaklaag beschadigen. Werkwijze: U
doet alle ingrediënten in het bakblik en u
stelt de machine in op programma JAM.
Daarna drukt u op start en de machine
zal nu eerst de ingrediënten gaan
voorverwarmen. Daarna zal de machine
gaan mengen en uiteindelijk zal de
machine de jam laten afkoelen. Als de
machine klaar is, geeft deze dit aan door
een piepsignaal. U kunt de jam in een
potje of bakje gieten en nog verder
laten afkoelen. Zodra het voldoende is
afgekoeld, kunt u het potje of bakje
afsluiten en in de koeling bewaren.
10: Cake Met dit programma kunt u brood maken
dat bereid wordt met bijvoorbeeld
bakpoeder i.p.v. gist. Broden gebakken
met dit programma worden minder hoog
en vaster van structuur. De timer kan
op deze stand niet gebruikt worden,
omdat het bakpoeder direct werkt en
uiteindelijk niet meer zal zorgen voor
een goede rijzing. Indien u met dit
programma cake wilt maken, raden wij
u aan de ingrediënten in het bakblik te
doen. Daarna stelt u de machine in en
voordat u op start drukt, dient u even
met een houten lepel de ingrediënten
omscheppen. Dit bevordert namelijk de
kneding.
11: Sandwich Dit programma kunt u gebruiken om een
heel luchtig wit brood te maken voor
onder andere sandwiches. Let op! Bij
dit programma kunt u geen korstkleur
instellen, de machine doet dit zelf.
12: Bakken Dit programma kunt u gebruiken voor
kant-en-klaar deeg dat u bijvoorbeeld al
eerder heeft gemaakt. U kunt het deeg
met dit programma alleen afbakken. Het
programma is voorgeprogrammeerd
op 60 minuten. Volg bij kant-en-
klaar brooddeeg de instructies van
de fabrikant op. Ook kunt u reeds
gebakken brood weer wat opwarmen.
8 | BROOD BAKKEN
Stap 2: Plaats de kneedhaak (bijgevoegd) op
de as in het midden van het bakblik.
De kneedhaak moet op een juiste en
zorgvuldige manier geplaatst worden
zodat alle ingrediënten voldoende
gemengd en gekneed worden. Reinig
de as altijd goed, zodat eventuele
bakrestjes volledig verwijderd zijn.
Stap 3: Doe de ingrediënten op de volgende
wijze en volgorde in het bakblik:
1. De helft van de benodigde bloem/meel
2. Water/melk
3. Boter/olie
4. Eventueel eieren
5. De rest van de benodigde bloem/meel
6. Suiker (doe suiker aan één kant)
7. Zout (doe zout aan de andere kant)
8. Gist (doe gist in een holletje in het
midden) Let op: De gist mag niet in
aanraking komen met het water. De
mogelijkheid bestaat dat het water de gist
zal activeren alvorens de ingrediënten
voldoende gemengd en gekneed zijn.
Stap 4: Verwijder alle restjes van de ingrediënten
aan de buitenkant van het bakblik. Plaats
het bakblik weer in de machine en draai
deze een kwartslag naar rechts zodat het
bakblik goed stevig vast staat.
Stap 5: Sluit het deksel.
Stap 6: Doe de stekker in het stopcontact. Op het
display zal programma 1, 800 gram met de
tijd “3:00“ verschijnen.
Stap 7: Stel het juiste programma in door middel
van de MENU-knop.
Stap 8: Door middel van de KLEUR-knop kunt
u de kleur van de korst instellen. U kunt
kiezen uit licht, middel of donker. De
gekozen korstkleur word boven in het
display aangegeven met een “∆“.
Stap 9: Met behulp van de GRAM-knop kiest u
de juiste grootte van het brood wat u wilt
maken, 650 of 800 gram. De gekozen
grootte wordt rechtsboven in het display
aangegeven met een “∆“.
Stap 10: Stel eventueel de tijdvertraging in met
behulp van de tijdvertragingsknoppen
(+/-). Zie ook: “Het gebruik van de
tijdvertraging”.
Stap 11: Druk op de startknop. De dubbele punt
zal nu gaan knipperen en geeft aan dat
de machine werkt.
Een overzicht van de exacte programma-tijden vindt u op
de laatste pagina van de Nederlandse gebruiksaanwijzing.
De tijd die in het display staat, is aangegeven in uren en
minuten. Voorbeeld: Programma 1, Basis, korstkleur middel
duurt 3 uur.
Tijdens het kneedproces gaat een “piepsignaal”: na dit
“piepsignaal” kunt u extra ingrediënten zoals droge
krenten, noten of andere producten toevoegen. U doet de
deksel open, doet de extra ingrediënten erin, vervolgens
sluit u de deksel en het kneedproces zal vervolgen. Let op:
Laat krenten, rozijnen en noten vooraf wellen en droog
ze met een doek of keukenpapier af. Let erop dat deze
ingrediënten niet te groot of te scherp zijn, anders kan de
anti-aanbaklaag van het bakblik beschadigen.

7
• Weeg de ingrediënten altijd zeer nauwkeurig af en let
erop dat deze op kamertemperatuur zijn.
• Voeg de ingrediënten toe in de juiste volgorde.
• Zorg ervoor dat de ingrediënten vers zijn.
• Doe de gist als laatste in de vorm. Doe dit in een
holletje in het meel. Deze mag niet in aanraking komen
met zout, suiker en water (melk).
• Tip: U kunt de versheid van de gist vaststellen door de
volgende test te doen:
Los in een half kopje lauw water 1 theelepel suiker op
en voeg aan dit mengsel 1 theelepel gist toe. Na een
paar minuten moet het geheel gaan borrelen en bruisen,
pas dan weet u dat de gist vers is.
• Tip: Ca. 5 tot 10 minuten na de start van de
broodmachine kunt u testen of de deegbal goed is. Het
deeg moet eruit zien als een gladde, elastische, ronde
bol. U opent het deksel en raakt even met uw vingers
de bovenkant van de deegbal aan. Let er op dat de
kneedhaak doordraait. Indien het deeg iets blijft
plakken aan uw vingers is dit goed. Blijft het deeg
plakken aan het bakblik dan is deze te nat. Blijft het
deeg niet plakken aan uw vingers dan is de deegbal te
droog.
• Tip: Zout remt de werking van gist en suiker bevordert
de werking. Indien u één van deze twee ingrediënten
niet gebruiken mag vanwege een dieet, dan moet u het
andere ook weglaten. U krijgt dan brood zonder suiker
en zout.
• Wanneer u direct een nieuw brood wilt bakken, laat
u de machine 10 tot 20 minuten afkoelen alvorens deze
opnieuw te gebruiken.
• Verschillende soorten brood hebben een andere
structuur en grootte omdat de gebruikte ingrediënten
verschillen. Sommige broden kunnen veel vaster en
kleiner zijn dan andere. Dit is normaal.
• Het kan zijn dat u bij sommige recepten de
verhoudingen aan moet passen. Daar bedoelen wij mee:
de hoeveelheid gist of de hoeveelheid meel of de
hoeveelheid water. Nooit alles tegelijk aanpassen.
Dit zal namelijk geen eect hebben. De aanpassing kan
nodig zijn in verband met:
- kwaliteit en soortelijk gewicht van het meel
- temperatuurverschillen van de omgeving
- versheid van de ingrediënten.
• Het brood dat u zelf bakt, bevat geen conserverings-
middelen dus is derhalve ook maar beperkt houdbaar.
Indien u het brood luchtdicht verpakt, nadat u het goed
heeft laten afkoelen, kunt u het brood een paar dagen
goed houden. Uiteraard kunt u het brood ook invriezen,
zodat u het later kunt consumeren.
Wanneer u de tijdvertraging wilt gebruiken, dient u dit in te
stellen voordat u op de START-knop drukt.
Belangrijk: gebruik de tijdvertraging niet wanneer u
ingrediënten gebruikt die maar beperkt houdbaar zijn.
Volg de eerste 9 stappen beschreven in het hoofdstuk
“Brood bakken“, vervolgens; nadat u het juiste programma
en de juiste korstkleur heeft ingesteld, drukt u op de
pijltjes toetsen om de tijd op het display te verhogen of te
verlagen. Zie ook het hoofdstuk “Het display”.
+ = 10 minuten erbij
- = 10 minuten eraf
De tijd die u op het display ziet verschijnen, is de totaal
vereiste baktijd. De tijdvertraging is programmeerbaar tot
13 uur.
Voorbeeld: Het is 9.00 uur ‘s morgens en u wilt om 17.00
uur ‘s middags vers gebakken brood.
Doe alle ingrediënten in het bakblik. Plaats het bakblik in
de broodmachine. Sluit het deksel en druk op de MENU-
knop om het juiste programma in te stellen. Druk op de
9 | DE TIJDVERTRAGING INSTELLEN
Stap 12: Wanneer het brood klaar is, hoort u
enkele piepjes. Druk op de stoptoets en
houd deze toets gedurende enkele
seconden ingedrukt. De machine zal
nogmaals piepen om te bevestigen dat
u het programma heeft gestopt.
Verwijder de stekker uit de
wandcontactdoos en open het deksel
van de machine. Verwijder de bakvorm
met behulp van ovenhandschoenen. Laat
het brood in het bakblik ca. 10 tot 15
minuten afkoelen en houdt het bakblik
omgekeerd boven het aanrecht en schud
lichtjes het brood uit het blik.
Plaats het brood en het bakblik nooit
op de buitenkant van de machine of
direct op een plastic tafelkleed.
Let op: de aluminium bakvorm is niet
bestand tegen slaan, kloppen op het
aanrecht en duwen cq. drukken op de
zijkanten. Na het bakken is de hete
bakvorm week en dient deze niet
mechanisch te worden belast.
Wanneer het brood niet onmiddelijk los
komt, draai dan voorzichtig aan de as aan
de onderzijde van het bakblik totdat het
brood los komt. Indien u het brood uit de
machine haalt en de kneedhaak in het
brood blijft steken, verwijder deze
voorzichtig uit het brood. Laat het brood
eventueel nog verder afkoelen op een
rooster zodat u daarna de kneedhaak
met uw handen kunt verwijderen. Let
wel goed op dat de kneedhaak goed is
afgekoeld. Het is aan te bevelen om het
brood pas na 15-20 minuten door te
snijden.
Extra: Als u bijvoorbeeld een keer niet
op tijd thuis bent, verwarmt de
broodmachine nog 60 minuten na. Dit is
niet bij de programmatijd inbegrepen.
kleurknop om de korstkleur in te stellen en stel met de
grammenknop het juiste gewicht in. Druk op “+”
tot er 8:00 in het display verschijnt. Er zullen immers 8
uren voorbij gegaan zijn vanaf het moment dat u op de
START-knop gedrukt heeft tot het moment dat het brood
klaar moet zijn (17.00 uur ‘s middags). Druk op de START-
knop. De dubbele punt op het display zal gaan knipperen
en de tijd zal nu gaan aflopen tot het tijdstip bereikt is
waarop de broodmachine moet beginnen met kneden.
De broodmachine zal nu het hele ingestelde programma
doorlopen zodat het brood klaar is op het door u
gewenste tijdstip.
10 | ENKELE TIPS

8
Vraag: Waarom is er steeds verschil in de vorm en de
hoogte van het brood?
Antwoord: De vorm en de hoogte van het brood zijn
afhankelijk van de omgevingstemperatuur,
de kwaliteit en de hoeveelheid van de
ingrediënten.
Vraag: Waarom rijst het brood niet?
Antwoord: Gist vergeten, te weinig gist of oude gist
zorgen ervoor dat het brood niet rijst en
“plat” blijft.
Vraag: Hoe werkt de tijdvertraging?
Antwoord: De tijdvertraging mag niet ingesteld worden
onder de 1:28 uur of boven de 13 uur. De
tijdvertraging vereist een minimum
van 1 uur en 28 minuten om alle
noodzakelijke processen door te lopen.
De ingrediënten kunnen bederven wanneer zij
langer dan 13 uur in de broodmachine blijven
zonder gebakken te worden. Voor verdere
uitleg, zie het hoofdstuk “Het gebruik van de
tijdvertraging“.
Vraag: Waarom mogen aan de basis-ingrediënten
geen extra ingrediënten worden toegevoegd?
Antwoord: Om aan het deeg cq. het brood de juiste
vorm te geven en te laten rijzen zoals het
hoort, moeten de gedroogde krenten en
dergelijke later toegevoegd worden.
Bovendien bestaat de kans dat deze
ingrediënten stuk gekneed worden tijdens
het kneedproces. Zij kunnen aan elkaar
gaan kleven en niet gelijkmatig verdeeld
worden over het deeg. U kunt deze
ingrediënten pas na het eerste “piepsignaal”
toevoegen. U kunt geen ingrediënten
toevoegen wanneer u het snelle programma
gebruikt.
Vraag: Kan er verse melk gebruikt worden in plaats
van water?
Antwoord: Dat kan, maar dan dient u ervoor te zorgen
dat u dezelfde hoeveelheid vocht behoudt.
Bijvoorbeeld: als in een recept 210ml water
staat, kunt u dit vervangen door 210ml melk
of door 105ml water en 105ml melk. Het is
belangrijk dat u de totaal aangegeven
hoeveelheid vocht gebruikt.
Vraag: Het brood is bijna of helemaal niet meer
uit het bakblik te krijgen, wat kan ik daaraan
doen?
Antwoord: Dit kan twee oorzaken hebben. De anti-
aanbaklaag van uw bakblik is versleten
- Indien u een door de molen gemalen bloem of volkoren
bloem neemt, kan het brood wat platter zijn (geen mooi
bolletje).
- Als uw brood helemaal niet rijst, dan is het nodig de
gist te controleren. Heeft u niet vergeten de gist erbij
te doen? Indien het brood slechts lichtjes gerezen is,
kan het zijn dat de gist te oud was.
- De activering van de gist wordt verhinderd door te koud
of te warm water.
- Kijk ook de gebruikte dosis zout na. Verzeker u ervan
dat u niet teveel zout heeft gebruikt.
11 | PROBLEMEN EN OPLOSSINGEN
Er bestaan verschillende factoren die uw brood kunnen
doen mislukken. Hieronder zullen wij een aantal
voorbeelden van slechte resultaten weergeven en
eventueel de oplossingen.
Het brood is ingezakt
- Indien uw brood ingezakt lijkt langs alle kanten, dan
wil dit zeggen dat het deeg te vochtig was. Probeer iets
minder water toe te voegen. Wanneer u geconserveerd
fruit of groenten gebruikt, laat ze dan eerst goed
uitlekken en wrijf ze goed droog voordat u ze gebruikt.
Ze zijn langere tijd doordrenkt waardoor ze overtollig
vocht bezitten. U kunt ook proberen om een lichtere
bloemsoort te gebruiken.
- Het kan ook overrijs zijn. Het deeg is zoveel gerezen
dat het deeg de rijzing niet aan kan. Probeer iets
minder gist toe te voegen, 1 à 2 gram.
In dit geval kan het ook aan de hoeveelheid vocht
liggen. Het kan zijn dat het meel wat u gebruikt minder
water nodig heeft dan er standaard in de recepten
staat. Voeg een volgende keer 10 tot 20 ml. minder
water toe.
Het brood is in het midden onvoldoende gebakken
- Indien de binnenkant van het brood onvoldoende
gebakken is, kan dit aan de gebruikte bloemsoort
liggen. Dit gebeurt meestal door het gebruik
van zwaardere bloemsoorten, zoals roggebloem of
volkorenbloem. Probeer één kneedproces meer te
gebruiken wanneer u deze bloemsoorten gebruikt.
Wanneer de broodmachine het eerste kneedproces heeft
beëindigd, zet u het apparaat stop. Stel dan het
apparaat opnieuw in en druk op start: het apparaat
zal opnieuw beginnen met kneden, er is nu een grotere
hoeveelheid lucht in het deeg opgenomen.
- U kunt ook de bruiningsgraad van de korst op donker
zetten, waardoor de afbaktemperatuur wat hoger
wordt.
Het brood is overgelopen
- Indien uw brood hoger rijst dan normaal, heeft u teveel
gist gebruikt. Controleer of u de juiste hoeveelheid en
type gist heeft gebruikt.
- Teveel suiker kan uw gist te veel activeren. Verminder
de hoeveelheid suiker en pas ook op voor gedroogde
vruchten of honing die veel suiker bevatten. Probeer uw
hoeveelheid water met 10 tot 20 ml te verminderen.
Denk eraan dat een geringere vochtigheid het gist
verhindert te actief te zijn.
- Het gebruik van een zeer fijn gemalen bloem kan het
brood soms ook te hard doen rijzen. Deze bloemsoorten
hebben niet zo’n actieve gist nodig om te rijzen dan
zwaardere of grover gemalen bloemsoorten.
Het brood is te droog
- Gebruik iets minder bloem of voeg 1 eetlepel vloeistof
toe. Wanneer de broodmachine zwaarder deeg mengt of
wanneer hij langere kneedtijden gebruikt, kan het zijn
dat de machine lichtjes begint te trillen op het
aanrecht. Zorg er dus voor dat het apparaat op een
stabiel oppervlak staat, niet te dicht in de buurt van een
ander voorwerp en ook niet te kort op de rand van het
aanrecht.
Platte broden
12 | VEELGESTELDE VRAGEN

9
die in de gebruiksaanwijzing staan, zijn
basisrecepten. Het kan voor komen dat er
meel gebruikt wordt wat minder vocht
nodig heeft dan aangegeven staat. Wij
adviseren 10 tot 20 ml. vocht te minderen.
Het probleem zal nu opgelost zijn.
Vraag: Als ik rozijnenbrood maak, zitten alle
rozijnen onderin. Wat kan ik hieraan doen?
Antwoord: De deegbal is waarschijnlijk te compact
om de rozijnen goed door het deeg te kunnen
kneden. Voeg bij het basisrecept 10 tot
20 ml. vocht toe, zodat de deegbal soepeler
is en de rozijnen er makkelijker door heen
gekneed kunnen worden. Let wel op dat de
rozijnen zelf niet te nat zijn.
Vraag: De korst is soms lichter, soms donkerder?
Antwoord: Dit kunt u zelf instellen door de toets
“korst”. Voor een lichte korst zet u het
apparaat op licht (Low), voor een donkere
korst zet u het apparaat op donker (Hi).
Vraag: Wat is er gebeurd wanneer het brood even
hoog gekomen is als het deksel?
Antwoord: U heeft teveel gist en/of suiker gebruikt,
waardoor er meer gasbellen ontstaan zijn
binnenin het brood en het teveel gerezen is.
Vraag: Waarom mag u geen brood maken op basis
van fruit met de werkwijze “vlug”?
Antwoord: De gisttijd wordt verminderd bij dit
programma en wanneer u meer ingrediënten
gebruikt, wordt de baktijd ook beïnvloed
zodat u geen mooi resultaat zult krijgen
wanneer u dit programma met dergelijke
recepten gebruikt.
Vraag: De broodmachine kneedt trager bij het
maken van zwaardere broden?
Antwoord: Dit is een normaal verschijnsel wanneer u
deze recepten gebruikt. Dit is geen probleem
voor de machine, het is wel aan te raden een
eetlepel vloeistof toe te voegen.
Voordat u het toestel weg wilt brengen voor reparatie
Uw brood mislukt steeds
.
Wij adviseren u één maal een brood te maken met een
kant-en-klare broodmix van bijvoorbeeld Koopmans
of Honig. Deze kant-en-klare mixen hoeven alleen nog
maar aangevuld te worden met water en boter. Is het
resultaat goed, dat betekent dat uw machine in orde is en
zult u de versheid van uw normale ingrediënten moeten
controleren. Is het resultaat slecht, dan kunt u overleggen
met onze klantenservice of technische dienst wat u het
beste kunt doen. Het telefoonnummer vindt u op de
achterkant van deze gebruiksaanwijzing.
Let op: indien u een kant-en-klare mix gebruikt, dient u
rekening te houden met de hoeveelheid mix. De meeste
kant-en-klaar mixen zijn voor brood van 800 gram.
Het toestel werkt niet
- Is het ingeschakeld?
- De temperatuur van de broodmachine is te hoog
Het brood is ingezakt/Het midden is vochtig
- Het brood werd te lang in het bakblik gelaten na het
bakken.
- Er is teveel water of gist gebruikt.
Er komt rook uit de luchtgaten
- De ingrediënten zijn misschien op het
verwarmingselement gemorst.
of het brood is nog niet afgekoeld. Indien de
anti-aanbaklaag versleten is, adviseren wij
u een nieuw bakblik aan te schaen. Om
erachter te komen wat de oorzaak exact is,
adviseren wij u het volgende: zodra de
broodmachine klaar is, haalt men het bakblik
compleet met brood uit de machine en laat
het geheel 15 tot 20 minuten afkoelen op
het aanrecht. Houd daarna het bakblik
ondersteboven en schud het brood lichtjes
uit het bakblik. Laat het brood nog eens
15 minuten afkoelen op een rooster alvorens
het aan te snijden.
Vraag: Er is speling ontstaan op de kneedhaak. Hoe
komt dit en wat kan ik hieraan doen?
Antwoord: De anti-aanbaklaag aan de binnenkant van
de kneedhaak is dik, zacht en nog niet
volledig uitgehard. Dit uitharden gebeurt
pas als de machine in gebruik genomen
wordt. Door de druk die op de kneedhaak
komt te staan tijdens het kneden, zal de
anti-aanbaklaag aan de binnenkant dunner
en harder worden, waardoor er meer ruimte
ontstaat. Dit zal in de eerste weken gebeuren
en is volkomen normaal. De kneedhaak slijt
als het ware een beetje uit en zal niet verder
gaan dan dat.
Vraag: De kneedhaak blijft in het brood achter, wat
kan hieraan doen?
Antwoord: Niets, het is namelijk goed dat de kneedhaak
in het brood achter blijft. Als dit niet het
geval zou zijn, bestaat de kans dat er een
groot gat onderin het brood komt. Nu kan
het brood eerst afkoelen alvorens de
kneedhaak verwijderd wordt. Door het
afkoelen wordt het brood steviger en zal
er geen gat in het brood ontstaan. Tijdens het
eerste gebruik kan het zo zijn dat de
kneedhaak in het bakblik achterblijft. Dit
heeft alles te maken met de voorgaande
vraag.
Vraag: Hoe kan ik de binnenkant van mijn
broodmachine schoonmaken als het deeg
overgelopen is?
Antwoord: De binnenkant van de broodmachine
kan gereinigd worden met een ovenreiniger.
Let op dat het verwarmingselement goed
beschermd wordt. Het verwarmingselement
kan gereinigd worden door de machine één
of tweemaal, zonder inhoud, een
bakprogramma te laten afwerken. Het
verwarmingselement zal dan schoonbranden.
Vraag: Vanwege een dieet mag ik geen brood met
suiker, kan ik suikervrij brood maken in de
broodmachine?
Antwoord: Ja, dat kan. U kunt suiker weglaten uit het
basisrecept. Let echter wel op. Als u geen
suiker gebruikt, mag u ook geen zout
toevoegen. Dit om toch een goede rijzing te
krijgen.
Vraag: Mijn brood zakt in op het moment dat de
machine overgaat van rijzen naar bakken?
Antwoord: Dit kan twee oorzaken hebben. Er kan teveel
gist zijn gebruikt of er is teveel water
gebruikt. In de meeste gevallen wordt het
veroorzaakt door teveel water. De recepten
10
Tip! Indien u een grove meelsoort gebruikt, kan het zijn
dat u minder water moet gebruiken dan wij aangeven in
de recepten. Dit omdat een grove meelsoort minder vocht
opneemt.
14 | RECEPTEN
Wit brood 650 gram 800 gram
Witte bloem 400 gr. 500 gr.
Water 250 ml 300 ml.
Boter/ olie 7 gr. 10 gr.
Suiker 7 gr. 10 gr.
Zout 7 gr. 10 gr.
Gedroogde gist 5 gr. 6 gr.
Programma: Basis, Vlug of Sandwich
Volkorenbrood 650 gram 800 gram
Volkorenmeel 400 gr. 500 gr.
Water 275 ml 325 ml.
Boter/ olie 7 gr. 10 gr.
Suiker 7 gr. 10 gr.
Zout 7 gr. 10 gr.
Gedroogde gist 5 gr. 6 gr.
Programma: Frans of Volkoren
Tarwebrood 650 gram 800 gram
Volkorenmeel 250 gr. 300 gr.
Witte bloem 150 gr. 200 gr.
Water 250 ml 300 ml.
Boter/ olie 7 gr. 10 gr.
Suiker 7 gr. 10 gr.
Zout 7 gr. 10 gr.
Gedroogde gist 5 gr. 6 gr.
Programma: Frans of Volkoren
Honingbrood 650 gram 800 gram
Witte bloem 400 gr. 500 gr.
Water 250 ml 300 ml.
Boter/ olie 7 gr. 10 gr.
Honing* 7 gr. 10 gr.
Zout 7 gr. 10 gr.
Gedroogde gist 6 gr. 8 gr.
* Gebruik bij voorkeur vloeibare honing.
Programma: Basis, Frans of Volkoren
Zonnebloempitbrood 650 gram 800 gram
Witte bloem 400 gr. 500 gr.
Water 250 ml 300 ml.
Boter/ olie 7 gr. 10 gr.
Suiker 7 gr. 10 gr.
Zout 7 gr. 10 gr.
Gedroogde gist 5 gr. 6 gr.
Extra ingrediënten:
Zonnebloempitten 50 gr. 75 gr.
Programma: Zoet
Cake
Cakemeel 250 gram
Boter 200 gram
Eieren (geklopt) 3 eieren
Suiker 200 gram
Vanillesuiker 1 zakje
Melk 4 eetlepels
Programma: Cake
Wij raden u aan de ingrediënten in het bakblik te doen.
Daarna stelt u de machine in en voordat u op start drukt,
dient u even met een houten lepel de ingrediënten om
scheppen. Dit bevordert namelijk de kneding.
De bovenkant van het brood is gebarsten en ziet bruin
- Te veel bloem, gist of suiker.
Te klein brood
- Niet genoeg bloem, gist, suiker of water
- Gebruik van volkorenbloem of bloem die chemische gist
bevat.
- Gebruik van een slecht gisttype.
- Gebruik van bloem of gist die niet vers meer is.
Brood onvoldoende gebakken
- Stoptoets werd ingedrukt na inschakeling.
- Het deksel werd geopend tijdens het bakproces.
Een deel van het brood is nog bestrooid met bloem
- Niet genoeg water.
Brood is slecht gevormd
- Niet genoeg bloem.
- Niet genoeg water.
Brood is te hard gebakken
- Te veel suiker.
- Korstkleur op donker gezet.
Zet voordat u uw broodmachine wilt reinigen het apparaat
uit, verwijder de stekker uit de wandcontactdoos en laat
het apparaat volledig afkoelen.
Buitenkant
Reinig de buitenkant van het apparaat met een vochtige
doek of spons. Verwijder het bakblik alvorens te reinigen.
Indien noodzakelijk kunt u de buitenkant van het apparaat
met behulp van een mild afwasmiddel. Gebruik geen
agressieve reinigingsmiddelen! Dompel het apparaat, de
stekker en het snoer niet in water of andere vloeistoen.
Binnenkant
De binnenkant van het apparaat kunt u voorzichtig met
een licht vochtige doek schoonmaken. Pas op met het
schoonmaken van het verwarmingselement.
Bakblik en kneedhaak
Het bakblik en de kneedhaak kunt u reinigen met warm
water. Let hierbij op dat u de anti-aanbaklaag niet
beschadigd. Indien het niet lukt om de kneedhaak uit het
bakblik te verwijderen, dient u het bakblik volledig te laten
afkoelen. Vervolgens giet u een beetje warm water in het
bakblik zodat de kneedhaak onder water staat. Het water
zal er nu voor zorgen dat de klevende deeltjes oplossen en
de kneedhaak verwijderd kan worden. Het bakblik nooit
langer dan 15 tot 30 minuten laten weken.
Gebruik geen schoonmaakmiddelen of afwasborstels,
deze kunnen de anti-aanbaklaag van het bakblik en de
kneedhaak beschadigen. Het bakblik en de kneedhaak
zijn niet geschikt om in de afwasmachine te reinigen.
13 | REINIGING EN ONDERHOUD

11
Aardbeienjam
Aardbeien 450 gram
Suiker 275 gram
Citroensap (vers) 3 eetlepels
of citroensap (geconcentreerd) 1 eetlepel
Programma: Jam
Als u vruchten gebruikt met pitten, moet u deze eerst
verwijderen. Als u andere vruchten gebruikt, kan het zijn
dat u de hoeveelheid suiker of citroensap moet aanpassen.
Anders loopt u het risico dat het te zoet wordt.
Let op: In het fruit zitten fruitsuikers. De hoeveelheid
fruitsuikers kunnen per vrucht verschillen. Als er in een
vrucht veel fruitsuikers zitten, kan het gebeuren dat in
combinatie met de toegevoegde hoeveelheid suiker
de jam overkookt. Blijf daarom altijd in de buurt van de
machine als u jam maakt. Als de jam dreigt over te koken,
kunt u het deksel even voorzichtig open en weer dicht
doen totdat de jam weer gewoon kookt. Pas op: er komt
stoom uit de machine.
Abrikozenjam
Verse abrikozen 450 gram
Suiker 200 gram
Citroensap (vers) 3 eetlepels
of citroensap (geconcentreerd) 1 eetlepel
Programma: Jam
Rozijnen en notenbrood 650 gram 800 gram
Witte bloem 320 gr. 500 gr.
Eieren * 1 2
Water * 200 ml 300 ml
Boter/ olie 15 gr. 20 gr.
Suiker 5 gr. 10 gr.
Zout 5 gr. 10 gr.
Gedroogde gist 6 gr. 10 gr.
Extra ingrediënten:
Rozijnen 150 gr. 300 gr.
Noten 50 gr. 100 gr.
Programma: Zoet
Let op: Rozijnen en eventueel noten eerst wellen, anders
onttrekken zij het vocht uit het brood. Voeg de extra
ingrediënten toe na het eerste piepsignaal.
* U dient eerst de eieren in een maatbeker te doen en
daarna aanvullen tot 200/300 ml water. Dit in verband met
het vochtgehalte.
Deeg voor broodjes
Witte bloem 400 gr.
Eierdooier * 1
Water * 250 ml
Boter/ olie 15 gr.
Suiker 8 gr.
Zout 8 gr.
Gedroogde gist 11 gr.
Programma: Deeg
1 extra geklopt ei om de broodjes te besmeren.
* De hoeveelheid vocht (water en geklopte eieren samen)
moet ongeveer 250 ml. bedragen.
Werkwijze: Neem het deeg uit de machine bij het
piepsignaal. Verdeel het deeg in bolletjes. Leg ze op een
licht geoliede bakplaat. Laat het deeg gedurende een 40-
tal minuten rijzen. Besmeer elk bolletje met het geklopte
ei. Bak in een oven op ± 200°C gedurende 15 à 20 minuten
of tot wanneer ze een mooie goudgele kleur hebben.
Indien u glutenvrij brood wilt maken (voor coeliakie
patienten) verwijzen wij u door naar de Nederlandse
Coeliakie Vereniging.
Elk soort glutenvrij meel behoeft namelijk een eigen
recept en bij de coeliakie vereniging kunnen zij u het beste
helpen.
Nederlandse Coeliakie Vereniging
Postbus 65
3860 AB Nijkerk
Tel: 033 - 247 10 40
Fax: 033 - 247 10 42
E-mail: info@coeliakievereniging.nl
Website: www.glutenvrij.nl

12
Programma overzicht BM55
Programma Tijdinstelling 1e Rustperiode 2e Rijsperiode 1 Rijsperiode 2 Bakken Warmhouden Piepsignaal*
kneding kneding
1 Basis - 800g 13:00-3:00 12m 20m 18m 25m 40m 65m 60m 2:20
Basis - 650 g 13:00-2:53 11m 20m 17m 25m 40m 60m 60m 2:15
2 Frans - 800 g 13:00-3:50 20m 40m 25m 30m 45m 70m 60m 2:40
Frans - 650 g 13:00-3:40 18m 40m 22m 30m 45m 65m 60m 2:35
3 Volkoren - 800 g 13:00-3:40 12m 25m 23m 35m 60m 65m 60m 2:55
Volkoren - 650 g 13:00-3:32 11m 25m 21m 35m 60m 60m 60m 2:50
4 Vlug 2:10 12m 10m 13m 0m 25m 70m 60m 1:45
5 Zoet - 800 g 13:00-2:55 12m 5m 23m 30m 40m 65m 60m 2:30
Zoet - 650 g 13:00-2:50 12m 5m 23m 30m 40m 60m 60m 2:25
6 Glutenvrij - 800 g 13:00-2:55 12m 10m 13m 30m 40m 70m 60m 2:25
Glutenvrij - 650 g 13:00-2:50 12m 5m 13m 30m 40m 70m 60m 2:25
7 Extra snel - 800 g 1:38 13m - 5m 30m - 50m 60m 1:28
Extra snel - 650 g 1:28 13m - 5m 25m - 45m 60m 1:18
8 Deeg 13:00-1:30 25m - - 30m 35m - - -
9 Jam 1:20 15m - - - 45m 20m - -
10 Cake 1:50 7m 4m 10m 9m - 80m 60m 1:34
11 Sandwich - 800 g 13:00- 3:00 17m 40m 8m 25m 35m 55m 60m 2:04
Sandwich - 650 g 13:00-2:55 17m 40m 8m 25m 35m 50m 60m 1:59
12 Alleen bakken 1:00 - - - - - 10-60m 0-60m -
Tijdinstelling: 13:00 uur is de maximale tijdvertraging welke u in kunt stellen
en de tijd die daarna staat, is de totale programmaduur.
Rustperiode: de machine zal tijdens deze periode niets doen en de deegbal zal een beetje rijzen.
Warmhouden: de machine zal het brood nog 60 minuten warmhouden. Deze extra functie is
voor mensen die niet op tijd bij de machine zijn en toch een warm brood willen.
*De kolom Piepsignaal geeft de tijd aan die in het display staat voor het toevoegen van de extra ingrediënten.
( m = minuten )

ENGLISH
• Please read these instructions before operating the
appliance and retain for future use.
• The appliance is intended solely for domestic use within
the home.
• Attention! Avoid touching hot surfaces, especially the
outside of the appliance when the appliance is in use.
• Before plugging into a socket, check that the voltage in
your home corresponds with the voltage printed on the
bottom of the appliance.
• Never let the power cord of the appliance hang over the
edge of a table or counter, touch hot surfaces or become
knotted.
• Never place this appliance on or near a hot gas or
electric burner or where it could touch a heated oven or
microwave oven. Do not allow this appliance to touch
curtains, wall coverings, clothing, dishtowels or other
flammable materials during use.
• Always use the appliance on a secure, dry, level surface.
• Never leave the appliance unattended when in use.
• Always carry out regular checks of the power cord to
ensure no damage is evident. Should there be any signs
that the cord is damaged in the slightest degree, the
entire appliance should be returned to the Customer
Service Department. For your own safety, only use the
accessories and spare parts from the manufacturer
which are suitable for the appliance.
• For your own safety, only use the accessories and spare
parts from the manufacturer which are suitable for the
appliance.
• Always return the appliance after a malfunction, or if
it has been damaged in any manner to the Customer
Service Department for examination, repair or
adjustment as special purpose tools are required.
• Never unplug it from the socket by pulling on the cable.
• Always ensure that your hands are dry before handling
the plug, switch or power cord.
• An electrical appliance is not a toy, and should therefore
always be placed outside the reach of children. Children
are not always able to understand potential risks. Teach
children a responsible handling of electrical appliances.
• This appliance is not intended for use by persons
(including children) with reduced physical, sensory or
mental capabilities, or lack of experience and knowledge,
unless they have been given supervision or instruction
concerning use of the appliance by a person responsible
for their safety.
• Unplug the appliance as soon as you have finished using
it and when you are cleaning it.
• If an extension cord is used, check the marked electrical
rating of the extension cord to the electrical rating on
the appliance. Make sure that it can not be pulled on by
children or tripped over unintentionally.
• Should you decide not to use the appliance anymore,
make it inoperative by cutting the power cord after
removing the plug from the socket. We also recommend
making all potentially dangerous parts of the appliance
harmless, particularly for children who might be tempted
to play with it.
• Never use the appliance if it is not working properly,
or if it has been damaged. Any intervention other than
cleaning and normal maintenance by the customer must
be carried out by an approved service centre.
• Never immerse any part of the main body, lid, power
cord and plug in water or any other liquid to protect
against electrical hazards.
• If the appliance is used for other purposes than intended,
or is it not handled in accordance with the instruction
manual, the full responsibility for any consequences will
rest with the user. Any damages to the product or other
things are not covered by the warranty.
• This appliance is not intended to be operated by means
of an external timer or separate remote-control system.
1. Display
2. Lid with window
3. Housing
4. MENU-button
5. Programs
6. START-/ STOP-button
7. Size-button - GRAM
8. Timer +/ -
9. Crust-button - KLEUR
10. Breadpan
11. Kneading blade
13
1 | SAFETY INSTRUCTIONS
1. Basis
2. Frans
3. Volkoren
4. Snel
5. Zoet
6. Glutenvrij
7. Extra-snel
8. Deeg
9. Jam
10. Cake
11. Sandwich
12. Bakken
MENU
KLEUR GRAM
START
STOP
Licht Mid Dkr 650g 800g
+ -
4
10 11
5 5
16
79 8
1
2
3

14
The most important factors for baking good bread are
the quality, the freshness and the correct amount of
ingredients.
Flour
Flour is the most important ingredient for baking bread.
The weight of the flour varies from type to type. That
is why it is necessary to weigh the right amount with
a kitchenscale. Advice: when you buy flour check the
package. It should say that it is suitable for baking bread.
Gluten
Gluten is a network of elastics strands, which interlock to
trap the gas produced by yeast.
Yeast
Without yeast the bread will not rise. Yeast needs liquid,
sugar and warmth to grow and rise. Dried yeast has been
used in all the recipes in this instruction book. Before
using dried yeast always check the use by date, as stale
yeast will prevent the bread from rising. Some yeast’s
are more active in hot climates. So it is possible that you
have to use less than what is written in the recipes.
Salt
Salt does not only give flavour to the bread, but also
regulates the activity of the yeast, toughens the dough
and prevents the bread from rising too fast.
Butter/oil
Butter or oil adds flavour and retains the moisture of the
bread. Butter or oil must have roomtemperature before
adding.
Sugar
Sugar provides sweetness and flavour, browns the crust
and produces food for the yeast. Regular white sugar,
brown sugar of honey may be used. Note: Never use
sugar cubes because it may cause damage to the non-
stickcoating of the breadpan.
Liquids
Liquids includes water, milk and egg. DO NOT use any
perishable liquids with the timer. You can replace the
total amount of water with milk. Milk makes the bread
softer and tastier. Eggs increase the nutritional value of
the bread. They help with flavour, tenderness and are
usually used in the sweeter type of breads. The amount
and temperature of liquids is extremely important. It is
allright to open the machine to check the consistency
of the dough. Do this after about 5 to 10 minutes of
kneading. The dough should be a smooth, round
elastic ball. If it is too dry, add liquid ½ to 1 tablespoon
at a time; too wet, add 1 tablespoon of flour at a time.
With a normal roomtemperature, 21°C, you should use
lukewarm water: cold water does not activate the yeast
and too hot water activates it too strongly.
Other ingredients
Fruits and nuts etc. are added later. When the first
knead is complete, the machine will sound short beeps,
indicating it’s time to add other ingredients (fruits, nuts,
etc.). If added before this stage, excessive kneading will
cause the ingredients to break down, rather than hold
The quality of the bread you make in the breadmaker
depends on a lot of factors. The more you use the
breadmaker, the faster you learn these factors and how to
influence the result. The breadmaker, relatively easy to use,
requires a correct dosage of the ingredients. We advise you
to use a kitchenscale which weighs per grams.
The breadmaker gives you a choice between the dierent
programs. Select the program that is suitable for the type
of bread you want to make, or otherwise indicated in the
recipe.
Put the yeast on top of the flour and as the last ingredient,
preventing it to come in contact with the salt, sugar
and water and/or milk. Make sure that your ingredients
are fresh. Check the freshness of the yeast by dissolving
1 teaspoon of sugar in half a cup of water and add 1
teaspoon of yeast. After a few minutes the mixture should
bubble and then you’ll know that the yeast is fresh.
Check the dough during the kneading. After approx. 5 to
10 minutes it should look like a smooth, elastic round ball.
Add 1 tablespoon of water when the dough is lumpy or
add 1 tablespoon of flour when the dough is too wet.
Make sure that you add the ingredients, including the
water, in the order indicated in the manual and check if
they are roomtemperature. Take the butter and the yeast
out of the refrigerator on time.
Sometimes the bread can rise too fast. If the
Before you use the appliance for the first time, please do
as follows: Carefully unpack the appliance and remove
all the packaging material. Keep the material (plastic
bags and cardboard) out of reach of children. Check the
appliance after unpacking for any damage, possible from
transportation. In the box you will find the breadmaker, the
instruction manual, the breadpan and the kneadingblade.
Place the appliance on a stable and heat resistant surface.
Wipe the housing of the appliance only with a damp cloth
and rinse the breadpan and kneadingblade with warm
water. Thoroughly dry the parts.
The breadpan and kneadingblade have a non-
stickcoating that is why you may never clean these parts
with detergents, a brush or sponge. Only use a damp
cloth and water. That is enough to keep everything clean.
When you plug in the appliance for the first time, the
breadmaker will give a hard beep and the display shows
“3:00”. The breadmaker is ready for use. Note: the new
appliance can give o a bit of smoke at the first use, this is
perfectly normal and causes no harm to the appliance.
2 | BEFORE FIRST USE
4 | THE INGREDIENTS
3 | THE ART OF BAKING
• The largest bread that can be made in this machine is
2.0Lb (800 g). So follow the recipes in this instruction
manual for the maximum quantities of flour and yeast
that may be used.
• If the power cord of this appliance is damaged, it must
be replaced by the manufacturer, the manufacturer’s
customer service or a similarly qualified person to avoid
associated dangers.
roomtemperature or the temperature of the ingredients is
too high it can cause the bread to rise too fast.
After baking bread, let the breadmaker cool down for 15-
20 minutes, before baking another bread.

15
1: Basic This program is mostly used for baking a
Basis white bread.
2: French The bakingtime with this program is
Frans longer than with the normal program
which gives the bread a harder crust.
3: Whole wheat This program is used for preparing bread
Volkoren made from heavier flours, such as whole
wheat-, wheat- and multi-grainbread.
These flours need more time kneading
and rising. The bread will generally be
smaller because the flour is heavier.
4: Quick You can use this program for baking a
Vlug white bread in short amount of time.
The bread will be smaller then a bread
baked with the normal program.
5: Sweet For preparing “sweet“ breads like bread
Zoet with raisins and nuts.
6: Gluten free You can use this program for baking
Glutenvrij a gluten free bread. The machine with
knead it, let it rise and will bake it.
7: Ultra-Fast You can use this program for baking a
Extra snel white bread of 650 grams within 90
min. and within 100 min. a bread of 800
grams.
8: Dough With this program you can make dough
Deeg for buns, pizza or any other recipe with
needs dough. The dough will not be
baked. A signal sounds, indicating that
the dough is ready and can be removed
from the breadpan.
9: Jam For preparing a delicious jam. Note:
Make sure that you remove all the pips
before you put the ingredients in the
breadpan. Sharp pips can damage the
non-stickcoating. Process: Put all the
ingredients in a breadpan and select
the JAM program. Press Start and the
breadmaker will first heat up the
ingredients. After that the breadmaker
will mix and eventually the breadmaker
will cool down the jam. After the
breadmaker has finished you will hear a
beep-signal. You can put the jam in a
jar or container and leave it to cool. As
soon as it has cooled down suciently
you can close the jar or container and
keep it in the refrigerator.
10: Cake For preparing a bread made with
bakingpowder instead of yeast. Breads
made with this program will be less high
and more compact. The timer cannot be
used with this program because of the
immediate activity of the bakingpowder.
If you want to make cake with this
program we advise you to put all the
ingredients in the breadpan. Select the
program and before you press start, stir
the ingredients with a wooden spoon.
This increases the kneading.
11: Sandwich You can use this program to make a soft
and airy bread for sandwiches. Attention!
You can not set the color-crust when
using this program.
When, after switching on the breadmaker, the display says
“H:HH”, it means that the temperature of the breadmaker
is still too high. Open the lid and leave the breadmaker
to cool down before you bake another bread. When the
display says EE0 or EE1, unplug the breadmaker and
contact the service department.
MENU-button
Press this button to select one of the automatic
programs available. These settings are listed on the last
page of this manual. Every time you press this button
you will hear a beep and the number of the program
changes. The program is shown on the display. This
breadmaker has 12 programs (see: Programs).
START- and STOP-button
With this button you can either start or stop the program.
TIP: If you have chosen the wrong program, you can
alter this by pressing the stop-button for a few seconds.
You can reset the breadmaker with the correct program.
START: to start a program, press the button and you will
hear a beep. The colon in the time on the display will
blink and the time starts to countdown.
STOP: to stop a program, press the button for a few
seconds until you hear a beep. The sound confirms that
you have stopped the program.
COLOR-button (KLEUR)
Press the color-button to select one of the three crust
colour settings available for the bread settings only; light,
medium or dark.
TIP: If you try a recipe for the first time, we advise you
use crust colour medium.
GRAM-button
You use this button to select the size of bread you wish
to make. You can choose a bread of 650 or 800 grams.
TIP: The total amount of ingredients listed in the recipe,
is the size/ weight of the bread you are going to make.
TIMER (+/ -)
For use when setting the timer to delay baking. By
pressing the buttons «+» and «-», the time will move
up or down in 10 minutes increments to preset the
programmable timer. See: How to use the preset timer.
ON/OFF?
How to check if the
machine is working or if
the program is running?
If the colon blinks, the
program is running.
If the colon is steady, the
program has stopped.
5 | THE DISPLAY
7 | PROGRAMS
6 | ERRORS IN THE DISPLAY
their shape. Be careful not to use ingredients which are
too big and too hard. They can cause damage to the
non-stickcoating.

16
If you wish to use the timer, you must set the timer before
you press the START-button.
Important: do not use the timer if you use perishable
ingredients.
Follow the first 9 steps of the chapter “Baking bread“, then;
after you have selected the right program and the right
crust colour, press on the timer-buttons to increase or
decrease the time on the display. See the chapter “The
display”.
+ = 10 minutes to
- = 10 minutes o
The time shown on the display is the total amount of
processing time. The timer can be programmed up to 13
hours.
medium takes 3 hours.
During the kneadingprocess a “beep-signal” sounds: after
this “beep-signal” you can add extra ingredients such as
dried currants, nuts or other products. Open the lid, add
the ingredients, close the lid and the kneading process will
proceed. Attention: Let currants, raisins and nuts steep
before adding and dry them with a kitchen towel. Make
sure that the ingredients are not too large or too sharp,
otherwise they can damage the non-stickcoating of the
breadpan.
Step 12: When the bread is finished baking, the
breadmaker will sound double “beeps“ and
display will read “0:00“. Press the
STOP button and hold it for several seconds.
The breadmaker will beep again to confirm
that you have de-activated the program.
Unplug the breadmaker and open the lid.
Remove the breadpan with ovenmitts as it is
very hot! Leave the bread in the breadpan to
cool o for 10 to 15 minutes. Turn the
breadpan upside down and shake to loosen.
Never place the bread and the breadpan on
the outside of the breadmaker or on a plastic
tablecloth. Attention: the aluminum
breadpan can not stand beating, knocking
on the counter and pushing and/or
squeezing on the sides. After baking the
hot breadpan is weak and must not be
loaded on mechanically.
When the bread does not loosen immediately,
carefully turn on the bottom of the
driveshaft until the bread loosens.
If you remove the bread from the
breadmaker and the kneading blade stays in
the bread, carefully remove it.
Leave the bread to cool on a wire rack and
remove the kneading blade afterwards with
your fingers. Make sure that the
kneadingblade is cooled down. It is
recommendable to cut the bread after 15 to
20 minutes.
Extra: If you do not wish or are not able to remove the
bread immediately, the breadmaker will automatically go
into a “keep warm“ setting, holding the temperature of the
bread for up to 60 minutes. This is not included in the total
time of the program.
9 | HOW TO USE THE TIMER
12: Bake With this program you can bake-o
ready-made-dough. This program is only
for baking. The program is preset at 60
minutes. Follow the instructions on the
package of the ready-made-dough. You
can also heat up a baked bread.
Step 1: Open the lid and remove the breadpan by
turning it a quarter to the left and pull it
straight up with the handle.
Step 2: Place the kneading blade on the drive shaft
in the middle of the breadpan. If the
kneading blade is not seated correctly,
ingredients may not be mixed and kneaded
properly. Before inserting the kneading
blade ensure that there are no crumbs
attached to the shaft inside the breadpan or
inside the hole in the kneading blade.
Step 3: Put the ingredients into the breadpan in the
following order:
1. First half of the flour
2. Water/milk
3. Butter/oil
4. Eggs - if necessary
5. The remaining flour
6. Sugar (place the sugar on one side)
7. Salt (place the salt on the other side)
8. Yeast (place the yeast in the center)
Attention: The yeast may not come in
contact with the water. The possibility exists
that the water will activate the yeast before
the ingredients are kneaded properly.
Step 4: Wipe down the outside of the breadpan to
remove spillage. Place the breadpan in the
breadmaker and turn it a quarter to the right
making sure the breadpan stands firmly into
position.
Step 5: Close the lid.
Step 6: Put the plug into a socket. The display shows
program 1 - 800 grams - time “3:00“.
Step 7: Select the right program with the MENU-
button.
Step 8: With the COLOR-button you can select the
colour of the crust. You can select light (Low),
medium (Mid) or dark (Hi). The selected crust
will be shown at the top of the display
with a “∆“.
Step 9: With the GRAM-button you can select the
right size of bread you wish to make, 650 or
800 grams. The selected size will be shown
on the top right of the display with a “∆“.
Step 10: Set the timer with the timer-buttons (+/ -).
See also: “How to use the preset timer”.
Step 11: Press the START-button. The colon will now
blink, indicating that the program is
activated.
You can find an overview of the exact times on the last
page of the English manual.
The time which is shown in the display is given in hours
and minutes. For example: Program 1, Basic, crustcolour
8 | BAKING BREAD

17
Question: Why does the shape and height of the bread
dier?
Answer: The shape and height of the bread depend on
the room temperature, the quality and
amount of the ingredients.
Question: Why did the bread not rise?
Answer: Forgot to add the yeast, too small amount of
yeast or old yeast cause the bread not to rise
and stay “flat“.
Dierent factors can cause the bread to fail. We will set a
few examples below of bad results and solutions.
The bread has collapsed
- If your bread has collapsed on all sides, the dough was
too wet. Add less water. When you use preserved fruits
11 | PROBLEMS THAT MAY OCCUR
or vegetables, drain them first and dry them before
using. They are soaked and contain too many fluids. You
can also use a lighter flour.
- Overrise is also a possibility. Usually this is because the
ingredients are not in balance. The dough has risen too
much and can only collapse. Add less yeast, 1 or 2
grams. Too many liquids is also possible. It is possible
that you are using flour that needs less water than the
recipe states. The next time add 10 to 20 ml. less water.
The bread is not baked enough in the middle
- If the inside of the bread is not well baked, the flour
you used may be the cause. This usually happens with
heavy flours, such as whole wheat or rye. Try to use an
extra kneadingcycle when you use one of these flours.
Once the breadmaker has finished the first kneading-
cycle, de-activate the program. Set the program again
and press start. The breadmaker will start kneading
again and the dough will have more air in it.
- You can also set the crust on dark, which make the
bake-o temperature a little higher.
The bread has run over
- If your bread rises more then normal, you have used too
much yeast. Check if you used the right amount and the
right type of yeast.
- Too much sugar can over-activate the yeast. Use less
sugar and also be careful with dried fruits or honey. Try
to add less water, 10 to 20 ml. Remember that a too
small amount of fluid restrains the yeast.
- The use of very fine grinded flour can also cause the
bread to rise too much. These flours do not need as
much yeast as other types of flours.
The bread is too dry
- Use less flour or add 1 tablespoon of liquid.
When the breadmaker is mixing heavy dough or when
it uses longer kneadingtimes, it is possible that the
breadmaker slightly shakes on the kitchencounter. Make
sure that the breadmaker is placed on a stable surface,
not to close near the edge.
Flat breads
- When you use flour grinded by a mill or whole wheat
flour, it is possible that the top of bread is flat.
- If the bread did not rise at all, check the use by date of
the yeast. Did you forget to add the yeast? If the bread
has only risen a little, check the use by date of the
yeast.
- The activation of the yeast is restrained by too cold or
too warm water.
- Checked the used amount of salt. Make sure you did not
add too much.
12 | FREQUENTLY ASKED QUESTIONS
For example: The present time is 9:00am and you want
the bread to be ready at 6:30pm. It is 9 hours and 30
minutes from now until 6:30pm. You should therefore set
the timer with the “+“ button to 9 hours and 30 minutes
- “9:30“. The breadmaker will now run the program and
make sure that the bread is ready on the time you want.
• Do check use by dates on ingredients and make sure
they are at room temperature.
• Do add ingredients to the breadpan in the order stated
in the recipe.
• Do use fresh ingredients.
• Do add the yeast as the last ingredient. Place the yeast
in a small hole in the center of the flour. It may not
come in contact with salt, sugar and water (milk).
• Tip: Check the freshness of the yeast by dissolving
1 teaspoon of sugar in half a cup of water and add 1
teaspoon of yeast. After a few minutes the mixture
should bubble, then you’ll know that the yeast is fresh.
• Tip: After approx. 5 to 10 minutes after starting
kneading you can check the dough. The dough should
be a smooth, elastic, round ball. Open the lid and touch
the top of the ball of dough carefully with your fingers.
Watch out, because the kneadingblade is still turning. If
the dough sticks to the breadpan, the dough is too wet.
If it does not stick to your fingers at all, the dough is too
dry.
• Tip: Salt restrains the activity of the yeast and sugar
boosts the activation. If, by any change, you may not
use one of these two ingredients, because of a diet, you
must take out the otherone. You will get bread without
salt and sugar.
• Leave the breadmaker to cool down for 10 to 20 minutes
before you use it again.
• Dierent types of bread have another structure and size
because the used ingredients dier.
Some breads can be more solid and smaller than others.
This is normal.
• It is possible with some recipes that you have to adjust
the proportions. By that we mean: the amount of yeast
or the amount of flour or the amount of water. Never
adjust them at the same time. This will take no eect.
The adjustment can be necessary in connection with:
- quality and specific gravity of the flour
- temperaturedierences of the surroundings
- freshness of the ingredients.
• The bread you bake, contains no preservatives so
therefore it is perishable. When you keep it airtight,
after you have let it cool down, you can store the bread
for a few days. The bread can also be frozen for up to
one month.
10 | TIPS FOR BAKING BREAD

18
Question: How does the timer work?
Answer: The timer can not be set under 1:50 hours
or over 13 hours. The timer needs a minimum
o 1 hours and 50 minutes to finish all
necessary processes. The ingredients
can perish when they stay in the breadmaker
over 13 hours without being cooked. For
further explanations, see chapter “How to use
the preset timer“.
Question: Why can I not add extra ingredients to the
basic ingredients?
Answer: To give the dough and/or the bread the right
shape and to let it rise properly, the dried
currants and others should be added
later. There is a chance that the ingredients
are being squashed during the kneading-
process. They can stick together and then they
will not be evenly divided in the dough. Add
the extra ingredients only after the first
“beep”. You may not add extra ingredients
when you use one of the fast programs.
Question: Can water be replaced by fresh milk?
Answer: Yes - but not when using the preset timer and
use the same amount of liquids that the recipe
states.
Question: I can not get the bread out of the breadpan,
what can I do?
Answer: This can be caused by two problems. The
non-stickcoating of your breadpan is worn out
or the bread has not yet cooled down. If
the non-stickcoating is worn out, we advise
you to buy a new breadpan. To find out what
the exact problem is, we advise the following:
as soon as the breadmaker has finished, take
out the breadpan with the bread and let it
cool down for 15 to 20 minutes. Turn the
breadpan upside down and slowly shake out
the bread. Leave the bread to cool for another
15 minutes on a wire rack before you cut it.
Question: There is a margin on the kneadingblade. What
causes this and how can I prevent this?
Answer: The non-stickcoating at the inside on the
kneading blade is thick, soft and not
completely hardened. The final hardening
happens at first operation of the machine.
Because of the pressure, which is being put on
the kneadingblade during kneading, the non-
stickcoating will become thinner and harder,
which causes more space to become between
the kneadingblade and the driveshaft in the
breadpan. This process will happen in the first
few weeks of operation. This is fully normal.
Question: The kneadingblade remains in the bread
after removing the bread out of the breadpan.
Is this normal?
Answer: It is perfectly normal that the kneadingblade
sticks in the bread. If this would not be the
case, there would be a large hole in the bread
after removing it out of the breadpan. Now
the bread will first cool down and therefore
become more solid, before the kneadingblade
is removed. The hole in the bread will in
this case be much smaller. During the first few
operations, it could happen that the
kneadingblade remains in the breadpan, this is
because of the question above.
Question: How can I clean the inside of the breadmaker
when the dough has run over?
Answer: You can clean the inside of the breadmaker
with a ovencleaner. Make sure that you
protect the heating element. You can clean
the heating element by letting the
breadmaker, without content, finish a
complete program, once or twice. The heating
element will burn clean.
Question: Because of a diet I am not allowed to eat
bread with sugar. Is it possible to make a
sugarfree bread in this machine?
Answer: Yes, this is possible. You can leave out the
sugar from the basic-recipe. When doing this,
you should leave out the salt from the recipe
also.
Question: My bread collapses, when changing from rising
to baking. What is the problem?
Answer: This could be caused by two problems.
Either you have used too much yeast or
too much water. In most cases the problem is
caused by too much water. The recipes in the
instruction manual are basic-recipes. It could
happen for example that the flour needs less
water then stated. We advise you to use 10 to
20 ml. less water. The problem should now be
solved.
Question: When I bake a bread with raisins, all the
raisins are at the bottom. What can I do to
solve this?
Answer: The dough is probably to compact and cannot
divide the raisins properly. Add 10 to 20 ml.
of water to the basic-recipe, causing the
dough to be more flexible and the raisins to
divide better amongst the dough. Please make
sure that the raisins themselves are not too
wet.
Question: The crust is sometimes light and sometimes
dark?
Answer: You can set this yourself with the button
“crust” (= korst). For a light crust set the
breadmaker on light (Low), for a dark crust set
the breadmaker on dark (Hi).
Question: What has happened when the bread is so high
that is touches the lid?
Answer: You have used too much yeast and/or sugar,
which causes more gas inside the bread and
too much rising.
Question: Why is not allowed to make bread with fruit
with the program “fast-superfast”?
Answer: The time for rising is less with this program
and when you use more ingredients, it
influences the bakingtime which causes a bad
result if you use such a program with these
ingredients, like fruit.
Question: The breadmaker is kneading slower when
making a heavy bread?
Answer: This is normal when you use these recipes.
It does not cause a problem for the machine,
but it is advisable to add one tablespoon of
fluids.
Before you take the bread away for repairs
You keep getting bad results
.
We advise to make one bread with a ready-made
breadmix. You only have to add water and butter. When
you get a good result, it means that your breadmaker has

19
Tip! When you use a coarse type of flour, it is possible
that you need to use less water then stated in the recipes.
Because a coarse type of flour can soak up less fluids.
White bread 650 gram 800 gram
White flour 400 gr. 500 gr.
Water 250 ml 300 ml
Butter/oil 7 gr. 10 gr.
Sugar 7 gr. 10 gr.
Salt 7 gr. 10 gr.
Dried yeast 5 gr. 6 gr.
Program: Basic, Quick or Sandwich
Whole wheat bread 650 gram 800 gram
Whole wheat flour 400 gr. 500 gr.
Water 275 ml 325 ml
Butter/ oil 7 gr. 10 gr.
Sugar 7 gr. 10 gr.
Salt 7 gr. 10 gr.
Dried yeast 5 gr. 6 gr.
Program: French or Whole wheat
Wheat bread 650 gram 800 gram
Whole wheat flour 250 gr. 300 gr.
White flour 150 gr. 200 gr.
Water 250 ml 300 ml
Butter/ oil 7 gr. 10 gr.
Sugar 7 gr. 10 gr.
Salt 7 gr. 10 gr.
Dried yeast 5 gr. 6 gr.
Program: French or Whole wheat
Bread with honey 650 gram 800 gram
White flour 400 gr. 500 gr.
Water 250 ml 300 ml
Butter/ oil 7 gr. 10 gr.
Honey* 7 gr. 10 gr.
Salt 7 gr. 10 gr.
Dried yeast 6 gr. 8 gr.
* Preferably use liquid honey.
Program: Basic, French or Whole wheat
Bread with sunflower seeds
650 gram 800 gram
White flour 400 gr. 500 gr.
Water 250 ml 300 ml
Butter/ oil 7 gr. 10 gr.
Sugar 7 gr. 10 gr.
Salt 7 gr. 10 gr.
Dried yeast 5 gr. 6 gr.
Extra ingredients:
Sunflower seeds 50 gr. 75 gr.
Program: Sweet
Cake
Flour for cake 250 grams
Butter 200 grams
Eggs (beaten) 3 eggs
Sugar 200 grams
Vanilla sugar 1 sack
Milk 4 tablespoons
Program: Cake
Before cleaning your Inventum breadmaker, remove
the plug from the socket and allow the unit to cool
completely.
Outside
Clean the housing and the lid of the breadmaker with a
damp cloth and warm soapy water or a stainless steel
cleanser. Remove the breadpan before cleaning. Do not
use abrasives! Never immerse the appliance, power cord
or plug in water or any other liquids.
Inside
The inside of the breadmaker can be cleaned with a damp
cloth. Attention: careful not to touch the heating element.
This is very delicate.
Breadpan and kneadingblade
The breadpan and kneadingblade can be cleaned with
warm water and a soft cloth. Be careful not to damage the
non-stickcoating.
If you can’t remove the kneadingblade, fill the breadpan
half with lukewarm water and let it sit for no more than
10 minutes. Then carefully remove the kneadingblade and
proceed with cleaning the breadpan.
Never use any detergents, harsh cleaners (brush or
sponge), abrasives or steel wool. Never wash the
breadpan or kneadingblade in the dishwasher.
no problem and you should check the freshness of the
ingredients. If you get a bad result you can consult with
your supplier.
Attention: when you use a ready-made mixture, you must
take in account the amount of the mixture. Most ready-
made mixtures are for making a loaf of 800 grams.
The breadmaker does not work
- Is it activated?
- The temperature is too high
The bread is collapsed/The center is moist
- The bread was left too long in the breadpan after
baking.
- Too much water or too much yeast is used.
Smoke is coming from the airvents
- Maybe ingredients spilled on the heating element.
The top of the bread is cracked and brown
- Too much flour, yeast or sugar.
The bread is too small
- Not enough flour, yeast, sugar or water
- Use of whole wheat or flour with chemical yeast.
- Use of bad yeast.
- Use of flour or yeast that has passed the using date.
The bread is not well baked
- Stop-button was pressed after activation.
- The lid was opened during baking.
Part of the bread is still covered with flour
- Not enough water.
Bread badly shaped
- Not enough flour.
- Not enough water.
Bread baked too hard
- Too much sugar.
- Crust-setting on dark.
13 | CLEANING & MAINTENANCE
14 | RECIPES

20
Put the ingredients in the breadpan. Set the breadmaker
and before you press start, stir the ingredients with a
wooden spoon. This enhances the kneading process.
Strawberry jam
Strawberries 450 grams
Sugar 275 grams
Lemonjuice (fresh) 3 tablespoons
or lemonjuice (concentrated) 1 tablespoon
Program: Jam
If you use fruits with pips, you should first remove these.
If you use other fruits, it is possible that you have to adjust
the amount of sugar or lemonjuice. Otherwise the jam
could be too sweet.
Attention: the fruit contains fruitsugars. The amount of su-
gars can dier per fruit. When a fruit contains a lot of sugar
of its own it is possible that the jam boils over. Always stay
in the neighbourhood of the machine when you are ma-
king jam. If the jam is almost boiling over, carefully open
the lid and close it when the jam is boiling regurlarly again.
Be carefull: hot steam will get out of the breadmaker.
Apricotjam
Fresh apricots 450 grams
Sugar 250 grams
Lemonjuice (fresh) 3 tablespoons
or lemonjuice (concentrated) 1 tablespoon
Program: Jam
Bread with raisins and nuts
650 gram 800 gram
White flour 320 gr. 500 gr.
Eggs * 1 2
Water * 200 ml 300 ml
Butter/ oil 15 gr. 20 gr.
Sugar 5 gr. 10 gr.
Salt 5 gr. 10 gr.
Dried yeast 5 gr. 10 gr.
Extra ingredients:
Raisins 150 gr. 300 gr.
Nuts 50 gr. 100 gr.
Program: Sweet
Attention: First soak the raisins and if necessary the nuts,
otherwise they take out all the fluids from the dough.
Add the extra ingredients after the first beep-signal.
* First you must put an egg in a measuring cup and then
fill it up to 200/300 ml with water.
Dough for buns
White flour 400 gr.
Egg yolk * 1
Water * 250 ml
Butter/ oil 15 gr.
Sugar 8 gr.
Salt 8 gr.
Dried yeast 11 gr.
Program: Dough
1 extra egg (beaten) to smear on the buns.
* The amount of fluids (water and beaten eggs together)
should be approx. 250 ml.
Process: Take the dough out of the breadmaker when the
beep sounds. Devide the dough in buns. Place them on a
slightly oiled baking tray. Leave the dough to rise for about
40 minutes. Smear the beaten egg on every bun. Bake
them in a oven at ± 200°C in 15 to 20 minutes or when
they are coloured goldenbrown.
If you wish to make a glutenfree bread, check out the
website:
www.celiac.com
Every kind of glutenfree flour needs its own recipe.
Table of contents
Languages:
Other inventum Bread Maker manuals

inventum
inventum BM120 User manual

inventum
inventum BM50 User manual

inventum
inventum BM125 User manual

inventum
inventum BM60 User manual

inventum
inventum BM90 User manual

inventum
inventum BM121 User manual

inventum
inventum BM75 User manual

inventum
inventum BM121B User manual

inventum
inventum BM95 User manual
Popular Bread Maker manuals by other brands

Silvercrest
Silvercrest SBB 850 EDS A1 Recipe book

Silvercrest
Silvercrest SBB 850 B1 operating instructions

Silvercrest
Silvercrest KH 1171 operating instructions

Silvercrest
Silvercrest SBB 850 D1 quick start guide

Silvercrest
Silvercrest SBB 850 EDS A1 operating instructions

Silvercrest
Silvercrest SBB 850 C1 operating instructions