© 2018 InVue Security Products Inc. All rights reserved.
InVue is a registered trademark of InVue Security Products.
SD0612 Rev5 07/11a/18
www.invue.com
NA / LATAM // 704.752.6513 •888.55.INVUE
EMEA // +31.23.8900150
APAC // +852.3127.6811
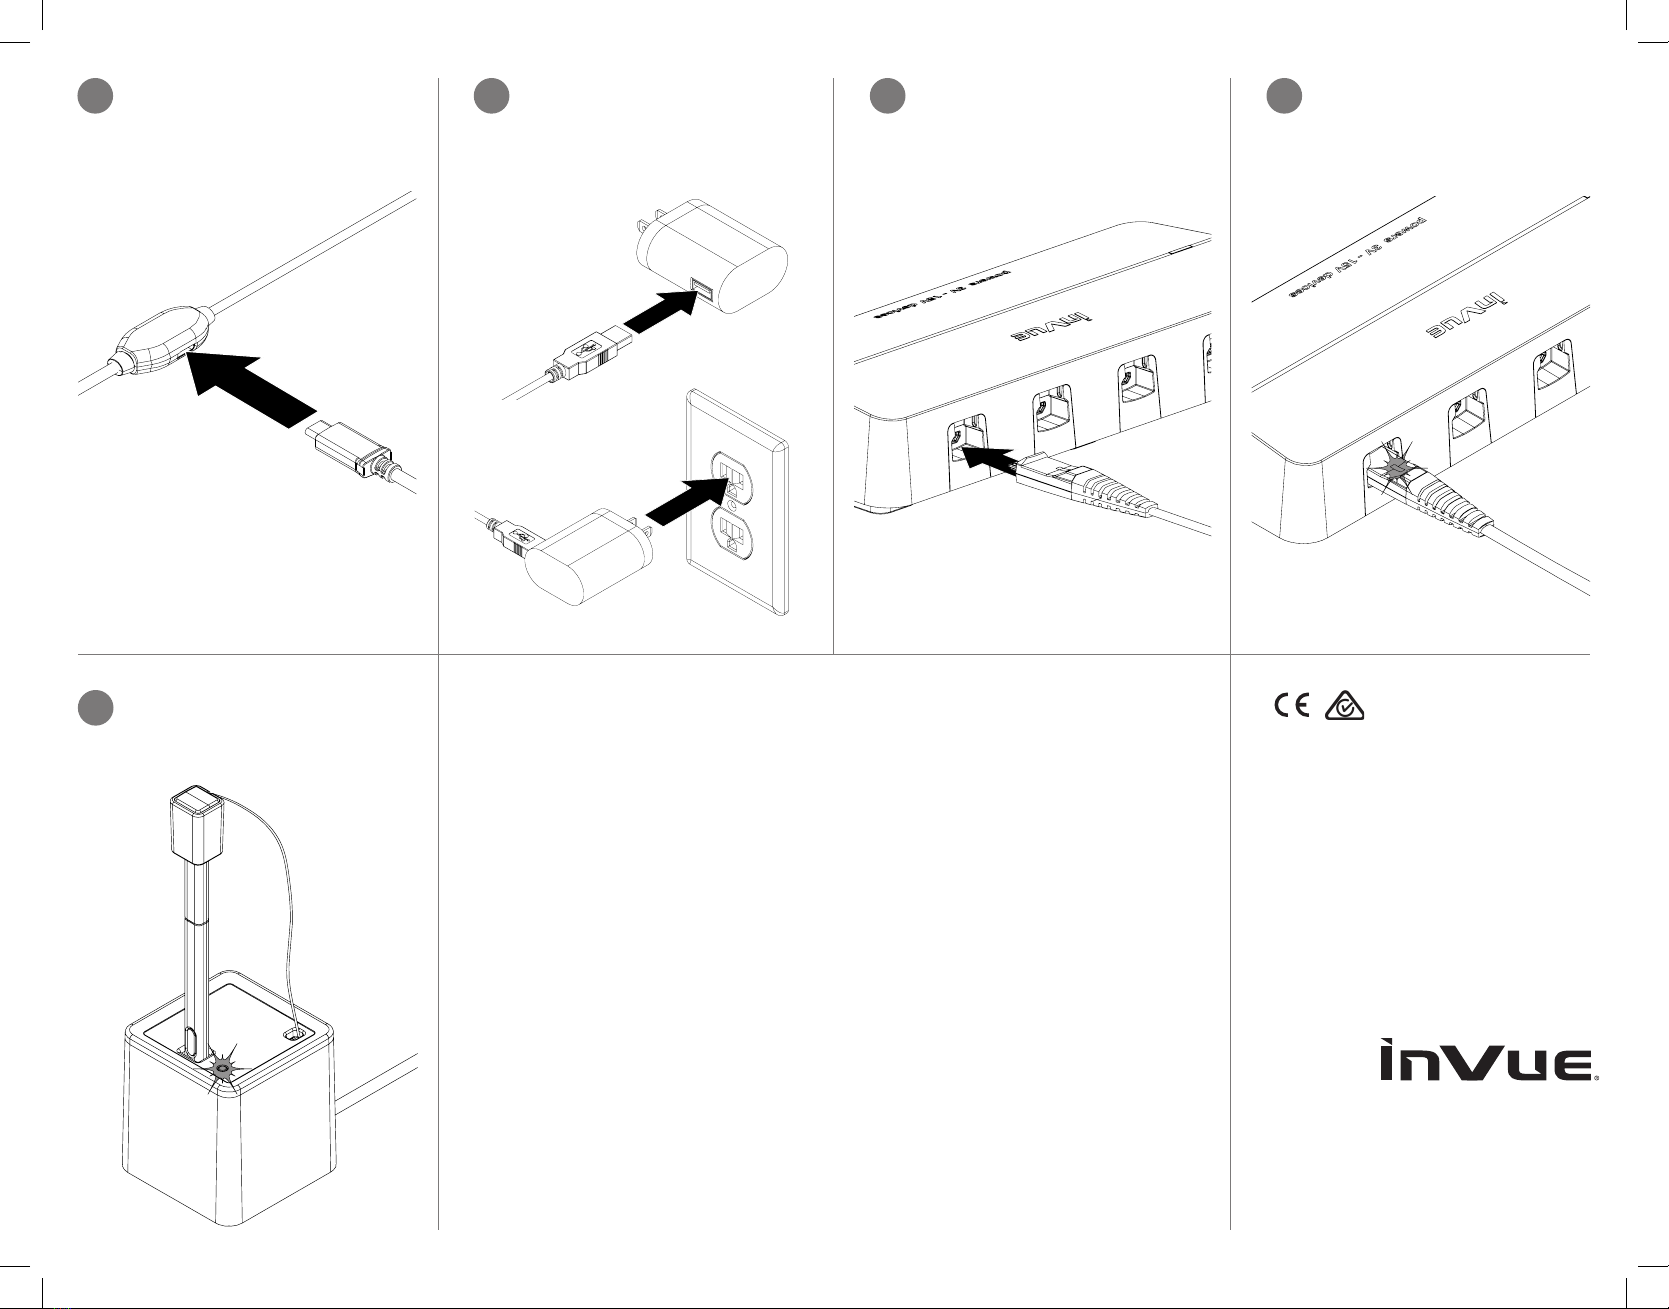
Plug the USB-A end of the power
cable into a power supply (InVue’s
PS515 or an OEM travel adapter).
Plug the power supply into a power
outlet.
15 16 Optional: If Alarming fuctionality is
desired, plug the micro-USB end of
the cable into a preinstalled S2800,
S2865 or Zips 2.0 unit.
18 The LED on the recoiler will illuminate
to indicate the S-Pen is charging
when fully docked as shown and will
turn off when it is removed.
17 If the micro-USB end of the cable
was plugged in to provide alarming
function, the LED on the sensor will
be illuminated to indicate that the
alarm circuit is armed.
14 Power Only: Plug the supplied USB-
C cable into the side of the power
injection port.
FCC WARNING STATEMENT
FCC Part 15.19 This device complies with part 15 of the FCC Rules. Operation is subject to the following two conditions: (1) this
device may not cause harmful interference, and (2) this device must accept any interference received, including interference that may
cause undesired operation. FCC Part 15.21 Any changes or modications (including the antennas) to this device that are not expressly
approved by the manufacturer may void the user’s authority to operate the equipment.
FCC RADIATION EXPOSURE STATEMENT
(Wireless Charger Dock)
This equipment complies with FCC Radiation exposure limits set forth for an uncontrolled environment. This device and its antenna
must not be co-located or operating in conjunction with any other antenna or transmitter. This equipment should be installed and
operated with a minimum distance of 20cm between the radiator and your body.
IC WARNING STATEMENT
This device complies with Industry Canada licence-exempt RSS standard(s). Operation is subject to the following two conditions:
(1) this device may not cause interference, and (2) this device must accept any interference, including interference that may cause
undesired operation of the device. Le présent appareil est conforme aux CNR d’Industrie Canada applicables aux appareils radio
exempts de licence. L’exploitation est autorisée aux deux conditions suivantes : (1) L’appareil ne doit pas produire de brouillage, et (2)
L’utilisateur de l’appareil doit accepter tout brouillage radioélectrique subi, même si le brouillage est susceptible d’en compromettre le
fonctionnement.
IC RADIATION EXPOSURE STATEMENT
(Wireless Charger Dock)
This equipment complies with IC RF Radiation exposure limits set forth for an uncontrolled environment. This device and its antenna
must not be co-located or operating in conjunction with any other antenna or transmitter. This equipment should be installed and
operated with a minimum distance of 20cm between the radiator and your body. Cet équipement est conforme aux limites établies par
Industrie Canada en matière d’exposition aux radiofréquences dans un environnement non contrôlé. Cet appareil etson antenne ne
doivent pas être colocalisés ou fonctionner en conjonction avec tout autre antenne ou émetteur. Cet équipement doit être installé et
utilisé avec une distance minimale de 20cm entre le radiateur et votre corps.