iQ Pet Remote Trainer User manual


1
by Dogtra
Portable Remote Controlled Dog Training Collars
Owner’s Manual
Please read this manual before operating your system,
and keep it for future reference.
Remote Trainer

2 3
Duration your dog can wear the unit
Leaving the receiver/collar in the same
location on the dog’s neck for an extended
period of time can cause skin irritation.
If the dog is to wear the e-collar for long
periods, occasionally reposition the collar
so that the contact points are moved to a
different location on the dog’s neck. Make
sure you check for skin irritation each
time you use the unit. If your dog exhibits
signs of skin irritation, consult with a
veterinarian.
Inadvertent activation
If the constant button is held down for 12
seconds or more, the unit will automatically
shut down. It reactivates when the button is
released and depressed again.
3URSHU¿W
A loose fit can allow the collar to move
around on the dog’s neck. When this
happens, the contact points may rub the
skin and cause irritation. If the unit is too
loose, the contact points will not make
proper contact and your dog will not
receive consistent stimulation.
Product Safety and Health Statements
e-collar to correct dogs that are aggressive
towards other dogs or people.
Interference with other electronic devices
iQ Pet’s industry-leading technology
filtering system ensures minimal
interference with other electronic devices
(garage door openers, mobile phones, etc.).
Our digital microprocessor offers thousands
of unique codes to eliminate frequency
match-up with other iQ Pet e-collars. iQ
Pet recommends consulting your physician
if you are going to use the e-collar and you
have any type of medical devices.
Proper e-collar use
iQ Pet e-collars are intended for the sole
SXUSRVHRI EHKDYLRUPRGL¿FDWLRQ RIGRJV
They are NOT intended for human use or
use on other animals. iQ Pet and Dogtra
Company does not assume any liability for
the improper use of a iQ Pet e-collar.
Aggressive dogs
iQ Pet highly recommends consulting a
dog training professional when using an
Product Safety and
Health Statements
Product Safety and Health Statements

4 5
Table of Contents
At a Glance
Main Features of the iQ Remote Trainer
Overview
Understanding your training system
1. How to turn on/off the unit
2. How the buttons work
+RZWR¿WWKHFROODURQWKHGRJ
4. Finding the right stimulation level for my dog
5. To maximize the distance
6. Checking the status using the LED indicator
7. Charging the battery
General Training Tips
Maintenance
Troubleshooting Guide
Warranty
Table of Contents
6
7
8
10
11
12
13
14
15
16
17
19
22
23
26
Training Methods
E-collars can be used with many different
methods. If you have any concerns in
the training methods provided by iQ Pet,
consult with a dog training professional.
Reaction to the stimulation
Every dog has a different tolerance and
reaction to the stimulation. Please look at
your dog’s reaction to find out just right
stimulation level. The stimulation level
may vary depending on the situation
and distractions. Normally a distracted
dog (chasing another dog, squirrel, etc.)
will require a higher level of stimulation
compared to when there is no distraction.
Product Safety and Health Statements

6 7
Main Features of the iQ Remote Trainer
Main Features of the iQ Remote Trainer
Waterproof receiver Nick/constant/pager
Water-resistant transmitter Low/medium stimulation
400-yard range For dogs as small as 10 lbs
100 stimulation levels 2-hour quick charge
At a Glance
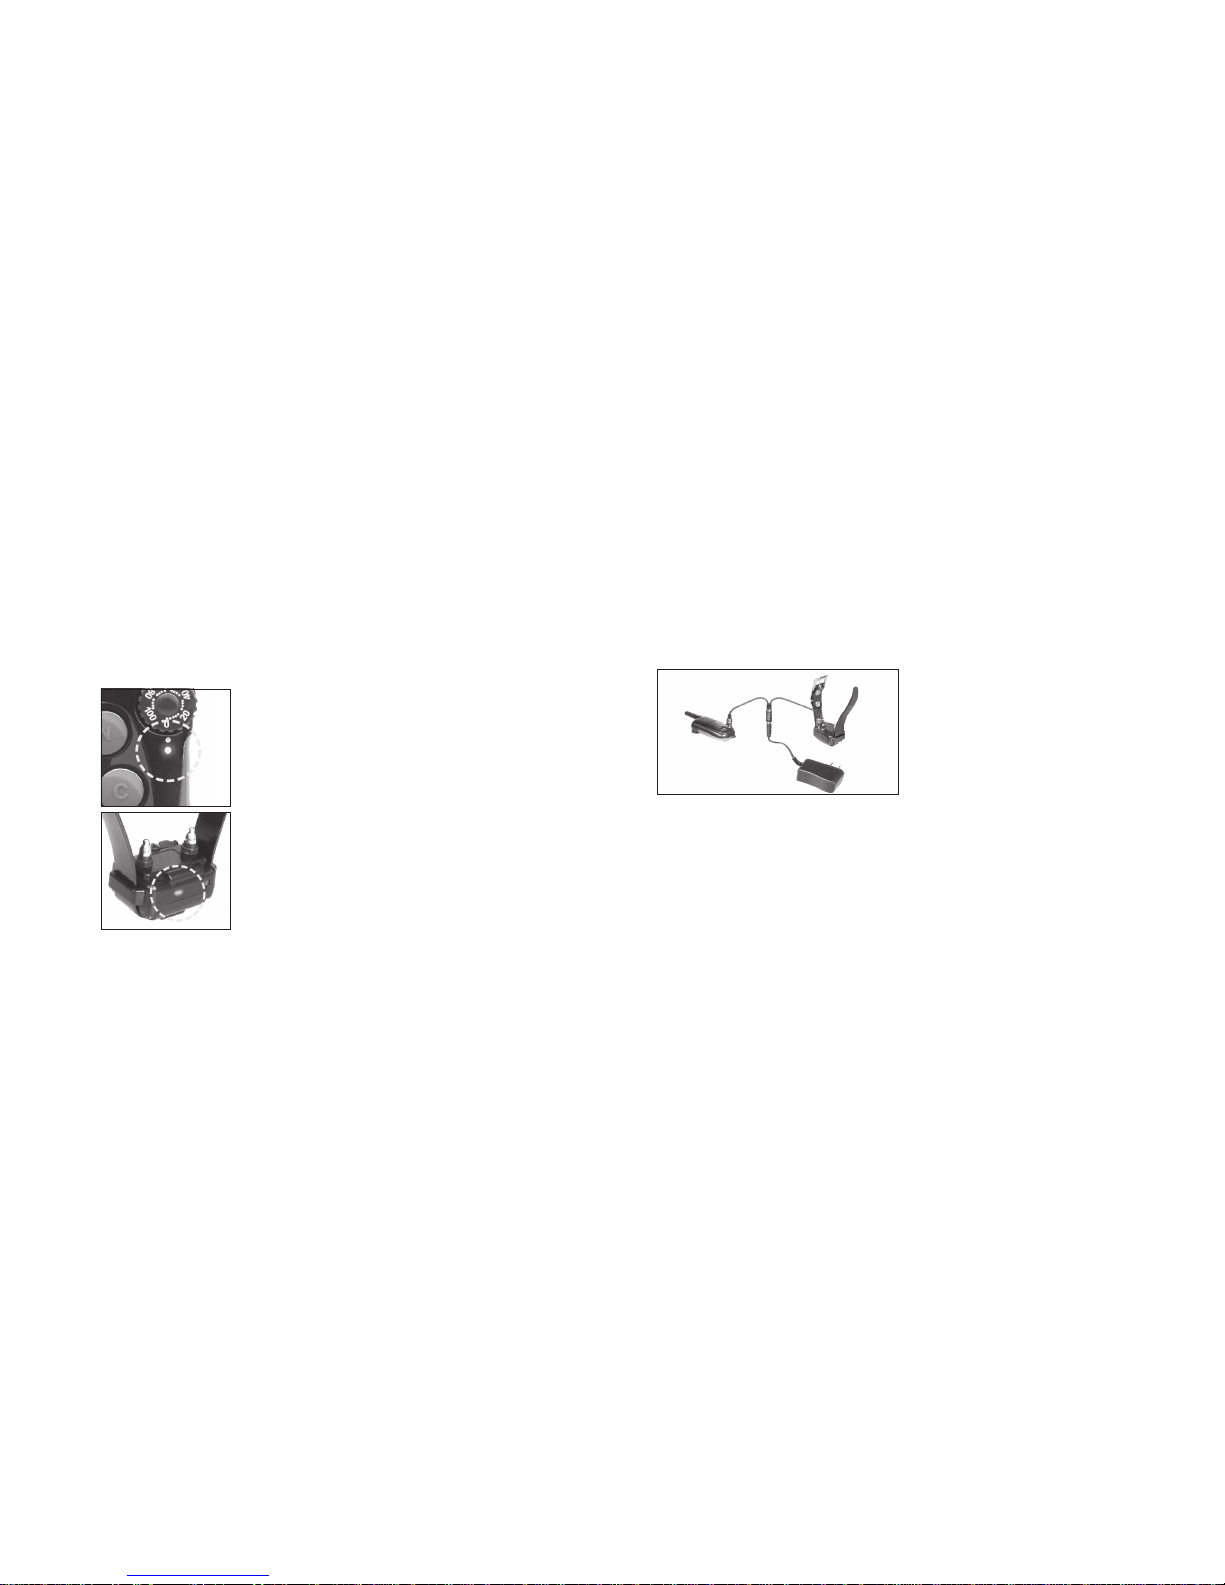
Included in Package
Transmitter Receiver Battery charger Splitter cable Owner’s manual
Optional Accessories
Field Auto Charger: designed for use with 5-volt cigarette lighter in your car.
European Charger: designed for use with 230V AC electrical outlets in Europe.
To purchase optional accessories, please visit www.iqpetcollar.com or
call our customer service at 1-888-811-9111.
At a Glance

8 9
Collar strap
LED indicator
Contact points
On/off magnetic
switch (red dot)
Battery charging
receptacle / rubber plug
Receiver/Collar
Overview
Overview
Nick button
Constant button
Pager button
Stimulation intensity
dial
LED indicator
Antenna
On/off activation
magnet (red dot)
Battery charging
receptacle / rubber plug
Handheld Transmitter
Overview

10 11
To activate the receiver/collar, place the red
dot on the back of the transmitter to the red
dot on the receiver/collar. Hold the two red
dots together for a moment until the LED
light on the receiver/collar comes on.
To deactivate the unit, repeat the same
procedure holding the two red dots together
momentarily. The LED light will turn
red for a brief moment indicating that the
receiver/collar is now shut off.
The transmitter does not have an on/off
switch, and it will only activate when
buttons are pressed.
1. How to turn on/o the unit
1. How to turn on/off the unit
Understanding your training system
1. How to turn on/off the unit
2. How the buttons work
+RZWR¿WWKHFROODURQWKHGRJ
4. Finding the right stimulation level for my dog
5. To maximize the distance
6. Checking the status using the LED indicator
7. Charging the battery
Understanding your training system
11
12
13
14
15
16
17
12 13
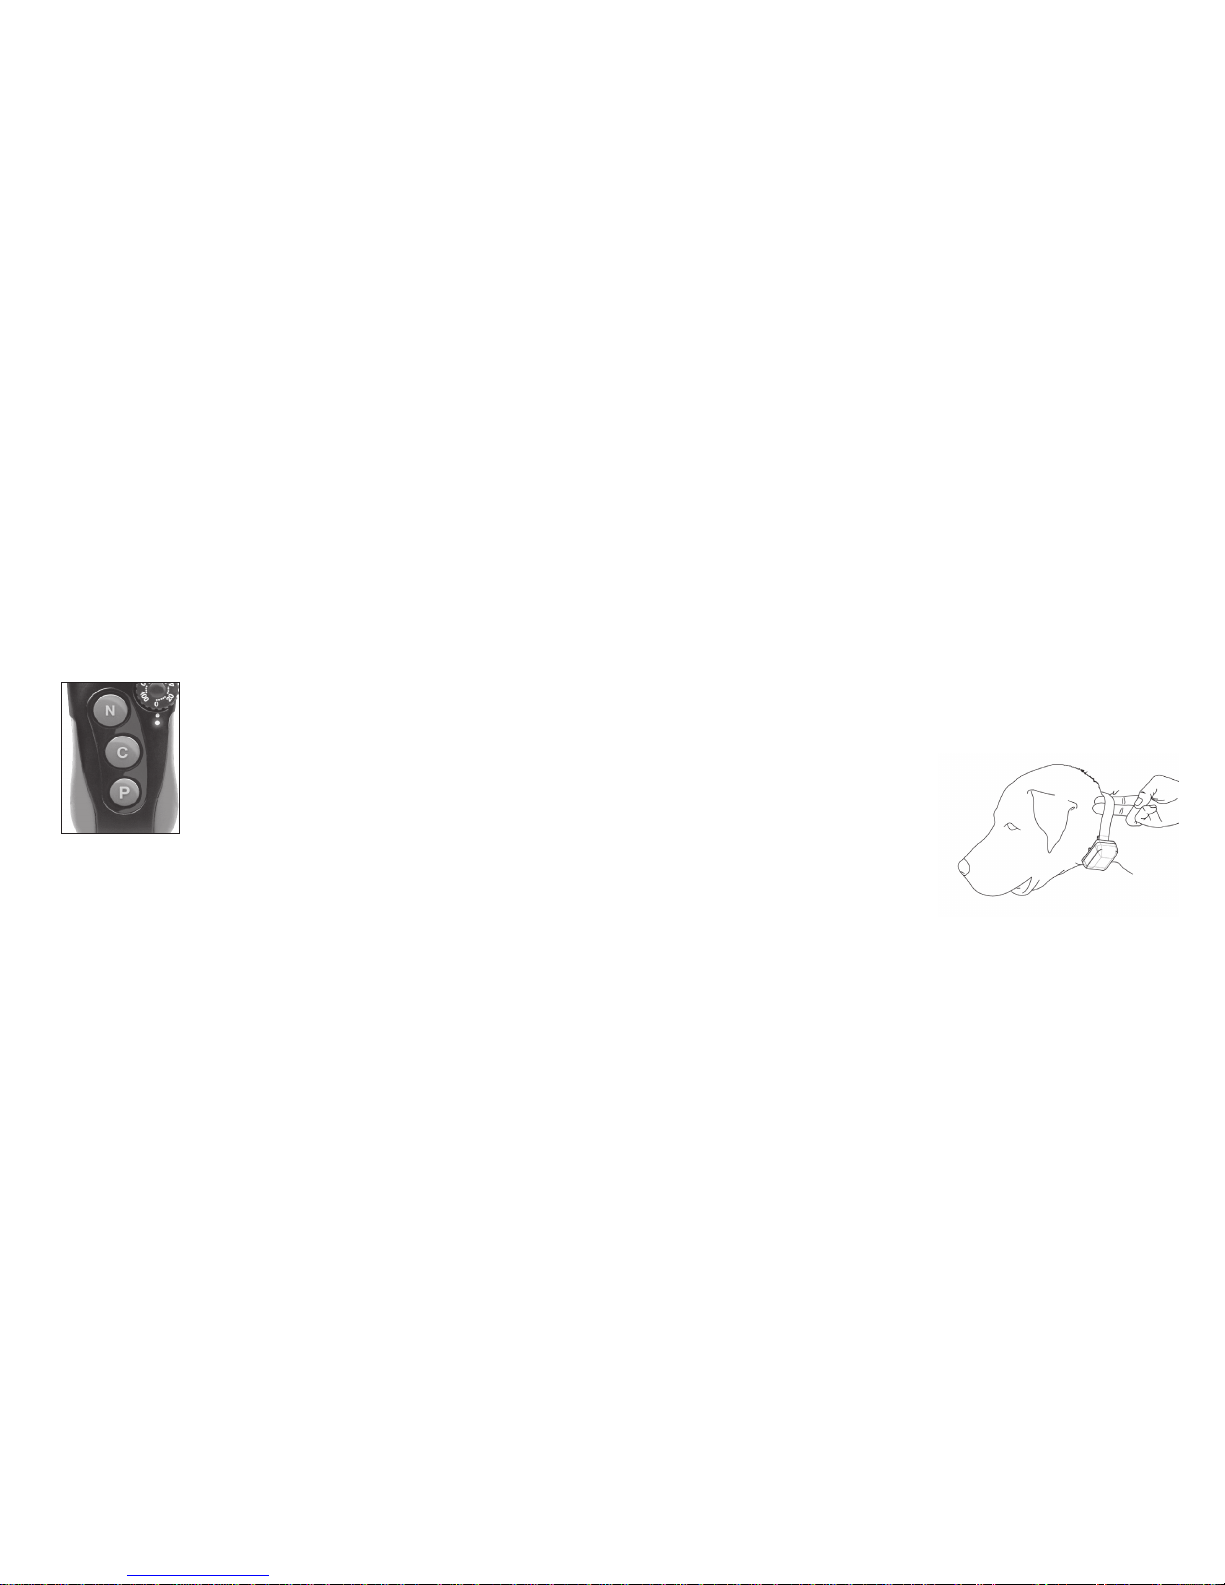
3. How to t the collar on the dog
The collar should be fitted so that the
surgical stainless steel contact points
press firmly against the dog’s skin. When
properly fitted, you should be able to fit
a finger or two snugly in between the
contact points and your dog’s skin. When
properly fitted, the receiver/collar should
not move on the dog. The best location for
the receiver box is either side of the dog’s
windpipe.
A loose fit can allow the receiver/collar
to move around on the dog’s neck. When
this happens, the contact points may rub
the skin and cause irritation. If the collar
is too tight, the dogs may have difficulty
breathing.
+RZWR¿WWKHFROODURQWKHGRJ
2. How the buttons work
There are three buttons in front of the
transmitter.
N - Nick button
Nick is a single rapid pulse of electrical
stimulation.
C - Constant button
Constant gives constant stimulation as
long as the button is pushed, for up to 12
seconds. The unit has an automatic shut off
should the button be depressed for more
than 12 seconds.
P - Pager button
Pager is a non-stimulating vibration.
2. How the buttons work

14 15
5. To maximize the distance
iQ Remote Trainer has a 400-yard range.
Depending on the way you hold your
transmitter, the range may vary. Hold the
transmitter away from your body to get
the greatest range. For maximum signal
strength, keep your unit properly charged.
5. To maximize the distance
Maximum Range Typical Range Minimum Range
* Avoid touching the antenna as the range
may substantially decrease.
4. Finding the right stimulation level
for my dog
Stimulation level is controlled by the
stimulation intensity dial: (0) being the
lowest level and (100) being the highest
level. Setting adjustment depends on your
dog’s temperament and threshold for
stimulation. Always start at the lowest level
and work your way up. An appropriate
level is when the dog responds to the
stimulation with a mild negative reaction
such as jerking/tensing of the neck muscles.
When the dog’s attitude changes, especially
during times of increased excitement or
distraction, you may need to adjust the
intensity level upwards.
4. Finding the right stimulation level for my dog
16 17
7. Charging the battery
1. Remove the rubber plug temporarily and
plug in the charger.
2. Plug the adapter’s power plug into a
standard AC wall outlet. The LED will
glow red.
3. When charging is finished the LED
will glow green. Unplug the adapter’s
power plug from the AC wall outlet and
disconnect the charger from the unit.
4. Place the rubber plug back in the battery
charging receptacle.
* The receiver/collar is still fully waterproof
even if the rubber plug is not closed,
but place the rubber plug in the battery
charging receptacle to make sure dirt
does not get inside.
7. Charging the battery
6. Checking the status using the
LED indicator
When the receiver/collar is on and ready to
RSHUDWHWKH /('ÀDVKHVHYHU\VHFRQGV
The LED will glow steadily on both
transmitter and receiver/collar while any
buttons are pressed.
The LED color indicates battery life level.
Green = full charge, Amber = medium,
Red = needs charge
If you continue to operate the unit when
the LED is red (needs charge), it will shut
down.
6. Checking the status using the LED indicator
Table of contents
Other iQ Pet Pet Care Product manuals


Popular Pet Care Product manuals by other brands


ubbink
ubbink KoiFeeder Solar operating instructions

CADOCA
CADOCA Deuba 106911 instructions

Dogtra
Dogtra RR Deluxe owner's manual

Carson
Carson CONVERTIBLE PET YARD 2200 owner's manual

Creative Cedar Designs
Creative Cedar Designs K-9 Kabin Assembly instruction

Petdwell
Petdwell ON2PETS Canopies Assembly instructions